


在很多的开发中经常会用到圆形头像来显示一些信息,通常情况下会直接使用第三方依赖库来快速的去实现功能。没有研究其内部原理,其实内部实现很简单。
效果图如下:图片尺寸自动根据控件尺寸进行缩放或放大,自定义边框的宽度和颜色

步骤实现
缩放图片让其宽高根据view进行设置
先将目标图片绘制在画布上
绘制一个圆形,将两个画布进行重叠。使用DST_IN重叠模式
添加自定义属性 如边框和边框的颜色
这里我们直接继承ImageView,可以省去onLayout、onMeasure操作。重写onLayout()根据getDrawable()获取到设置的图片资源
    BitmapDrawable bitmapDrawable = (BitmapDrawable) getDrawable();
mBitmap = bitmapDrawable.getBitmap();先根据控件的大小来设置bitmap的大小,使用Matrix矩阵来进行设置
 int bitmapWidth = mBitmap.getWidth();
 int bitmapHeight = mBitmap.getHeight();

 int viewWidth = getWidth();
 int viewHeight = getHeight();

 //计算缩放的比例
 float scaleW = viewWidth / (float)bitmapWidth;
 float scaleH = viewHeight / (float)bitmapHeight;
 //用来缩放的矩阵
 Matrix matrix = new Matrix();
 matrix.reset();
 matrix.setScale(scaleW,scaleH);
 mScaledBitmap = Bitmap.createBitmap(mBitmap,0,0
        ,bitmapWidth,bitmapHeight
        ,matrix,true);
重写onDraw方法,如果当前bitmap不为空的情况下自己处理绘制,为空则交给系统处理
 @Override
    protected void onDraw(Canvas canvas) {
        if (mBitmap == null) {
            super.onDraw(canvas);
        } else {
            onDrawCircleView(canvas);
        }

    }
绘制圆形遮罩层
Bitmap.Config config = Bitmap.Config.ARGB_8888;
bitmapMask = Bitmap .createBitmap(getWidth(),getHeight(),config);
Canvas canvas = new Canvas(bitmapMask);
canvas.drawOval(0,0,getWidth(),getHeight(),mPaint);
将资源绘制到画布上,因为涉及到绘制重叠。需要对画布进行设置,需要对画布进行saveLayer操作如下图:将内容进行重叠
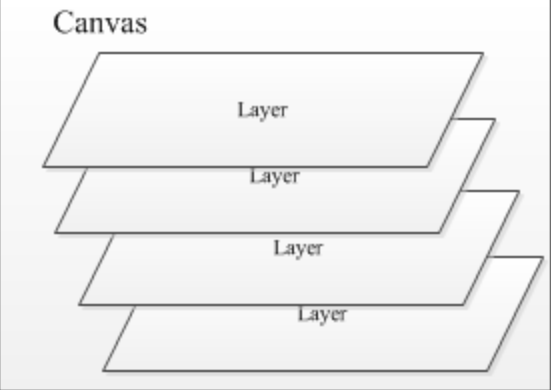
int saveLayer = canvas.saveLayer(0, 0, getWidth(), getHeight(), mPaint,Canvas.ALL_SAVE_FLAG);

//绘制目标图像
canvas.drawBitmap(mScaledBitmap,0 ,0, mPaint);
//设置画布重叠模式
mPaint.setXfermode(new PorterDuffXfermode(PorterDuff.Mode.DST_IN));
//绘制遮罩
canvas.drawBitmap(bitmapMask,0,0,mPaint);
//清空画笔模式
mPaint.setXfermode(null);
canvas.restoreToCount(saveLayer);
//绘制边框
ondrawBorder(canvas);
最后绘制边框,根据自定义属性读取颜色和宽度属性
mPaint.setStyle(Paint.Style.STROKE);
mPaint.setColor(strokeColor);
mPaint.setStrokeWidth(strokeWidth);
canvas.drawOval(strokeWidth/2, strokeWidth/2, getWidth() - strokeWidth/2, getHeight() - strokeWidth/2, mPaint);
绘制起来很简单,只要对需求进行拆分一步步去实现就能做出效果,有时候一个小小的变通就能节省很多事情。
以下是完整代码:
public class RoundImageView extends ImageView {

    Paint mPaint;
    Bitmap mBitmap;
    Bitmap bitmapMask;
    Bitmap mScaledBitmap;
    int strokeWidth = 3;
    int strokeColor = Color.WHITE;

    public RoundImageView(Context context) {
        this(context,null);
    }

    public RoundImageView(Context context, @Nullable AttributeSet attrs) {
        this(context, attrs,0);
    }

    public RoundImageView(Context context, @Nullable AttributeSet attrs, int defStyleAttr) {
        super(context, attrs, defStyleAttr);
        //获取自定义属性
        TypedArray typeface = context.obtainStyledAttributes(attrs, R.styleable.RoundImageView);
        strokeWidth = typeface.getDimensionPixelOffset(R.styleable.RoundImageView_stroke_width,strokeWidth);
        strokeColor = typeface.getColor(R.styleable.RoundImageView_storke_color,strokeColor);
        typeface.recycle();

        init();
    }

    private void init() {
        mPaint = new Paint();
        mPaint.setAntiAlias(true);
        mPaint.setColor(Color.WHITE);
        mPaint.setStyle(Paint.Style.FILL);
    }

    @Override
    protected void onDraw(Canvas canvas) {
        if (mBitmap == null) {
            super.onDraw(canvas);
        } else {
            onDrawCircleView(canvas);
        }

    }

    private void onDrawCircleView(Canvas canvas) {
        int saveLayer = canvas.saveLayer(0, 0, getWidth(), getHeight(), mPaint,Canvas.ALL_SAVE_FLAG);

        //绘制目标图像
        canvas.drawBitmap(mScaledBitmap,0 ,0, mPaint);
        //设置画布重叠模式
        mPaint.setXfermode(new PorterDuffXfermode(PorterDuff.Mode.DST_IN));
        //绘制遮罩
        canvas.drawBitmap(bitmapMask,0,0,mPaint);
        //清空画笔模式
        mPaint.setXfermode(null);

        canvas.restoreToCount(saveLayer);

        //绘制边框
       ondrawBorder(canvas);
    }

    private void ondrawBorder(Canvas canvas) {
        mPaint.setStyle(Paint.Style.STROKE);
        mPaint.setColor(strokeColor);
        mPaint.setStrokeWidth(strokeWidth);

        canvas.drawOval(strokeWidth/2, strokeWidth/2, getWidth() - strokeWidth/2, getHeight() - strokeWidth/2, mPaint);
    }

    private void createMask() {
        Bitmap.Config config = Bitmap.Config.ARGB_8888;
        bitmapMask = Bitmap .createBitmap(getWidth(),getHeight(),config);

        Canvas canvas = new Canvas(bitmapMask);
        canvas.drawOval(0,0,getWidth(),getHeight(),mPaint);
    }

    @Override
    protected void onLayout(boolean changed, int left, int top, int right, int bottom) {
        super.onLayout(changed, left, top, right, bottom);

        BitmapDrawable bitmapDrawable = (BitmapDrawable) getDrawable();
        mBitmap = bitmapDrawable.getBitmap();
        //缩放图片
        scaleBitmap();
        //绘制遮罩图像
        createMask();
    }

    /**
     * 按照控件大小缩放放大图片
     */
    private void scaleBitmap(){
        if(mScaledBitmap == null && mBitmap != null){
            int bitmapWidth = mBitmap.getWidth();
            int bitmapHeight = mBitmap.getHeight();

            int viewWidth = getWidth();
            int viewHeight = getHeight();

            //计算缩放的比例
            float scaleW = viewWidth / (float)bitmapWidth;
            float scaleH = viewHeight / (float)bitmapHeight;

            //用来缩放的矩阵
            Matrix matrix = new Matrix();
            matrix.reset();
            matrix.setScale(scaleW,scaleH);
            mScaledBitmap = Bitmap.createBitmap(mBitmap,0,0,bitmapWidth,bitmapHeight,matrix,true);
        }
    }
}
自定义属性:
    <declare-styleable name="RoundImageView">
        <attr name="stroke_width" format="dimension"/>
        <attr name="storke_color" format="color"/>
    </declare-styleable>


 3257
3257


 被折叠的 条评论
为什么被折叠?
被折叠的 条评论
为什么被折叠?
 到【灌水乐园】发言


