


文章是照着教程点击打开链接 写的第二部分纹理,实现两个纹理的混合,纹理单元的使用。加载图片时候使用的FreeImage 这是个开源的加载照片的
源代码点击打开链接 选择里面shader2文件夹,按照要求选择shader.h头文件和 texture1.cpp
头文件shader.h
#ifndef SHADER_H
#define SHADER_H
#include<string>
#include<fstream>
#include<sstream>
#include<iostream>
#include<GL/glew.h>
using namespace std;
class Shader
{
public:
	//程序的ID
	GLuint Program;
	//读取渲染程序并创建Shader
	Shader(const GLchar * vertexSourcePath,const GLchar *fragmentSource);
	{
		//1.从文件路径获得vertex/fragment源码
		string vertexCode;
		string fragmentCode;
		try{
			//打开文件Open files
			ifstream vShaderFile(vertexPath);
			ifstream fShaderFile(fragmentPath);

			stringstream vShaderStream,fShaderStream;
			//读取文件缓冲到流、
			vShaderStream<<vShaderFile.rdbuf();
			fShaderStream<<fShaderFile.rdbuf();

			//关闭文件句柄
			vShaderFile.close();
			fShaderFile.close();
			//将流转为GLchar数组
			 vertexCode = vShaderStream.str();
        fragmentCode = fShaderStream.str();
		}
		catch(std::exception e)
    {
        std::cout << "ERROR::SHADER::FILE_NOT_SUCCESFULLY_READ" << std::endl;
    }
		const GLchar* vShaderCode = vertexCode.c_str();
        const GLchar * fShaderCode = fragmentCode.c_str();
        // 2.编译着色器
        GLuint vertex, fragment;
        GLint success;
        GLchar infoLog[512];
        // 顶点着色器
        vertex = glCreateShader(GL_VERTEX_SHADER);
        glShaderSource(vertex, 1, &vShaderCode, NULL);
        glCompileShader(vertex);
        // 打印着色器是否错误
        glGetShaderiv(vertex, GL_COMPILE_STATUS, &success);
        if (!success)
        {
            glGetShaderInfoLog(vertex, 512, NULL, infoLog);
            std::cout << "ERROR::SHADER::VERTEX::COMPILATION_FAILED\n" << infoLog << std::endl;
        }
        // 片段着色器
        fragment = glCreateShader(GL_FRAGMENT_SHADER);
        glShaderSource(fragment, 1, &fShaderCode, NULL);
        glCompileShader(fragment);
        // 打印是否有任何错误
        glGetShaderiv(fragment, GL_COMPILE_STATUS, &success);
        if (!success)
        {
            glGetShaderInfoLog(fragment, 512, NULL, infoLog);
            std::cout << "ERROR::SHADER::FRAGMENT::COMPILATION_FAILED\n" << infoLog << std::endl;
        }
        // 着色器程序
        this->Program = glCreateProgram();
        glAttachShader(this->Program, vertex);
        glAttachShader(this->Program, fragment);
        glLinkProgram(this->Program);
        // 打印是否有错误
        glGetProgramiv(this->Program, GL_LINK_STATUS, &success);
        if (!success)
        {
            glGetProgramInfoLog(this->Program, 512, NULL, infoLog);
            std::cout << "ERROR::SHADER::PROGRAM::LINKING_FAILED\n" << infoLog << std::endl;
        }
        // 删除着色器程序
        glDeleteShader(vertex);
        glDeleteShader(fragment);
	}
	//使用Program
	void Use();
	{
glUseProgram(this->Program);
	}
}
#endif//纹理单元的使用
#include<iostream>
//GLEW
#define GLEW_STATIC
#include <GL/glew.h>
// GLFW
#include <GLFW/glfw3.h>
#pragma comment(lib,"FreeImage.lib")
// Other Libs
#include<FreeImage.h>
#include<Shader.h>
using namespace std;
// 函数原型
void key_callback(GLFWwindow* window, int key, int scancode, int action, int mode);
// Window 尺寸
const GLuint WIDTH = 800, HEIGHT = 600;
// The MAIN function, from here we start the application and run the game loop
int main()
{
// 初始化GLFW
glfwInit();
FreeImage_Initialise(TRUE);//初始化FreeImage
// Set all the required options for GLFW 设置全部要求的GLFW选项
glfwWindowHint(GLFW_CONTEXT_VERSION_MAJOR, 3);
glfwWindowHint(GLFW_CONTEXT_VERSION_MINOR, 3);
glfwWindowHint(GLFW_OPENGL_PROFILE, GLFW_OPENGL_CORE_PROFILE);
glfwWindowHint(GLFW_RESIZABLE, GL_FALSE);
// Create a GLFWwindow object that we can use for GLFW's functions 创建窗口
GLFWwindow* window = glfwCreateWindow(WIDTH, HEIGHT, "LearnOpenGL", nullptr, nullptr);
glfwMakeContextCurrent(window);
// Set the required callback functions 设置回调函数
glfwSetKeyCallback(window, key_callback);
// Set this to true so GLEW knows to use a modern approach to retrieving function pointers and extensions 恢复函数指针和扩展
glewExperimental = GL_TRUE;
// Initialize GLEW to setup the OpenGL Function pointers 初始化GLEW
glewInit();
// Define the viewport dimensions 定义视图的尺寸
glViewport(0, 0, WIDTH, HEIGHT);
// Build and compile our shader program 建立和编译我们的渲染程序
Shader ourShader("D:/C语言/openglflew/shader2/shader.vs", "D:/C语言/openglflew/shader2/shader.frag");
// Set up vertex data (and buffer(s)) and attribute pointers 设置顶点数据和属性指针
GLfloat vertices[] = {
// Positions 位置 // Colors 颜色 // Texture Coords 纹理坐标
0.5f, 0.5f, 0.0f, 1.0f, 0.0f, 0.0f, 1.0f, 1.0f, // Top Right 上右
0.5f, -0.5f, 0.0f, 0.0f, 1.0f, 0.0f, 1.0f, 0.0f, // Bottom Right底右
-0.5f, -0.5f, 0.0f, 0.0f, 0.0f, 1.0f, 0.0f, 0.0f, // Bottom Left底左
-0.5f, 0.5f, 0.0f, 1.0f, 1.0f, 0.0f, 0.0f, 1.0f // Top Left 左上
};
GLuint indices[] = { // Note that we start from 0! 备注:我们从0开始
0, 1, 3, // First Triangle 第一个三角形
1, 2, 3 // Second Triangle 第二个三角形
};
//创建VAO VBO EBO,
GLuint VBO, VAO, EBO;
glGenVertexArrays(1, &VAO);
glGenBuffers(1, &VBO);
glGenBuffers(1, &EBO);
//绑定
glBindVertexArray(VAO);
glBindBuffer(GL_ARRAY_BUFFER, VBO);
glBufferData(GL_ARRAY_BUFFER, sizeof(vertices), vertices, GL_STATIC_DRAW);
glBindBuffer(GL_ELEMENT_ARRAY_BUFFER, EBO);
glBufferData(GL_ELEMENT_ARRAY_BUFFER, sizeof(indices), indices, GL_STATIC_DRAW);
// Position attribute 顶点属性
glVertexAttribPointer(0, 3, GL_FLOAT, GL_FALSE, 8 * sizeof(GLfloat), (GLvoid*)0);
glEnableVertexAttribArray(0);
// Color attribute 颜色属性
glVertexAttribPointer(1, 3, GL_FLOAT, GL_FALSE, 8 * sizeof(GLfloat), (GLvoid*)(3 * sizeof(GLfloat)));
glEnableVertexAttribArray(1);
// TexCoord attribute 纹理坐标属性
glVertexAttribPointer(2, 2, GL_FLOAT, GL_FALSE, 8 * sizeof(GLfloat), (GLvoid*)(6 * sizeof(GLfloat)));
glEnableVertexAttribArray(2);
glBindVertexArray(0); // Unbind VAO 解绑VAO
// Load, create texture and generate mipmaps 加载,创建纹理并且形成译码
//image format
FREE_IMAGE_FORMAT fif = FIF_UNKNOWN;
FREE_IMAGE_FORMAT fifmt;
int width, height;
FIBITMAP *dib(0);
//1 获取图片格式
fifmt = FreeImage_GetFileType("D:/C语言/openglflew/wall.png", 0);
//2 加载图片
if(FreeImage_FIFSupportsReading(fifmt))
dib = FreeImage_Load(fifmt, "D:/C语言/openglflew/wall.png",0);
printf("bit: %d\n", FreeImage_GetBPP(dib));//灰度
printf("type: %d\n",FreeImage_GetImageType(dib));//返回类型
printf("bit: %d\n",FreeImage_GetColorsUsed(dib));//调色板的大小
printf("bit: %d\n",FreeImage_GetDIBSize(dib));//大小
//if the image failed to load, return failure
if(!dib)
cout<<55<<endl;
//3 转化为rgb 24色
dib = FreeImage_ConvertTo24Bits(dib);
//4 获取数据指针
BYTE *pixels = (BYTE*)FreeImage_GetBits(dib);
width = FreeImage_GetWidth(dib);
height = FreeImage_GetHeight(dib);
cout<<"width:"<<width<<endl;
cout<<"height:"<<height<<endl;
///----------------------------------------加载第二个纹理图片----
FREE_IMAGE_FORMAT fif1 = FIF_UNKNOWN;
FREE_IMAGE_FORMAT fifmt1;
int width1, height1;
FIBITMAP *dib1(0);
//1 获取图片格式
fifmt1 = FreeImage_GetFileType("D:/C语言/openglflew/face.png", 0);
//2 加载图片
if(FreeImage_FIFSupportsReading(fifmt1))
dib1 = FreeImage_Load(fifmt1, "D:/C语言/openglflew/face.png",0);
printf("bit: %d\n", FreeImage_GetBPP(dib1));//灰度
printf("type: %d\n",FreeImage_GetImageType(dib1));//返回类型
printf("bit: %d\n",FreeImage_GetColorsUsed(dib1));//调色板的大小
printf("bit: %d\n",FreeImage_GetDIBSize(dib1));//大小
//if the image failed to load, return failure
if(!dib1)
cout<<55<<endl;
//3 转化为rgb 24色
dib1= FreeImage_ConvertTo24Bits(dib1);
//4 获取数据指针
BYTE *pixels1 = (BYTE*)FreeImage_GetBits(dib1);
width1 = FreeImage_GetWidth(dib1);
height1 = FreeImage_GetHeight(dib1);
cout<<"width1:"<<width1<<endl;
cout<<"height1:"<<height1<<endl;
// Load and create a texture 加载和创建纹理
GLuint texture1;
GLuint texture2;
// ====================
// Texture 1 纹理1
// ====================
glGenTextures(1, &texture1);
// All upcoming GL_TEXTURE_2D operations now have effect on our texture object 全不即将到来的GL_TEXTURE_2D操作的将会影响的我们的纹理对象
glBindTexture(GL_TEXTURE_2D, texture1);
// Set our texture parameters 设置我们的纹理程序
glTexParameteri(GL_TEXTURE_2D, GL_TEXTURE_WRAP_S, GL_REPEAT); // Set texture wrapping to GL_REPEAT 设置纹理 包装GL_REPEAT
glTexParameteri(GL_TEXTURE_2D, GL_TEXTURE_WRAP_T, GL_REPEAT);
// Set texture filtering 设置纹理过滤
glTexParameteri(GL_TEXTURE_2D, GL_TEXTURE_MIN_FILTER, GL_LINEAR);
glTexParameteri(GL_TEXTURE_2D, GL_TEXTURE_MAG_FILTER, GL_LINEAR);
glTexImage2D(GL_TEXTURE_2D, 0, GL_RGB, width, height, 0, GL_BGR_EXT, GL_UNSIGNED_BYTE, pixels);
FreeImage_Unload(dib);
FreeImage_DeInitialise();
glGenerateMipmap(GL_TEXTURE_2D);
glBindTexture(GL_TEXTURE_2D, 0); // Unbind texture when done, so we won't accidentily mess up our texture. 解绑纹理,,这样做将不会让我们纹理陷入困境
// ===================
// Texture 2 纹理2
// ===================
glGenTextures(1, &texture2);
glBindTexture(GL_TEXTURE_2D, texture2);
// Set our texture parameters 设置我们的纹理程序
glTexParameteri(GL_TEXTURE_2D, GL_TEXTURE_WRAP_S, GL_REPEAT);
glTexParameteri(GL_TEXTURE_2D, GL_TEXTURE_WRAP_T, GL_REPEAT);
// Set texture filtering 设置纹理的过滤
glTexParameteri(GL_TEXTURE_2D, GL_TEXTURE_MIN_FILTER, GL_LINEAR);
glTexParameteri(GL_TEXTURE_2D, GL_TEXTURE_MAG_FILTER, GL_LINEAR);
// Load, create texture and generate mipmaps 加载,创建纹理和形成译码
glTexImage2D(GL_TEXTURE_2D, 0, GL_RGB, width1, height1, 0, GL_BGR_EXT, GL_UNSIGNED_BYTE, pixels1);
FreeImage_Unload(dib1);
FreeImage_DeInitialise();
glGenerateMipmap(GL_TEXTURE_2D);
glBindTexture(GL_TEXTURE_2D, 0);
// Game loop
while (!glfwWindowShouldClose(window))
{
// Check if any events have been activiated (key pressed, mouse moved etc.) and call corresponding response functions 检查是否有事件
glfwPollEvents();
// Render 渲染
// Clear the colorbuffer 清除颜色缓存
glClearColor(0.2f, 0.3f, 0.3f, 1.0f);
glClear(GL_COLOR_BUFFER_BIT);
// Activate shader 设置活动的着色器
ourShader.Use();
// Bind Textures using texture units 绑定纹理使用纹理单元
glActiveTexture(GL_TEXTURE0);//激活纹理单元
glBindTexture(GL_TEXTURE_2D, texture1);//绑定当前纹理单元到激活的纹理单元
//我们使用glUniform1i设置unform采样器的位置和日纹理单元。通过glUniform1i的设置,我们保证
glUniform1i(glGetUniformLocation(ourShader.Program, "ourTexture1"), 0);
glActiveTexture(GL_TEXTURE1);
glBindTexture(GL_TEXTURE_2D, texture2);
glUniform1i(glGetUniformLocation(ourShader.Program, "ourTexture2"), 1);
// Draw container 画画容器
glBindVertexArray(VAO);
glDrawElements(GL_TRIANGLES, 6, GL_UNSIGNED_INT, 0);
glBindVertexArray(0);
// Swap the screen buffers
glfwSwapBuffers(window);
}
// Properly de-allocate all resources once they've outlived their purpose 删除占用的资源
glDeleteVertexArrays(1, &VAO);
glDeleteBuffers(1, &VBO);
glDeleteBuffers(1, &EBO);
// Terminate GLFW, clearing any resources allocated by GLFW. 清除任何关于GLFW的资源
glfwTerminate();
return 0;
}
// Is called whenever a key is pressed/released via GLFW
void key_callback(GLFWwindow* window, int key, int scancode, int action, int mode)
{
if (key == GLFW_KEY_ESCAPE && action == GLFW_PRESS)
glfwSetWindowShouldClose(window, GL_TRUE);
}#version 330 core
in vec3 ourColor;
in vec2 TexCoord;
out vec4 color;
// Texture samplers
uniform sampler2D ourTexture1;
uniform sampler2D ourTexture2;
void main()
{
// Linearly interpolate between both textures (second texture is only slightly combined) 在第一个和第二个纹理在中线性插入
color = mix(texture(ourTexture1, TexCoord), texture(ourTexture2, TexCoord), 0.2);
//mix是GLSL带的函数,根据第三个参数决定前两个的输入值,现在是前面的占0.8,后面的0.2。假如第三个是0那么第一个值输入
}顶点着色器
#version 330 core
layout (location = 0) in vec3 position;
layout (location = 1) in vec3 color;
layout (location = 2) in vec2 texCoord;

out vec3 ourColor;
out vec2 TexCoord;

void main()
{
	gl_Position = vec4(position, 1.0f);
	ourColor = color;
	// We swap the y-axis by substracing our coordinates from 1.我们替换y轴通过1减去我们的坐标
 //This is done because most images have the top y-axis inversed with OpenGL's top y-axis.这样做是因为大部分图像y轴坐标和opengl的坐标时颠倒的
	// TexCoord = texCoord;
	TexCoord = vec2(texCoord.x, 1.0 - texCoord.y);
}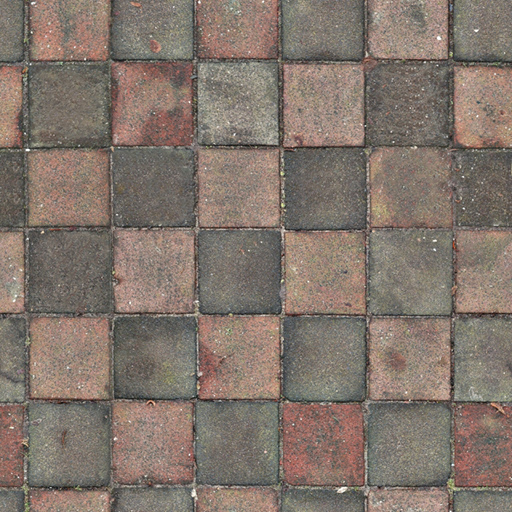

运行效果图


 1万+
1万+


 被折叠的 条评论
为什么被折叠?
被折叠的 条评论
为什么被折叠?
 到【灌水乐园】发言


