


1、使用一下代码将activity中系统自带的标题栏隐藏掉,从而使用我们自己的指定的标题栏。
   protected void onCreate(Bundle savedInstanceState) {
        super.onCreate(savedInstanceState);
        setContentView(R.layout.activity_like_iphone);
        ActionBar actionBar=getSupportActionBar();
        if(actionBar!=null){
            actionBar.hide();
        }
    }
2、对于那些需要反复使用的标题栏,可以将标题栏单独作为一个布局文件。
<?xml version="1.0" encoding="utf-8"?>
<LinearLayout xmlns:android="http://schemas.android.com/apk/res/android"
    xmlns:app="http://schemas.android.com/apk/res-auto"
    xmlns:tools="http://schemas.android.com/tools"
    android:layout_width="match_parent"
    android:layout_height="wrap_content"
    tools:context="com.example.david.firstcode_ui.like_iphone">
    <Button
        android:id="@+id/Title_back"
        android:layout_width="wrap_content"
        android:layout_height="wrap_content"
        android:layout_gravity="left"
        android:layout_margin="5dp"
        android:text="Back"
        android:textColor="#fff"
    />

    <TextView
        android:id="@+id/Title_text"
        android:layout_width="0dp"
        android:layout_height="wrap_content"
        android:layout_margin="12dp"
        android:layout_weight="1"
        android:gravity="center"
        android:text="Title Text"
        android:textColor="#000"
        android:textSize="24sp"
        />

    <Button
        android:id="@+id/Title_edit"
        android:layout_width="wrap_content"
        android:layout_height="wrap_content"
        android:layout_gravity="right"
        android:layout_margin="5dp"
        android:text="Edit"
        android:textColor="#fff"
        />

</LinearLayout>

在其他布局文件中需要使用时,直接使用include语句将其他布局文件引入即可。
<?xml version="1.0" encoding="utf-8"?>
<LinearLayout xmlns:android="http://schemas.android.com/apk/res/android"
    xmlns:app="http://schemas.android.com/apk/res-auto"
    xmlns:tools="http://schemas.android.com/tools"
    android:layout_width="match_parent"
    android:layout_height="match_parent"
    android:orientation="vertical"
    tools:context="com.example.david.firstcode_ui.test_ipone">

<include layout="@layout/activity_like_iphone"/>
<Button
    android:layout_height="wrap_content"
    android:layout_width="match_parent"
    android:text="button"
    />
</LinearLayout>

3、使用LayoutInflater来加载布局文件。
(1)在 实际开发中LayoutInflater这个类还是非常有用的,它的作用类似于findViewById()。不同点是LayoutInflater是用 来找res/layout/下的xml布局文件,并且实例化;而findViewById()是找xml布局文件下的具体widget控件(如 Button、TextView等)。 具体作用: 1、对于一个没有被载入或者想要动态载入的界面,都需要使用LayoutInflater.inflate()来载入。
(2)对于一个已经载入的界面,就可以使用Activiyt.findViewById()方法来获得其中的界面元素。
获得 LayoutInflater 实例的三种方式
1.
LayoutInflater inflater = getLayoutInflater();  //调用Activity的getLayoutInflater()
2.
LayoutInflater localinflater =(LayoutInflater)context.getSystemService (Context.LAYOUT_INFLATER_SERVICE);
3.
 LayoutInflater inflater = LayoutInflater.from(context);
其实,这三种方式本质是相同的,最终本质是都是调用的Context.getSystemService()。
转自:http://blog.csdn.net/guolin_blog/article/details/12921889
下面我们就通过一个非常简单的小例子,来更加直观地看一下LayoutInflater的用法。比如说当前有一个项目,其中MainActivity对应的布局文件叫做activity_main.xml,代码如下所示:
<LinearLayout xmlns:android="http://schemas.android.com/apk/res/android"
    android:id="@+id/main_layout"
    android:layout_width="match_parent"
    android:layout_height="match_parent" >
</LinearLayout>
这个布局文件的内容非常简单,只有一个空的LinearLayout,里面什么控件都没有,因此界面上应该不会显示任何东西。
那么接下来我们再定义一个布局文件,给它取名为button_layout.xml,代码如下所示:
<Button xmlns:android="http://schemas.android.com/apk/res/android"
    android:layout_width="wrap_content"
    android:layout_height="wrap_content"
    android:text="Button" >

</Button>
那么接下来我们再定义一个布局文件,给它取名为button_layout.xml,代码如下所示:
public class MainActivity extends Activity {
private LinearLayout mainLayout;
@Override
protected void onCreate(Bundle savedInstanceState) {
super.onCreate(savedInstanceState);
setContentView(R.layout.activity_main);
mainLayout = (LinearLayout) findViewById(R.id.main_layout);
LayoutInflater layoutInflater = LayoutInflater.from(this);
View buttonLayout = layoutInflater.inflate(R.layout.button_layout, null);
mainLayout.addView(buttonLayout);
}
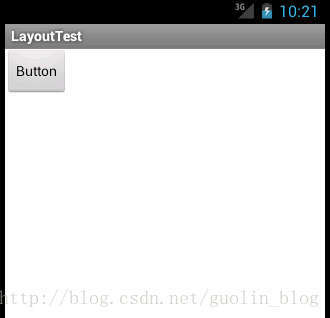
}可以看到,这里先是获取到了LayoutInflater的实例,然后调用它的inflate()方法来加载button_layout这个布局,最后调用LinearLayout的addView()方法将它添加到LinearLayout中。
现在可以运行一下程序,结果如下图所示:


 141
141

 被折叠的 条评论
为什么被折叠?
被折叠的 条评论
为什么被折叠?
 到【灌水乐园】发言


