


前言
本项目基于 MNIST 数据集,使用 VGG-19 网络模型,将图像进行风格迁移,实现去噪功能。
VGG-19是一种深度卷积神经网络模型,具有较强的图像特征提取能力。在本项目中,我们利用VGG-19模型的卷积层,提取输入图像的特征表示。
图像风格迁移是一种通过将图像的内容与另一个图像的风格相结合,生成新图像的技术。通过将待处理的图像输入VGG-19模型,我们可以获得图像的内容特征和风格特征。然后,利用风格迁移算法,将图像的内容特征与一个风格图像的风格特征进行融合。这样,我们可以生成一张具有原始图像内容但具有去除噪声的新图像。
这项技术可以应用于图像处理领域,提高图像质量,去除噪声干扰,从而改善图像的视觉效果和可用性。
总体设计
本部分包括系统整体结构图和系统流程图。
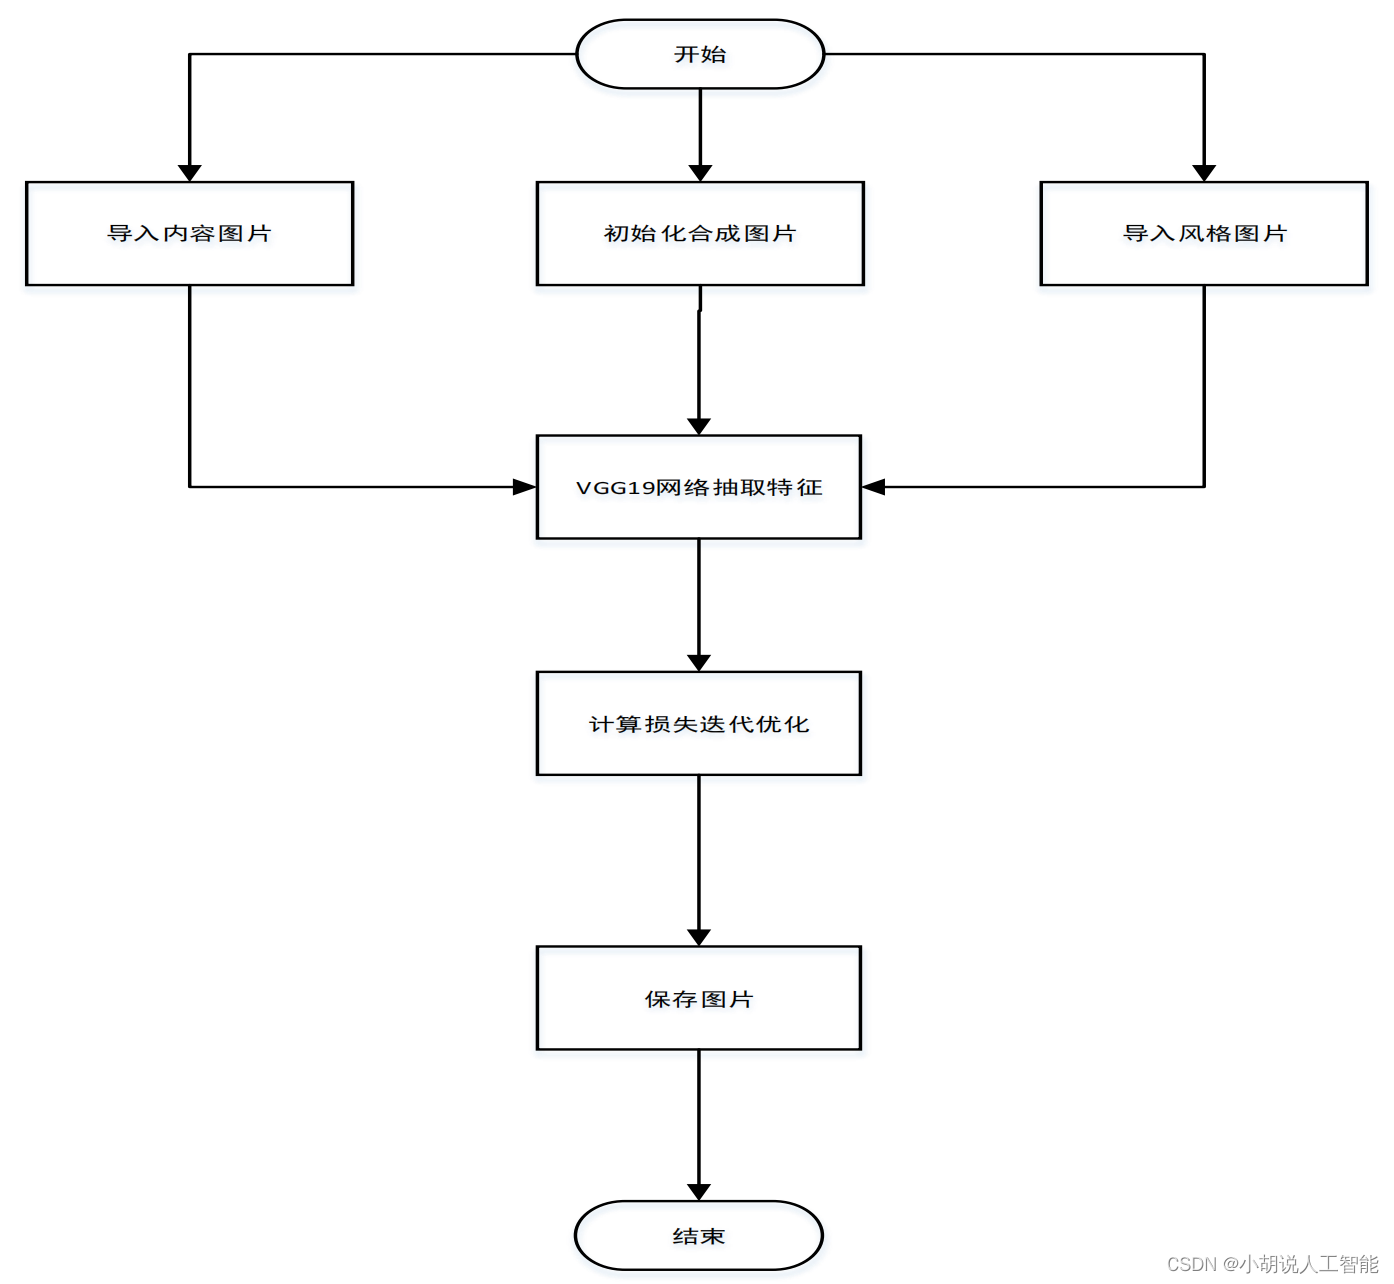
系统整体结构图
系统整体结构如图所示。
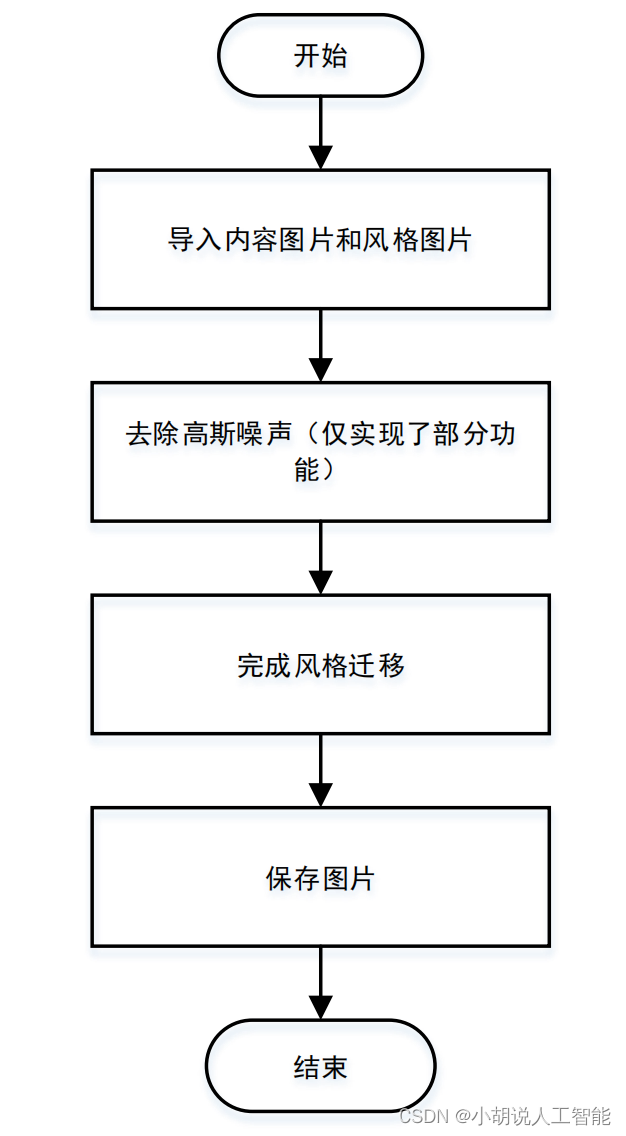
系统流程图
系统流程如图所示。
运行环境
本部分包括 Python 和 TensorFlow 运行环境。
Python 环境
需要 Python 3.6 及以上配置,在 Windows 环境下推荐下载 Anaconda 完成 Python 所需的配置,下载地址:https://www.anaconda.com/。也可以下载虚拟机在 Linux 环境下运行代码。
TensorFlow 环境
打开 Anaconda Prompt,输入清华仓库镜像。
conda config --add channels https://mirrors.tuna.tsinghua.edu.cn/anaconda/pkgs/free/
conda config –set show_channel_urls yes
创建 Python 3.5 环境,名称为 TensorFlow:
conda create -n tensorflow python=3.5
有需要确认的地方,都输入 y。
在 Anaconda Prompt 中激活 TensorFlow 环境:
activate tensorflow
安装 CPU 版本的 TensorFlow:
pip install –upgrade --ignore-installed tensorflow
模块实现
本项目包括3 个模块:图片处理、模型构造、迭代更新,下面分别给出各模块的功能介绍及相关代码。
1. 图片处理
图片风格迁移会涉及到图片处理,主要为图片的大小裁剪、导入和保存。由于图片尺寸参差不齐,在风格迁移之前,将图片大小调为一致以降低难度。图像风格迁移过程中会迭代更新很多张图片,这些图片放一起做成动图。
def get_resized_image(img_path, width, height, save=True):
    #改变图片大小
    image = Image.open(img_path)
    image = ImageOps.fit(image, (width, height), Image.ANTIALIAS)
    if save:
        image_dirs = img_path.split('/')
        image_dirs[-1] = 'resized_' + image_dirs[-1]
        out_path = '/'.join(image_dirs)
        if not os.path.exists(out_path):
            image.save(out_path)
    image = np.asarray(image, np.float32)
    return np.expand_dims(image, 0)
def generate_noise_image(content_image, width, height, noise_ratio=0.6):
    #给图片加噪声
    noise_image = np.random.uniform(-20, 20, (1, height, width, 3)).astype(np.float32)
    return noise_image * noise_ratio + content_image * (1 - noise_ratio)
def save_image(path, image):
    #保存图片
    image = image[0]
    image = np.clip(image, 0, 255).astype('uint8')
    scipy.misc.imsave(path, image)
def safe_mkdir(path):
    #生成路径
    try:
        os.mkdir(path)
    except OSError:
        pass
def create_gif(root_dir, duration=0.3):
    #创建GIF动图
    img_list = os.listdir(root_dir)
    img_list.sort(key=lambda x: int(x[6:-4]))
    frames = list()
    gif_name = GIF_PATH + '/' + root_dir.split('/')[-1] + '.gif'
    for i in img_list:
        i = root_dir + '/' + i
        frames.append(imageio.imread(i))
    imageio.mimsave(gif_name, frames, 'GIF', duration=duration)
    return gif_name
2. 模型构造
本部分包括定义模型结构和优化损失函数。
1)定义模型结构
项目用到的网络模型为预训练好的 VGG-19,使用过程中抛弃最后三个全连接层,取出前面各层的参数,构建网络结构。
def download(download_link, file_name, expected_bytes):
    #下载VGG-19
    print(file_name)
    if os.path.exists(file_name):
        print("VGG-19 pre-trained model is ready")
        return
    print("Downloading the VGG pre-trained model. This might take a while ...")
    file_name, _ = urllib.request.urlretrieve(download_link, file_name)
    file_stat = os.stat(file_name)
    if file_stat.st_size == expected_bytes:
      print('Successfully downloaded VGG-19 pre-trained model', file_name)
    else:
        raise Exception('File ' + file_name +
       ' might be corrupted.You should try downloading it with a browser.')
class VGG(object):
    def __init__(self, input_img):
        #下载文件
        utils.download(VGG_DOWNLOAD_LINK, VGG_FILENAME, EXPECTED_BYTES)
        #加载文件
        self.vgg_layers = scipy.io.loadmat(VGG_FILENAME)["layers"]
        self.input_img = input_img
      #VGG在处理图像时将图片进行mean-center,所以要计算RGB三个通道上的mean值
      #为训练集每个通道求和的均值,统一减去,使得均值为0,模型收敛更快
   		self.mean_pixels=np.array([123.68,116.779,103.939]).reshape((1,1,1, 3))
    def _weights(self, layer_idx, expected_layer_name):
        #参数特定存储位置
        W = self.vgg_layers[0][layer_idx][0][0][2][0][0]
        b = self.vgg_layers[0][layer_idx][0][0][2][0][1]
        #当前层的名称
        layer_name = self.vgg_layers[0][layer_idx][0][0][0][0]
        assert layer_name==expected_layer_name, print("Layer name error!")
        return W, b.reshape(b.size)
    def conv2d_relu(self, prev_layer, layer_idx, layer_name):
        with tf.variable_scope(layer_name):
            #获取当前权重(numpy格式)
            W, b = self._weights(layer_idx, layer_name)
            #将权重转化为tensor(由于不需要重新训练VGG的权重,初始化为常数)
            W = tf.constant(W, name="weights")
            b = tf.constant(b, name="bias")
            #卷积操作
            conv2d = tf.nn.conv2d(input=prev_layer,
                                  filter=W,
                                  strides=[1, 1, 1, 1],
                                  padding="SAME")
            #激活
            out = tf.nn.relu(conv2d + b)
        setattr(self, layer_name, out)
    def avgpool(self, prev_layer, layer_name):
        with tf.variable_scope(layer_name):
            out = tf.nn.avg_pool(value=prev_layer,
                                 ksize=[1, 2, 2, 1],
                                 strides=[1, 2, 2, 1],
                                 padding="SAME")
        setattr(self, layer_name, out)
    def load(self):
        self.conv2d_relu(self.input_img, 0, "conv1_1")
        self.conv2d_relu(self.conv1_1, 2, "conv1_2")
        self.avgpool(self.conv1_2, "avgpool1")
        self.conv2d_relu(self.avgpool1, 5, "conv2_1")
        self.conv2d_relu(self.conv2_1, 7, "conv2_2")
        self.avgpool(self.conv2_2, "avgpool2")
        self.conv2d_relu(self.avgpool2, 10, "conv3_1")
        self.conv2d_relu(self.conv3_1, 12, "conv3_2")
        self.conv2d_relu(self.conv3_2, 14, "conv3_3")
        self.conv2d_relu(self.conv3_3, 16, "conv3_4")
        self.avgpool(self.conv3_4, "avgpool3")
        self.conv2d_relu(self.avgpool3, 19, "conv4_1")
        self.conv2d_relu(self.conv4_1, 21, "conv4_2")
        self.conv2d_relu(self.conv4_2, 23, "conv4_3")
        self.conv2d_relu(self.conv4_3, 25, "conv4_4")
        self.avgpool(self.conv4_4, "avgpool4")
        self.conv2d_relu(self.avgpool4, 28, "conv5_1")
        self.conv2d_relu(self.conv5_1, 30, "conv5_2")
        self.conv2d_relu(self.conv5_2, 32, "conv5_3")
        self.conv2d_relu(self.conv5_3, 34, "conv5_4")
        self.avgpool(self.conv5_4, "avgpool5")
2)优化损失函数
搭建好网络模型,需要定义损失函数,由内容损失、风格损失构成。内容损失采用 L2范数损失,风格损失用 Gram 矩阵计算各通道的相关性,以便更好的捕捉笔触、纹理等细节信息,利用 adam 梯度下降算法进行优化。
     def create_input(self):
       #初始化图片tensor
       with tf.variable_scope("input"):
           self.input_img = tf.get_variable("in_img",
                              shape=([1, self.img_height, self.img_width, 3]),
                                            dtype=tf.float32,
                                            initializer=tf.zeros_initializer())
    def load_vgg(self):
        #加载VGG模型并对图片进行预处理
        self.vgg = load_vgg.VGG(self.input_img)
        self.vgg.load()
        #mean-center
        self.content_img -= self.vgg.mean_pixels
        self.style_img -= self.vgg.mean_pixels
    def _content_loss(self, P, F):
        #计算内容损失
        self.content_loss = tf.reduce_sum(tf.square(F - P))/(4.0 * P.size)
        def _gram_matrix(self, F, N, M):
        F = tf.reshape(F, (M, N))
        return tf.matmul(tf.transpose(F), F)
    def _single_style_loss(self, a, g):
        N = a.shape[3]
        M = a.shape[1] * a.shape[2]
        #生成特征图的gram_matrix
        A = self._gram_matrix(a, N, M)
        G = self._gram_matrix(g, N, M)
        return tf.reduce_sum(tf.square(G - A)) / ((2 * N * M) ** 2)
    def _style_loss(self, A):
        #层数(用conv1_1, conv2_1, conv3_1, conv4_1, conv5_1)
        n_layers = len(A)
        #计算损失
    E=[self.single_style_loss(A[i],getattr(self.vgg,self.style_layers[i]))
             for i in range(n_layers)]
        #加权求和
        self.style_loss = sum(self.style_layer_w[i] * E[i] for i in range(n_layers))
    def losses(self):
        #模型总体损失
        with tf.variable_scope("losses"):
            #内容损失
            with tf.Session() as sess:
                sess.run(self.input_img.assign(self.content_img))
                gen_img_content = getattr(self.vgg, self.content_layer)
                content_img_content = sess.run(gen_img_content)
            self._content_loss(content_img_content, gen_img_content)
            #风格损失
            with tf.Session() as sess:
                sess.run(self.input_img.assign(self.style_img))
                style_layers = sess.run([getattr(self.vgg, layer) for layer in self.style_layers])
            self._style_loss(style_layers)
            #加权求得最终的损失
            self.total_loss = self.content_w * self.content_loss + self.style_w * self.style_loss
    def optimize(self):
        self.optimizer = tf.train.AdamOptimizer(self.lr).minimize(self.total_loss, global_step=self.gstep)
3)迭代更新
训练过程中,每 10 个 epoch 生成一张图片。当 epoch > 20 时,每 20 个 epoch 生成一张图片,以免生成过多。
    def train(self, epoches=20):
        skip_step = 1
        with tf.Session() as sess:
            sess.run(tf.global_variables_initializer())
            sess.run(self.input_img.assign(self.initial_img))
            initial_step = self.gstep.eval()
            for epoch in range(initial_step, epoches):
                #前面几轮每隔10个epoch生成一张图片
                if 5 <= epoch < 20:
                    skip_step = 10
                #后面每隔20个epoch生成一张图片
                elif epoch >= 20:
                    skip_step = 20
                sess.run(self.optimizer)
                if epoch == epoches - 1 or (epoch + 1) % skip_step == 0:
                    gen_image, total_loss = sess.run([self.input_img, self.total_loss])
                    #对生成的图片逆向mean-center,即在每个通道加上mean
                    gen_image = gen_image + self.vgg.mean_pixels
                    print("Step {}\n   Sum: {:5.1f}".format(epoch + 1, np.sum(gen_image)))
                    print("   Loss: {:5.1f}".format(total_loss))
                    filename = OUTPUT_PATH + "/%s_%s/epoch_%d.png" % (self.content_name, self.style_name, epoch + 1)
                    utils.save_image(filename, gen_image)
                    self.mix_img = filename.replace(sys.path[0], '')
                    self.prog = (epoch + 1) / epoches * 100
系统测试
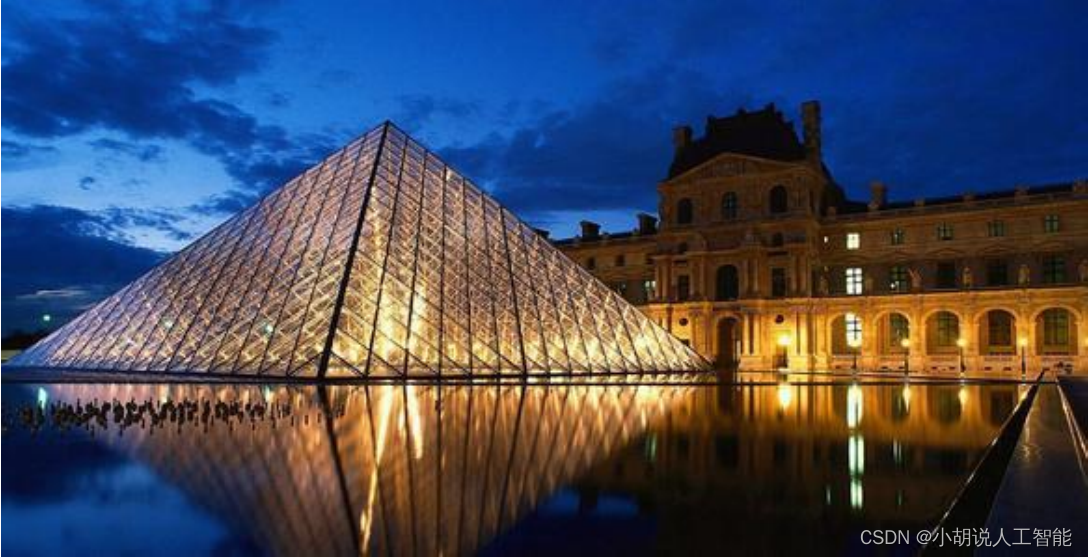
对于分类问题,数据都有很明确的标签,可以用准确率、召回率来评判模型优劣程度。但对于图像风格迁移这种模糊算法,并没有客观的评判标准。损失函数可以反映出一部分情况,更多的是人为观察运行结果。内容如图 1 所示,风格如图 2 所示。

进行 100 次迭代更新,第一次迭代的损失值如下图所示。

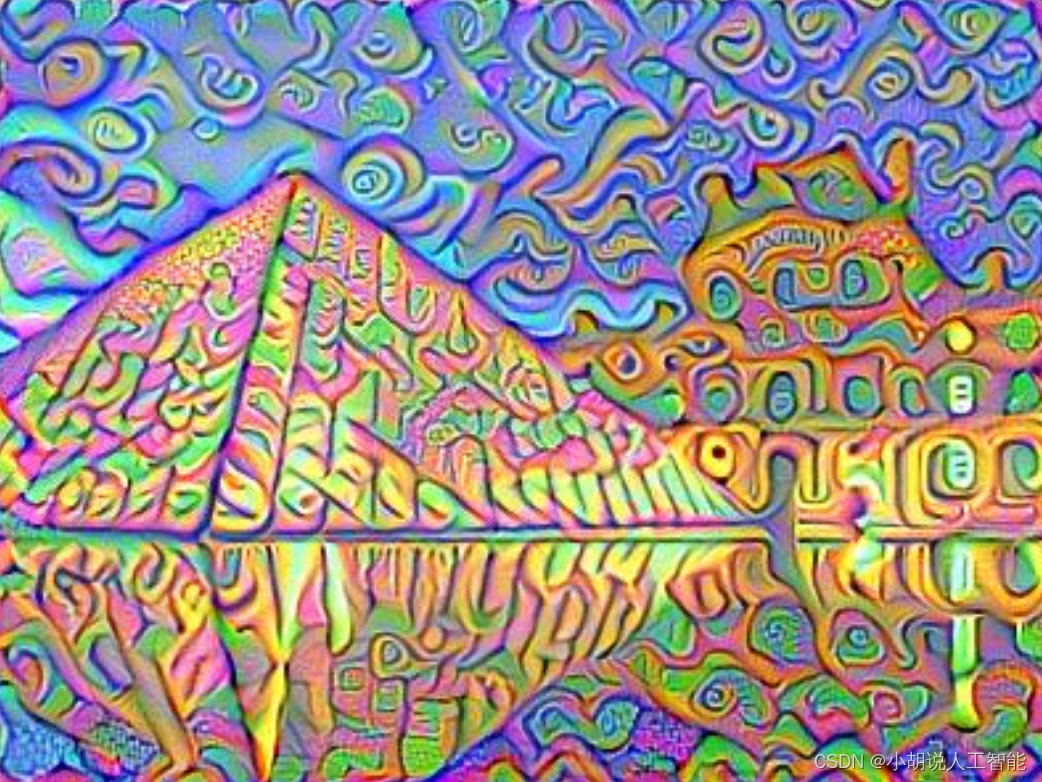
经过 40 次迭代,损失值和效果如图 3 和图 4 所示。

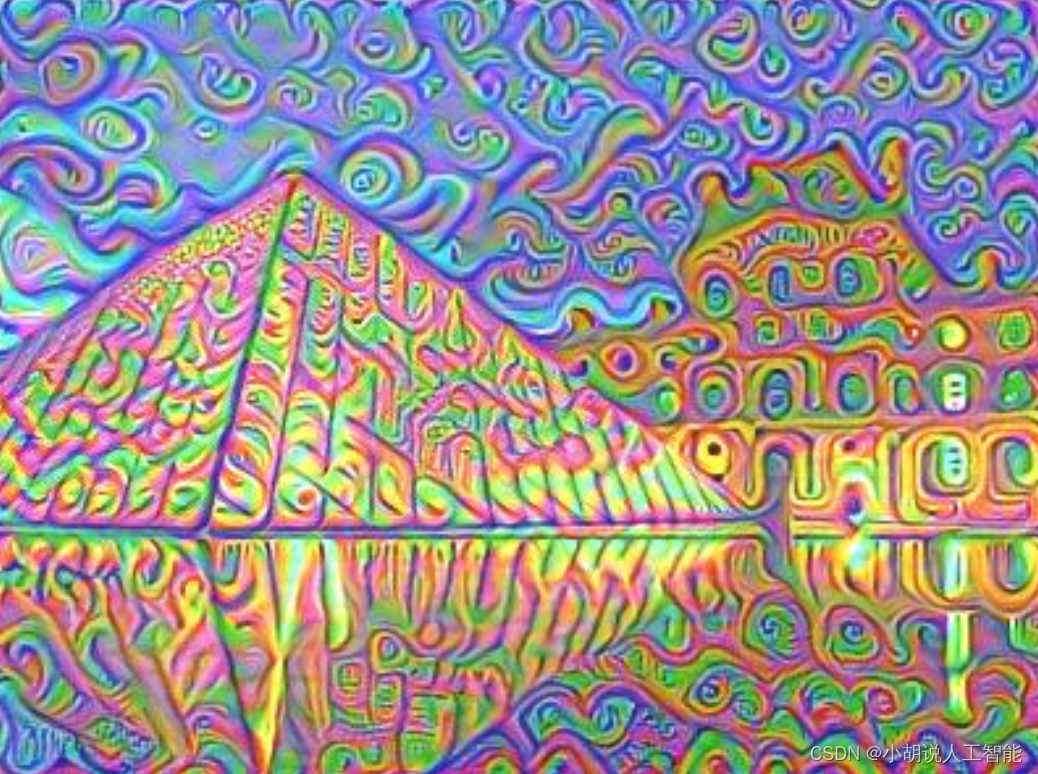
40 次和 100 次迭代的效果并未明显增强,且 40 次迭代风格迁移已很明显,可根据自身需求,合理调节迭代次数。100 次迭代的损失和效果如图 5 和图 6 所示。

工程源代码下载
其它资料下载
如果大家想继续了解人工智能相关学习路线和知识体系,欢迎大家翻阅我的另外一篇博客《重磅 | 完备的人工智能AI 学习——基础知识学习路线,所有资料免关注免套路直接网盘下载》
这篇博客参考了Github知名开源平台,AI技术平台以及相关领域专家:Datawhale,ApacheCN,AI有道和黄海广博士等约有近100G相关资料,希望能帮助到所有小伙伴们。


 2万+
2万+


 被折叠的 条评论
为什么被折叠?
被折叠的 条评论
为什么被折叠?
 到【灌水乐园】发言


