


 本文详细介绍了在CentOS环境下安装配置Elasticsearch和Kibana的过程,包括解决常见错误的方法,如文件描述符限制和root用户启动问题,以及如何配置ES和Kibana实现远程访问。
系列文章:
- 从零学Elasticsearch系列——基础概念
- 从零学Elasticsearch系列——环境搭建
- 从零学Elasticsearch系列——使用kibana实现ES基本的操作
- 从零学Elasticsearch系列——深入搜索(Query、Filter、Aggregation)
- 从零学Elasticsearch系列——JAVA API操作
- 从零学Elasticsearch系列——集成中文分词器IK
- 从零学Elasticsearch系列——构建ES集群
- 从零学Elasticsearch系列——搭建ELK Nginx日志分析平台
一、Elasticsearch环境搭建
准备工作
- CentOS(版本需大于7 如:CentOS-7-x86_64-Minimal-1804.iso)
- Java(版本需大于1.8 如:jdk-8u181-linux-x64.rpm)
- ES安装包(如: elasticsearch-6.4.0.tar.gz)
环境搭建
安装Java
[root@localhost ~]# rpm -ivh jdk-8u181-linux-x64.rpm
warning: jdk-8u181-linux-x64.rpm: Header V3 RSA/SHA256 Signature, key ID ec551f03: NOKEY
Preparing...                          ################################# [100%]
Updating / installing...
    1:jdk1.8-2000:1.8.0_181-fcs        ################################# [100%]
Unpacking JAR files...
    tools.jar...
    plugin.jar...
    javaws.jar...
    deploy.jar...
    rt.jar...
    jsse.jar...
    charsets.jar...
    localedata.jar...

[root@localhost latest]# vi /etc/profile
export JAVA_HOME=/usr/java/latest
export CLASSPATH=.
export PATH=$PATH:$JAVA_HOME/bin

[root@localhost latest]# source /etc/profile
安装ES
[root@localhost ~]# tar -zxvf elasticsearch-6.4.0.tar.gz -C /usr
启动
[root@localhost elasticsearch-6.4.0]# bin/elasticsearch
-
出现异常:
Caused by: java.lang.RuntimeException: can not run elasticsearch as root原因:ES不允许通过ROOT用户启动
解决方案:
[root@localhost elasticsearch-6.4.0]# groupadd es
[root@localhost elasticsearch-6.4.0]# useradd -g es es
[root@localhost elasticsearch-6.4.0]# chown -R es:es /usr/elasticsearch-6.4.0/
[root@localhost elasticsearch-6.4.0]# ll
total 436
drwxr-xr-x.  3 es es   4096 Dec 18 01:15 bin
drwxr-xr-x.  2 es es    178 Dec 18 01:16 config
drwxr-xr-x.  3 es es   4096 Aug 17 19:23 lib
-rw-r--r--.  1 es es  13675 Aug 17 19:11 LICENSE.txt
drwxr-xr-x.  2 es es    218 Dec 18 01:16 logs
drwxr-xr-x. 27 es es   4096 Aug 17 19:23 modules
-rw-r--r--.  1 es es 401465 Aug 17 19:22 NOTICE.txt
drwxr-xr-x.  2 es es      6 Aug 17 19:22 plugins
-rw-r--r--.  1 es es   8511 Aug 17 19:11 README.textile
[root@localhost elasticsearch-6.4.0]# su es
[es@localhost elasticsearch-6.4.0]$ bin/elasticsearch
测试
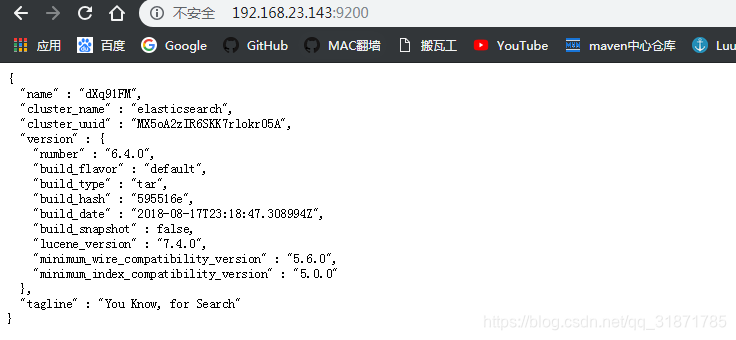
[root@localhost ~]# curl -X GET localhost:9200
{
  "name" : "x0vIhEF",
  "cluster_name" : "elasticsearch",
  "cluster_uuid" : "Cpga8etSTu6LmcYm35QqkA",
  "version" : {
    "number" : "6.4.0",
    "build_flavor" : "default",
    "build_type" : "tar",
    "build_hash" : "595516e",
    "build_date" : "2018-08-17T23:18:47.308994Z",
    "build_snapshot" : false,
    "lucene_version" : "7.4.0",
    "minimum_wire_compatibility_version" : "5.6.0",
    "minimum_index_compatibility_version" : "5.0.0"
  },
  "tagline" : "You Know, for Search"
}
配置远程访问
[root@localhost elasticsearch-6.4.0]# vim config/elasticsearch.yml
 51	# ---------------------------------- Network -----------------------------------
 52 #
 53 # Set the bind address to a specific IP (IPv4 or IPv6):
 54 #
 55 network.host: 192.168.23.141
 56 #
 57 # Set a custom port for HTTP:
 58 #
 59 #http.port: 9200
 60 #
 61 # For more information, consult the network module documentation.
 62 #
 63 # --------------------------------- Discovery ----------------------------------
-
重新启动ES服务,出现异常
ERROR: [3] bootstrap checks failed
[1]: max file descriptors [4096] for elasticsearch process is too low, increase to at least [65536]
[2]: max number of threads [3802] for user [es] is too low, increase to at least [4096]
[3]: max virtual memory areas vm.max_map_count [65530] is too low, increase to at least [262144]
解决方案(切换到root用户):
[root@localhost elasticsearch-6.4.0]# vim /etc/security/limits.conf
# 添加以下内容
*	soft	nofile	65536
*	hard	nofile	131072
*	soft	nproc	2048
*	hard	nproc	4096

[root@localhost elasticsearch-6.4.0]# vim /etc/sysctl.conf
# 添加以下内容
vm.max_map_count=655360
[root@localhost elasticsearch-6.4.0]# sysctl -p
vm.max_map_count = 655360
[root@localhost elasticsearch-6.4.0]# reboot

[root@localhost ~]# systemctl stop firewalld
[root@localhost ~]# systemctl disable firewalld
Removed symlink /etc/systemd/system/multi-user.target.wants/firewalld.service.
Removed symlink /etc/systemd/system/dbus-org.fedoraproject.FirewallD1.service.
测试访问
二、Kibana环境搭建
概述
Kibana是一个针对Elasticsearch的开源数据分析及可视化平台,用来搜索、查看交互存储在Elasticsearch索引中的数据。使用Kibana,可以通过各种图表进行高级数据分析及展示。
Kibana让海量数据更容易理解。它操作简单,基于浏览器的用户界面可以快速创建仪表板(dashboard)实时显示Elasticsearch查询动态。
设置Kibana非常简单。无需编码或者额外的基础架构,几分钟内就可以完成Kibana安装并启动Elasticsearch索引监测。
安装配置
[root@localhost ~]# tar -zxvf kibana-6.4.0-linux-x86_64.tar.gz -C /usr
[root@localhost ~]# cd /usr/kibana-6.4.0-linux-x86_64/
[root@localhost kibana-6.4.0-linux-x86_64]# vim config/kibana.yml

# To allow connections from remote users, set this parameter to a non-loopback address.
server.host: "192.168.23.141"

# The URL of the Elasticsearch instance to use for all your queries.
elasticsearch.url: "http://192.168.23.141:9200"

[root@localhost kibana-6.4.0-linux-x86_64]# bin/kibana


 8119
8119

 被折叠的 条评论
为什么被折叠?
被折叠的 条评论
为什么被折叠?
 到【灌水乐园】发言


