


 本文详细介绍了在Ubuntu环境下搭建STM32MP15开发环境的步骤,包括安装STM32CubeProgrammer、libusb、创建启动镜像、制作SD卡引导程序、连接并访问STM32MP15 Linux终端、安装开发包SDK等关键过程。
一.安装工具包
1)安装工具
TM32CubeProgrammer 需要 1.8 版本的JAVA平台
- sudo apt-get install openjdk-8-jre
- sudo update-alternatives --config java
2)在主机上面创建STM32MPU工具目录(根据自己的电脑创建文件夹)
- mkdir $HOME/STM32MPU_workspace/STM32MPU-Tools
- mkdir $HOME/STM32MPU_workspace/STM32MPU-Tools/STM32CubeProgrammer-2.2.0
注意:$HOME 不是/home,而是当前的家目录的用户名,比如你用户名是my-linux,则$HOME相当于/home/my-linux
3)在STM32MPU_workspace创建一个临时工作目录
- mkdir $HOME/STM32MPU_workspace/tmp
4)下载STM32CubeProgrammer v2.2.0在 $HOME/STM32MPU_workspace/tmp此目录
- eg:Download STM32CubeProgrammer v2.2.0 在下面的目录
$HOME/STM32MPU_workspace/tmp
进入此目录,并解压zip文件
- cd $HOME/STM32MPU_workspace/tmp
- unzip SetupSTM32CubeProgrammer.zip
解压过后会看到三个文件
- SetupSTM32CubeProgrammer-2.2.0.app
- SetupSTM32CubeProgrammer-2.2.0.exe
- SetupSTM32CubeProgrammer-2.2.0.linux
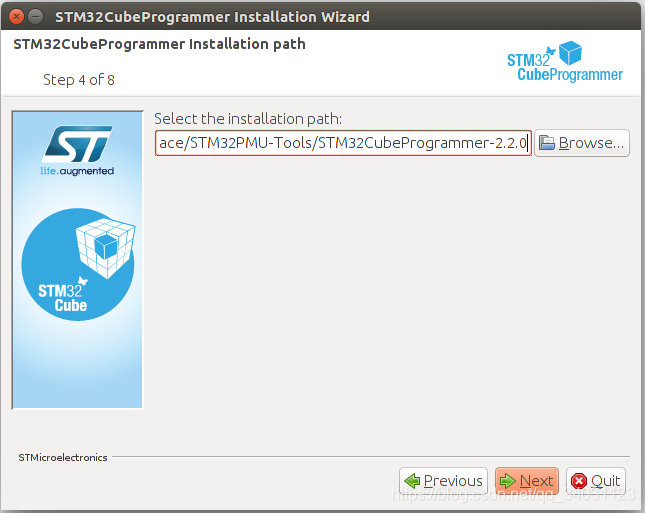
执行linux文件安装,并选择"$HOME/STM32MPU-Tools/STM32CubeProgrammer-2.2.0"安装目录,如下:
./SetupSTM32CubeProgrammer-2.2.0.linux
5)添加STM32CubeProgrammer到PATH环境变量
- export PATH=$HOME/STM32MPU_workspace/STM32MPU-Tools/STM32CubeProgrammer-2.2.0/bin:$PATH
6)检查STM32CubeProgrammer工具是否正确安装
- STM32_Programmer_CLI --h,如果正确安装会显示以下信息
------------------------------------------------------------------- STM32CubeProgrammer v2.2.0 -------------------------------------------------------------------
二.在主机上安装libusb
- sudo apt-get install libusb-1.0-0
- STM32CubeProgrammer允许通过基本命令连接到usb端口),如下:
- cd $HOME/STM32MPU_workspace/STM32MPU-Tools/STM32CubeProgrammer-2.2.0/Drivers/rules
- sudo cp *.* /etc/udev/rules.d/
三.在主机上创建一个STM32MP15 启动镜像烧录目录
1.创建镜像文件夹
- mkdir $HOME/STM32MPU_workspace/STM32MP15-Ecosystem-v1.1.0
- mkdir $HOME/STM32MPU_workspace/STM32MP15-Ecosystem-v1.1.0/Starter-Package
- cd $HOME/STM32MPU_workspace/STM32MP15-Ecosystem-v1.1.0/Starter-Package
2.下载 STM32MP15-Ecosystem-v1.1.0 启动包 到下面这个目录:
- $HOME/STM32MPU_workspace/STM32MP15-Ecosystem-v1.1.0/Starter-Package
包文件这个格式en.FLASH-stm32mp1-openstlinux-4.19-thud-mp1-19-10-09.tar.xz
3.解压文件
1)xz -d en.FLASH-stm32mp1-openstlinux-4.19-thud-mp1-19-10-09.tar.xz
解压成en.FLASH-stm32mp1-openstlinux-4.19-thud-mp1-19-02-20.tar
2)tar -xvf en.FLASH-stm32mp1-openstlinux-4.19-thud-mp1-19-02-20.tar
解压成stm32mp1-openstlinux-4.19-thud-mp1-19-02-20文件夹
四.制作sdcard启动镜像
1)进入这个目录cd $HOME/STM32MPU_workspace/STM32MP15-Ecosystem-v1.1.0/Starter-Package/stm32mp1-openstlinux-4.19-thud-mp1-19-02-20/images/stm32mp1
2)获得usb设备端口连接情况如下:
STM32_Programmer_CLI -l usb ------------------------------------------------------------------- STM32CubeProgrammer v2.2.0 ------------------------------------------------------------------- ===== DFU Interface ===== Total number of available STM32 device in DFU mode: 1 Device Index : USB1 USB Bus Number : 003 USB Address Number : 002 Product ID : DFU in HS Mode @Device ID /0x500, @Revision ID /0x0000 Serial number : 004800233338511634383330 Firmware version : 0x0110 Device ID : 0x0500
3)用microSD card制作可靠的引导程序
STM32_Programmer_CLI -c port=usb1 -w flashlayout_st-image-weston/FlashLayout_sdcard_stm32mp157c-dk2-trusted.tsv
注意:如果板子供电电流没有达到3A,红灯指示的问题分为下面几种情况:
| blink | console message | boot process |
|---|---|---|
| 2 times | WARNING 500mA power supply detected Current too low, use a 3A power supply! | Continue and red LED stays ON |
| 3 times | WARNING 1500mA power supply detected Current too low, use a 3A power supply! | Continue and red LED stays ON |
| forever | ERROR USB TYPE-C connection in unattached mode Check that USB TYPE-C cable is correctly plugged | stop |
| forever | USB TYPE-C charger not compliant with USB specification | stop |
镜像成功之后,出现下面信息Flashing service completed successfully!
然后是上电复位启动板子。
五.接下来解释板子linux终端通过ST-LINK/V2-1连接主机
通过uart接口与板子进行串行通信
1)安装minicom串口
- sudo apt-get install minicom
2)获取需要用于访问ST-LINK/V2-1的ttyACM设备实例,需要插上ST-LINK
- ls /dev/ttyACM*
- /dev/ttyACM0
3)连接minicom到/dev//ttyACM0设备
- minicom -D /dev/ttyACM0
显示:Welcome to minicom 2.7 OPTIONS: I18n Compiled on Nov 15 2018, 20:18:47. Port /dev/ttyACM0, 15:56:03 Press CTRL-A Z for help on special keys
4)按复位按钮重启板子,在minicom窗口可以看到启动的信息如下:
NOTICE: CPU: STM32MP157CAC Rev.B
NOTICE: Model: STMicroelectronics STM32MP157C-DK2 Discovery Board
NOTICE: Board: MB1272 Var2 Rev.C-01
INFO: Reset reason (0x14): INFO: Pad Reset from NRST
INFO: Using SDMMC INFO: Instance 1
INFO: Boot used partition fsbl1
NOTICE: BL2: v2.0-r1.5(debug):
NOTICE: BL2: Built : 13:13:37, Oct 2 2018
INFO: BL2: Doing platform setup INFO: PMIC version = 0x10
INFO: RAM: DDR3-1066/888 bin G 1x4Gb 533MHz v1.45
INFO: Memory size = 0x20000000 (512 MB)
INFO: BL2 runs SP_MIN setup
INFO: BL2: Loading image id 4
INFO: Loading image id=4 at address 0x2fff0000
INFO: Image id=4 loaded: 0x2fff0000 - 0x30000000
INFO: BL2: Loading image id 5
INFO: Loading image id=5 at address 0xc0100000
INFO: STM32 Image size : 805258 WARNING: Skip signature check (header option)
INFO: Image id=5 loaded: 0xc0100000 - 0xc01c498a
INFO: read version 0 current version 0
NOTICE: BL2: Booting BL32
INFO: Entry point address = 0x2fff0000
INFO: SPSR = 0x1d3
INFO: PMIC version = 0x10
NOTICE: SP_MIN: v2.0-r1.5(debug): NOTICE: SP_MIN: Built : 13:13:37, Oct 2 2018
INFO: ARM GICv2 driver initialized
INFO: stm32mp HSI (18): Secure only
INFO: stm32mp HSE (20): Secure only INFO: stm32mp PLL2 (27): Secure only INFO: stm32mp PLL2_R (30): Secure only
............
.........
root@stm32mp1:~#
5)打印板子详细分配信息
- lsb_release -a LSB
Version: core-5.0-noarch:core-5.0-arm Distributor ID: openstlinux-weston Description: ST OpenSTLinux - Weston - (A Yocto Project Based Distro) 2.6-openstlinux-4.19-thud-mp1-19-10-09 Release: 2.6-openstlinux-4.19-thud-mp1-19-10-09 Codename: thud
6)打印板子系统信息
- Board $> uname -a
Linux stm32mp1 4.19.49 #1 SMP PREEMPT Sun Jun 9 07:17:25 UTC 2019 armv7l armv7l armv7l GNU/Linux
7)打印板子内核和编译器版本
- Board $> cat /proc/version
Linux version 4.19.49 (oe-user@oe-host) (gcc version 8.2.0 (GCC)) #1 SMP PREEMPT Sun Jun 9 07:17:25 UTC 2019
8)打印挂载到系统文件下的磁盘空间
- df -h
9)打印板子的IP地址
- ip addr show eth0
3: eth0: <BROADCAST,MULTICAST,UP,LOWER_UP> mtu 1500 qdisc mq state UP group default qlen 1000 link/ether 00:xx:xx:xx:xx:xx brd ff:ff:ff:ff:ff:ff inet xx.xx.xx.xx/22 brd xx.xx.xx.xx scope global dynamic eth0 valid_lft 159045sec preferred_lft 159045sec inet6 xx::xx:xx:xx:xx/64 scope link valid_lft forever preferred_lft forever
10)主机通过ssh连接板子终端
- PC $> ssh root@xx.xx.xx.xx
root@stm32mp1:~#
六.安装stm32mp157开发包,包括编译应用程序和内核的软件开发包工具
运行环境:Ubuntu 16.04
- 安装 SDK
1)配置主机电脑,安装额外的工具包
PC $> sudo apt-get update
PC $> sudo apt-get install sed wget curl cvs subversion git-core coreutils unzip texi2html texinfo docbook-utils gawk python-pysqlite2 diffstat help2man make gcc build-essential g++ desktop-file-utils chrpath libxml2-utils xmlto docbook bsdmainutils iputils-ping cpio python-wand python-pycryptopp python-crypto
PC $> sudo apt-get install libsdl1.2-dev xterm corkscrew nfs-common nfs-kernel-server device-tree-compiler mercurial u-boot-tools libarchive-zip-perl
PC $> sudo apt-get install ncurses-dev bc linux-headers-generic gcc-multilib libncurses5-dev libncursesw5-dev lrzsz dos2unix lib32ncurses5 repo libssl-dev
PC $> sudo apt-get install default-jre
2)附加的配置
运行每个MMC之多16个分区
注意:在linux系统上,默认分配给MMC最大8个分区,然而所有的程序包需要存储设备有超过10个分区,为了把每个设备的分区扩展到16个,必须添加自动处理可以载入模块,如下命令:
PC $> echo 'options mmc_block perdev_minors=16' > /tmp/mmc_block.conf
PC $> sudo mv /tmp/mmc_block.conf /etc/modprobe.d/mmc_block.conf
3)下载 STM32MP15-Ecosystem-v1.1.0 开发包 SDK 到下面的目录:
$HOME/STM32MPU_workspace/tmp
进入该目录
PC $> cd $HOME/STM32MPU_workspace/tmp
通过xz -d en.SDK-x86_64-stm32mp1-openstlinux-4.19-thud-mp1-19-10-09.tar.xz解压成tar格式:
en.SDK-x86_64-stm32mp1-openstlinux-4.19-thud-mp1-19-02-20.tar
然后tar xvf en.SDK-x86_64-stm32mp1-openstlinux-4.19-thud-mp1-19-10-09.tar解压成:
stm32mp1-openstlinux-4.19-thud-mp1-19-02-20文件夹
4)在主机上创建 STM32MP15 开发包SDK 目录
PC $> mkdir $HOME/STM32MPU_workspace/STM32MP15-Ecosystem-v1.1.0/Developer-Package
PC $> mkdir $HOME/STM32MPU_workspace/STM32MP15-Ecosystem-v1.1.0/Developer-Package/SDK
5)便于安装,改变SDK安装脚本执行权限
PC $> chmod +x $HOME/STM32MPU_workspace/tmp/stm32mp1-openstlinux-4.19-thud-mp1-19-02-20/sdk/st-image-weston-openstlinux-weston-stm32mp1-x86_64-toolchain-2.6-openstlinux-4.19-thud-mp1-19-02-20.sh
6)执行安装脚本
PC $> $HOME/STM32MPU_workspace/tmp/stm32mp1-openstlinux-4.19-thud-mp1-19-02-20/sdk/st-image-weston-openstlinux-weston-stm32mp1-x86_64-toolchain-2.6-openstlinux-4.19-thud-mp1-19-02-20.sh -d $HOME/STM32MPU_workspace/STM32MP15-Ecosystem-v1.1.0/Developer-Package/SDK
如果成功安装,会显示下面的信息:
ST OpenSTLinux - Weston - (A Yocto Project Based Distro) SDK installer version 2.6-openstlinux-4.19-thud-mp1-19-10-09 ===================================================================================================================== You are about to install the SDK to "/local/home/frq08927/STM32MPU_workspace/STM32MP15-Ecosystem-v1.1.0/Developer-Package/SDK". Proceed[Y/n]? Y Extracting SDK..................................................................................................................................................................done Setting it up...done SDK has been successfully set up and is ready to be used. Each time you wish to use the SDK in a new shell session, you need to source the environment setup script e.g. $ . /<working directory absolute path>/STM32MPU_workspace/STM32MP15-Ecosystem-v1.1.0/Developer-Package/SDK/environment-setup-cortexa7t2hf-neon-vfpv4-openstlinux_weston-linux-gnueabi
7)使得SDK生效,
注意:The SDK environment setup script must be run once in each new working terminal in which you cross-compile,也就是说每一个新工作的终端都必须运行一次脚本
PC $> cd $HOME/STM32MPU_workspace/STM32MP15-Ecosystem-v1.1.0/Developer-Package
PC $> source /home/my-linux/STM32MPU_workspace/STM32MP15-Ecosystem-v1.1.0/Developer-Package/SDK/environment-setup-cortexa7t2hf-neon-vfpv4-openstlinux_weston-linux-gnueabi
8)检查编译环境是否正确安装
a.检查arm架构
PC $> echo $ARCH
- arm
b.检查目标编译工具
PC $> echo $CROSS_COMPILE
- arm-openstlinux_weston-linux-gnueabi-
c.检查编译版本
PC $> $CC --version
- arm-openstlinux_weston-linux-gnueabi-gcc (GCC) 8.2.0 Copyright (C) 2018 Free Software Foundation, Inc. This is free software; see the source for copying conditions. There is NO warranty; not even for MERCHANTABILITY or FITNESS FOR A PARTICULAR PURPOSE.
d.检查是否为预期的编译版本
PC $> echo $OECORE_SDK_VERSION
- 2.6-openstlinux-4.19-thud-mp1-19-10-09 /* For ecosystem release v1.1.0 */
如果以上检查都没有类似的打印结果,重新安装SDK


 1090
1090

 被折叠的 条评论
为什么被折叠?
被折叠的 条评论
为什么被折叠?
 到【灌水乐园】发言


