


前言
osgearth_tilesource示例,展示如何创建自定义瓦片源并添加到图层。
此示例对于加载瓦片,并没有提供更明确的指导。比如本机有一些瓦片图,实际应该怎么加载,依然还没有想到方案。
cmd中执行命令:
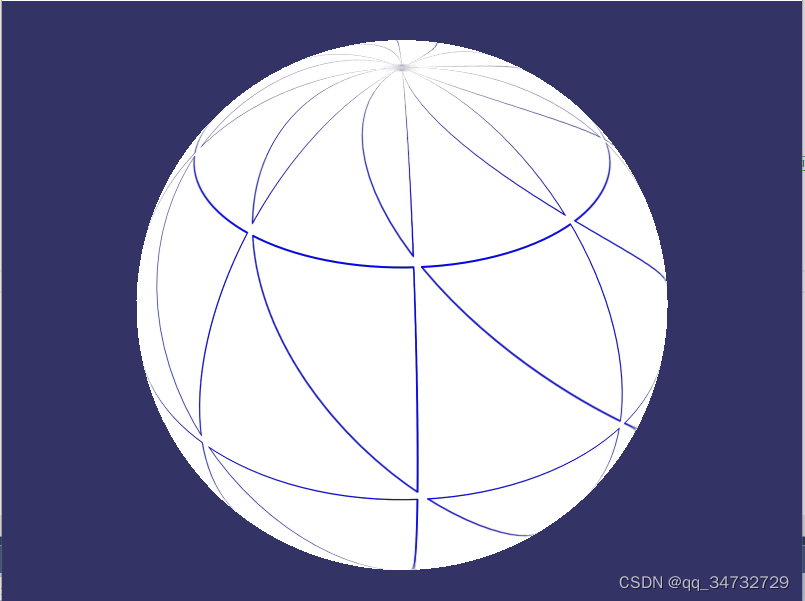
osgearth_tilesourced.exe执行效果

可以自行绘制几何图形,呈献不同的形状。
代码分析
#include <osg/Image>
#include <osgGA/StateSetManipulator>
#include <osgViewer/Viewer>
#include <osgViewer/ViewerEventHandlers>
#include <osgEarth/Map>
#include <osgEarth/MapNode>
#include <osgEarth/ImageLayer>
#include <osgEarth/Registry>
#include <osgEarthSymbology/Geometry>
#include <osgEarthSymbology/GeometryRasterizer>
#include <osgEarthUtil/EarthManipulator>
#include <osgEarthUtil/AutoClipPlaneHandler>

using namespace osgEarth;
using namespace osgEarth::Util;
using namespace osgEarth::Symbology;

/**
 * This sample demonstrates how to create a custom TileSource.
 * 此示例演示如何创建自定义瓦片源TileSource。
 */

static osg::Vec4 colors[4] = {
    osg::Vec4(1,0,0,1),
    osg::Vec4(0,1,0,1),
    osg::Vec4(0,0,1,1),
    osg::Vec4(0,0,0,1)
};

/**
 * Our homemade TileSource.
 * 自制瓦片源
 */
class CustomTileSource : public TileSource
{
public:
    // Constructor that takes the user-provided options.
	// 构造函数,使用默认父类的瓦片源选项
    CustomTileSource() : TileSource(TileSourceOptions())
    {
        // Create a shape that we will use to render tile images.
		// 定义一个环(起点终点相同,且有方向),在环上渲染瓦片
        _geom = new Ring();
		// 由于每一张影像瓦片尺寸都是 256*256,所以此矩形的尺寸设置会影响绘制的矩形间距
		// 按照下述尺寸设置时,每个方格之间的间距为10像素
		// XYZ坐标下,为了便于理解,可以假定认为单位是像素或米。
        _geom->push_back( osg::Vec3(5, 250, 0) );
        _geom->push_back( osg::Vec3(250, 250, 0) );
        _geom->push_back( osg::Vec3(250, 5, 0) );
        _geom->push_back( osg::Vec3(5, 5, 0) );
    }

    // Called by the terrain engine when a layer using this driver is first added.
	// 首次添加使用此驱动程序的图层时由地形引擎调用。
    Status initialize(const osgDB::Options* dbOptions)
    {
        if ( !getProfile() )
        {
            // Set the profile for this tile source. The profile defines the
            // tiling scheme native to this tile source. The terrain engine will
            // call createImage or createHeightField with TileKeys according to
            // the profile you set here.
			// 设置瓦片源的配置文件。
			// 配置文件定义瓦片源的平铺方案。
			// 地形引擎将根据您在此设置的配置文件调用createImage方法或createHeightField方法,使用TileKeys。
            setProfile( Registry::instance()->getGlobalGeodeticProfile() );

            // Create custom data extents. This is optional, but giving the terrain
            // engine information about the extents of your dataset will improve
            // performance in most cases. In this case, the data covers the
            // entire profile, but we want to tell the terrain engine that this
            // tile source only has data up to LOD 15:
			// 设置瓦片层级0-15,最多加载15级
            getDataExtents().push_back(DataExtent(getProfile()->getExtent(), 0u, 15u));
        }
        return STATUS_OK;
    }

    // Tells the layer not to cache data from this tile source.
    // Overriding this function is optional - by default it will inherit the
    // caching policy from the Layer.
	// 通知图层不要缓存来自此瓦片源的数据。
    CachePolicy getCachePolicyHint(const Profile* profile) const
    {
        return CachePolicy::NO_CACHE;
    }

    // Define this method to return an image corresponding to the given TileKey.
	// 定义此方法以返回与给定TileKey相对应的图像。
    osg::Image* createImage( const TileKey& key, ProgressCallback* progress )
    {
		// GeometryRasterizer类:使用软件路径渲染将几何图形绘制到图像画布上。
		// // 图像w-h尺寸
        GeometryRasterizer rasterizer( 256, 256 );
		// 在缩放过程中,矩形环线的颜色会按照 红、绿、蓝、黑,进行切换
        rasterizer.draw( _geom.get(), colors[key.getLevelOfDetail() % 4] );
        return rasterizer.finalize();
    }

    osg::ref_ptr<Ring> _geom;
};


int main(int argc, char** argv)
{
    osg::ArgumentParser arguments(&argc,argv);
    osgViewer::Viewer viewer(arguments);

    // Start by creating an empty map:
    Map* map = new Map();

    // Create out image layer with a custom tile source.
	// 使用自定义的瓦片源 创建自定义影像图层
    CustomTileSource* tileSource = new CustomTileSource();

    // Open the tile source. If you don't do this, the Map will automatically try to
    // open it when you add the Layer later on. But doing so here allows us to check
    // for any errors beforehand.
	// 打开瓦片源。否则,当程序稍后添加图层时map会自动尝试打开。
	// 但在这里 先打开,可以让我们事先检查是否有错误。
    Status status = tileSource->open();
    if (status.isError())
    {
        OE_WARN << "Error opening the tile source; message = " << status.message() << std::endl;
        return -1;
    }

    // Add a new ImageLayer to the map with our custom tile source.
    ImageLayerOptions options( "My custom ImageLayer" );
	// 添加到图层
    map->addLayer( new ImageLayer(options, tileSource) );

    // That's it, the map is ready; now create a MapNode to render the Map:
    MapNode* mapNode = new MapNode( map );

    viewer.setSceneData( mapNode );
    viewer.setCameraManipulator( new EarthManipulator() );

    // add some stock OSG handlers:
    viewer.addEventHandler(new osgViewer::StatsHandler());
    viewer.addEventHandler(new osgViewer::WindowSizeHandler());
    viewer.addEventHandler(new osgGA::StateSetManipulator(viewer.getCamera()->getOrCreateStateSet()));

    return viewer.run();
}


 1004
1004


 被折叠的 条评论
为什么被折叠?
被折叠的 条评论
为什么被折叠?
 到【灌水乐园】发言


