


前言
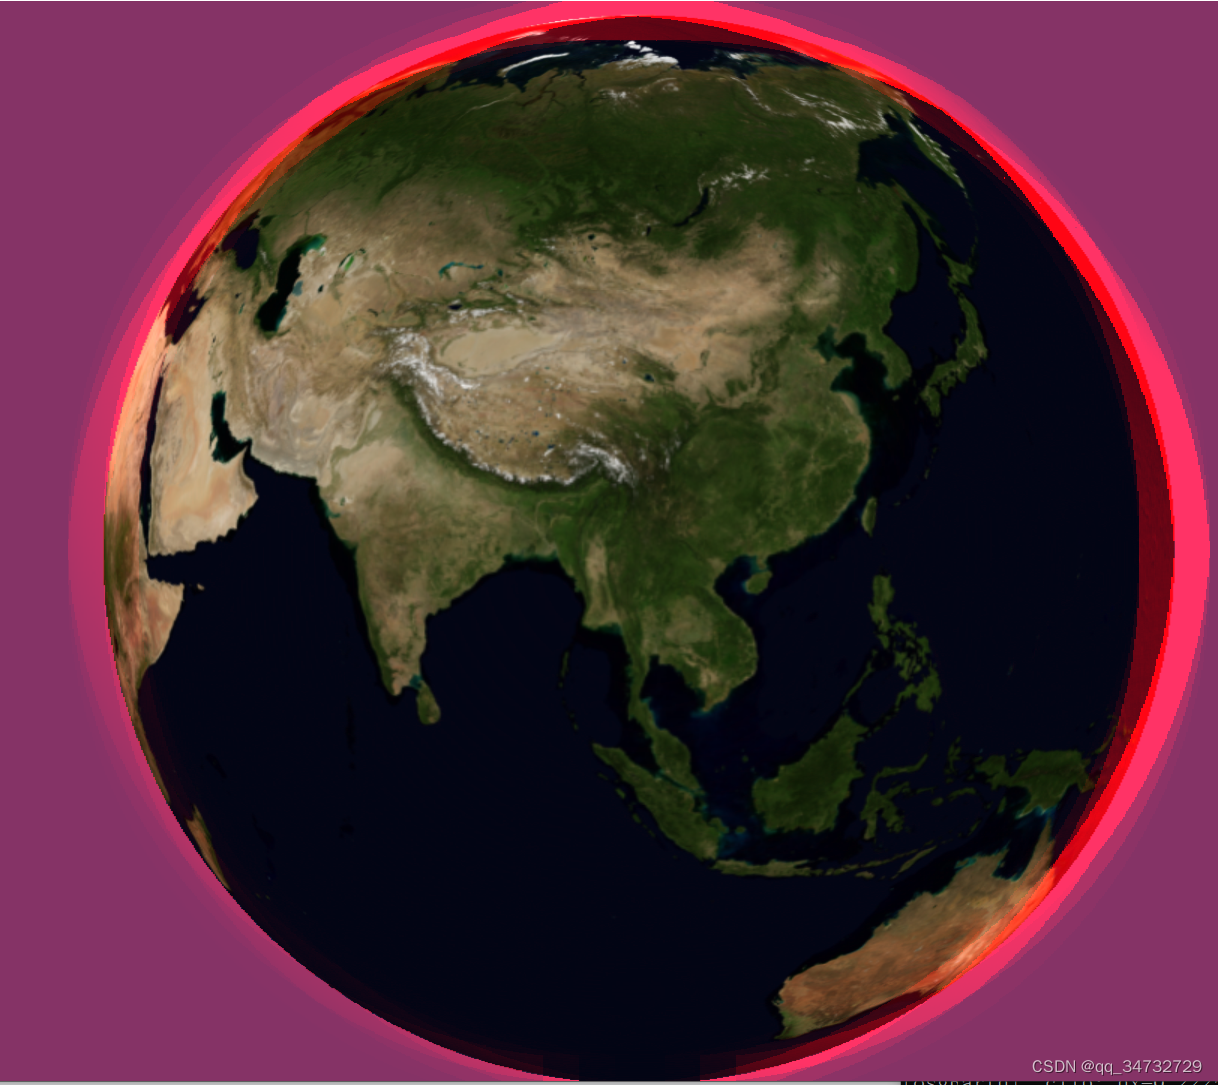
osgearth_mrt示例,展示了一个带呼吸灯光环的地球,点击地球,会获取到一些视点信息。此示例暂时并没有分析太清楚,等更深入了解了OPenGL 和 osg的相机部分内容,再来看,应该会容易一些。
执行命令
osgearth_mrtd.exe earth_image\world.earth效果
地球有玫红色光环,像呼吸灯一样。且拖动地球,会打印输出如下信息。
[osgEarth]  clip: nx=0.0578426, ny=-0.0658017
[osgEarth]  model: near = 0.0267361, -2.55096e+07, -333942
[osgEarth]  model: far  = 2.67361e+08, 9.97595e+09, 3.13182e+06
[osgEarth]  i = 512347, -6.34375e+06, -327300
[osgEarth]  clip: nx=0.280875, ny=0.0157553
[osgEarth]  model: near = 1.0768e+07, -2.30312e+07, -2.1124e+06
[osgEarth]  model: far  = -3.03072e+09, 9.54787e+09, 9.11324e+08
[osgEarth]  i = 4.78469e+06, -4.20293e+06, -315447
[osgEarth]  clip: nx=0.346535, ny=0.0231696
[osgEarth]  model: near = 2.39936e+07, -8.4836e+06, -1.78569e+06
[osgEarth]  model: far  = -8.83956e+09, 4.82471e+09, 8.02607e+08
[osgEarth]  i = 6.26138e+06, 1.18557e+06, -176444
[osgEarth]  clip: nx=0.428869, ny=0.0676552
[osgEarth]  model: near = 1.98387e+07, 1.58329e+07, 2.56901e+06
[osgEarth]  model: far  = -9.0098e+09, -4.65339e+09, -7.87755e+08
......
代码分析
这个示例,对于不熟悉OpenGL的同学来说 分析难度有点大。所以,我也暂时不分析了,等用的到的时候,再过来分析。
#include <osg/Notify>
#include <osg/Geode>
#include <osg/Geometry>
#include <osg/TextureRectangle>
#include <osgGA/GUIEventHandler>
#include <osgViewer/Viewer>
#include <osgEarth/VirtualProgram>
#include <osgEarth/GLUtils>
#include <osgEarthUtil/EarthManipulator>
#include <osgEarthUtil/ExampleResources>

#define LC "[viewer] "

using namespace osgEarth;
using namespace osgEarth::Util;

// shared data.
struct App
{
	// 封装OpenGL纹理功能的纹理状态类。
    osg::TextureRectangle* gcolor;	// 颜色
    osg::TextureRectangle* gnormal;	// 法线
    osg::TextureRectangle* gdepth;	// 深度
};

// 创建核磁共振图像?
osg::Node*
createMRTPass(App& app, osg::Node* sceneGraph)
{
	// rtt相机
    osg::Camera* rtt = new osg::Camera();
    rtt->setRenderOrder(osg::Camera::PRE_RENDER);
    rtt->setRenderTargetImplementation(osg::Camera::FRAME_BUFFER_OBJECT);
    rtt->setViewport(0, 0, app.gcolor->getTextureWidth(), app.gcolor->getTextureHeight());
    rtt->setClearMask(GL_COLOR_BUFFER_BIT | GL_DEPTH_BUFFER_BIT);// 颜色缓存,深度缓存
    rtt->attach(osg::Camera::BufferComponent(osg::Camera::COLOR_BUFFER0), app.gcolor);
    rtt->attach(osg::Camera::BufferComponent(osg::Camera::COLOR_BUFFER1), app.gnormal);
    rtt->attach(osg::Camera::BufferComponent(osg::Camera::COLOR_BUFFER2), app.gdepth);
    rtt->setCullingMode(rtt->getCullingMode() & ~osg::CullSettings::SMALL_FEATURE_CULLING);

	// 顶点着色器
    static const char* vertSource =
        "out float mrt_depth;\n"
        "void oe_mrt_vertex(inout vec4 vertexClip)\n"
        "{\n"
        "    mrt_depth = (vertexClip.z/vertexClip.w)*0.5+1.0;\n"
        "}\n";

	// 片段着色器
    static const char* fragSource =
        "in float mrt_depth;\n"
        "in vec3 vp_Normal; \n"
        "void oe_mrt_fragment(inout vec4 color)\n"
        "{\n"
        "    gl_FragData[0] = color; \n"
        "    gl_FragData[1] = vec4((vp_Normal+1.0)/2.0,1.0);\n"
        "    gl_FragData[2] = vec4(mrt_depth,mrt_depth,mrt_depth,1.0); \n"
        "}\n";

	// 着色器程序
    VirtualProgram* vp = VirtualProgram::getOrCreate( rtt->getOrCreateStateSet() );
    vp->setFunction( "oe_mrt_vertex",   vertSource, ShaderComp::LOCATION_VERTEX_CLIP );
    vp->setFunction( "oe_mrt_fragment", fragSource, ShaderComp::LOCATION_FRAGMENT_OUTPUT );

    rtt->addChild( sceneGraph );
    return rtt;
}

// 创建缓存矩形
osg::Node*
createFramebufferQuad(App& app)
{
	// 获取 app 颜色 纹理宽高
    float w = (float)app.gcolor->getTextureWidth();
    float h = (float)app.gcolor->getTextureHeight();

    osg::Geometry* g = new osg::Geometry();
    g->setSupportsDisplayList( false );

	// 初始化4个顶点坐标
    osg::Vec3Array* v = new osg::Vec3Array();
    v->push_back(osg::Vec3(-w/2, -h/2, 0));
    v->push_back(osg::Vec3( w/2, -h/2, 0));
    v->push_back(osg::Vec3( w/2,  h/2, 0));
    v->push_back(osg::Vec3(-w/2,  h/2, 0));
    g->setVertexArray(v);

	// 纹理坐标
    osg::Vec2Array* t = new osg::Vec2Array();
    t->push_back(osg::Vec2(0,0));
    t->push_back(osg::Vec2(w,0));
    t->push_back(osg::Vec2(w,h));
    t->push_back(osg::Vec2(0,h));
    g->setTexCoordArray(0, t);

	// 一个颜色绑定所有顶点(4个顶点)
    osg::Vec4Array* c = new osg::Vec4Array(osg::Array::BIND_OVERALL);
    c->push_back(osg::Vec4(1,1,1,1));
    g->setColorArray(c);

	// 绘制四边形
    g->addPrimitiveSet(new osg::DrawArrays(GL_QUADS, 0, 4));

    osg::Geode* geode = new osg::Geode();
    geode->addDrawable( g );

    return geode;
}

osg::Node*
createFramebufferPass(App& app)
{
	// 创建四边形节点
    osg::Node* quad = createFramebufferQuad(app);

	// 获取四边形状态
    osg::StateSet* stateset = quad->getOrCreateStateSet();

	// 顶点着色器
    static const char* vertSource =
        "out vec4 texcoord;\n"
        "void effect_vert(inout vec4 vertexView)\n"
        "{\n"
        "    texcoord = gl_MultiTexCoord0; \n"
        "}\n";

    // fragment shader that performs edge detection and tints edges red.
	// 执行边缘检测并将边缘着色为红色的片段着色器。
    static const char* fragSource =
        "#version " GLSL_VERSION_STR "\n"
        "#extension GL_ARB_texture_rectangle : enable\n"
        "uniform sampler2DRect gcolor;\n"
        "uniform sampler2DRect gnormal;\n"
        "uniform sampler2DRect gdepth;\n"
        "uniform float osg_FrameTime;\n"
        "in vec4 texcoord;\n"

        "void effect_frag(inout vec4 color)\n"
        "{\n"
        "    color = texture(gcolor, texcoord.st); \n"
        "    float depth = texture(gdepth, texcoord.st).r; \n"
        "    vec3 normal = texture(gnormal,texcoord.st).xyz *2.0-1.0; \n"

        // sample radius in pixels:
        "    float e = 25.0 * sin(osg_FrameTime); \n"

        // sample the normals around our pixel and find the approximate
        // deviation from our center normal:
        "    vec3 avgNormal =\n"
        "       texture(gnormal, texcoord.st+vec2( e, e)).xyz + \n"
        "       texture(gnormal, texcoord.st+vec2(-e, e)).xyz + \n"
        "       texture(gnormal, texcoord.st+vec2(-e,-e)).xyz + \n"
        "       texture(gnormal, texcoord.st+vec2( e,-e)).xyz + \n"
        "       texture(gnormal, texcoord.st+vec2( 0, e)).xyz + \n"
        "       texture(gnormal, texcoord.st+vec2( e, 0)).xyz + \n"
        "       texture(gnormal, texcoord.st+vec2( 0,-e)).xyz + \n"
        "       texture(gnormal, texcoord.st+vec2(-e, 0)).xyz;  \n"
        "    avgNormal = normalize((avgNormal/8.0)*2.0-1.0); \n"

        // average deviation from normal:
        "    float deviation = clamp(dot(normal, avgNormal),0.0,1.0); \n"

        // use that to tint the pixel red:
        "    e = 2.5 * (1.0-deviation); \n"
        "    color.rgb = color.rgb + vec3(e,0,0);\n"
        "}\n";

	// 着色器程序
    VirtualProgram* vp = VirtualProgram::getOrCreate(stateset);
    vp->setFunction("effect_vert", vertSource, ShaderComp::LOCATION_VERTEX_VIEW);
    vp->setFunction("effect_frag", fragSource, ShaderComp::LOCATION_FRAGMENT_COLORING);

	// 设置四边形的状态属性,以下参数的设置与OpenGL原理相同
    stateset->setTextureAttributeAndModes(0, app.gcolor, 1);
    stateset->addUniform(new osg::Uniform("gcolor", 0));
    stateset->setTextureAttributeAndModes(1, app.gnormal, 1);
    stateset->addUniform(new osg::Uniform("gnormal", 1));
    stateset->setTextureAttributeAndModes(2, app.gdepth, 1);
    stateset->addUniform(new osg::Uniform("gdepth", 2));
    GLUtils::setLineWidth(stateset, 2.0f, 1);

    float w = app.gcolor->getTextureWidth();
    float h = app.gcolor->getTextureHeight();

    osg::Camera* camera = new osg::Camera();
    camera->setReferenceFrame( osg::Transform::ABSOLUTE_RF );
    camera->setViewMatrix( osg::Matrix::identity() );
    camera->setProjectionMatrixAsOrtho2D( -w/2, (-w/2)+w, -h/2, (-h/2)+h );// 正投影矩阵

    camera->addChild( quad );
    return camera;
}

// 渲染目标
void
createRenderTargets(App& app, unsigned width, unsigned height)
{
    app.gcolor = new osg::TextureRectangle();
    app.gcolor->setTextureSize(width, height);
    app.gcolor->setInternalFormat(GL_RGBA);
    app.gcolor->setFilter(osg::Texture2D::MIN_FILTER,osg::Texture2D::LINEAR);
    app.gcolor->setFilter(osg::Texture2D::MAG_FILTER,osg::Texture2D::LINEAR);

    app.gnormal = new osg::TextureRectangle();
    app.gnormal->setTextureSize(width, height);
    app.gnormal->setInternalFormat(GL_RGB);
    app.gnormal->setFilter(osg::Texture2D::MIN_FILTER,osg::Texture2D::NEAREST);
    app.gnormal->setFilter(osg::Texture2D::MAG_FILTER,osg::Texture2D::NEAREST);

    app.gdepth = new osg::TextureRectangle();
    app.gdepth->setTextureSize(width, height);
    app.gdepth->setInternalFormat(GL_LUMINANCE);
    app.gdepth->setFilter(osg::Texture2D::MIN_FILTER,osg::Texture2D::NEAREST);
    app.gdepth->setFilter(osg::Texture2D::MAG_FILTER,osg::Texture2D::NEAREST);
}


int
usage(const char* name)
{
    OE_NOTICE
        << "\nUsage: " << name << " file.earth" << std::endl
        << MapNodeHelper().usage() << std::endl;

    return 0;
}

// RTT相交测试
struct RTTIntersectionTest : public osgGA::GUIEventHandler
{
    osgViewer::View* _view;
    osg::Node*       _node;

    virtual bool handle(const osgGA::GUIEventAdapter& ea, osgGA::GUIActionAdapter& aa, osg::Object*, osg::NodeVisitor*)
    {
        if ( ea.getEventType() == ea.PUSH )
        {
            // mouse click from [-1...1]
            float nx = ea.getXnormalized();
            float ny = ea.getYnormalized();

            // clicked point in clip space:
            osg::Vec3d pn( nx, ny, -1 ); // on near plane
            osg::Vec3d pf( nx, ny,  1 ); // on far plane

            OE_NOTICE << "clip: nx=" << nx << ", ny=" << ny << std::endl;

            // take the view matrix as-is: 获取当前相机视口矩阵
            osg::Matrix view = _view->getCamera()->getViewMatrix();

            // adjust projection matrix to include entire earth:调整地球的投影矩阵
            double fovy, ar, zn, zf;
            _view->getCamera()->getProjectionMatrix().getPerspective(fovy, ar, zn, zf);
            osg::Matrix proj;
            proj.makePerspective(fovy, ar, 1.0, 1e10);

            // Invert the MVP to transform points from clip to model space:
            osg::Matrix MVP = view * proj;
            osg::Matrix invMVP;
            invMVP.invert(MVP);

            pn = pn * invMVP;
            pf = pf * invMVP;

            OE_NOTICE << "model: near = " << pn.x() << ", " << pn.y() << ", " << pn.z() << std::endl;
            OE_NOTICE << "model: far  = " << pf.x() << ", " << pf.y() << ", " << pf.z() << std::endl;

            // Intersect in model space.
            osgUtil::LineSegmentIntersector* lsi = new osgUtil::LineSegmentIntersector(
                osgUtil::Intersector::MODEL, pn, pf );

            lsi->setIntersectionLimit( lsi->LIMIT_NEAREST );

            osgUtil::IntersectionVisitor iv( lsi );

            _node->accept( iv );

            if ( lsi->containsIntersections() )
            {
                osg::Vec3d p = lsi->getIntersections().begin()->getWorldIntersectPoint();
                OE_NOTICE << "i = " << p.x() << ", " << p.y() << ", " << p.z() << std::endl;
            }
        }
        return false;
    }
};

int
main(int argc, char** argv)
{
    osg::ArgumentParser arguments(&argc,argv);
    osgViewer::Viewer viewer(arguments);
    viewer.setCameraManipulator( new EarthManipulator() );

    osg::Group* root = new osg::Group();

    osg::Node* node = MapNodeHelper().load( arguments, &viewer );
    if ( node )
    {
		// 创建APP变量
        App app;
		// 创建要渲染的目标
        createRenderTargets( app, 1280, 1024 );

		// 围绕地球的核磁共振??
        osg::Node* pass1 = createMRTPass(app, node);
        root->addChild( pass1 );

        osg::Node* pass2 = createFramebufferPass(app);
        root->addChild( pass2 );

        // demonstrate scene intersection when using MRT/RTT.
		// 演示使用MRT/RTT时的场景交叉。
        RTTIntersectionTest* isect = new RTTIntersectionTest();
        isect->_view = &viewer;
        isect->_node = node;
        viewer.addEventHandler( isect );

        viewer.setSceneData( root );

        viewer.run();
    }
    else
    {
        return usage(argv[0]);
    }
    return 0;
}


 4357
4357


 被折叠的 条评论
为什么被折叠?
被折叠的 条评论
为什么被折叠?
 到【灌水乐园】发言


