


这个文章是我看一个视频之后写的一个练习。
SpringMVC介绍
先介绍一下SpringMVC的处理流程
- 用户在页面发送一个请求到DispatcherServlet,对url进行解析
- DispatcherServlet收到请求后调用HandlerMapping获取Handler配置的相关对象(包括Handler对象和其对象的拦截器)最后生成处理器返回格前端
- 前端调用适配器去处理Handler,处理完成后会返回ModelAndView到DispatcherServlet
- DispatcherServlet将ModelAndView传入给ViewReslover进行解析,返回View
- 将渲染好的视图呈现给用户
大致流程是这样的,那么我将从最核心的地方DispatcherServlet说起,首先DispatcherServlet本身就是httpServlet,拿传统的Servlet+jsp进行演示。

一个传统的war项目,首先存在web.xml,如果写入一个Servlet怎么做呢
package com.servlet;

import javax.servlet.ServletException;
import javax.servlet.http.HttpServlet;
import javax.servlet.http.HttpServletRequest;
import javax.servlet.http.HttpServletResponse;
import java.io.IOException;

/**
 * @Description: 测试的Servlet
 * @Auther: wjx
 * @Date: 2019/1/31 15:14
 */
public class LoginServlet extends HttpServlet {

    public LoginServlet() {
        super();
    }

    @Override
    protected void doGet(HttpServletRequest request, HttpServletResponse response) throws ServletException, IOException {
        doPost(request, response);
    }

    @Override
    protected void doPost(HttpServletRequest request, HttpServletResponse response) throws ServletException, IOException {
        //设置编码格式
        response.setContentType("text/html;charset=utf-8");
        request.getRequestDispatcher("index.jsp").forward(request,response);
    }
}
对应的web.xml要进行配置
<?xml version="1.0" encoding="UTF-8"?>

<web-app xmlns:xsi="http://www.w3.org/2001/XMLSchema-instance" xmlns="http://xmlns.jcp.org/xml/ns/javaee"
         xsi:schemaLocation="http://xmlns.jcp.org/xml/ns/javaee http://xmlns.jcp.org/xml/ns/javaee/web-app_3_1.xsd"
         id="WebApp_ID" version="3.1">
    <display-name>Archetype Created Web Application</display-name>


    <welcome-file-list>
        <welcome-file>index.jsp</welcome-file>
        <welcome-file>index.html</welcome-file>
        <welcome-file>index.htm</welcome-file>
    </welcome-file-list>

    <servlet>
        <servlet-name>LoginServlet</servlet-name>
        <servlet-class>com.servlet.LoginServlet</servlet-class>
    </servlet>

    <servlet-mapping>
        <servlet-name>LoginServlet</servlet-name>
        <url-pattern>/login</url-pattern>
    </servlet-mapping>

</web-app>
然后用户输入地址Servlet进行处理,处理完成之后Request转发或者Response进行重定向到指定的页面
开始写代码啦
手写DispatcherServlet也是集成HttpServlet。
SpringMVC存在很多注解,本文就挑几个核心注解进行自定义实现,分为
@Controller:自定义@CustomController
@Service: 自定义@CustomService
@Autowired:自定义@CustomAutowired
@RequestMapping: 自定义 @CustomRequestMapping
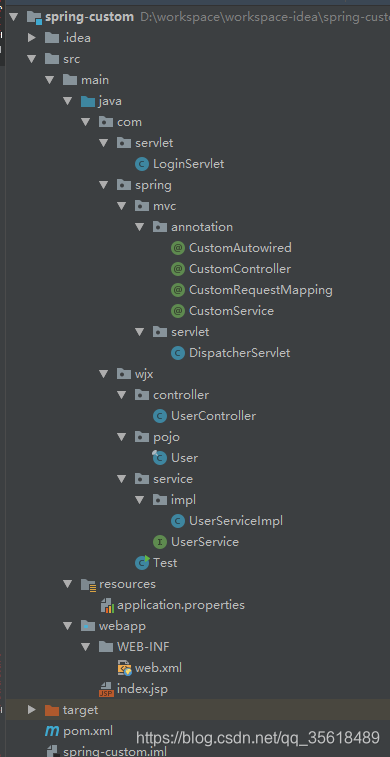
项目结构是:
主要代码:
pom.xml依赖
<?xml version="1.0" encoding="UTF-8"?>

<project xmlns="http://maven.apache.org/POM/4.0.0" xmlns:xsi="http://www.w3.org/2001/XMLSchema-instance"
         xsi:schemaLocation="http://maven.apache.org/POM/4.0.0 http://maven.apache.org/xsd/maven-4.0.0.xsd">
    <modelVersion>4.0.0</modelVersion>

    <groupId>com.wjx</groupId>
    <artifactId>spring-custom</artifactId>
    <version>1.0-SNAPSHOT</version>
    <packaging>war</packaging>

    <name>spring-custom Maven Webapp</name>
    <!-- FIXME change it to the project's website -->
    <url>http://www.example.com</url>

    <properties>
        <project.build.sourceEncoding>UTF-8</project.build.sourceEncoding>
        <maven.compiler.source>1.7</maven.compiler.source>
        <maven.compiler.target>1.7</maven.compiler.target>
        <java.version>1.8</java.version>
    </properties>

    <dependencies>
        <!--调试-->
        <dependency>
            <groupId>junit</groupId>
            <artifactId>junit</artifactId>
            <version>4.11</version>
            <scope>test</scope>
        </dependency>

        <!--Servlet 依赖-->
        <dependency>
            <groupId>javax.servlet</groupId>
            <artifactId>servlet-api</artifactId>
            <version>3.0</version>
            <scope>provided</scope>
        </dependency>

        <!--json 依赖-->
        <dependency>
            <groupId>com.alibaba</groupId>
            <artifactId>fastjson</artifactId>
            <version>1.2.54</version>
        </dependency>

    </dependencies>

    <build>
        <plugins>
            <!--添加tomcat的插件启动-->
            <plugin>
                <groupId>org.apache.tomcat.maven</groupId>
                <artifactId>tomcat7-maven-plugin</artifactId>
                <version>2.2</version>
                <configuration>
                    <path>/</path>
                    <port>8089</port>
                </configuration>
            </plugin>
        </plugins>
    </build>
</project>
CustomController.java
package com.spring.mvc.annotation;

import java.lang.annotation.*;

/**
 * @Description: 自定义Controller
 * @Auther: wjx
 * @Date: 2019/1/31 15:05
 */

@Target(value = ElementType.TYPE)
@Retention(RetentionPolicy.RUNTIME)
@Documented
public @interface CustomController {

    /**
     * 自定义实例名
     *
     * @return
     */
    String value() default "";
}
CustomService.java
package com.spring.mvc.annotation;

import java.lang.annotation.*;

/**
 * @Description: 自定义Service
 * @Auther: wjx
 * @Date: 2019/1/31 15:05
 */

@Target(value = {ElementType.TYPE})
@Retention(RetentionPolicy.RUNTIME)
@Documented
public @interface CustomService {

    /**
     * 自定义实例名
     *
     * @return
     */
    String value() default "";
}
CustomAutowired.java
package com.spring.mvc.annotation;

import java.lang.annotation.*;

/**
 * @Description: 自定义Autowired
 * @Auther: wjx
 * @Date: 2019/1/31 15:05
 */

@Target(value = ElementType.FIELD)
@Retention(RetentionPolicy.RUNTIME)
@Documented
public @interface CustomAutowired {

    /**
     * 自定义实例名
     *
     * @return
     */
    String value() default "";
}
CustomRequestMapping.java
package com.spring.mvc.annotation;

import java.lang.annotation.*;

/**
 * @Description: 自定义RequestMapping
 * @Auther: wjx
 * @Date: 2019/1/31 15:05
 */

@Target(value = {ElementType.METHOD, ElementType.TYPE})
@Retention(RetentionPolicy.RUNTIME)
@Documented
public @interface CustomRequestMapping {

    /**
     * 自定义实例名
     *
     * @return
     */
    String value() default "";
}
结构注解已经完成了,现在来写Controller层
UserController.java
package com.wjx.controller;

import com.alibaba.fastjson.JSONObject;
import com.spring.mvc.annotation.CustomAutowired;
import com.spring.mvc.annotation.CustomController;
import com.spring.mvc.annotation.CustomRequestMapping;
import com.wjx.pojo.User;
import com.wjx.service.UserService;

import javax.servlet.http.HttpServletRequest;
import javax.servlet.http.HttpServletResponse;
import java.io.IOException;

/**
 * @Description:
 * @Auther: wjx
 * @Date: 2019/1/31 15:03
 */

@CustomController
@CustomRequestMapping("/hello")
public class UserController {

    @CustomAutowired
    private UserService userService;

    @CustomAutowired
    private User user;


    @CustomRequestMapping("/getUser")
    public Object getUser(HttpServletRequest request, HttpServletResponse response, String name) throws IOException {
        System.out.println("--------------getUser---------------");
        response.getWriter().write(JSONObject.toJSONString(userService.getUser()));
        return null;
    }

}
那么现在项目是不是可以跑起来了呢?
因为还没有配置DispatcherServlet所有这几个注解人家不认识,那么现在最核心的来了,就是 手写 简化版 DispatcherServlet.java
先介绍一下这个类写了什么,重写了 HttpServlet 的doGet,doPost,init方法,doPost里面所有的请求都到doDispatcher()方法进行处理
init(ServletConfig config) 配置,加载web.xml里面的初始化参数,读取配置文件,使用反射进行Url映射等等,代码里面有注释
代码完成顺序顺序 先配置web.xml
- init(ServletConfig config)
- doLoadConfig(String contextConfigLocation)
- doScanPackage(String scanPackage)
- doLoadScanClass()
- doLoadAutowired()
- initHandlerMapping
- doPost(HttpServletRequest req, HttpServletResponse resp)
- doDispatcher(HttpServletRequest req, HttpServletResponse resp)
核心代码
package com.spring.mvc.servlet;

import com.spring.mvc.annotation.CustomAutowired;
import com.spring.mvc.annotation.CustomController;
import com.spring.mvc.annotation.CustomRequestMapping;
import com.spring.mvc.annotation.CustomService;

import javax.servlet.ServletConfig;
import javax.servlet.ServletException;
import javax.servlet.http.HttpServlet;
import javax.servlet.http.HttpServletRequest;
import javax.servlet.http.HttpServletResponse;
import java.io.File;
import java.io.IOException;
import java.io.InputStream;
import java.lang.reflect.Field;
import java.lang.reflect.Method;
import java.net.URL;
import java.util.*;
import java.util.concurrent.ConcurrentHashMap;

/**
 * @Description: CustomDispatcherServlet
 * @Auther: wjx
 * @Date: 2019/2/1 09:49
 */
public class CustomDispatcherServlet extends HttpServlet {
    /**
     * 扫描包的静态类名
     */
    private static final String SCAN_PACKAGE = "scanPackage";
    /**
     * web.xml配置的init初始化参数
     */
    private static final String CONTEXT_CONFIG_LOCATION = "contextConfigLocation";
    /**
     * 将扫描包里面的className都扫描出来
     */
    private List<String> classNameList = new ArrayList<>();
    /**
     * 存放加载到ioc类里面的bean
     */
    private Map<String, Object> iocBeanMap = new ConcurrentHashMap<>();

    /**
     * 存放handler映射的集合
     */
    private Map<String, Method> handlerUrlMap = new ConcurrentHashMap<>();
    /**
     * 存放controller的集合
     */
    private Map<String, Object> controllerMap = new ConcurrentHashMap<>();


    /**
     * 定义加载配置文件的类
     */
    private Properties contextProperties = new Properties();

    @Override
    protected void doGet(HttpServletRequest req, HttpServletResponse resp) throws ServletException, IOException {
        doPost(req, resp);
    }

    @Override
    protected void doPost(HttpServletRequest req, HttpServletResponse resp) throws ServletException, IOException {
        //所有的请求都到这个方法进行处理
        doDispatcher(req, resp);
    }

    /**
     * 处理请求
     */
    private void doDispatcher(HttpServletRequest req, HttpServletResponse resp) {
        //获取当前的路径
        String url = req.getRequestURI();
        resp.setCharacterEncoding("utf-8");
        if (!handlerUrlMap.containsKey(url)) {
            try {
                resp.getWriter().write("404 page!!!当前页面不存在");
                return;
            } catch (IOException e) {
                e.printStackTrace();
            }
        }

        /**
         * 分析一下,现在是有了Url,servlet初始化也可以获取到method,也可以获取当前类
         * 那么我们就要通过反射机制实现url和method的绑定
         */
        //第一步:获取当前的方法
        Method method = this.handlerUrlMap.get(url);
        if (method == null) {
            return;
        }
        //第二步:获取当前的实例
        Object instance = this.controllerMap.get(url);
        //第三步:获取所有参数类型
        Class<?>[] parameterTypes = method.getParameterTypes();
        //第四步:获取参数所有值的集合
        Map<String, String[]> parameterMap = req.getParameterMap();

        //invoke存入的是数组,先新建个数据
        Object[] invokeValue = new Object[parameterTypes.length];
        //遍历获取参数
        for (int i = 0; i < parameterTypes.length; i++) {
            //先获取参数的名称
            String parameterName = parameterTypes[i].getSimpleName();
            if (parameterName.equals("HttpServletRequest")) {
                //模拟,如果是HttpServletRequest则当前参数为req
                invokeValue[i] = req;
            }
            if (parameterName.equals("HttpServletResponse")) {
                //模拟,如果是HttpServletResponse则当前参数为resp
                invokeValue[i] = resp;
            }
            //其他的类型就以String作为测试了
            if (parameterName.equals("String")) {
                //获取值,遍历参数的map集合
                for (Map.Entry<String, String[]> entry : parameterMap.entrySet()) {
                    //获取值
                    //反射的时候会出现参数问题这么设置     String value = Arrays.toString(param.getValue()).replaceAll("\\[|\\]", "").replaceAll(".\\s", "");
                    String value = Arrays.toString(entry.getValue());
                    invokeValue[i] = value;
                }
            }
        }

        //第五步:获取值之后进行注入参数和绑定Url
        //获取当前的字段
        Field[] fields = instance.getClass().getDeclaredFields();
        try {
            for (Field field : fields) {
                //参数设置可见
                field.setAccessible(true);
                //field.set(当前的类实例,注入实例)
                field.set(instance, this.iocBeanMap.get(field.getName()));
            }
            method.invoke(instance, invokeValue);
        } catch (Exception e) {
            e.printStackTrace();
        }
    }

    /**
     * 初始化加载配置
     *
     * @param config
     * @throws ServletException
     */
    @Override
    public void init(ServletConfig config) throws ServletException {

        System.out.println("***********************spring custom init************************");
        System.out.println(config.getInitParameterNames());
        System.out.println(config.getInitParameter(CONTEXT_CONFIG_LOCATION));

        //加载配置文件
        doLoadConfig(config.getInitParameter(CONTEXT_CONFIG_LOCATION));
        //扫描包
        doScanPackage(this.contextProperties.get(SCAN_PACKAGE).toString());
        //加载扫描包下面所有的类
        doLoadScanClass();
        //实现依赖注入
        doLoadAutowired();
        //实现HandlerMapping映射
        initHandlerMapping();
    }

    /**
     * 加载配置文件
     *
     * @param contextConfigLocation
     */
    private void doLoadConfig(String contextConfigLocation) {
        //将配置文件转化为io流
        InputStream inputStream = null;
        try {
            inputStream = this.getClass().getClassLoader().getResourceAsStream(contextConfigLocation);
            this.contextProperties.load(inputStream);
        } catch (Exception e) {
            e.printStackTrace();
        }

    }

    /**
     * 获取扫描包里面所有的class文件
     *
     * @param scanPackage
     */
    private void doScanPackage(String scanPackage) {
        //读取扫描包里面的路径,将 . 换成 /
        URL url = this.getClass().getClassLoader().getResource(scanPackage.replaceAll("\\.", "/"));
        if (url != null) {
            String filePath = url.getFile();
            File file = new File(filePath);
            //遍历所有子目录
            for (File f : file.listFiles()) {
                if (f.isDirectory()) {
                    /**
                     * 如果当前是目录,继续
                     */
                    doScanPackage(scanPackage + "." + f.getName());
                } else {
                    //获取类的路径,因为ClassLoader是从target/classes/下面加载的,所以类最后面是以.class结尾
                    String className = scanPackage + "." + f.getName().replaceAll(".class", "");
                    this.classNameList.add(className);
                }
            }
        }
    }

    /**
     * 加载扫描包里面的类
     */
    private void doLoadScanClass() {
        if (this.classNameList.isEmpty()) {
            return;
        }

        /**
         * 只加载Controller和Service两个注解的类,因为Autowired是注入,这个步骤不需要加载
         */
        for (String className : classNameList) {
            try {
                //根据上下文获取类
                Class<?> clazz = Class.forName(className);
                //判断类是不是Controller注解
                if (clazz.isAnnotationPresent(CustomController.class)) {
                    //类的实例
                    Object instance = clazz.newInstance();
                    //获取当前的注解对象
                    CustomController customController = clazz.getAnnotation(CustomController.class);
                    String value = customController.value();
                    /**
                     * 如果value值存在,就用value值加载,如果不存在就用首字母小写注入
                     */
                    String beanName = "";
                    if (value.length() < 1) {
                        beanName = initialsLower(clazz.getSimpleName());
                    }
                    //存放到iocBeanMap里面,key:类名,value:类的实例
                    this.iocBeanMap.put(beanName, instance);
                }
                //判断类是不是Service注解
                if (clazz.isAnnotationPresent(CustomService.class)) {
                    //类的实例
                    Object instance = clazz.newInstance();
                    //获取当前的注解对象
                    CustomService customController = clazz.getAnnotation(CustomService.class);
                    String beanName = customController.value();
                    /**
                     * 如果value值存在,就用value值加载,如果不存在就用首字母小写注入
                     */
                    if (beanName.length() < 1) {
                        beanName = initialsLower(clazz.getSimpleName());
                    }
                    //存放到iocBeanMap里面,key:类名,value:类的实例
                    this.iocBeanMap.put(beanName, instance);

                    /**
                     * 还有一种情况是,子类引用指向父类
                     * 就是  Controller注入的UserService,但是UserService是接口,@Service是在实现类上面
                     */
                    //所有的实现类
                    Class<?>[] interfaces = clazz.getInterfaces();
                    for (Class<?> aClass : interfaces) {
                        this.iocBeanMap.put(initialsLower(aClass.getSimpleName()), instance);
                    }

                }
            } catch (Exception e) {
                e.printStackTrace();
            }
        }

    }

    /**
     * 将iocBeanMap实现依赖注入
     */
    private void doLoadAutowired() {
        if (this.iocBeanMap.isEmpty()) {
            return;
        }
        //遍历Map
        for (Map.Entry<String, Object> entry : iocBeanMap.entrySet()) {
            Object entryValue = entry.getValue();
            //获取当前bean里面的字段
            Field[] fields = entryValue.getClass().getDeclaredFields();
            //通过反射获取字段
            for (Field field : fields) {
                if (field.isAnnotationPresent(CustomAutowired.class)) {
                    //如果当前字段加了依赖注入的注解
                    //获取当前的值
                    CustomAutowired fieldAnnotation = field.getAnnotation(CustomAutowired.class);
                    String beanName = fieldAnnotation.value();
                    if (beanName.length() < 1) {
                        //如果没有设置初始值,beanName则使用属性名的类型,同样的首字母要小写
                        beanName = initialsLower(field.getType().getSimpleName());
                    }
                    //以防万一字段的类型是private私有的,设置成为公有的
                    field.setAccessible(true);
                    try {
                        /**
                         * field.set(a,b)介绍一下,
                         * 参数a是当前类的newInstance,参数b是当前属性的newInstance
                         */
                        field.set(entryValue, this.iocBeanMap.get(beanName));
                    } catch (Exception e) {
                        e.printStackTrace();
                    }
                }
            }
        }

    }

    /**
     * 实现HandlerMapping映射
     */
    private void initHandlerMapping() {
        if (this.iocBeanMap.isEmpty()) {
            return;
        }
        /**
         * 判断方法是不是存在@CustomRequestMapping注解
         * 两种情况
         * 1:类上面存在@CustomRequestMapping注解注解
         * 2:类里面方法上面存在@CustomRequestMapping注解
         */
        for (Map.Entry<String, Object> entry : iocBeanMap.entrySet()) {
            Class<?> aClass = entry.getValue().getClass();
            //映射必须是Controller才可以
            if (!aClass.isAnnotationPresent(CustomController.class)) {
                //没有Controller注解返回,不进行映射
                return;
            }

            //情况1
            String mappingUrl = "";
            if (aClass.isAnnotationPresent(CustomRequestMapping.class)) {
                CustomRequestMapping aClassAnnotation = aClass.getAnnotation(CustomRequestMapping.class);
                String value = aClassAnnotation.value();
                if (value.length() > 0) {
                    mappingUrl += value;
                }
            }
            //情况2
            //获取当前的方法
            Method[] methods = aClass.getMethods();
            for (Method method : methods) {
                String methodUrl = null;
                if (method.isAnnotationPresent(CustomRequestMapping.class)) {
                    CustomRequestMapping methodAnnotation = method.getAnnotation(CustomRequestMapping.class);
                    methodUrl = methodAnnotation.value();
                    if (methodUrl.length() > 0) {
                        char[] chars = methodUrl.toCharArray();
                        if (chars[0] != "/".charAt(0)) {
                            //判断存不存在 /
                            mappingUrl = mappingUrl + "/" + methodUrl;
                        }
                        mappingUrl += methodUrl;
                        handlerUrlMap.put(mappingUrl, method);
                        try {
                            controllerMap.put(mappingUrl, aClass.newInstance());
                        } catch (Exception e) {
                            e.printStackTrace();
                        }
                        System.out.println("mapperUrl:" + mappingUrl + ",method:" + method.getName());
                    }
                }
            }
        }

    }

    /**
     * 首字母小写
     *
     * @param className
     * @return
     */
    private String initialsLower(String className) {
        char[] chars = className.toCharArray();
        chars[0] += 32;
        return String.valueOf(chars);
    }
}
写完之后需要配置web.xml
<?xml version="1.0" encoding="UTF-8"?>

<web-app xmlns:xsi="http://www.w3.org/2001/XMLSchema-instance" xmlns="http://xmlns.jcp.org/xml/ns/javaee"
         xsi:schemaLocation="http://xmlns.jcp.org/xml/ns/javaee http://xmlns.jcp.org/xml/ns/javaee/web-app_3_1.xsd"
         id="WebApp_ID" version="3.1">
    <display-name>Archetype Created Web Application</display-name>


    <welcome-file-list>
        <welcome-file>index.jsp</welcome-file>
        <welcome-file>index.html</welcome-file>
        <welcome-file>index.htm</welcome-file>
    </welcome-file-list>


    <servlet>
        <servlet-name>LoginServlet</servlet-name>
        <servlet-class>com.servlet.LoginServlet</servlet-class>
    </servlet>

    <servlet-mapping>
        <servlet-name>LoginServlet</servlet-name>
        <url-pattern>/login</url-pattern>
    </servlet-mapping>


    <!--servlet的类的位置-->
     <servlet>
         <servlet-name>DispatcherServlet</servlet-name>
         <servlet-class>com.spring.mvc.servlet.CustomDispatcherServlet</servlet-class>
         <init-param>
             <param-name>contextConfigLocation</param-name>
             <param-value>application.properties</param-value>
         </init-param>
     </servlet>
     <!--servlet的映射-->
     <servlet-mapping>
         <servlet-name>DispatcherServlet</servlet-name>
         <url-pattern>/*</url-pattern>
     </servlet-mapping>

</web-app>
application.properties
##配置扫描包
scanPackage=com.wjx


 890
890

 被折叠的 条评论
为什么被折叠?
被折叠的 条评论
为什么被折叠?
 到【灌水乐园】发言


