


From:
-- Only need Start from step2.
VNC stands for “Virtual Network Computing” is a sharing system or set of protocols for sharing desktops. There is much software available to access Linux-based desktop remotely including, TigerVNC, TightVNC, Vino, vnc4server, and more.
TigerVNC is a free, open-source, and high-performance VNC server used to control or access Linux-based desktop remotely. It is a client/server application that allows you to interact with graphical applications on remote machines.
In this tutorial, we will show you how to install and configure a VNC server on Ubuntu 20.04.
Step 1 – Install Desktop Environment
By default, Ubuntu Server does not include a Desktop Environment. TigerVNC server is designed to controls only desktop systems. So you will need to add a desktop environment to your server.
First, update and upgrade all installed packages with the following command:
apt update -yapt upgrade -y
Once your system is updated, install the Tasksel utility to install a desktop environment:
ADVERTISEMENT
apt install tasksel -y
After installing Tasksel, launch the Tasksel utility with the following command:
tasksel
You should see the following interface:
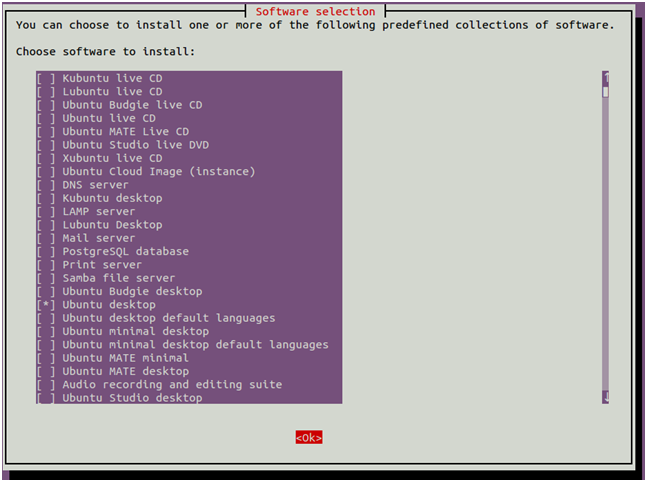
Use the arrow key to scroll down the list and find Ubuntu desktop. Next, press the Space key to select it then press the Tab key to select OK then hit Enter to install the Ubuntu desktop.
Once all the packages are installed, you will need to set your system boots into the graphical target. You can set it with the following command:
systemctl set-default graphical.target
Next, restart your system to apply the changes.
Step 2 – Install TigerVNC Server
By default, the TigerVNC package is available in the Ubuntu 20.04 default repository. You can install it by just running the following command:
apt install tigervnc-standalone-server -y
(切换user的动作可以不做!)
After installing TigerVNC, create a new user and set a VNC password for that user.
First, create a new user named hitesh with the following command:
adduser hitesh
Next, switch the user to hitesh and set a VNC password with the following command:
su - hiteshvncpasswd
Provide your desired password as shown below:
Password:
Verify:
Would you like to enter a view-only password (y/n)? n
Next, start the VNC server using the following command:
(遇到过必须用sudo启动vncserver才能成功,具体原因等待继续看。另外,下面的vncserver是一个链接,链接到了tighervnc)
vncserver -localhost no
Once the VNC server is started, you should get the following output:
New 'ubuntu2004:1 (hitesh)' desktop at :1 on machine ubuntu2004

Starting applications specified in /etc/X11/Xvnc-session
Log file is /home/hitesh/.vnc/ubuntu2004:1.log

Use xtigervncviewer -SecurityTypes VncAuth,TLSVnc -passwd /home/hitesh/.vnc/passwd ubuntu2004:1 to connect to the VNC server.
You can verify your running VNC server using the following command:
vncserver -list
You should get the following output:
TigerVNC server sessions:

X DISPLAY #	RFB PORT #	PROCESS ID
:1		5901		1719
Step 3 – Install VNC Client
(我在windows上安装的client是vnc viewer, 登录配置是一样的,可能RealVNC更好吧)
In this section, we will install the RealVNC VNC client on the remote machine and connect it to the VNC server.
You can download the RealVNC client from the RealVNC download page.
Once the download is completed, install the downloaded package with the following command:
dpkg -i /home/vyom/Downloads/VNC-Viewer-6.20.529-Linux-x64.deb
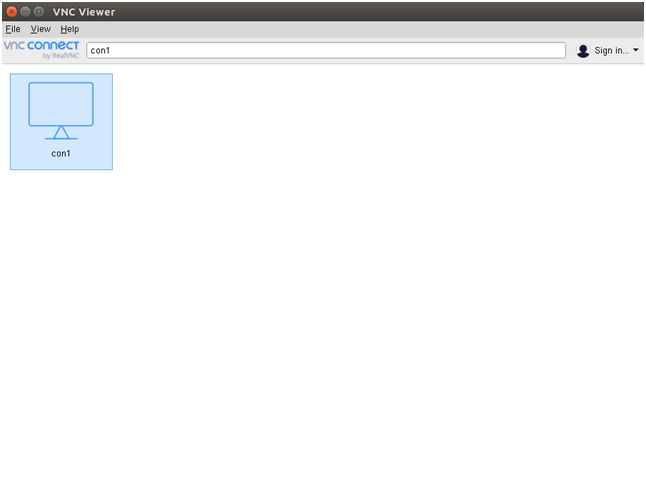
Next, launch the VNC client from the Gnome application menu. Then, Click on the File menu => New connection to create a new connection. You should see the following screen:

Provide the Name(linux用户名) and IP address along with VNC session ID :1 of your VNC server and click on the OK to save the connection. You should see your saved connection in the following screen:
Now, double click on your newly created connection. You will be asked to provide your VNC password:
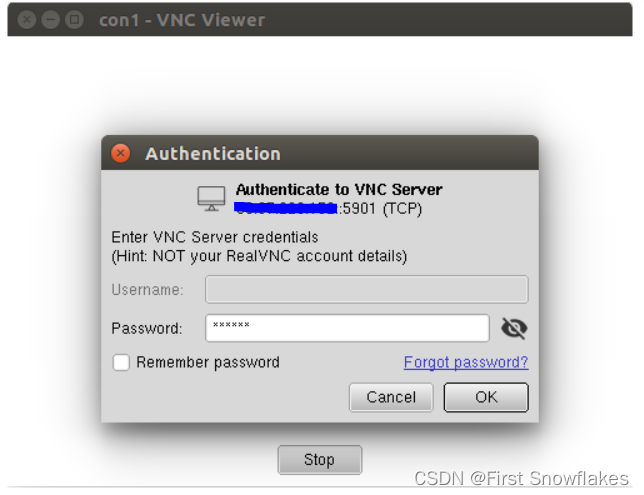
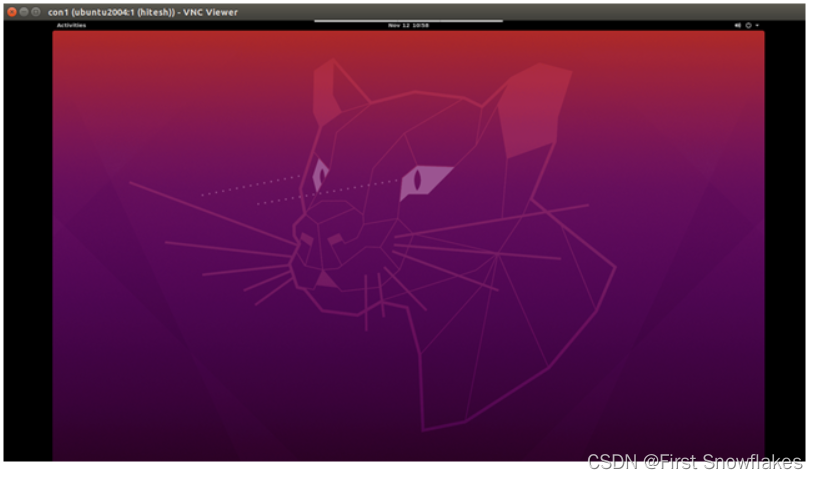
Provide your VNC password and click on the OK. Once connected, you should see your Ubuntu desktop screen: (看来没有显示左侧的工具栏是正常的哈)
Step 4 – Configure VNC to Work with Your Desktop Environment
Before starting, stop the VNC instance using the vncserver command with a -kill option and the server session ID as an argument.
vncserver -kill :1
You should get the following output:
Killing Xtigervnc process ID 1719… success!
Next, you will need to configure TigerVNC to work with Gnome(如果用的是ligthDM呢??). You can do it by creating new file xstartup inside .vnc directory:
su - hitesh
nano ~/.vnc/xstartup
Add the following lines:
#!/bin/sh
exec /etc/vnc/xstartup
xrdb $HOME/.Xresources
vncconfig -iconic &
dbus-launch --exit-with-session gnome-session &
Save and close the file when you are finished. The above script will be executed automatically whenever you start or restart the TigerVNC server.
Next, give execute permissions to the ~/.vnc/xstartup file:
chmod u+x ~/.vnc/xstartup
Step 5 – Create a Systemd Service File for VNC
Next, you will need to create a systemd file for TigerVNC to manage the VNC service. You can create it with the following command:
nano /etc/systemd/system/vncserver@.service
Add the following lines:
[Unit]
Description=Remote desktop service (VNC)
After=syslog.target network.target

[Service]
Type=simple
User=hitesh
PAMName=login
PIDFile=/home/%u/.vnc/%H%i.pid
ExecStartPre=/usr/bin/vncserver -kill :%i > /dev/null 2>&1 || :
ExecStart=/usr/bin/vncserver :%i -localhost no -geometry 1024x768
ExecStop=/usr/bin/vncserver -kill :%i

[Install]
WantedBy=multi-user.target
Save and close the file then reload the systemd daemon with the following command:
systemctl daemon-reload
Next, enable the VNC service to start at system reboot with the following command:
systemctl enable vncserver@1.service
Next, start the VNC service with the following command:
systemctl start vncserver@1.service
Conclusion
Congratulations! you have successfully installed and set up the Tiger VNC server on Ubuntu 20.04. You can now connect your Ubuntu system from any desktop system and manage it with easy to use graphical interface.


 被折叠的 条评论
为什么被折叠?
被折叠的 条评论
为什么被折叠?
 到【灌水乐园】发言


