


一、学习内容
MTCNN的学习,主要学习其预测过程。具体细节结合以下代码记录:
pytorch框架:https://github.com/TropComplique/mtcnn-pytorch,
MXNet框架:https://github.com/pangyupo/mxnet_mtcnn_face_detection
主要围绕pytorch框架来记录,其代码实现基本相似,主要的函数操作是相同的,之所以基于pytorch来记录,是因为在Windows上这个框架下的能跑通,而MXNet框架下的跑不通,里面好像有个什么multiprocessing库下的Pool()函数有问题(而这个又是其主要功能函数)。所以选择了pytorch的。
ps:这是下面运行遇到的一个小问题。
ValueError: Object arrays cannot be loaded when allow_pickle=False
似乎是numpy版本的问题,可以查看下自己numpy的版本是不是高于1.16.2,
是的话安装成1.16.2即可。跑完这个,可以再将自己版本的安装回来。
(numpy.__version__ 查看numpy版本)

pip install numpy==1.16.2
二、具体内容
主要包括以下几个脚本:
test.py
detector.py
get_nets.py
first_stage.py
box_utils.py
首先是test.py,如下所示。
这个里面主要是detect_faces()这个函数,此函数返回的是bbox坐标信息(x1,y1,x2,y2)和5个关键点信息(2眼睛,1鼻子,2嘴角)。这个函数涉及到detector.py这个脚本。见下面detector.py脚本记录。这里有个需要记录的,就是Image和cv2读取图片,两个的output是不一样的,前者是<class’PIL.JpegImagePlugin.JpegImageFile’>,后者是<class ‘numpy.ndarray’> 。此外一些方法调用上也不同,如前者要想获取图片的h和w,则应该h,w=image.size ,而后者,则应该h,w,_ = image.shape
from src import detect_faces
from PIL import Image
import cv2

image = Image.open('images/office2.jpg')
bounding_boxes, landmarks = detect_faces(image)

image = cv2.imread('images/office2.jpg')

draw = image.copy()
for b in bounding_boxes:
    cv2.rectangle(draw, (int(b[0]), int(b[1])), (int(b[2]), int(b[3])), (255, 255, 255))

for p in landmarks:
    for i in range(5):
        cv2.circle(draw, (p[i], p[i + 5]), 1, (0, 0, 255), 2)

cv2.imshow("detection result", draw)
cv2.waitKey(0)
接下来是detector.py脚本,这是这个预测的核心代码。具体如下。代码结构上可以分为3部分。
第一部分,主要是前期的一些数据初始化,模型的准备等。首先看到min_face_size=20.0,代表最小人脸大小;thresholds=[0.6, 0.7, 0.8],代表3个模型不同的阈值,其精度越来越高,代表3个个模型中是人脸的置信度越来越高。然后通过get_nets()脚本加载进来训练好的P-Net,R-Net,O-Net三个模型,三个模型所得到的输出是不同一样的,前两个包括分类输出score(人脸的概率)和回归结果bbox(N*4个坐标值)。最后一个比前面多了landmark位置的回归(5个关键点坐标)。具体见后面get_nets()脚本的分析。接着看到最小检测尺寸 min_detection_size = 12,缩小因子 factor = 0.707,通过原图像最小的边来不断使其缩小,直至满足最小检测尺寸,并通过scale保存下来其对应缩小因子。
第二部分,主要是3个阶段的模型对人脸逐层筛选,置信度逐渐升高。首先是P-Net的输出,对应run_first_stage()该函数,其返回为[num_bbox * 9]的list,包括4个坐标点信息,一个置信度score和4个用来调整前面4个坐标点的偏移回归信息,该函数分析具体见first_stage.py脚本记录。然后进行一系列去空操作,通过np.vstack()将其由list按照列叠加成一个新的为numpy array,便于后面处理操作。接着通过nms()函数进行去重操作,选出非重复的框的index,然后通过bounding_boxes[keep]将非重复的框挑选出来。(具体见box_utils.py脚本)。calibrate_box()就是通过offset来调整bbox坐标,convert_to_square()来将框调整为正方形,得到的正方形的中心店还是原来矩形的中心点,边长是矩阵宽高的最大值,最后进行一个四舍五入操作。后面R-Net和O-Net的计算操作,主要包括resize大小和output的不同,即get_image_boxes()和output=rnet(img_boxes),output = onet(img_boxes),前者是获得指定size的在原img上的bbox的信息,然后将其放入pytorch的Variable中,用于rnet模型的计算,输出为两个list,一个是预测得到的偏移回归信息,[num_bbox * 4],另一个是置信度分类信息[num_bbox * 2],然后根据置信度是否大于阈值,来进一步筛选去除非人脸框,也减少了后续计算量,然后后面操作同P-Net操作。最后O-Net,相对于前两个多了一个输出,landmark[num_bbox * 10],其余操作基本相同。
第三部分,是O-Net中区别于前两个的关键点坐标的计算修正。以为此时得到的关键点坐标,并不是最终的结果,而是经过缩放的坐标值,所以要变换回去,这就需要通过bbox的w和h来变换了。后面需要注意的是,nms操作选用的mode是min,区别于union的是分母除以的是相交面积中较小的那个,可见bbox_utils.py脚本中nms()的代码。然后和上面操作一样,挑选出符合的bbox和landmarks即可。
import numpy as np
import torch
from torch.autograd import Variable
from .get_nets import PNet, RNet, ONet
from .box_utils import nms, calibrate_box, get_image_boxes, convert_to_square
from .first_stage import run_first_stage


def detect_faces(image, min_face_size=20.0,
                 thresholds=[0.6, 0.7, 0.8],
                 nms_thresholds=[0.7, 0.7, 0.7]):
    """
    Arguments:
        image: an instance of PIL.Image.
        min_face_size: a float number.
        thresholds: a list of length 3.
        nms_thresholds: a list of length 3.

    Returns:
        two float numpy arrays of shapes [n_boxes, 4] and [n_boxes, 10],
        bounding boxes and facial landmarks.
    """

    # LOAD MODELS
    pnet = PNet()
    rnet = RNet()
    onet = ONet()
    onet.eval()

    # BUILD AN IMAGE PYRAMID
    width, height = image.size
    min_length = min(height, width)

    min_detection_size = 12
    factor = 0.707  # sqrt(0.5)

    # scales for scaling the image
    scales = []

    # scales the image so that
    # minimum size that we can detect equals to
    # minimum face size that we want to detect
    m = min_detection_size/min_face_size
    min_length *= m

    factor_count = 0
    while min_length > min_detection_size:
        scales.append(m*factor**factor_count)
        min_length *= factor
        factor_count += 1

    # STAGE 1

    # it will be returned
    bounding_boxes = []

    # run P-Net on different scales
    for s in scales:
        boxes = run_first_stage(image, pnet, scale=s, threshold=thresholds[0])
        bounding_boxes.append(boxes)        #[ [....9个东西],[...9个东西],...]

    # collect boxes (and offsets, and scores) from different scales
    bounding_boxes = [i for i in bounding_boxes if i is not None]
    bounding_boxes = np.vstack(bounding_boxes)                 # [[....9个东西]
                                                               #   [....9个东西]
                                                               #    ...         ]

    keep = nms(bounding_boxes[:, 0:5], nms_thresholds[0])
    bounding_boxes = bounding_boxes[keep]
    # use offsets predicted by pnet to transform bounding boxes
    bounding_boxes = calibrate_box(bounding_boxes[:, 0:5], bounding_boxes[:, 5:])  # shape [n_boxes, 5]
    bounding_boxes = convert_to_square(bounding_boxes)
    bounding_boxes[:, 0:4] = np.round(bounding_boxes[:, 0:4])

    # STAGE 2

    img_boxes = get_image_boxes(bounding_boxes, image, size=24)
    img_boxes = Variable(torch.FloatTensor(img_boxes), volatile=True)
    output = rnet(img_boxes)
    offsets = output[0].data.numpy()  # shape [n_boxes, 4]
    probs = output[1].data.numpy()  # shape [n_boxes, 2]

    keep = np.where(probs[:, 1] > thresholds[1])[0]
    bounding_boxes = bounding_boxes[keep]
    bounding_boxes[:, 4] = probs[keep, 1].reshape((-1,))
    offsets = offsets[keep]

    keep = nms(bounding_boxes, nms_thresholds[1])
    bounding_boxes = bounding_boxes[keep]
    bounding_boxes = calibrate_box(bounding_boxes, offsets[keep])
    bounding_boxes = convert_to_square(bounding_boxes)
    bounding_boxes[:, 0:4] = np.round(bounding_boxes[:, 0:4])

    # STAGE 3

    img_boxes = get_image_boxes(bounding_boxes, image, size=48)
    if len(img_boxes) == 0:
        return [], []
    img_boxes = Variable(torch.FloatTensor(img_boxes), volatile=True)
    output = onet(img_boxes)
    landmarks = output[0].data.numpy()  # shape [n_boxes, 10]
    offsets = output[1].data.numpy()  # shape [n_boxes, 4]
    probs = output[2].data.numpy()  # shape [n_boxes, 2]

    keep = np.where(probs[:, 1] > thresholds[2])[0]
    bounding_boxes = bounding_boxes[keep]
    bounding_boxes[:, 4] = probs[keep, 1].reshape((-1,))
    offsets = offsets[keep]
    landmarks = landmarks[keep]

    # compute landmark points
    width = bounding_boxes[:, 2] - bounding_boxes[:, 0] + 1.0
    height = bounding_boxes[:, 3] - bounding_boxes[:, 1] + 1.0
    xmin, ymin = bounding_boxes[:, 0], bounding_boxes[:, 1]

    landmarks[:, 0:5] = np.expand_dims(xmin, 1) + np.expand_dims(width, 1)*landmarks[:, 0:5]
    landmarks[:, 5:10] = np.expand_dims(ymin, 1) + np.expand_dims(height, 1)*landmarks[:, 5:10]

    bounding_boxes = calibrate_box(bounding_boxes, offsets)
    keep = nms(bounding_boxes, nms_thresholds[2], mode='min')
    bounding_boxes = bounding_boxes[keep]
    landmarks = landmarks[keep]

    return bounding_boxes, landmarks
这里是get_nets()脚本,具体如下。这里需要学习的是P-Net,R-Net,O-Net三个网络的网络结构和输出,可以看到三个网络的输出是不同的,各代表什么和其shape。同时,这里我们可以学习如何加载训练好的模型,并将其参数赋进对应的网络中。下面为其网络结构图: 
import torch
import torch.nn as nn
import torch.nn.functional as F
from collections import OrderedDict
import numpy as np


class Flatten(nn.Module):

    def __init__(self):
        super(Flatten, self).__init__()

    def forward(self, x):
        """
        Arguments:
            x: a float tensor with shape [batch_size, c, h, w].
        Returns:
            a float tensor with shape [batch_size, c*h*w].
        """

        # without this pretrained model isn't working
        x = x.transpose(3, 2).contiguous()

        return x.view(x.size(0), -1)


class PNet(nn.Module):

    def __init__(self):

        super(PNet, self).__init__()

        # suppose we have input with size HxW, then
        # after first layer: H - 2,
        # after pool: ceil((H - 2)/2),
        # after second conv: ceil((H - 2)/2) - 2,
        # after last conv: ceil((H - 2)/2) - 4,
        # and the same for W

        self.features = nn.Sequential(OrderedDict([
            ('conv1', nn.Conv2d(3, 10, 3, 1)),
            ('prelu1', nn.PReLU(10)),
            ('pool1', nn.MaxPool2d(2, 2, ceil_mode=True)),

            ('conv2', nn.Conv2d(10, 16, 3, 1)),
            ('prelu2', nn.PReLU(16)),

            ('conv3', nn.Conv2d(16, 32, 3, 1)),
            ('prelu3', nn.PReLU(32))
        ]))

        self.conv4_1 = nn.Conv2d(32, 2, 1, 1)
        self.conv4_2 = nn.Conv2d(32, 4, 1, 1)

        weights = np.load('src/weights/pnet.npy')[()]
        for n, p in self.named_parameters():
            p.data = torch.FloatTensor(weights[n])

    def forward(self, x):
        """
        Arguments:
            x: a float tensor with shape [batch_size, 3, h, w].
        Returns:
            b: a float tensor with shape [batch_size, 4, h', w'].
            a: a float tensor with shape [batch_size, 2, h', w'].
        """
        x = self.features(x)
        a = self.conv4_1(x)
        b = self.conv4_2(x)
        a = F.softmax(a)
        return b, a


class RNet(nn.Module):

    def __init__(self):

        super(RNet, self).__init__()

        self.features = nn.Sequential(OrderedDict([
            ('conv1', nn.Conv2d(3, 28, 3, 1)),
            ('prelu1', nn.PReLU(28)),
            ('pool1', nn.MaxPool2d(3, 2, ceil_mode=True)),

            ('conv2', nn.Conv2d(28, 48, 3, 1)),
            ('prelu2', nn.PReLU(48)),
            ('pool2', nn.MaxPool2d(3, 2, ceil_mode=True)),

            ('conv3', nn.Conv2d(48, 64, 2, 1)),
            ('prelu3', nn.PReLU(64)),

            ('flatten', Flatten()),
            ('conv4', nn.Linear(576, 128)),
            ('prelu4', nn.PReLU(128))
        ]))

        self.conv5_1 = nn.Linear(128, 2)
        self.conv5_2 = nn.Linear(128, 4)

        weights = np.load('src/weights/rnet.npy')[()]
        for n, p in self.named_parameters():
            p.data = torch.FloatTensor(weights[n])

    def forward(self, x):
        """
        Arguments:
            x: a float tensor with shape [batch_size, 3, h, w].
        Returns:
            b: a float tensor with shape [batch_size, 4].
            a: a float tensor with shape [batch_size, 2].
        """
        x = self.features(x)
        a = self.conv5_1(x)
        b = self.conv5_2(x)
        a = F.softmax(a)
        return b, a


class ONet(nn.Module):

    def __init__(self):

        super(ONet, self).__init__()

        self.features = nn.Sequential(OrderedDict([
            ('conv1', nn.Conv2d(3, 32, 3, 1)),
            ('prelu1', nn.PReLU(32)),
            ('pool1', nn.MaxPool2d(3, 2, ceil_mode=True)),

            ('conv2', nn.Conv2d(32, 64, 3, 1)),
            ('prelu2', nn.PReLU(64)),
            ('pool2', nn.MaxPool2d(3, 2, ceil_mode=True)),

            ('conv3', nn.Conv2d(64, 64, 3, 1)),
            ('prelu3', nn.PReLU(64)),
            ('pool3', nn.MaxPool2d(2, 2, ceil_mode=True)),

            ('conv4', nn.Conv2d(64, 128, 2, 1)),
            ('prelu4', nn.PReLU(128)),

            ('flatten', Flatten()),
            ('conv5', nn.Linear(1152, 256)),
            ('drop5', nn.Dropout(0.25)),
            ('prelu5', nn.PReLU(256)),
        ]))

        self.conv6_1 = nn.Linear(256, 2)
        self.conv6_2 = nn.Linear(256, 4)
        self.conv6_3 = nn.Linear(256, 10)

        weights = np.load('src/weights/onet.npy')[()]
        for n, p in self.named_parameters():
            p.data = torch.FloatTensor(weights[n])

    def forward(self, x):
        """
        Arguments:
            x: a float tensor with shape [batch_size, 3, h, w].
        Returns:
            c: a float tensor with shape [batch_size, 10].
            b: a float tensor with shape [batch_size, 4].
            a: a float tensor with shape [batch_size, 2].
        """
        x = self.features(x)
        a = self.conv6_1(x)
        b = self.conv6_2(x)
        c = self.conv6_3(x)
        a = F.softmax(a)
        return c, b, a
这里是first_stage.py脚本,具体如下。这个里面主要包括两个函数:run_first_stage()和_generate_bboxes()。前一个函数,就是用来生成图像金字塔每个scale对应的bbox信息。后一个函数是调整下offset的形式,同时计算得到每个scale对应的bbox坐标值。(代码注释很清晰)
import torch
from torch.autograd import Variable
import math
from PIL import Image
import numpy as np
from .box_utils import nms, _preprocess


def run_first_stage(image, net, scale, threshold):
    """Run P-Net, generate bounding boxes, and do NMS.

    Arguments:
        image: an instance of PIL.Image.
        net: an instance of pytorch's nn.Module, P-Net.
        scale: a float number,
            scale width and height of the image by this number.
        threshold: a float number,
            threshold on the probability of a face when generating
            bounding boxes from predictions of the net.

    Returns:
        a float numpy array of shape [n_boxes, 9],
            bounding boxes with scores and offsets (4 + 1 + 4).
    """

    # scale the image and convert it to a float array
    width, height = image.size
    sw, sh = math.ceil(width*scale), math.ceil(height*scale)
    img = image.resize((sw, sh), Image.BILINEAR)
    img = np.asarray(img, 'float32')

    img = Variable(torch.FloatTensor(_preprocess(img)), volatile=True)
    output = net(img)
    probs = output[1].data.numpy()[0, 1, :, :]
    offsets = output[0].data.numpy()

    # probs: probability of a face at each sliding window
    # offsets: transformations to true bounding boxes

    boxes = _generate_bboxes(probs, offsets, scale, threshold)
    if len(boxes) == 0:
        return None

    keep = nms(boxes[:, 0:5], overlap_threshold=0.5)
    return boxes[keep]


def _generate_bboxes(probs, offsets, scale, threshold):
    """Generate bounding boxes at places
    where there is probably a face.

    Arguments:
        probs: a float numpy array of shape [n, m].
        offsets: a float numpy array of shape [1, 4, n, m].
        scale: a float number,
            width and height of the image were scaled by this number.
        threshold: a float number.

    Returns:
        a float numpy array of shape [n_boxes, 9]
    """

    # applying P-Net is equivalent, in some sense, to
    # moving 12x12 window with stride 2
    stride = 2
    cell_size = 12

    # indices of boxes where there is probably a face
    inds = np.where(probs > threshold)

    if inds[0].size == 0:
        return np.array([])

    # transformations of bounding boxes
    tx1, ty1, tx2, ty2 = [offsets[0, i, inds[0], inds[1]] for i in range(4)]
    # they are defined as:
    # w = x2 - x1 + 1
    # h = y2 - y1 + 1
    # x1_true = x1 + tx1*w
    # x2_true = x2 + tx2*w
    # y1_true = y1 + ty1*h
    # y2_true = y2 + ty2*h

    offsets = np.array([tx1, ty1, tx2, ty2])
    score = probs[inds[0], inds[1]]

    # P-Net is applied to scaled images
    # so we need to rescale bounding boxes back
    bounding_boxes = np.vstack([
        np.round((stride*inds[1] + 1.0)/scale),
        np.round((stride*inds[0] + 1.0)/scale),
        np.round((stride*inds[1] + 1.0 + cell_size)/scale),
        np.round((stride*inds[0] + 1.0 + cell_size)/scale),
        score, offsets
    ])

    return bounding_boxes.T
这里是bbox_utils.py脚本,具体如下。主要包括以下5个函数。
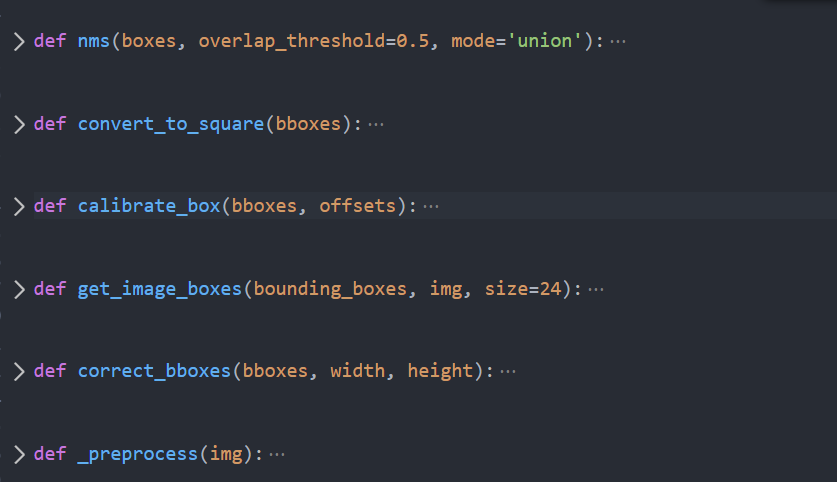
几个函数作用和实现比较好理解,nms,correct_bboxes和get_image_boxes是里面相对不太好看明白的,记录一下。
关于nms的可以移步这里nms,讲解的非常清晰,我这篇博客好多内容也是参考和借鉴的这里。(其实就是通过这里学的,Hhh,讲的超清楚)
下面是correct_bboxes的记录。这个函数主要是用来进行一些检查操作,避免尺寸超过图像大小或者尺寸是负值等。因为坐标值在和offset进行整合时,容易超出图片大小或者是坐标值出现负值,这个函数解决了这个问题。这个函数返回的是10个参数,dx,dy,edx,edy,x,y,ex,ey,h,w 。dx,dy多为0,出现正数,意味着x,y为负数了,取了下相反数;edx,edy放的是修正过后的bbox的宽/高度,x,y,ex,ey即bbox的始末坐标值;h,w放的是实际的bbox的宽/高度。
下面是get_image_boxes的记录。这个函数的作用就是将bbox所框出来的原img上的像素copy到指定size的大小上,便于后期模型计算。
import numpy as np
from PIL import Image


def nms(boxes, overlap_threshold=0.5, mode='union'):
    """Non-maximum suppression.

    Arguments:
        boxes: a float numpy array of shape [n, 5],
            where each row is (xmin, ymin, xmax, ymax, score).
        overlap_threshold: a float number.
        mode: 'union' or 'min'.

    Returns:
        list with indices of the selected boxes
    """

    # if there are no boxes, return the empty list
    if len(boxes) == 0:
        return []

    # list of picked indices
    pick = []

    # grab the coordinates of the bounding boxes
    x1, y1, x2, y2, score = [boxes[:, i] for i in range(5)]

    area = (x2 - x1 + 1.0)*(y2 - y1 + 1.0)
    ids = np.argsort(score)  # in increasing order

    while len(ids) > 0:

        # grab index of the largest value
        last = len(ids) - 1
        i = ids[last]
        pick.append(i)

        # compute intersections
        # of the box with the largest score
        # with the rest of boxes

        # left top corner of intersection boxes
        ix1 = np.maximum(x1[i], x1[ids[:last]])
        iy1 = np.maximum(y1[i], y1[ids[:last]])

        # right bottom corner of intersection boxes
        ix2 = np.minimum(x2[i], x2[ids[:last]])
        iy2 = np.minimum(y2[i], y2[ids[:last]])

        # width and height of intersection boxes
        w = np.maximum(0.0, ix2 - ix1 + 1.0)
        h = np.maximum(0.0, iy2 - iy1 + 1.0)

        # intersections' areas
        inter = w * h
        if mode == 'min':
            overlap = inter/np.minimum(area[i], area[ids[:last]])
        elif mode == 'union':
            # intersection over union (IoU)
            overlap = inter/(area[i] + area[ids[:last]] - inter)

        # delete all boxes where overlap is too big
        ids = np.delete(
            ids,
            np.concatenate([[last], np.where(overlap > overlap_threshold)[0]])
        )

    return pick


def convert_to_square(bboxes):
    """Convert bounding boxes to a square form.

    Arguments:
        bboxes: a float numpy array of shape [n, 5].

    Returns:
        a float numpy array of shape [n, 5],
            squared bounding boxes.
    """

    square_bboxes = np.zeros_like(bboxes)
    x1, y1, x2, y2 = [bboxes[:, i] for i in range(4)]
    h = y2 - y1 + 1.0
    w = x2 - x1 + 1.0
    max_side = np.maximum(h, w)
    square_bboxes[:, 0] = x1 + w*0.5 - max_side*0.5
    square_bboxes[:, 1] = y1 + h*0.5 - max_side*0.5
    square_bboxes[:, 2] = square_bboxes[:, 0] + max_side - 1.0
    square_bboxes[:, 3] = square_bboxes[:, 1] + max_side - 1.0
    return square_bboxes


def calibrate_box(bboxes, offsets):
    """Transform bounding boxes to be more like true bounding boxes.
    'offsets' is one of the outputs of the nets.

    Arguments:
        bboxes: a float numpy array of shape [n, 5].
        offsets: a float numpy array of shape [n, 4].

    Returns:
        a float numpy array of shape [n, 5].
    """
    x1, y1, x2, y2 = [bboxes[:, i] for i in range(4)]
    w = x2 - x1 + 1.0
    h = y2 - y1 + 1.0
    w = np.expand_dims(w, 1)
    h = np.expand_dims(h, 1)

    # this is what happening here:
    # tx1, ty1, tx2, ty2 = [offsets[:, i] for i in range(4)]
    # x1_true = x1 + tx1*w
    # y1_true = y1 + ty1*h
    # x2_true = x2 + tx2*w
    # y2_true = y2 + ty2*h
    # below is just more compact form of this

    # are offsets always such that
    # x1 < x2 and y1 < y2 ?

    translation = np.hstack([w, h, w, h])*offsets
    bboxes[:, 0:4] = bboxes[:, 0:4] + translation
    return bboxes


def get_image_boxes(bounding_boxes, img, size=24):
    """Cut out boxes from the image.

    Arguments:
        bounding_boxes: a float numpy array of shape [n, 5].
        img: an instance of PIL.Image.
        size: an integer, size of cutouts.

    Returns:
        a float numpy array of shape [n, 3, size, size].
    """

    num_boxes = len(bounding_boxes)
    width, height = img.size

    [dy, edy, dx, edx, y, ey, x, ex, w, h] = correct_bboxes(bounding_boxes, width, height)
    img_boxes = np.zeros((num_boxes, 3, size, size), 'float32')

    for i in range(num_boxes):
        img_box = np.zeros((h[i], w[i], 3), 'uint8')

        img_array = np.asarray(img, 'uint8')
        img_box[dy[i]:(edy[i] + 1), dx[i]:(edx[i] + 1), :] =\
            img_array[y[i]:(ey[i] + 1), x[i]:(ex[i] + 1), :]

        # resize
        img_box = Image.fromarray(img_box)
        img_box = img_box.resize((size, size), Image.BILINEAR)
        img_box = np.asarray(img_box, 'float32')

        img_boxes[i, :, :, :] = _preprocess(img_box)

    return img_boxes


def correct_bboxes(bboxes, width, height):
    """Crop boxes that are too big and get coordinates
    with respect to cutouts.

    Arguments:
        bboxes: a float numpy array of shape [n, 5],
            where each row is (xmin, ymin, xmax, ymax, score).
        width: a float number.
        height: a float number.

    Returns:
        dy, dx, edy, edx: a int numpy arrays of shape [n],
            coordinates of the boxes with respect to the cutouts.
        y, x, ey, ex: a int numpy arrays of shape [n],
            corrected ymin, xmin, ymax, xmax.
        h, w: a int numpy arrays of shape [n],
            just heights and widths of boxes.

        in the following order:
            [dy, edy, dx, edx, y, ey, x, ex, w, h].
    """

    x1, y1, x2, y2 = [bboxes[:, i] for i in range(4)]
    w, h = x2 - x1 + 1.0,  y2 - y1 + 1.0
    num_boxes = bboxes.shape[0]

    # 'e' stands for end
    # (x, y) -> (ex, ey)
    x, y, ex, ey = x1, y1, x2, y2

    # we need to cut out a box from the image.
    # (x, y, ex, ey) are corrected coordinates of the box
    # in the image.
    # (dx, dy, edx, edy) are coordinates of the box in the cutout
    # from the image.
    dx, dy = np.zeros((num_boxes,)), np.zeros((num_boxes,))
    edx, edy = w.copy() - 1.0, h.copy() - 1.0

    # if box's bottom right corner is too far right
    ind = np.where(ex > width - 1.0)[0]
    edx[ind] = w[ind] + width - 2.0 - ex[ind]
    ex[ind] = width - 1.0

    # if box's bottom right corner is too low
    ind = np.where(ey > height - 1.0)[0]
    edy[ind] = h[ind] + height - 2.0 - ey[ind]
    ey[ind] = height - 1.0

    # if box's top left corner is too far left
    ind = np.where(x < 0.0)[0]
    dx[ind] = 0.0 - x[ind]
    x[ind] = 0.0

    # if box's top left corner is too high
    ind = np.where(y < 0.0)[0]
    dy[ind] = 0.0 - y[ind]
    y[ind] = 0.0

    return_list = [dy, edy, dx, edx, y, ey, x, ex, w, h]
    return_list = [i.astype('int32') for i in return_list]

    return return_list


def _preprocess(img):
    """Preprocessing step before feeding the network.

    Arguments:
        img: a float numpy array of shape [h, w, c].

    Returns:
        a float numpy array of shape [1, c, h, w].
    """
    img = img.transpose((2, 0, 1))
    img = np.expand_dims(img, 0)
    img = (img - 127.5)*0.0078125
    return img
三、结尾
好了,到这里差不多就是结束了。写这个的作用一来是便于今后快速回顾,二来是记录某个阶段所做了哪些事。
多谢观看,哪里有问题的可以留言评论。


 3265
3265


 被折叠的 条评论
为什么被折叠?
被折叠的 条评论
为什么被折叠?
 到【灌水乐园】发言


