


nnUnet for 2D Images Segmentation
A tutorial on how to use nnUnet for 2D image segmentation, using MICCAI2022 Challenge: GOALS as an example. Currently my best performing method.
paper:nnU-Net: Self-adapting Framework for U-Net-Based Medical Image Segmentation
code: nnunet
Installation of nnUnet
PYTORCH is necessary!
For use as integrative framework (this will create a copy of the nnU-Net code on your computer so that you can modify it as needed):
git clone https://github.com/MIC-DKFZ/nnUNet.git
cd nnUNet
pip install -e .
After you have installed these, each of your operations on nnUNet will start with nnUNet_ in the command line, which represents the command for your nnUNet to start working.
The next step is to create the data storage directory.
- Go into the nnUNet folder you created earlier and create a folder named DATASET, DATASET is where we will put the data next;

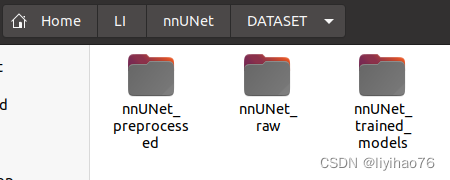
- Go to the created DATASET folder and create the following three folders: nnUNet_preprocessed, nnUNet_raw, and nnUNet_trained_models. The first is used to store the preprocessed data of the original data, the second is used to store the original data you want to train, and the third is used to store the training results.
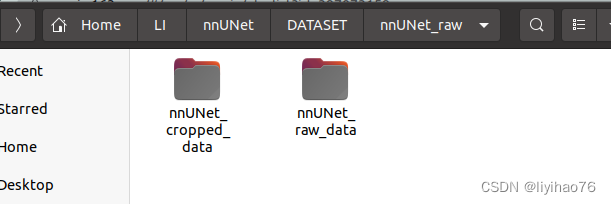
- Enter the above folder nnUNet_raw, create the following two folders, nnUNet_cropped_data, nnUNet_raw_data, the right side is the original data, the left side is the cropped data.
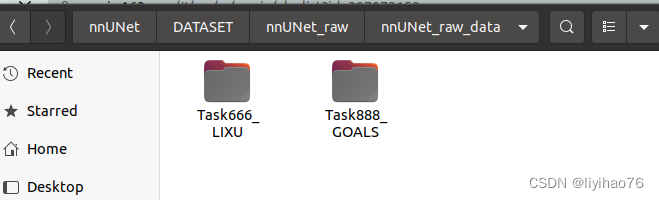
- Go to the right folder nnUNet_raw_data, and create a folder named Task888_GOALS (Explanation: The data format of this nnUnet is fixed, Task001_BloodVessel consists of Task+ID+data name, you can name the digital ID of this task arbitrarily, such as you To split the heart, you can name it Task001_Heart, for example, if you want to split the kidney, you can name it Task002_Kidney, provided it must follow this format)
Environment configuration
nnU-Net needs to know where you intend to save raw data, preprocessed data and trained models. For this you need to set a few of environment variables.
Setting up Paths
The method above sets the paths permanently (until you delete the lines from your .bashrc) on your system. If you wish to set them only temporarily, you can run the export commands in your terminal:
export nnUNet_raw_data_base="/home/liyihao/LI/nnUNet/DATASET/nnUNet_raw"
export nnUNet_preprocessed="/home/liyihao/LI/nnUNet/DATASET/nnUNet_preprocessed"
export RESULTS_FOLDER="/home/liyihao/LI/nnUNet/DATASET/nnUNet_trained_models"
Data configuration
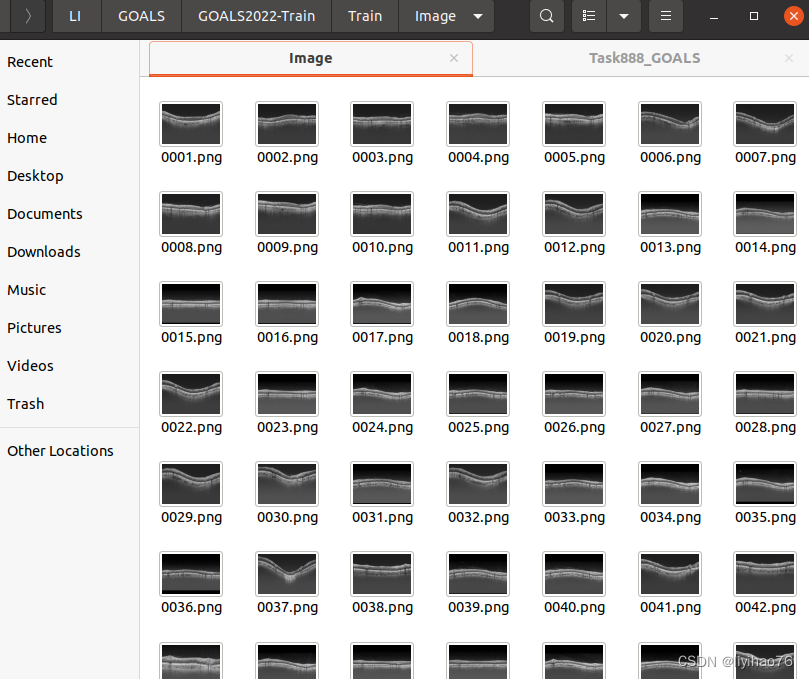
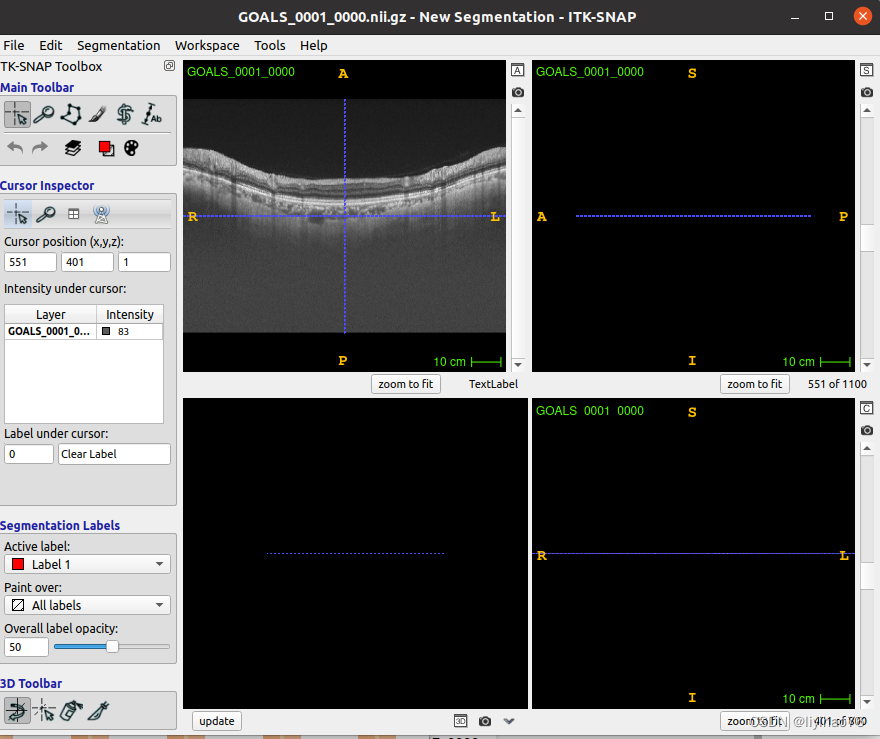
This is the form of the raw data
We need to convert it to the format required by nnunet
First of all, we need to put the training set, gt, and test set in these three files, and also bring the json file (the file name is as shown in the figure, it cannot be changed)
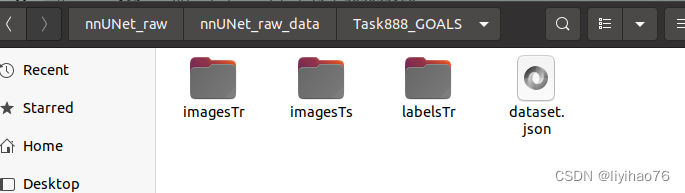
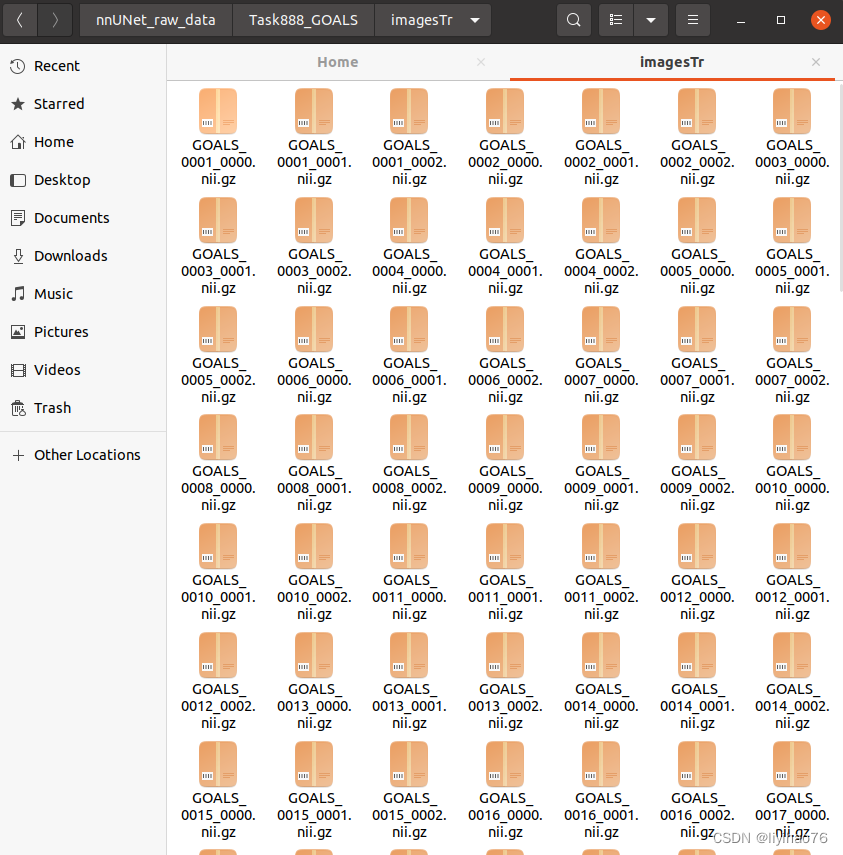
The data format of nnUnet is fixed, Task888_GOALS consists of Task+ID+data name, imagesTr is training data, imagesTs is test data, labelsTr is the label of training data, data sample la_003_0000.nii.gz consists of case sample name + modal flag + .nii.gz, different modals are distinguished by 0000/0001/0002/0003.
Example tree structure:
nnUNet_raw_data_base/nnUNet_raw_data/Task002_Heart
├── dataset.json
├── imagesTr
│   ├── la_003_0000.nii.gz
│   ├── la_004_0000.nii.gz
│   ├── ...
├── imagesTs
│   ├── la_001_0000.nii.gz
│   ├── la_002_0000.nii.gz
│   ├── ...
└── labelsTr
    ├── la_003.nii.gz
    ├── la_004.nii.gz
    ├── ...
Our original 2-dimensional data is RGB three-channel, we can regard the RGB three-channel data as 3 modes, extract the data of different channels respectively, convert the shape to (1, width, height), and save it as 3-dimensional data.
import os
import random
from tqdm import tqdm
import SimpleITK as sitk
import cv2
import numpy as np

root = '/home/liyihao/LI/GOALS'
base_image = root + '/GOALS2022-Train/Train/Image'
base_gt = root + '/GOALS2022-Train/Train/Layer_Masks'
base_test = root + '/GOALS2022-Validation/GOALS2022-Validation/Image'

target_labelsTr = '/home/liyihao/LI/nnUNet/DATASET/nnUNet_raw/nnUNet_raw_data/Task888_GOALS/labelsTr/'
target_imagesTr = '/home/liyihao/LI/nnUNet/DATASET/nnUNet_raw/nnUNet_raw_data/Task888_GOALS/imagesTr/'

# train set
savepath_img = target_imagesTr
savepath_mask = target_labelsTr

img_path = base_image
mask_path = base_gt
ImgList = os.listdir(img_path)
print(ImgList)

with tqdm(ImgList, desc="conver") as pbar:
    for name in pbar:
        #print(name)
        Img = cv2.imread(os.path.join(img_path, name))
        #print(Img.shape)
        gt_img = cv2.imread(os.path.join(mask_path, name))
        gt_img[gt_img == 0] = 3
        gt_img[gt_img == 80] = 1
        gt_img[gt_img == 160] = 2
        gt_img[gt_img == 255] = 0
        gt_img = gt_img[:,:,1].astype(np.uint8)
        #print(gt_img.shape)
        Img_Transposed = np.transpose(Img, (2, 0, 1))
        Img_0 = Img_Transposed[0].reshape(1, Img_Transposed[0].shape[0], Img_Transposed[0].shape[1])
        Img_1 = Img_Transposed[1].reshape(1, Img_Transposed[1].shape[0], Img_Transposed[1].shape[1])
        Img_2 = Img_Transposed[2].reshape(1, Img_Transposed[2].shape[0], Img_Transposed[2].shape[1])
        gt_img = gt_img.reshape(1, gt_img.shape[0], gt_img.shape[1])
        #print(np.unique(gt_img))
        Img_0_name = 'GOALS_'+ str(name.split('.')[0]) + '_0000.nii.gz'
        Img_1_name = 'GOALS_'+ str(name.split('.')[0]) + '_0001.nii.gz'
        Img_2_name = 'GOALS_'+ str(name.split('.')[0]) + '_0002.nii.gz'
        #print(str(name.split('.')[0]))
        gt_img_name = 'GOALS_'+ str(name.split('.')[0]) + '.nii.gz'

        Img_0_nii = sitk.GetImageFromArray(Img_0)
        Img_1_nii = sitk.GetImageFromArray(Img_1)
        Img_2_nii = sitk.GetImageFromArray(Img_2)
        gt_img_nii = sitk.GetImageFromArray(gt_img)

        sitk.WriteImage(Img_0_nii, os.path.join(savepath_img, Img_0_name))
        sitk.WriteImage(Img_1_nii, os.path.join(savepath_img, Img_1_name))
        sitk.WriteImage(Img_2_nii, os.path.join(savepath_img, Img_2_name))
        sitk.WriteImage(gt_img_nii, os.path.join(savepath_mask, gt_img_name))

# test
img_path = base_test
ImgList = os.listdir(img_path)
print(ImgList)

savepath_img = '/home/liyihao/LI/nnUNet/DATASET/nnUNet_raw/nnUNet_raw_data/Task888_GOALS/imagesTs/'
with tqdm(ImgList, desc="conver") as pbar:
    for name in pbar:
        #print(name)
        Img = cv2.imread(os.path.join(img_path, name))

        #print(gt_img.shape)
        Img_Transposed = np.transpose(Img, (2, 0, 1))
        Img_0 = Img_Transposed[0].reshape(1, Img_Transposed[0].shape[0], Img_Transposed[0].shape[1])
        Img_1 = Img_Transposed[1].reshape(1, Img_Transposed[1].shape[0], Img_Transposed[1].shape[1])
        Img_2 = Img_Transposed[2].reshape(1, Img_Transposed[2].shape[0], Img_Transposed[2].shape[1])
        #print(np.unique(gt_img))
        Img_0_name = 'GOALS_'+ str(name.split('.')[0]) + '_0000.nii.gz'
        Img_1_name = 'GOALS_'+ str(name.split('.')[0]) + '_0001.nii.gz'
        Img_2_name = 'GOALS_'+ str(name.split('.')[0]) + '_0002.nii.gz'


        Img_0_nii = sitk.GetImageFromArray(Img_0)
        Img_1_nii = sitk.GetImageFromArray(Img_1)
        Img_2_nii = sitk.GetImageFromArray(Img_2)

        sitk.WriteImage(Img_0_nii, os.path.join(savepath_img, Img_0_name))
        sitk.WriteImage(Img_1_nii, os.path.join(savepath_img, Img_1_name))
        sitk.WriteImage(Img_2_nii, os.path.join(savepath_img, Img_2_name))
make json file :
import glob
import os
import re
import json
from collections import OrderedDict
train_list = os.listdir('/home/liyihao/LI/nnUNet/DATASET/nnUNet_raw/nnUNet_raw_data/Task888_GOALS/labelsTr/')
print(train_list)
test_list = os.listdir('/home/liyihao/LI/GOALS/'+'/GOALS2022-Validation/GOALS2022-Validation/Image')
test_patient = []
for i in test_list:
patient = i.split('.')[0]
name = 'GOALS_'+str(patient)+ '.nii.gz'
test_patient.append(name)
print(test_patient)
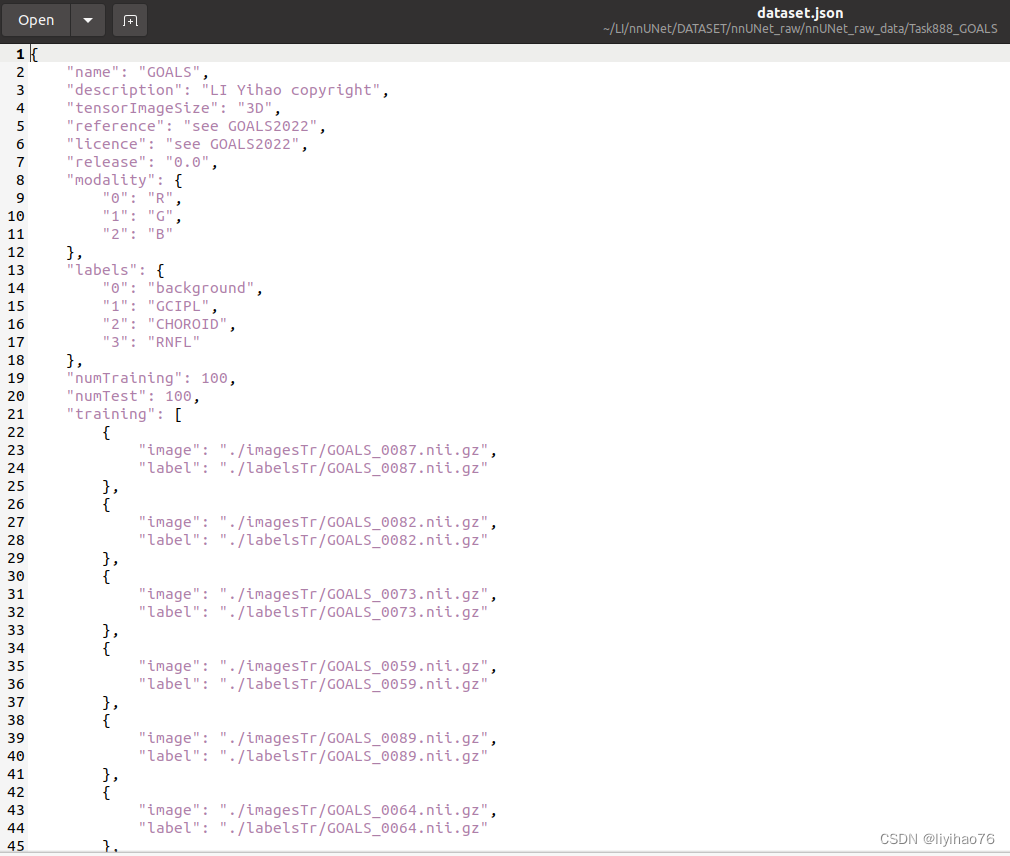
json_dict = OrderedDict()
json_dict['name'] = "GOALS"
json_dict['description'] = "LI Yihao copyright"
json_dict['tensorImageSize'] = "3D"
json_dict['reference'] = "see GOALS2022"
json_dict['licence'] = "see GOALS2022"
json_dict['release'] = "0.0"
json_dict['modality'] = {
"0": "R",
"1": "G",
"2": "B"
}
json_dict['labels'] = {
"0": "background",
"1": "GCIPL",
"2": "CHOROID",
"3": "RNFL"
}
json_dict['numTraining'] = len(train_list)
json_dict['numTest'] = len(test_patient)
json_dict['training'] = [{'image': "./imagesTr/%s" % i, "label": "./labelsTr/%s" % i} for i in
train_list]
json_dict['test'] = [{'image': "./imagesTs/%s" % i} for i in test_patient]
with open('dataset.json', 'w', encoding='utf-8') as f:
json.dump(json_dict, f, ensure_ascii=False, indent=4)
I put all processed data in
/home/shared/GOALS_challenge/LI/nnUnet
Train
data preprocessing
Note that since this is a 2D dataset there is no need to run preprocessing for 3D U-Nets. You should therefore run the
nnUNet_plan_and_preprocess command like this:
ref : Task120_Massachusetts_RoadSegm.py
nnUNet_plan_and_preprocess -t 888 -pl3d None
The GPU memory requirement is greater than 11G. Run the following commands one by one during training, and each fold of cross-validation will cost 16+ hours.
nnUNet_train 2d nnUNetTrainerV2 Task888_GOALS 0 --npz
nnUNet_train 2d nnUNetTrainerV2 Task888_GOALS 1 --npz
nnUNet_train 2d nnUNetTrainerV2 Task888_GOALS 2 --npz
nnUNet_train 2d nnUNetTrainerV2 Task888_GOALS 3 --npz
nnUNet_train 2d nnUNetTrainerV2 Task888_GOALS 4 --npz
Inference
After running the 5-fold cross-validation, the best configuration can be determined. The following 888 is the ID of the Task.
nnUNet_find_best_configuration -m 2d -t 888
Generate the following files
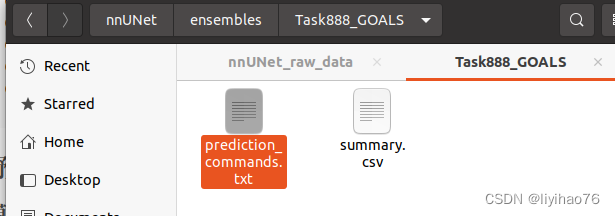
Then open the above txt file, which will generate the Inference method:
nnUNet_predict -i FOLDER_WITH_TEST_CASES -o OUTPUT_FOLDER_MODEL1 -tr nnUNetTrainerV2 -ctr nnUNetTrainerV2CascadeFullRes -m 2d -p nnUNetPlansv2.1 -t Task888_GOALS
for me:
nnUNet_predict -i /home/liyihao/LI/nnUNet/DATASET/nnUNet_raw/nnUNet_raw_data/Task888_GOALS/imagesTs/ -o ./pre_nnunet/ -tr nnUNetTrainerV2 -ctr nnUNetTrainerV2CascadeFullRes -m 2d -p nnUNetPlansv2.1 -t Task888_GOALS
Because the result of the model prediction is the nii.gz file, it needs to be converted into 2D image data
import os
import random
from tqdm import tqdm
import SimpleITK as sitk
import cv2
import numpy as np
import matplotlib.pyplot as plt

img_dir = './pre_nnunet/'
img_list = [i for i in os.listdir(img_dir) if ".nii.gz" in i]
print(img_list)

with tqdm(img_list, desc="conver") as pbar:
    for name in pbar:
        print(name)
        image = sitk.ReadImage(os.path.join(img_dir, name))
        image = sitk.GetArrayFromImage(image)[0]
        print(image.shape)
        image[image == 0] = 255
        image[image == 1] = 80
        image[image == 2] = 160
        image[image == 3] = 0
        #print(np.unique(image))
        #print(abc)
        cv2.imwrite(os.path.join('output', name.split(".")[0].split("_")[1]+".png"), image)


 4万+
4万+


 被折叠的 条评论
为什么被折叠?
被折叠的 条评论
为什么被折叠?
 到【灌水乐园】发言


