


Boost库学习笔记(一)安装与配置
1. 获取boost
https://www.boost.org/users/history/version_1_79_0.html
任选其一

boost的目录结构:
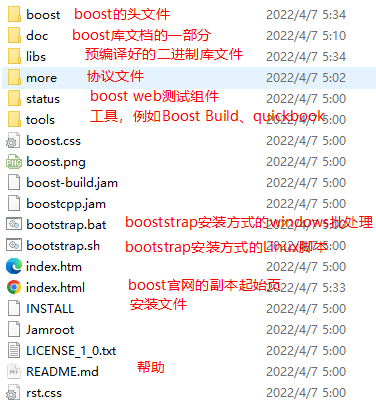
tip:
- boost库的根目录库应该设置到环境变量**$BOOST_ROOT** 中,笔者路径为(D:\Software\boost_1_79_0)
- 编译boost程序时,你需要将boost的头文件的目录添加进来,笔者路径为(D:\Software\boost_1_79_0\boost)
仅头文件的库:
大多数的boost库都是header-only的,即头文件已经包含了模板和内联函数,不需要单独编译或者在链接时特殊对待。
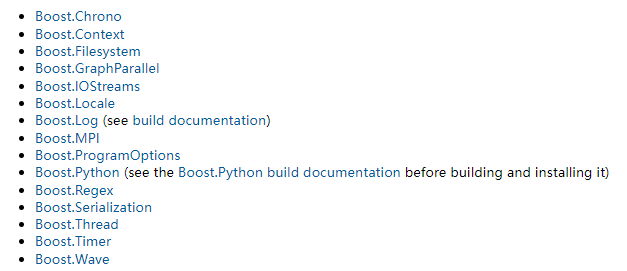
当然也有些库需要单独编译才能用:
还有一少部分是可选单独编译的:
- Boost.Graph also has a binary component that is only needed if you intend to parse GraphViz files.
- Boost.Math has binary components for the TR1 and C99 cmath functions.
- Boost.Random has a binary component which is only needed if you’re using
random_device. - Boost.Test can be used in “header-only” or “separately compiled” mode, although separate compilation is recommended for serious use.
- Boost.Exception provides non-intrusive implementation of exception_ptr for 32-bit _MSC_VER==1310 and _MSC_VER==1400 which requires a separately-compiled binary. This is enabled by #define BOOST_ENABLE_NON_INTRUSIVE_EXCEPTION_PTR.
- Boost.System is header-only since Boost 1.69. A stub library is still built for compatibility, but linking to it is no longer necessary
2.Windows安装过程
使用windows的命令提示符用管理员的权限打开,切换到boost的根目录。
bootstrap.bat  # 执行bootstrap.bat的批处理
# 运行完成后会生成b2.exe程序
b2.exe # 开始编译工作
b2.exe程序可以支持的参数有:
-
toolset编译器类别,可以是gcc,或者是msvc -
target-os目标操作系统,可以是Windows,Linux -
variant生成类型,可以是 debug(-gd-)或者release (-) -
threadapi线程API的实现,可以是win32或者pthread,在windows上编译就用win32 -
link链接库类型,可以是静态的static,也可以是shared,对应windows上的库就是.lib或者是dll -
runtime-link动态还是静态链接C/C++运行时库。同样有shared (-)和static (-s-)两种方式,这样runtime-link和link可以产生4种组合方式,可以根据需要选择编译. -
prefix安装路径 -
user-config用户自定义配置文件,在cross compile的时候可以用来配置编译工具链 -
address-model生成32位还是64位库文件 -
architecture=x86cpu架构,一般台式机位x86,嵌入式平台位arm
编译安装64位的Release版的静态链接库可以执行下面的指令:(-mt-s-)
.\b2.exe variant=release threading=multi threadapi=win32 link=static runtime-link=static --prefix=E:\boost_1_77_0 address-model=64 architecture=x86 install -j8
本段内容摘自https://www.cnblogs.com/lylygoing/p/BoostDownload.html
当没有指定参数的时候,默认编译生成在当前目录下。
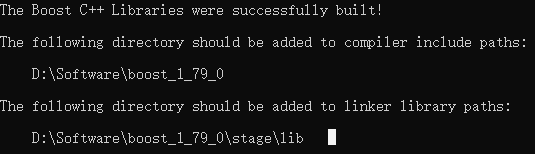
从输出可以看出,头文件在D:\Software\boost_1_79_0,链接的库的路径在D:\Software\boost_1_79_9\stage\lib下,其中也会生成bin.v2的目录,大小在2.3G左右,可以直接删除。
3. Linux安装过程
-
下载
https://www.boost.org/users/history/version_1_79_0.html
![[外链图片转存失败,源站可能有防盗链机制,建议将图片保存下来直接上传(img-JdOpAUfy-1659447175784)(imgs/image-20220802152104328.png)]](https://img-blog.csdnimg.cn/fdd3d7706a3d44f3875de47e1acb301b.png)
tar -xzvf boost_1_79_0.tar.gz #解压
cd boost_1_79_0 #进入目录
vim bootstrap.sh #修改prefix为指定目录,笔者为/usr/local/boost1.79
./bootstrap.sh
sudo ./b2 install # 不加sudo仍然生成在本目录
4.VS的编译工作准备
-
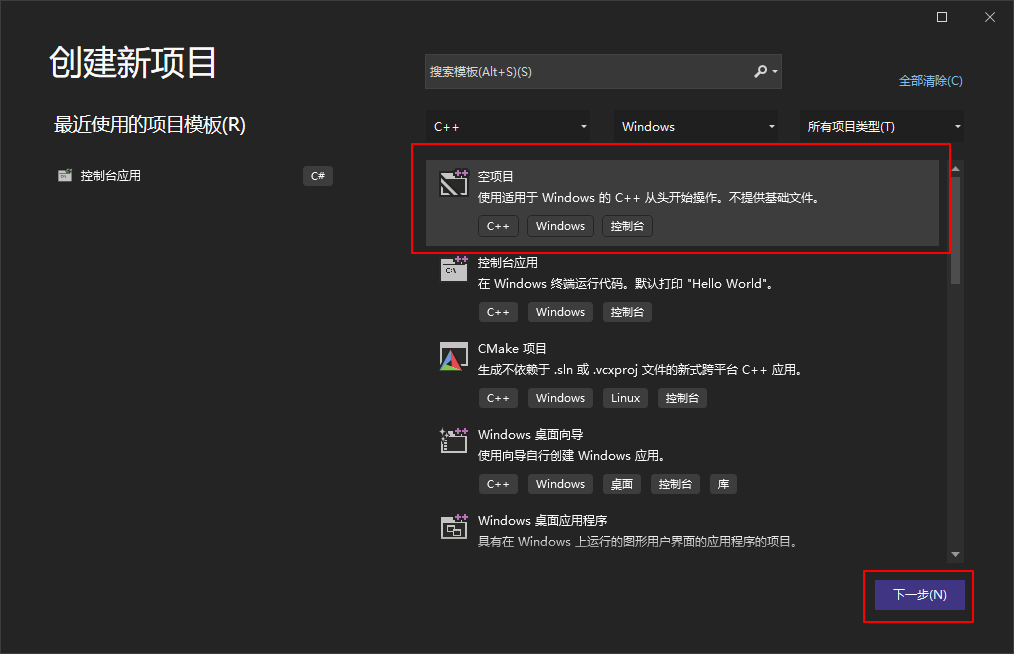
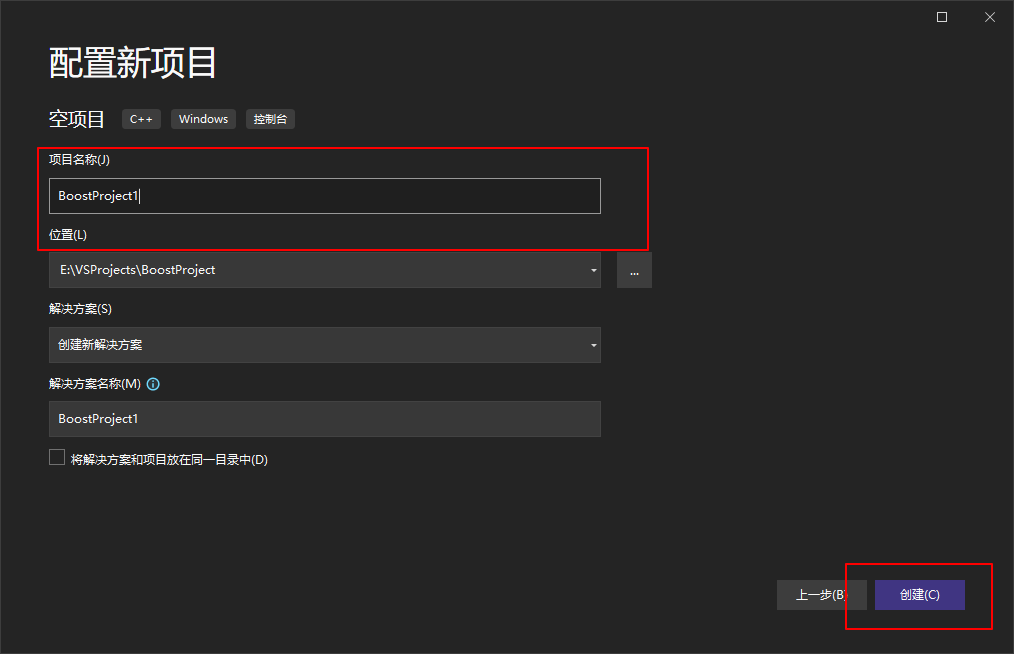
创建新项目(VS2022)
-
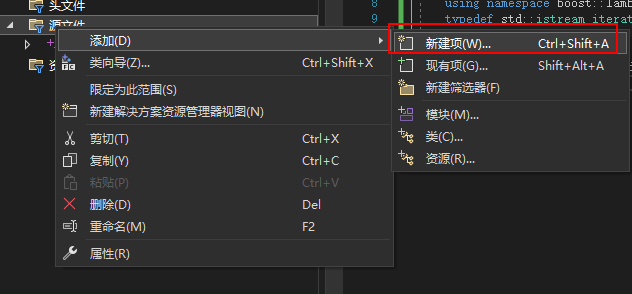
新建一个源文件

粘贴以下代码
#include <boost/lambda/lambda.hpp> #include <iostream> #include <iterator> #include <algorithm> int main() { using namespace boost::lambda; typedef std::istream_iterator<int> in; std::for_each( in(std::cin), in(), std::cout << (_1 * 3) << " "); } -
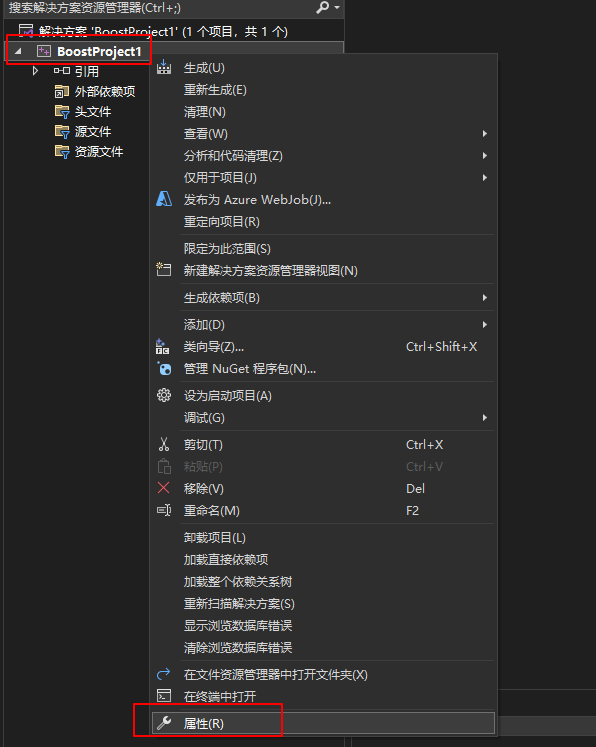
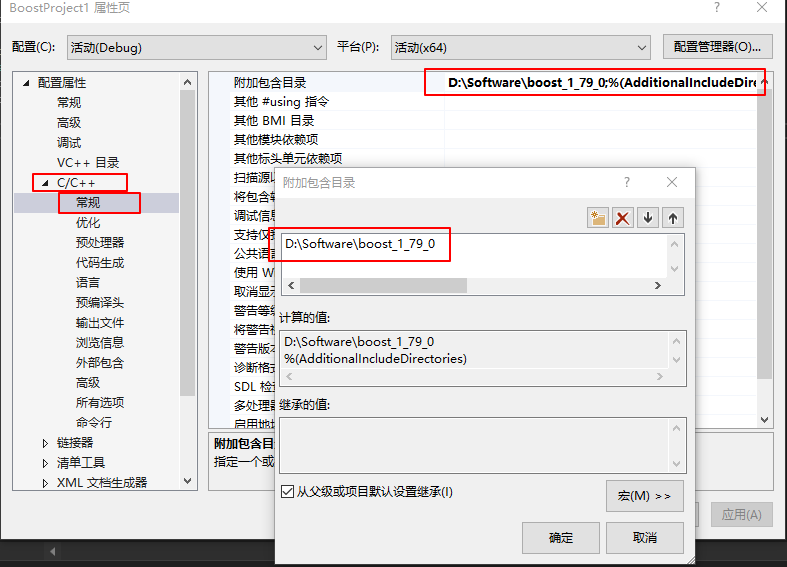
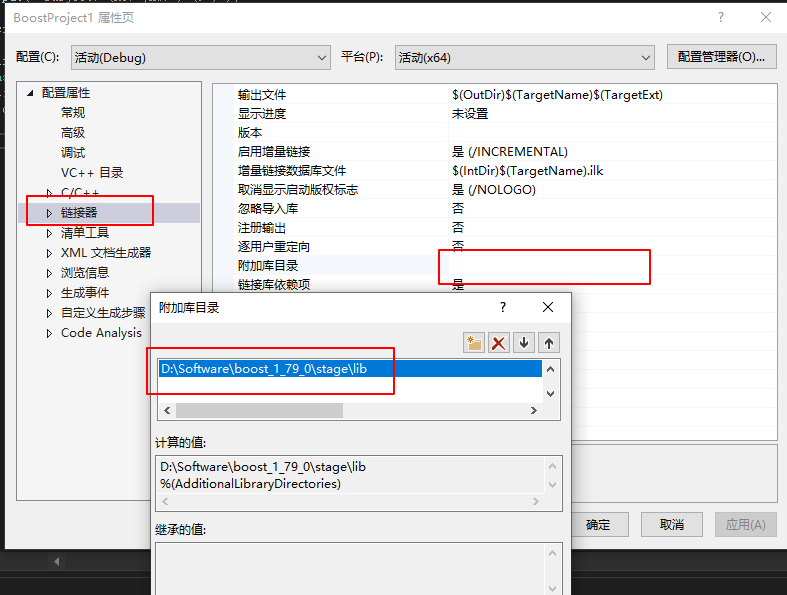
对解决方案进行配置
5.测试运行
每次都会输出你输入值的三倍
![[外链图片转存失败,源站可能有防盗链机制,建议将图片保存下来直接上传(img-7t1lWTu5-1659447175796)(imgs/image-20220802212612696.png)]](https://img-blog.csdnimg.cn/9590f67020b84baa97df774358d996c7.png)
6.要点总结
- 安装的时候先执行bootstrap的脚本文件(Windows执行.bat,Linux执行.sh),之后再执行b2的程序进行编译安装,注意参数可以指定。
- 使用Boost库主要是附加其头文件目录和库文件目录,用什么工具都要遵循这个原则。


 304
304


 被折叠的 条评论
为什么被折叠?
被折叠的 条评论
为什么被折叠?
 到【灌水乐园】发言


