


YOLO系列的算法更新实在太快了,前些天刚学习完YOLOV7,YOLOV8就出来了。今天先理解模型的训练过程,后续再学习V8的网络结构等细节。
YOLOV8源码链接:https://github.com/ultralytics/ultralytics
1 数据格式转换
Wider Face数据格式转YOLO数据格式可以参考我之前写的一篇博客:
https://blog.csdn.net/qq_38964360/article/details/128712287?spm=1001.2014.3001.5502
2 修改相关配置文件
首先是模型配置文件'ultralytics/models/v8/yolov8n.yaml',因为人脸检测是单目标检测,因此该配置文件里的nc应该改成1,部分代码如下:
# Ultralytics YOLO 🚀, GPL-3.0 license

# Parameters
nc: 1  # number of classes
depth_multiple: 0.33  # scales module repeats
width_multiple: 0.25  # scales convolution channels
随后仿照 'yolov8/ultralytics/yolo/data/datasets/coco128.yaml' 文件,新建 'yolov8/ultralytics/yolo/data/datasets/wider_face.yaml' 文件,文件内容如下:
# Train/val/test sets as 1) dir: path/to/imgs, 2) file: path/to/imgs.txt, or 3) list: [path/to/imgs1, path/to/imgs2, ..]
path: /kaxier01/projects/FAS/yolov8/datasets/wider_face  # dataset root dir
train: images/train  # train images (relative to 'path') 12876 images
val: images/val  # val images (relative to 'path') 3226 images
test:  # test images (optional)

# Classes
names:
  0: face

# Download script/URL (optional)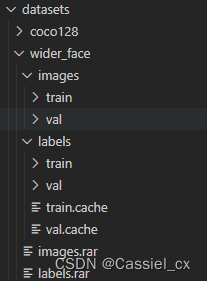
download:数据集文件目录如下(images以及labels均由步骤1生成):
最后修改 'yolov8/ultralytics/yolo/configs/default.yaml' 文件中的参数,如:batch size、device、lr、损失权重等,代码如下:
# Ultralytics YOLO 🚀, GPL-3.0 license
# Default training settings and hyperparameters for medium-augmentation COCO training

task: "detect" # choices=['detect', 'segment', 'classify', 'init'] # init is a special case. Specify task to run.
mode: "train" # choices=['train', 'val', 'predict'] # mode to run task in.

# Train settings -------------------------------------------------------------------------------------------------------
model: null # i.e. yolov8n.pt, yolov8n.yaml. Path to model file
data: null # i.e. coco128.yaml. Path to data file
epochs: 300 # number of epochs to train for
patience: 50  # TODO: epochs to wait for no observable improvement for early stopping of training
batch: 32 # number of images per batch
imgsz: 640 # size of input images
save: True # save checkpoints
cache: False # True/ram, disk or False. Use cache for data loading
device: 0,1,2,3 # cuda device, i.e. 0 or 0,1,2,3 or cpu. Device to run on
workers: 16 # number of worker threads for data loading
project: null # project name
name: null # experiment name
exist_ok: False # whether to overwrite existing experiment
pretrained: False # whether to use a pretrained model
optimizer: 'SGD' # optimizer to use, choices=['SGD', 'Adam', 'AdamW', 'RMSProp']
verbose: False # whether to print verbose output
seed: 0 # random seed for reproducibility
deterministic: True # whether to enable deterministic mode
single_cls: True # train multi-class data as single-class
image_weights: False # use weighted image selection for training
rect: False # support rectangular training
cos_lr: False # use cosine learning rate scheduler
close_mosaic: 10 # disable mosaic augmentation for final 10 epochs
resume: False # resume training from last checkpoint
# Segmentation
overlap_mask: True # masks should overlap during training
mask_ratio: 4 # mask downsample ratio
# Classification
dropout: 0.0  # use dropout regularization

# Val/Test settings ----------------------------------------------------------------------------------------------------
val: True # validate/test during training
save_json: False # save results to JSON file
save_hybrid: False # save hybrid version of labels (labels + additional predictions)
conf: null # object confidence threshold for detection (default 0.25 predict, 0.001 val)
iou: 0.7 # intersection over union (IoU) threshold for NMS
max_det: 300 # maximum number of detections per image
half: False # use half precision (FP16)
dnn: False # use OpenCV DNN for ONNX inference
plots: True # show plots during training

# Prediction settings --------------------------------------------------------------------------------------------------
source: null # source directory for images or videos
show: False # show results if possible
save_txt: False # save results as .txt file
save_conf: False # save results with confidence scores
save_crop: False # save cropped images with results
hide_labels: False # hide labels
hide_conf: False # hide confidence scores
vid_stride: 1 # video frame-rate stride
line_thickness: 3 # bounding box thickness (pixels)
visualize: False # visualize results
augment: False # apply data augmentation to images
agnostic_nms: False # class-agnostic NMS
retina_masks: False # use retina masks for object detection

# Export settings ------------------------------------------------------------------------------------------------------
format: torchscript # format to export to
keras: False  # use Keras
optimize: False  # TorchScript: optimize for mobile
int8: False  # CoreML/TF INT8 quantization
dynamic: False  # ONNX/TF/TensorRT: dynamic axes
simplify: False  # ONNX: simplify model
opset: 17  # ONNX: opset version
workspace: 4  # TensorRT: workspace size (GB)
nms: False  # CoreML: add NMS

# Hyperparameters ------------------------------------------------------------------------------------------------------
lr0: 0.02  # initial learning rate (SGD=1E-2, Adam=1E-3)
lrf: 0.01  # final OneCycleLR learning rate (lr0 * lrf)
momentum: 0.937  # SGD momentum/Adam beta1
weight_decay: 0.0005  # optimizer weight decay 5e-4
warmup_epochs: 3.0  # warmup epochs (fractions ok)
warmup_momentum: 0.8  # warmup initial momentum
warmup_bias_lr: 0.1  # warmup initial bias lr
box: 7.5  # box loss gain
cls: 0.5  # cls loss gain (scale with pixels)
dfl: 1.5  # dfl loss gain
fl_gamma: 0.0  # focal loss gamma (efficientDet default gamma=1.5)
label_smoothing: 0.0
nbs: 64  # nominal batch size
hsv_h: 0.015  # image HSV-Hue augmentation (fraction)
hsv_s: 0.7  # image HSV-Saturation augmentation (fraction)
hsv_v: 0.4  # image HSV-Value augmentation (fraction)
degrees: 0.0  # image rotation (+/- deg)
translate: 0.1  # image translation (+/- fraction)
scale: 0.5  # image scale (+/- gain)
shear: 0.0  # image shear (+/- deg)
perspective: 0.0  # image perspective (+/- fraction), range 0-0.001
flipud: 0.0  # image flip up-down (probability)
fliplr: 0.5  # image flip left-right (probability)
mosaic: 1.0  # image mosaic (probability)
mixup: 0.0  # image mixup (probability)
copy_paste: 0.0  # segment copy-paste (probability)

# Hydra configs --------------------------------------------------------------------------------------------------------
cfg: null # for overriding defaults.yaml
hydra:
  output_subdir: null  # disable hydra directory creation
  run:
    dir: .

# Debug, do not modify -------------------------------------------------------------------------------------------------
v5loader: False  # use legacy YOLOv5 dataloader
3 训练及验证
参考源码中的README.md 文件,安装相关依赖库,
pip install ultralytics模型的训练、验证及预测都有两种实现方式:
1)使用Command Line Interface (CLI)。指令如下:
# 单卡训练
yolo task=detect mode=train model=yolov8n.pt data=coco128.yaml device=0
# 多卡训练
yolo task=detect mode=train model=yolov8n.pt data=coco128.yaml device=\'0,1,2,3\'

# Syntax
yolo task=detect    mode=train    model=yolov8n.yaml      args...
          classify       predict        yolov8n-cls.yaml  args...
          segment        val            yolov8n-seg.yaml  args...
                         export         yolov8n.pt        format=onnx  args...
2)使用Python。新建一个脚本,代码如下:
# filename: python_example.py
# dir: yolov8/python_example.py
from ultralytics import YOLO


## 以下模型初始化指令选一个就行
model = YOLO("yolov8/ultralytics/models/v8/yolov8n.yaml")  # 从头开始训练
model = YOLO("yolov8/weights/yolov8n.pt")  # 或者加载预训练好的模型

# 模型训练
results = model.train(data="yolov8/ultralytics/yolo/data/datasets/wider_face.yaml", epochs=300)

# 模型验证
results = model.val()

# 模型导出
success = model.export(format="onnx")
使用以下指令便可多卡训练模型(我这里用了4卡训练,把default.yaml的device值改为0,1,2,3):
python -m torch.distributed.launch --nproc_per_node 4 --master_port 9527 yolov8/python_example.py数据集加载相关文件:'yolov8/ultralytics/yolo/data/dataloaders/v5loader.py'
数据增强相关文件:'yolov8/ultralytics/yolo/data/dataloaders/v5augmentations.py'
模型定义相关文件:'yolov8/ultralytics/yolo/engine/model.py'
模型训练相关文件:'yolov8/ultralytics/yolo/engine/trainer.py'
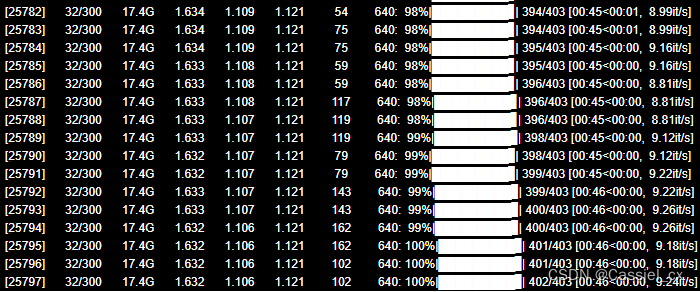
模型训练过程:
模型验证过程:

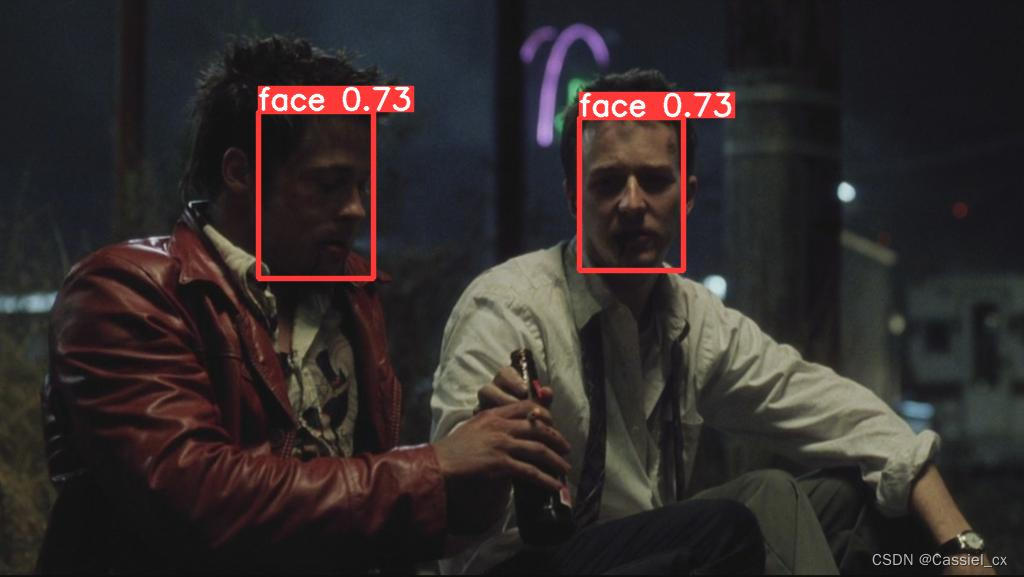
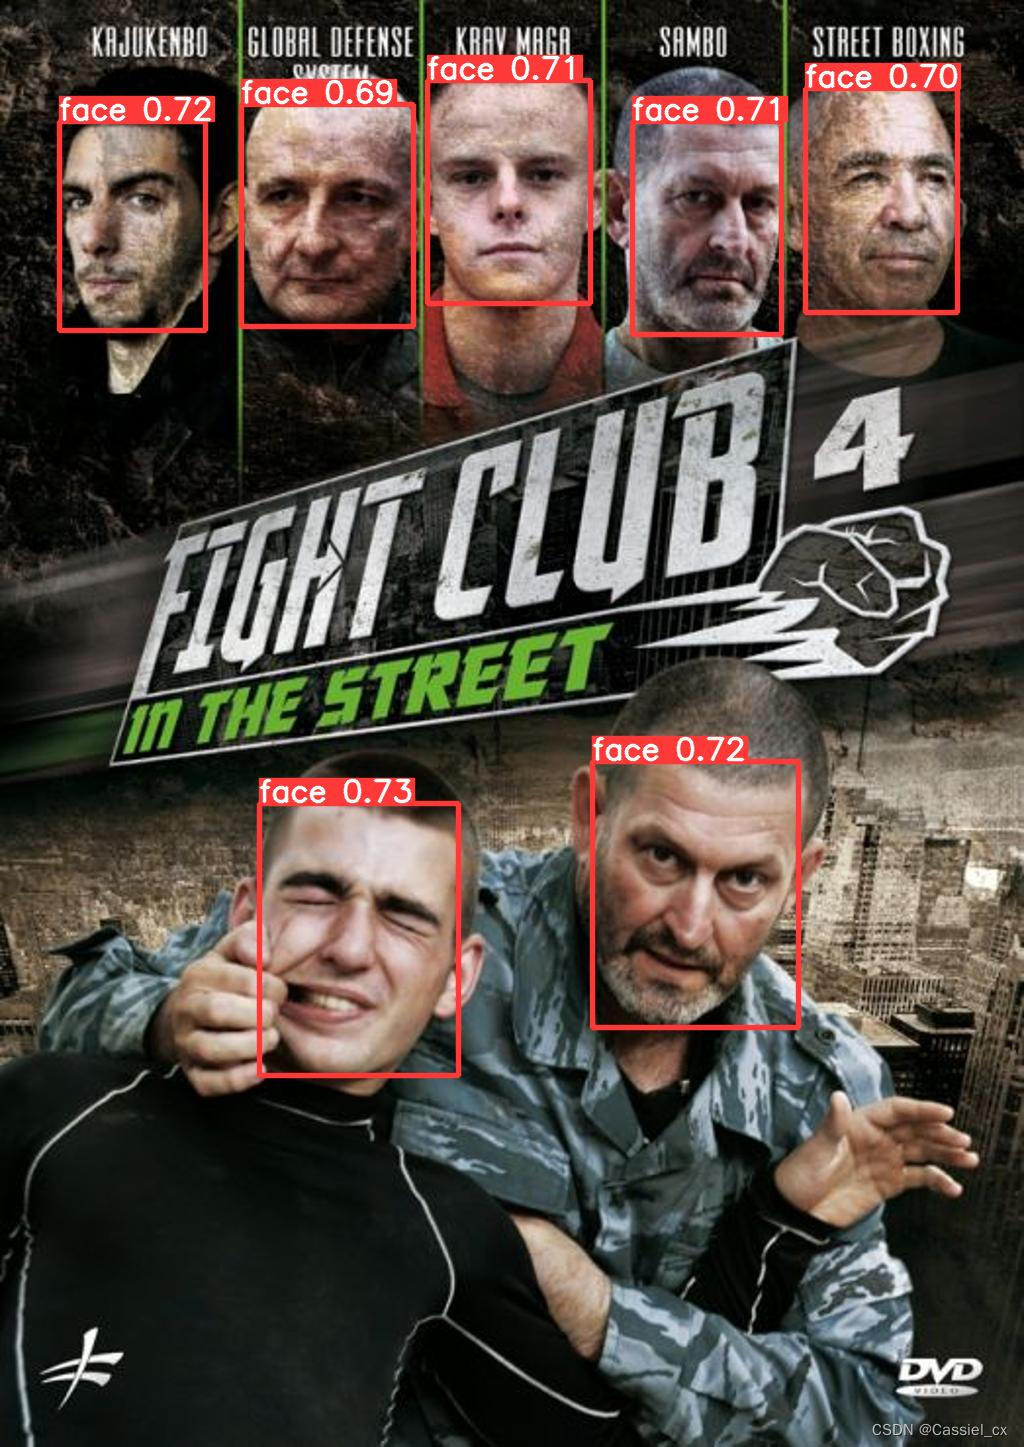
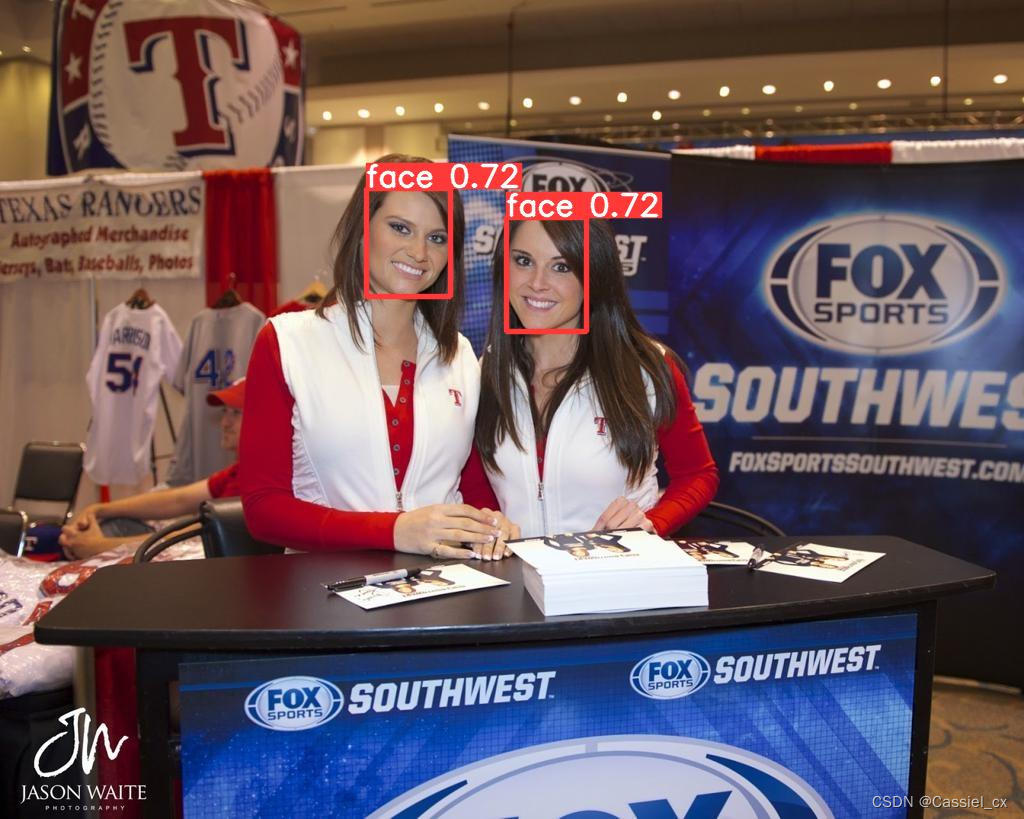
测试结果:


 3万+
3万+


 被折叠的 条评论
为什么被折叠?
被折叠的 条评论
为什么被折叠?
 到【灌水乐园】发言


