


一、项目介绍
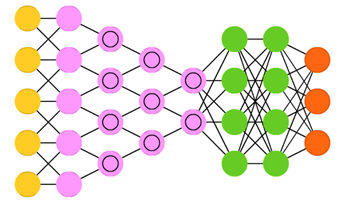
本文使用一个两层的卷积神经网络完成了对手写数字的识别。
在测试集中模型的准确率达到了99.06%,在10000个测试数据中仅有94个数字识别错误。在实际手写数字的识别中,10个数字仅有9个识别成功,正确率为90%,唯一识别错误的是数字9识别成了7。
数据集:MNIST
环境:Python 3.6
软件:Pycharm、Anaconda
二、技术背景
使用的到神经网络知识主要有:
- 二维卷积操作(nn.Conv2d) 卷积动图理解
- 损失函数(nn.CrossEntropyLoss) Loss Function
- 线性变换(nn.Linear)
- PIL图像处理
一维卷积:

二维卷积:

卷积神经网络
Convolutional neural networks (CNN or deep convolutional neural networks, DCNN)与大多数其他网络完全不同。它们主要用于图像处理,但也可用于其他类型的输入,如音频。 CNN的典型用例是您为网络图像提供信息,网络对数据进行分类,例如:如果你给它一张猫图片,它输出“cat”,当你给它一张狗图片时,它输出“dog”。
三、核心代码
1、定义、训练、测试模型
import torch
import torch.nn as nn
import torchvision
import torchvision.transforms as transforms

# 如果电脑上配备有GPU,则可以使用GPU来运算,提高速度
device = torch.device('cuda:0' if torch.cuda.is_available() else 'cpu')

# 定义基本参数
num_epochs = 5
num_classes = 10
batch_size = 100
learning_rate = 0.001

# 加载用于训练和测试卷积神经网络的数据集
# MNIST dataset 是一个经典的数字识别数据集
train_dataset = torchvision.datasets.MNIST(root='../../data/',
                                           train=True,
                                           transform=transforms.ToTensor(),
                                           download=True)

test_dataset = torchvision.datasets.MNIST(root='../../data/',
                                          train=False,
                                          transform=transforms.ToTensor())

# Data loader
train_loader = torch.utils.data.DataLoader(dataset=train_dataset,
                                           batch_size=batch_size,
                                           shuffle=True)

test_loader = torch.utils.data.DataLoader(dataset=test_dataset,
                                          batch_size=batch_size,
                                          shuffle=False)
# 定义卷积神经网络,一共由两个层组成
# Convolutional neural network (two convolutional layers)
class ConvNet (nn.Module):
    def __init__(self, num_classes=10):
        super(ConvNet, self).__init__()
        self.layer1 = nn.Sequential(
            nn.Conv2d(1, 16, kernel_size=5, stride=1, padding=2),
            nn.BatchNorm2d(16),
            nn.ReLU(),
            nn.MaxPool2d(kernel_size=2, stride=2))
        self.layer2 = nn.Sequential(
            nn.Conv2d(16, 32, kernel_size=5, stride=1, padding=2),
            nn.BatchNorm2d(32),
            nn.ReLU(),
            nn.MaxPool2d(kernel_size=2, stride=2))
        self.fc = nn.Linear(7*7*32, num_classes)

    def forward(self, x):
        out = self.layer1(x)
        out = self.layer2(out)
        out = out.reshape(out.size(0), -1)
        out = self.fc(out)
        return out

# 根据参数创建神经网络
model = ConvNet(num_classes).to(device)

# 损失函数和优化函数,用于模型的训练
# Loss and optimizer
criterion = nn.CrossEntropyLoss()
optimizer = torch.optim.Adam(model.parameters(), lr=learning_rate)

# 训练模型
total_step = len(train_loader)
for epoch in range(num_epochs):
    for i, (images, labels) in enumerate(train_loader):
        images = images.to(device)
        labels = labels.to(device)

        # Forward pass
        outputs = model(images)
        loss = criterion(outputs, labels)

        # 反向传播
        optimizer.zero_grad()
        loss.backward()
        optimizer.step()

        if (i+1) % 100 == 0:
            print('Epoch [{}/{}], Step [{}/{}], Loss: {:.4f}'
                   .format(epoch+1, num_epochs, i+1, total_step, loss.item()))

# 测试模型
model.eval()  # 评估模式(batchnorm使用移动均值/方差而不是小批量均值/方差)
with torch.no_grad():
    correct = 0
    total = 0
    for images, labels in test_loader:
        images = images.to(device)
        labels = labels.to(device)
        outputs = model(images)
        # 取可能性最大的作为分类结果
        _, predicted = torch.max(outputs.data, 1)
        total += labels.size(0)
        correct += (predicted == labels).sum().item()

    print('Test Accuracy of the model on the 10000 test images: {} %'.format(100 * correct / total))

# 保存模型,只保存模型的参数,保存速度快
torch.save(model.state_dict(), 'model.ckpt')
2、使用训练好的模型对手写的数字进行识别
import torch
import torch.nn as nn
import matplotlib.pyplot as plt
from PIL import Image
import numpy as np

# Device configuration
device = torch.device('cuda:0' if torch.cuda.is_available() else 'cpu')

# Convolutional neural network (two convolutional layers)
class ConvNet(nn.Module):
    def __init__(self, num_classes=10):
        super(ConvNet, self).__init__()
        self.layer1 = nn.Sequential(
            nn.Conv2d(1, 16, kernel_size=5, stride=1, padding=2),
            nn.BatchNorm2d(16),
            nn.ReLU(),
            nn.MaxPool2d(kernel_size=2, stride=2))
        self.layer2 = nn.Sequential(
            nn.Conv2d(16, 32, kernel_size=5, stride=1, padding=2),
            nn.BatchNorm2d(32),
            nn.ReLU(),
            nn.MaxPool2d(kernel_size=2, stride=2))
        self.fc = nn.Linear(7*7*32, num_classes)

    def forward(self, x):
        out = self.layer1(x)
        out = self.layer2(out)
        out = out.reshape(out.size(0), -1)
        out = self.fc(out)
        return out

# 获取图片的tensor
def getImagetensor(num):
    path = 'C:\\Users\\zouqianggui\\Desktop\\课程设计\\pytorch\\test_data\\'
    path = path+num+'.png'

    image = Image.open(path)

    # 转化为灰度图
    im1 = image.convert('L')

    # 将图像的尺寸进行伸缩
    im1 = im1.resize((28, 28))
    image_arr = np.array(im1, float)

    # 将灰度范围改为0-1
    b = np.array([255], float)
    image_arr = np.divide(image_arr, b)
    image_arr = np.subtract(np.array(1), image_arr)

    for i in range(28):
        for j in range(28):
            if image_arr[i, j] < 0.5:
                image_arr[i, j] = 0

    # plt.imshow(image_arr)
    # plt.show()

    return torch.from_numpy(image_arr)

# 获取手写的测试数据
def gettestdata():
    res = torch.rand(10, 1, 28, 28)
    for case in range(10):
        tens = getImagetensor(str(case))
        for i in range(28):
            for j in range(28):
                res[case, 0, i, j] = tens[i, j]
    return res

def main():
    # 加载模型
    model = ConvNet(10).to(device)
    model.load_state_dict(torch.load('model.ckpt'))

    # get the tensor of image
    inputs = gettestdata()

    outputs = model(inputs)
    _, predicted = torch.max(outputs.data, 1)

    total = 10
    correct = 0
    for i in range(10):
        if predicted[i] == i:
            correct += 1
        print(i, "->", predicted[i])
    print('Test Accuracy of the model on the 10 test images: {} %'.format(100 * correct / total))


if __name__ == '__main__':
    main()
四、实现过程
用于识别的手写数字图片:

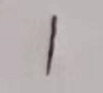


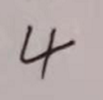
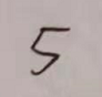

命名规则为0.png…9.png
第二段代码中的
path = 'C:\\Users\\zouqianggui\\Desktop\\课程设计\\pytorch\\test_data\\'
改为你存储这些图片的路径即可
MNIST数据集:

手写数字处理后:

识别结果:
0 -> tensor(0)
1 -> tensor(1)
2 -> tensor(2)
3 -> tensor(3)
4 -> tensor(4)
5 -> tensor(5)
6 -> tensor(6)
7 -> tensor(7)
8 -> tensor(8)
9 -> tensor(7)
Test Accuracy of the model on the 10 test images: 90.0 %
在模型的测试集中各个数字错误的统计:

五、主要参考资料
[1]https://github.com/yunjey/pytorch-tutorial
[2]https://github.com/pytorch/examples/tree/master/mnist
[3]https://pytorch-cn.readthedocs.io/zh/latest/
[4]https://pytorch.org/
[5]https://github.com/zergtant/pytorch-handbook
[6]《PyTorch机器学习从入门到实战》
[7]《PyTorch深度学习快速入门指南》
[8]《神经网络与深度学习-3小时》
[9]《深度学习与神经网络》


 206
206


 被折叠的 条评论
为什么被折叠?
被折叠的 条评论
为什么被折叠?
 到【灌水乐园】发言


