


前言
在ZYNQ上中有USB的控制器,最近在使用pluto sdr进行数据传输的时候,觉得串口太慢,但是也没有找到关于USB的在裸机下的资料。一般都是用操作系统来做的,这就很郁闷了啊,我一个FPGA小白,现在还不会linux啊。然后就上GitHub上找了找看看有没有人做过zynq裸机的usb的demo,嘿,你别说,还真有。
FPGA工程链接地址如下:
Zynq_winUSB FPGA repo

然后还这个作者还提供了一个测试软件,C#写的,看不太懂,但是可以知道是使用libusb这个跨平台的库写的。那么之后自己在进行上位机代码编写的时候,就使用这个libusb这个库就可以了。
上位机链接地址如下:
usb_loop
1. 搭建自己的USB硬件平台
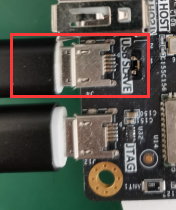
- ZYNQ板卡:微相Mizar7010
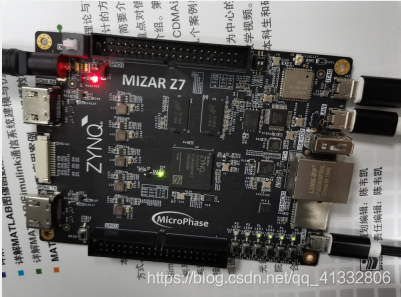
1.1 硬件平台
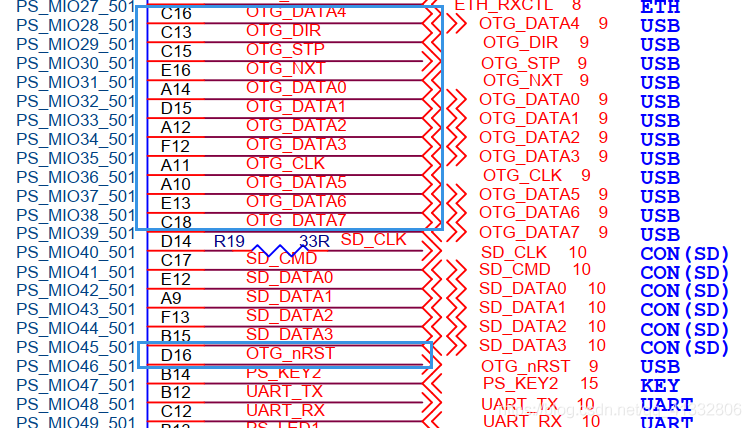
使能串口,方便打印调试信息,使能USB进行USB的裸机的实验,GPIO使能一个,是因为需要使用到USB的复位信号。


作为一个拿来主义的小白,硬件平台搭好之后,当然是直接把别人的代码拿来用了啊,简单又方便。
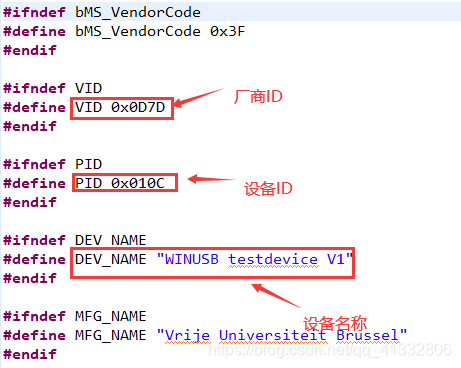
1.1.1 USB ID号
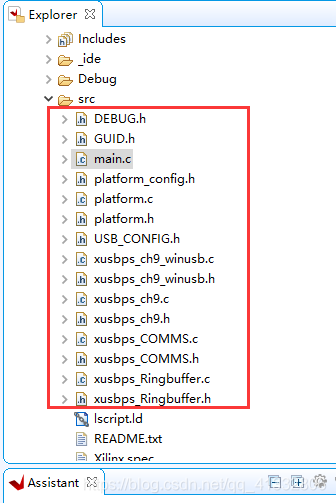
在代码中有几个比较重要的文件,首先是这个USB_CONFIG.h文件,这个文件里面提供用于配置USB设备ID的信息。通过更改这个文件里面的信息,就能够将usb接入到电脑上的时候,看到更改之后的信息。
1.1.2 生成设备描述信息
在一下两个文件当中,实现了设备信息的声明。

通过调用zynq系统的api函数,来完成设备描述文件的生成。
1.1.3 usb设备的初始化和中断的控制
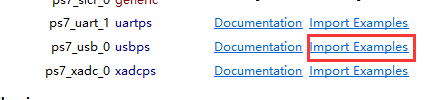
其实设备的初始化和中断的控制,可以直接打开vitis里面的示例demo就可以了。
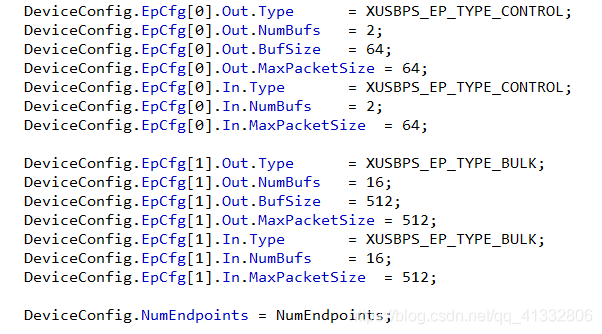
设备的初始化就根据这里面来就可以。在初始化的时候,需要对usb设备进行配置。代码中配置了两个断电,一个端点用于传输控制包,一个端点用于进行块传输。
1.1.4 收发数据的API
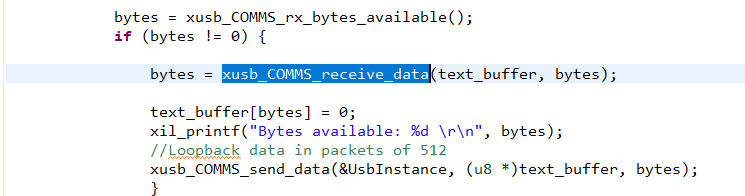
在代码中,原作者使用了Ringbuffer的结构来进行数据的接收发送,从这个API看来,发送和接收数据的API主要就是两个,在使用的时候,如果不去深究代码中具体干了什么事的话,使用这两个收发数据的API就可以了。
有了zynq的ps程序之后,就可以进行上位机的编写了,可以先使用上面那个作者提供的一个回环的例子,进行简单的上位机的测试,来验证一下zynq上运行的代码功能是否正确。
2. 上位机
上位机对于我这个不是做软件的人来说就有点麻烦了啊,不过通过查询一些资料写个简简单单的小程序应该还是可以的哈。
2.1 使用Zadig安装驱动
Zadig是一个开源的软件,用来给usb设备提供驱动的。使用这个软件,能够很方便地给我们地设备安装好libusb的驱动。
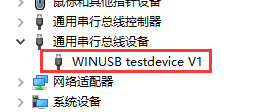
首先,让vitis里面的程序运行起来,然后将usb,连接到电脑上。
这个时候,在电脑上可能会识别出一个通用串行设备。这个设备的名称,就是前面在vitis当中设置的那个名字
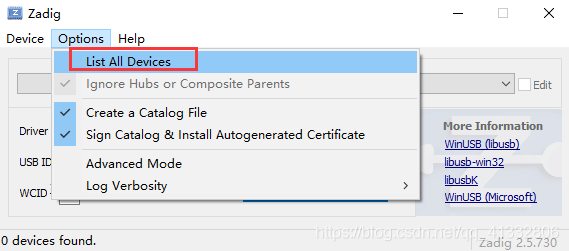
接下来使用Zaig来给这个设备添加一个libusb的驱动。Zadig的下载地址在这里:Zadig。
- 打开软件后,先列出所有usb设备。
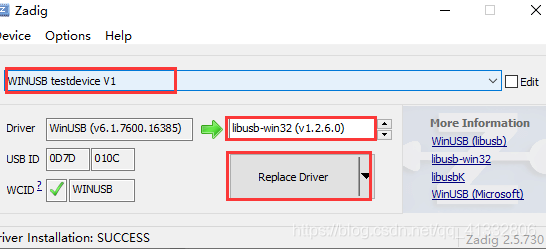
- 然后找到我们自己的设备,用libusb-win32给他替换一下驱动。
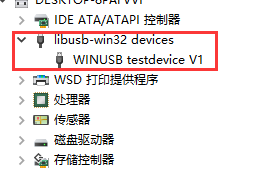
- 替换完成之后,在设备列表里面就能看到一个libusb的设备了
2.2 测试程序
libusb是一个开源的跨平台的库,在github上就能够找到。有关使用方法在它的主页上有链接可以参考。下面就是驱动文件夹中自带的一个测试例子,我稍微做了点更改
#include "stdafx.h"
#pragma comment (lib, "libusb.lib")
#include "lusb0_usb.h"
#include <stdint.h>

#include <Windows.h>
#include <process.h>         // needed for _beginthread()

#include <string>
#include <iostream>
#include <fstream>
#include <iostream>
#include <sstream>
#include <string>
using namespace std;

// Enables this example to work with a device running the
// libusb-win32 PIC Benchmark Firmware.
//#define BENCHMARK_DEVICE

//
// TEST SETUP (User configurable)

// Issues a Set configuration request
#define TEST_SET_CONFIGURATION

// Issues a claim interface request
#define TEST_CLAIM_INTERFACE

// Use the libusb-win32 async transfer functions. see
// transfer_bulk_async() below.
//#define TEST_ASYNC

// Attempts one bulk read.
#define TEST_BULK_READ

// Attempts one bulk write.
 #define TEST_BULK_WRITE

//
// DEVICE SETUP (User configurable)

// Device vendor and product id.
#define MY_VID 0x0D7D
#define MY_PID 0x010C

// Device configuration and interface id.
#define MY_CONFIG 1
#define MY_INTF 0

// Device endpoint(s)
#define EP_IN 0x81
#define EP_OUT 0x01

// Device of bytes to transfer.
#define BUF_SIZE 64

//
usb_dev_handle *open_dev(void);

static int transfer_bulk_async(usb_dev_handle *dev,
	int ep,
	char *bytes,
	int size,
	int timeout);

usb_dev_handle *open_dev(void)
{
	struct usb_bus *bus;
	struct usb_device *dev;

	for (bus = usb_get_busses(); bus; bus = bus->next)
	{
		for (dev = bus->devices; dev; dev = dev->next)
		{
			if (dev->descriptor.idVendor == MY_VID
				&& dev->descriptor.idProduct == MY_PID)
			{
				return usb_open(dev);
			}
		}
	}
	return NULL;
}

int main(void)
{
	usb_dev_handle *dev = NULL; /* the device handle */
	char tmp[BUF_SIZE] = "this is a test app\n";
	int ret;
	void* async_read_context = NULL;
	void* async_write_context = NULL;

	usb_init(); /* initialize the library */
	usb_find_busses(); /* find all busses */
	usb_find_devices(); /* find all connected devices */


	if (!(dev = open_dev()))
	{
		printf("error opening device: \n%s\n", usb_strerror());
		return 0;
	}
	else
	{
		printf("success: device %04X:%04X opened\n", MY_VID, MY_PID);
	}

#ifdef TEST_SET_CONFIGURATION
	if (usb_set_configuration(dev, MY_CONFIG) < 0)
	{
		printf("error setting config #%d: %s\n", MY_CONFIG, usb_strerror());
		usb_close(dev);
		return 0;
	}
	else
	{
		printf("success: set configuration #%d\n", MY_CONFIG);
	}
#endif

#ifdef TEST_CLAIM_INTERFACE
	if (usb_claim_interface(dev, 0) < 0)
	{
		printf("error claiming interface #%d:\n%s\n", MY_INTF, usb_strerror());
		usb_close(dev);
		return 0;
	}
	else
	{
		printf("success: claim_interface #%d\n", MY_INTF);
	}
#endif

#ifdef TEST_BULK_WRITE

#ifdef BENCHMARK_DEVICE
	ret = usb_control_msg(dev, USB_TYPE_VENDOR | USB_RECIP_DEVICE | USB_ENDPOINT_IN,
		14, /* set/get test */
		2,  /* test type    */
		MY_INTF,  /* interface id */
		tmp, 1, 1000);
#endif

#ifdef TEST_ASYNC
	// Running an async write test
	ret = transfer_bulk_async(dev, EP_OUT, tmp, sizeof(tmp), 5000);
#else
	// Running a sync write test
	ret = usb_bulk_write(dev, EP_OUT, "Test string \n", sizeof("Test string \n"), 5000);
#endif
	if (ret < 0)
	{
		printf("error writing:\n%s\n", usb_strerror());
	}
	else
	{
		printf("success: bulk write %d bytes\n", ret);
	}
#endif

#ifdef TEST_BULK_READ

#ifdef BENCHMARK_DEVICE
	ret = usb_control_msg(dev, USB_TYPE_VENDOR | USB_RECIP_DEVICE | USB_ENDPOINT_IN,
		14, /* set/get test */
		1,  /* test type    */
		MY_INTF,  /* interface id */
		tmp, 1, 1000);
#endif

#ifdef TEST_ASYNC
	// Running an async read test
	ret = transfer_bulk_async(dev, EP_IN, tmp, sizeof(tmp), 5000);

#else
	// Running a sync read test
	ret = usb_bulk_read(dev, EP_IN, tmp, sizeof(tmp), 5000);
#endif
	if (ret < 0)
	{
		printf("error reading:\n%s\n", usb_strerror());
	}
	else
	{
		printf("The read result is %s \n", tmp);
		printf("success: bulk read %d bytes\n", ret);
	}
#endif

#ifdef TEST_CLAIM_INTERFACE
	usb_release_interface(dev, 0);
#endif

	if (dev)
	{
		usb_close(dev);
	}
	printf("Done.\n");

	return 0;
}

/*
* Read/Write using async transfer functions.
*
* NOTE: This function waits for the transfer to complete essentially making
* it a sync transfer function so it only serves as an example of how one might
* implement async transfers into thier own code.
*/
static int transfer_bulk_async(usb_dev_handle *dev,
	int ep,
	char *bytes,
	int size,
	int timeout)
{
	// Each async transfer requires it's own context. A transfer
	// context can be re-used.  When no longer needed they must be
	// freed with usb_free_async().
	//
	void* async_context = NULL;
	int ret;

	// Setup the async transfer.  This only needs to be done once
	// for multiple submit/reaps. (more below)
	//
	ret = usb_bulk_setup_async(dev, &async_context, ep);
	if (ret < 0)
	{
		printf("error usb_bulk_setup_async:\n%s\n", usb_strerror());
		goto Done;
	}

	// Submit this transfer.  This function returns immediately and the
	// transfer is on it's way to the device.
	//
	ret = usb_submit_async(async_context, bytes, size);
	if (ret < 0)
	{
		printf("error usb_submit_async:\n%s\n", usb_strerror());
		usb_free_async(&async_context);
		goto Done;
	}

	// Wait for the transfer to complete.  If it doesn't complete in the
	// specified time it is cancelled.  see also usb_reap_async_nocancel().
	//
	ret = usb_reap_async(async_context, timeout);

	// Free the context.
	usb_free_async(&async_context);

Done:
	return ret;
}
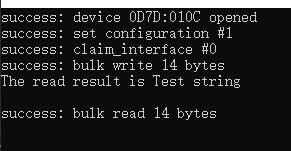
现在就可以进行PC和ZYNQ之间的数据传输了。
PC上运行结果:
ZYNQ上的运行结果:


 978
978


 被折叠的 条评论
为什么被折叠?
被折叠的 条评论
为什么被折叠?
 到【灌水乐园】发言


