


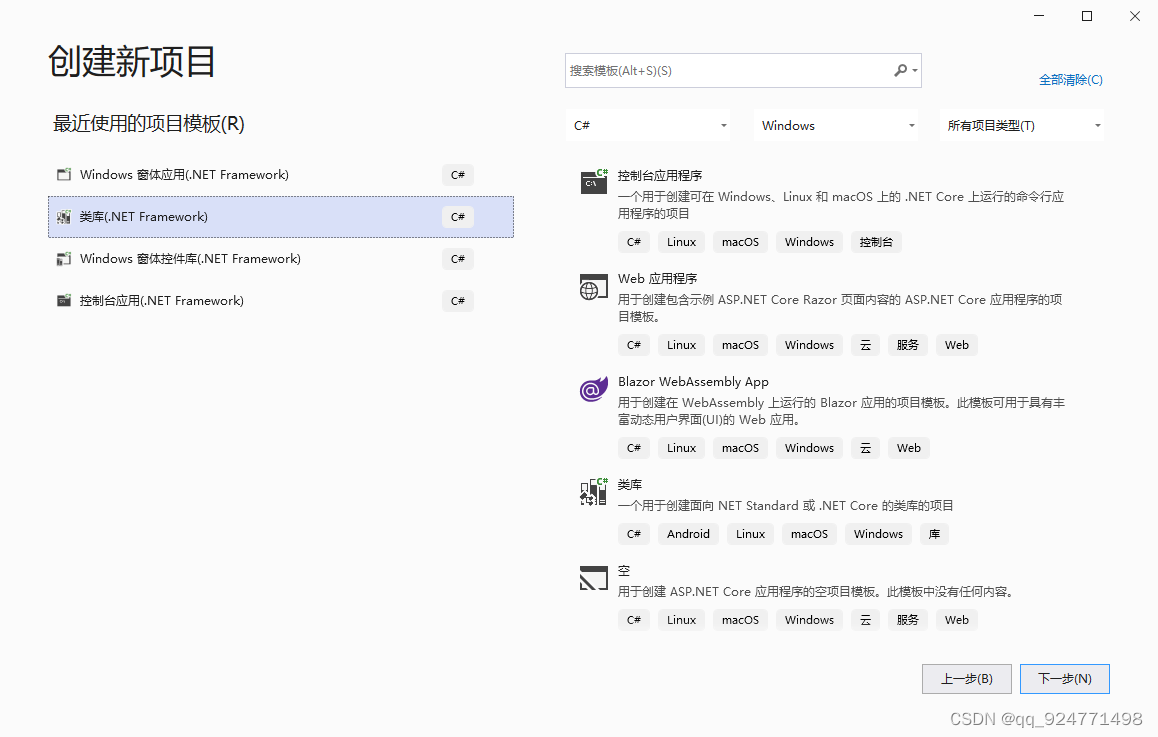
一、编写自定义工具
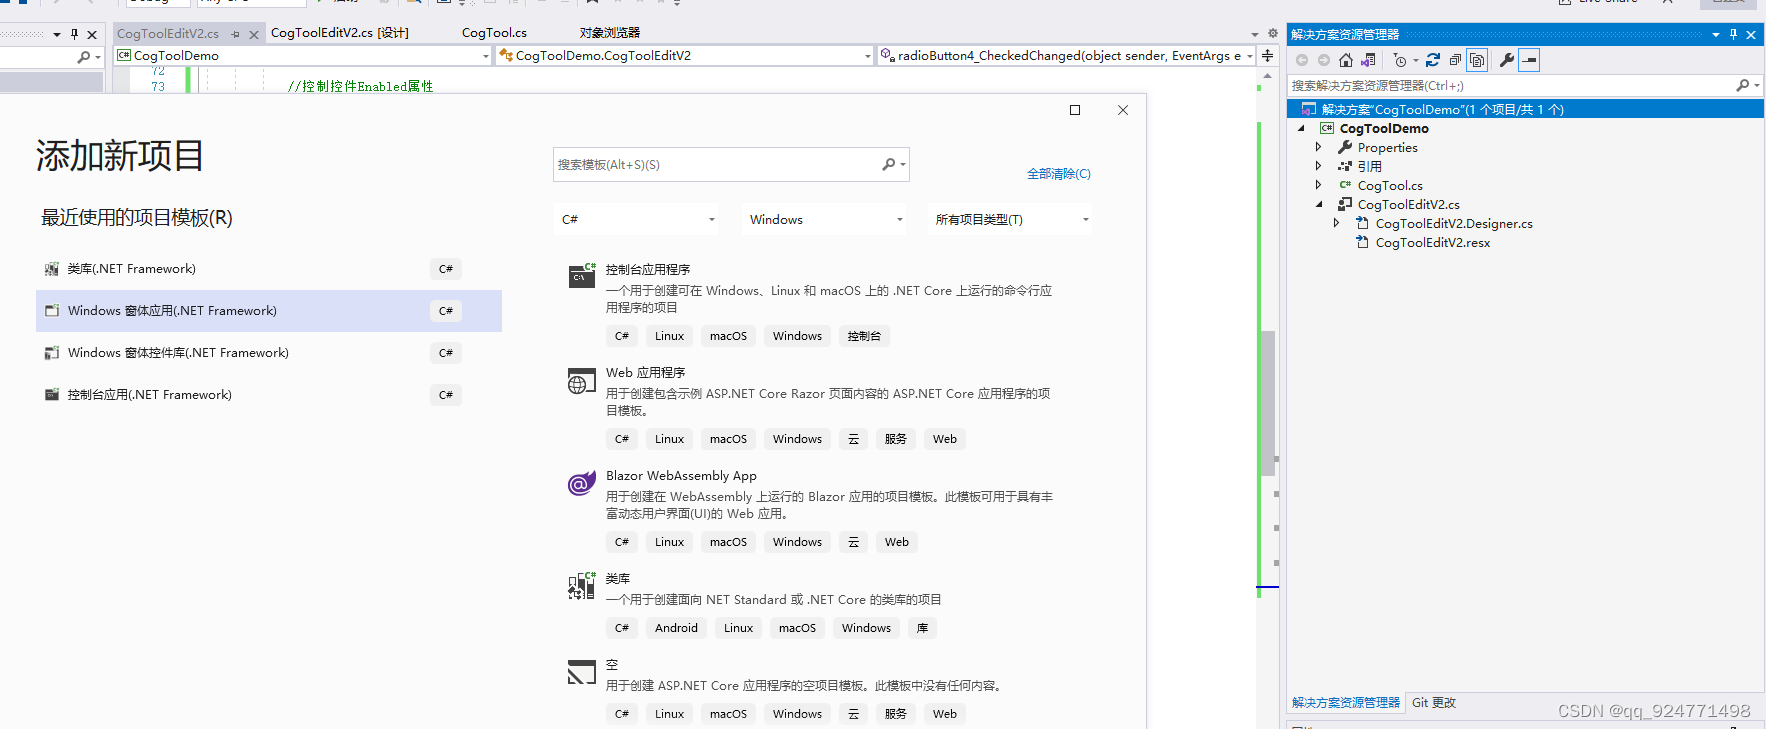
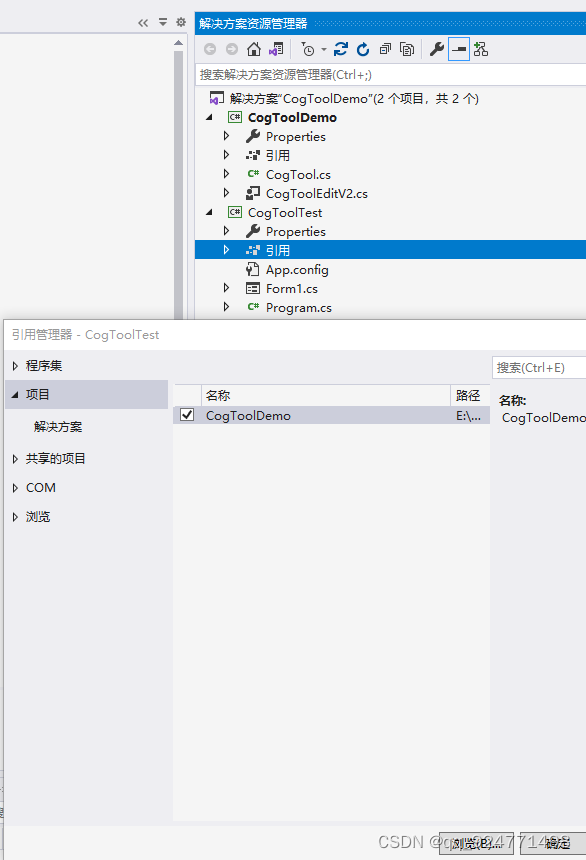
1、新建Windows类库
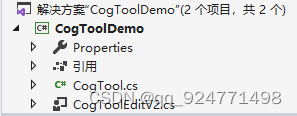
类库里面添加类和用户控件
2、CogTool
2.1、环境
需要Cognex.VisionPro 和 Cognex.VisionPro.Core 的引用
2.2、代码
using Cognex.VisionPro.Implementation;
using System;
using System.Collections.Generic;
using System.Linq;
using System.Text;
using System.Threading.Tasks;
using System.Runtime.Serialization;
using System.ComponentModel;
using System.Windows.Forms;
using Cognex.VisionPro;
using System.Drawing;

namespace CogToolDemo
{
    //需要Cognex.VisionPro 和 Cognex.VisionPro.Core 的引用

    [Serializable]
    [Editor(typeof(CogToolEditV2), typeof(Control))]   //CogToolEditV2为用户控件名称
    [CogDefaultToolInputTerminal(0, "InputImage", "InputImage")]
    [CogDefaultToolOutputTerminal(0, "OutputImage", "OutputImage")]
    [System.ComponentModel.DesignerCategory("")]
    public class CogTool : Cognex.VisionPro.Implementation.CogToolBase
    {
        #region 私有变量

        // 输入图像(可以不序列化输入图像)
        [CogSerializationOptionsAttribute(CogSerializationOptionsConstants.InputImages)]
        private ICogImage _InputImage;

        // 输出图像(可以不序列化输出图像)
        [CogSerializationOptionsAttribute(CogSerializationOptionsConstants.OutputImages)]
        private ICogImage _OutputImage;


        //------------新增私有变量-------------

        /// <summary>
        /// 图像算法类型-默认为0不处理图像
        /// </summary>
        private int _ImageProcessingType = 0;

        #endregion

        #region 构造函数和clone

        //无参构造函数
        public CogTool()
        {
        }

        public CogTool(CogTool otherTool)
            : base(otherTool)
        {

            // 输入图像
            if (otherTool._InputImage != null)
                _InputImage = otherTool._InputImage;

            // 输出图像
            if (otherTool._OutputImage != null)
            {
                //输入图像和输出图像相同
                if (Object.ReferenceEquals(otherTool._InputImage,
                                           otherTool._OutputImage))
                    _OutputImage = _InputImage;
                //输入图像和输出图像不同
                else
                    _OutputImage = otherTool._OutputImage;
            }

            _ImageProcessingType = otherTool._ImageProcessingType;
        }

        private CogTool(SerializationInfo info, StreamingContext context)
            : base(info, context)
        {
        }

        protected override object Clone() { return new CogTool(this); }
        #endregion

        #region 状态标志
        // 为返回可变数据的每个属性或方法定义一个 64 位状态标志常量。
        // 常量的名称必须是“Sf”,后跟属性或方法的名称。
        // 第一个状态标志应设置为“CogToolBase.SfNextSf”。
        private const long Sf0 = CogToolBase.SfNextSf;
        public const long SfInputImage = Sf0 << 0;
        public const long SfOutputImage = Sf0 << 1;
        public const long SfImageProcessing = Sf0 << 2;
        protected new const long SfNextSf = Sf0 << 3;
        #endregion

        #region GetSet
        public ICogImage InputImage
        {
            get { return _InputImage; }
            set
            {
                if (!Object.ReferenceEquals(_InputImage, value))
                {
                    _InputImage = value;
                    // 有值输入时,调用OnChanged更改状态
                    OnChanged(SfInputImage | SfCreateCurrentRecord);
                }
            }
        }

        public ICogImage OutputImage
        {
            get { return _OutputImage; }
        }

        public int ImageProcessingType
        {
            get { return _ImageProcessingType; }
            set
            {
                if (_ImageProcessingType != value)
                {
                    _ImageProcessingType = value;
                    OnChanged(SfImageProcessing);
                }
            }
        }
        #endregion

        #region CogToolBase overrides
        /// <summary>
        /// 以编程方式或从编辑控件调用工具时执行。
        /// </summary>
        /// <param name="message">
        /// 返回的信息(异常、自定义信息)
        /// </param>
        /// <returns></returns>
        protected override CogToolResultConstants InternalRun(ref string message)
        {
            // 输入图像为空抛异常
            if (_InputImage == null)
                throw new Cognex.VisionPro.Exceptions.CogOperatorNoInputImageException();

            ICogImage cogImage = _InputImage;
            Bitmap bitmap = cogImage.ToBitmap();

            switch (_ImageProcessingType)
            {
                case 0:
                    _OutputImage = cogImage;  //将输入图片给到输出
                    message = "默认";
                    break;
                case 1: //灰度化图像

                    try
                    {
                        for (int i = 0; i < bitmap.Width; i++)
                        {
                            for (int j = 0; j < bitmap.Height; j++)
                            {
                                Color color = bitmap.GetPixel(i, j);  //在此获取指定的像素的颜色
                                int gray = (int)(color.R * 0.3 + color.G * 0.59 + color.B * 0.11);
                                Color newColor = Color.FromArgb(gray, gray, gray);
                                //设置指定像素的颜色  参数:坐标x,坐标y,颜色
                                bitmap.SetPixel(i, j, newColor);
                            }
                        }
                        //将Bitmap转为8位灰度
                        cogImage = new CogImage8Grey(bitmap);

                        _OutputImage = cogImage;
                        message = "图像灰度化成功";
                    }
                    catch (Exception e)
                    {
                        message = "图像处理失败" +e.Message;
                        // 返回工具运行失败状态
                        return CogToolResultConstants.Error;
                    }
                    break;
                case 2: //反转

                    try
                    {
                        for (int i = 0; i < bitmap.Width - 1; i++)
                        {
                            for (int j = 0; j < bitmap.Height - 1; j++)
                            {
                                Color color = bitmap.GetPixel(i, j);  //在此获取指定的像素的颜色
                                int gray = (int)((255 - color.R + 255 - color.G + 255 - color.B) / 3);
                                Color newColor = Color.FromArgb(gray, gray, gray);
                                bitmap.SetPixel(i, j, newColor);
                            }
                        }
                        //将Bitmap转为8位灰度
                        cogImage = new CogImage8Grey(bitmap);

                        _OutputImage = cogImage;
                        message = "图像反转成功";
                    }
                    catch (Exception e)
                    {
                        message = "图像处理失败" + e.Message;
                        // 返回工具运行失败状态
                        return CogToolResultConstants.Error;
                    }
                    break;
                case 3: //二值化
                    try
                    {
                        for (int i = 0; i < bitmap.Width; i++)
                        {
                            for (int j = 0; j < bitmap.Height; j++)
                            {
                                //获取该点的像素的RGB的颜色
                                Color color = bitmap.GetPixel(i, j);
                                int value = 255 - color.B;
                                Color newColor = value > 125 ? Color.FromArgb(0, 0, 0) : Color.FromArgb(255, 255, 255);
                                bitmap.SetPixel(i, j, newColor);
                            }
                            //将Bitmap转为8位灰度
                            cogImage = new CogImage8Grey(bitmap);

                            _OutputImage = cogImage;
                            message = "图像二值化成功";
                        }
                    }
                    catch (Exception e)
                    {
                        message = "图像处理失败" + e.Message;
                        // 返回工具运行失败状态
                        return CogToolResultConstants.Error;
                    }
                    break;
                default:
                    _OutputImage = cogImage;  //将输入图片给到输出
                    break;
            }


            // 输出图像状态改变
            OnChanged(SfOutputImage | SfCreateLastRunRecord);

            // 返回工具运行成功状态
            return CogToolResultConstants.Accept;
        }


        /// <summary>
        /// 设置要在工具运行前显示在编辑控件中的图像;通常是输入图像。如果工具使用某个区域,通常也会包含该区域。
        /// </summary>
        /// <param name="newRecord">
        /// A newly-created record to which image sub-records may be added.
        /// </param>
        /// <param name="currentRecordEnable">
        /// An integer bit pattern indicating what images and graphics to add.
        /// </param>
        protected override void InternalCreateCurrentRecord(ICogRecord newRecord,
                                                            int currentRecordEnable)
        {
            // Add a new image record to the top-level "newRecord".
            newRecord.SubRecords.Add(
              new CogRecord(
                "InputImage",                  // Subrecord key for this record,
                typeof(ICogImage),         // Type of its content,
                CogRecordUsageConstants.Input, // Record represents an input,
                false,                         // Record content is unchanging,
                _InputImage,                   // The record's content,
                "InputImage"));                // Annotation (for display)
        }

        /// <summary>
        /// 设置要在工具运行后显示的图像。通常包括输出图像。如果该工具提供了结果图形,它们也包括在这里。
        /// </summary>
        /// <param name="newRecord">
        /// A newly-created record to which image sub-records may be added.
        /// </param>
        /// <param name="lastRunRecordEnable">
        /// An integer bit pattern indicating what images and graphics to add.
        /// </param>
        /// <param name="lastRunRecordDiagEnable">
        /// An integer bit pattern indicating what 'Diag' images and graphics
        /// to add.  'Diag' images and graphics are specified using a separate
        /// set of bits because they make the tool run significantly slower
        /// (or use significantly more memory).  Users must re-run the tool
        /// to see these items.
        /// </param>
        protected override void InternalCreateLastRunRecord(ICogRecord newRecord,
                                                            int lastRunRecordEnable,
                                                            int lastRunRecordDiagEnable)
        {
            // Add a new image record to the top-level "newRecord".
            newRecord.SubRecords.Add(
              new CogRecord(
                "OutputImage",                  // Subrecord key for this record,
                typeof(ICogImage),          // Type of its content,
                CogRecordUsageConstants.Result, // Record represents a result,
                false,                          // Record content is unchanging,
                _OutputImage,                   // The record's content,
                "OutputImage"));                // Annotation (for display)
        }
        #endregion
    }
}
3、CogToolEditV2用户控件
3.1、环境
1、需要Cognex.VisionPro.Controls的引用
2、需要继承CogToolEditControlBaseV2类
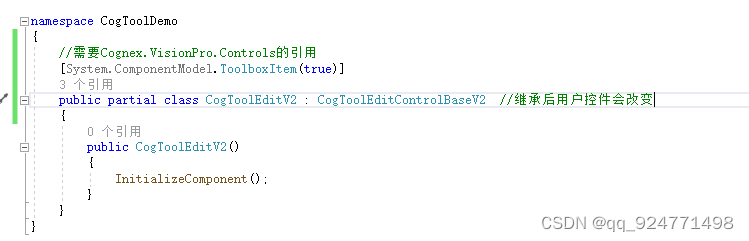
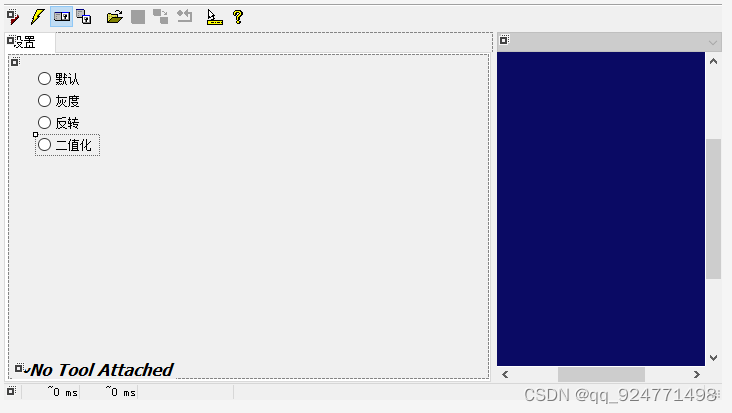
继承后,控件会如下图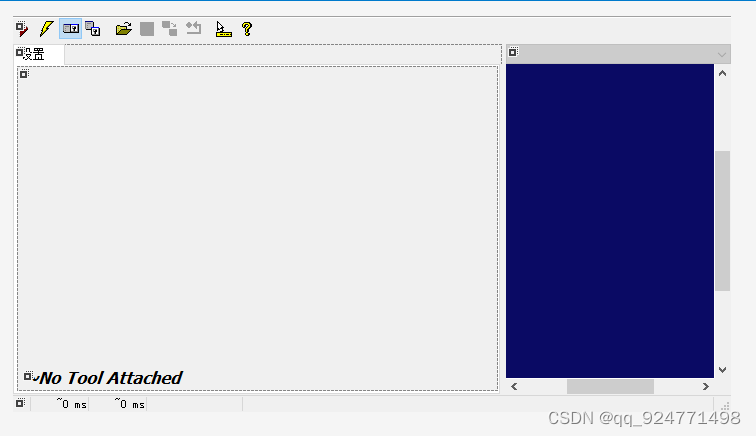
3.2、代码
using Cognex.VisionPro;
using System;
using System.Collections.Generic;
using System.ComponentModel;
using System.Data;
using System.Drawing;
using System.Linq;
using System.Text;
using System.Threading.Tasks;
using System.Windows.Forms;

namespace CogToolDemo
{
    //需要Cognex.VisionPro.Controls的引用
    [System.ComponentModel.ToolboxItem(true)]
    public partial class CogToolEditV2 : CogToolEditControlBaseV2  //继承后用户控件会改变
    {
        //构造函数
        public CogToolEditV2()
          : base(false)
        {
            InitializeComponent();
            tbbElectric.Visible = false;
            //选中默认项
            this.radioButton1.Checked = true;
        }

        //创建Subject属性,包括getter和setter。对象是vision工具的实例,其状态将通过此控件公开
        [Browsable(false)]
        [DesignerSerializationVisibility(DesignerSerializationVisibility.Hidden)]
        public CogTool Subject
        {
            get { return base.GetSubject() as CogTool; }

            set { base.SetSubject(value); }

        }

        //在Subject被替换后的第一个线程安全机会调用此方法。控件应使用此方法使用来自新Subject的值(重新)初始化自身。
        protected override void InitializeFromSubject()
        {
            base.InitializeFromSubject();

            SetupSettingsTab();

        }

        //当Subject引发已更改的事件时,都会调用此方法。此函数始终在GUI线程上执行。
        //在这里,你可以更新其关联工具属性值可能已更改的任何子控件,如所提供的已更改事件参数的状态标志所示。
        protected override void SubjectValuesChanged(
          object sender,
          CogChangedEventArgs e)
        {
            base.SubjectValuesChanged(sender, e);

            if ((e.StateFlags & CogTool.SfImageProcessing) != 0)
            {
                SetupSettingsTab();

            }

        }


        // 每当SubjectInUse属性发生更改时,就会调用此方法。这是启用或禁用子控制的好地方。
        protected override void SubjectInUseChanged()
        {
            base.SubjectInUseChanged();

            bool bEnabled = false;
            if (Subject != null)  //Subject不为空
                if (!SubjectInUse)   //Subject没有运行
                    bEnabled = true;

            //控制控件Enabled属性
            radioButton1.Enabled = bEnabled;
            radioButton2.Enabled = bEnabled;
            radioButton3.Enabled = bEnabled;
            radioButton4.Enabled = bEnabled;

        } // protected override void SubjectInUseChanged()


        // SetupSettingsTab() 访问 Subject.xxx,
        // 因此只能在安全时间调用(例如,当 SubjectInUse 为 false 时)。
        private void SetupSettingsTab()
        {
            AssertSafe();

            bool bChecked = false;
            if (Subject != null)
                bChecked = true;

            if (bChecked)
            {
                //工具窗体关闭后,重新获取控件状态
                switch (Subject.ImageProcessingType)
                {
                    case 0:
                        radioButton1.Checked = true;
                        radioButton2.Checked = false;
                        radioButton3.Checked = false;
                        radioButton4.Checked = false;
                        break;
                    case 1:
                        radioButton1.Checked = false;
                        radioButton2.Checked = true;
                        radioButton3.Checked = false;
                        radioButton4.Checked = false;
                        break;
                    case 2:
                        radioButton1.Checked = false;
                        radioButton2.Checked = false;
                        radioButton3.Checked = true;
                        radioButton4.Checked = false;
                        break;
                    case 3:
                        radioButton1.Checked = false;
                        radioButton2.Checked = false;
                        radioButton3.Checked = false;
                        radioButton4.Checked = true;
                        break;
                    default:
                        radioButton1.Checked = true;
                        radioButton2.Checked = false;
                        radioButton3.Checked = false;
                        radioButton4.Checked = false;
                        break;
                }
            }


            bool bEnabled = false;
            if (Subject != null)
                bEnabled = true;
            //控制控件Enabled属性
            radioButton1.Enabled = bEnabled;
            radioButton2.Enabled = bEnabled;
            radioButton3.Enabled = bEnabled;
            radioButton4.Enabled = bEnabled;

        }

        private void radioButton1_CheckedChanged(object sender, EventArgs e)
        {
            if (Subject == null)
                return;
            if (SubjectInUse)
                return;

            Subject.ImageProcessingType = 0;
        }

        private void radioButton2_CheckedChanged(object sender, EventArgs e)
        {
            if (Subject == null)
                return;
            if (SubjectInUse)
                return;

            Subject.ImageProcessingType = 1;
        }

        private void radioButton3_CheckedChanged(object sender, EventArgs e)
        {
            if (Subject == null)
                return;
            if (SubjectInUse)
                return;

            Subject.ImageProcessingType = 2;
        }

        private void radioButton4_CheckedChanged(object sender, EventArgs e)
        {
            if (Subject == null)
                return;
            if (SubjectInUse)
                return;

            Subject.ImageProcessingType = 3;
        }
    }
}
4、环境和注意事项
1、目标平台为Any CPU,后面窗体添加此控件的时候就不会出问题
2、生成的DLL要与VisionPro工具名一致,不一致的话后面添加进VisionPro里面会获取不到ico图标

二、测试并生成VTT文件
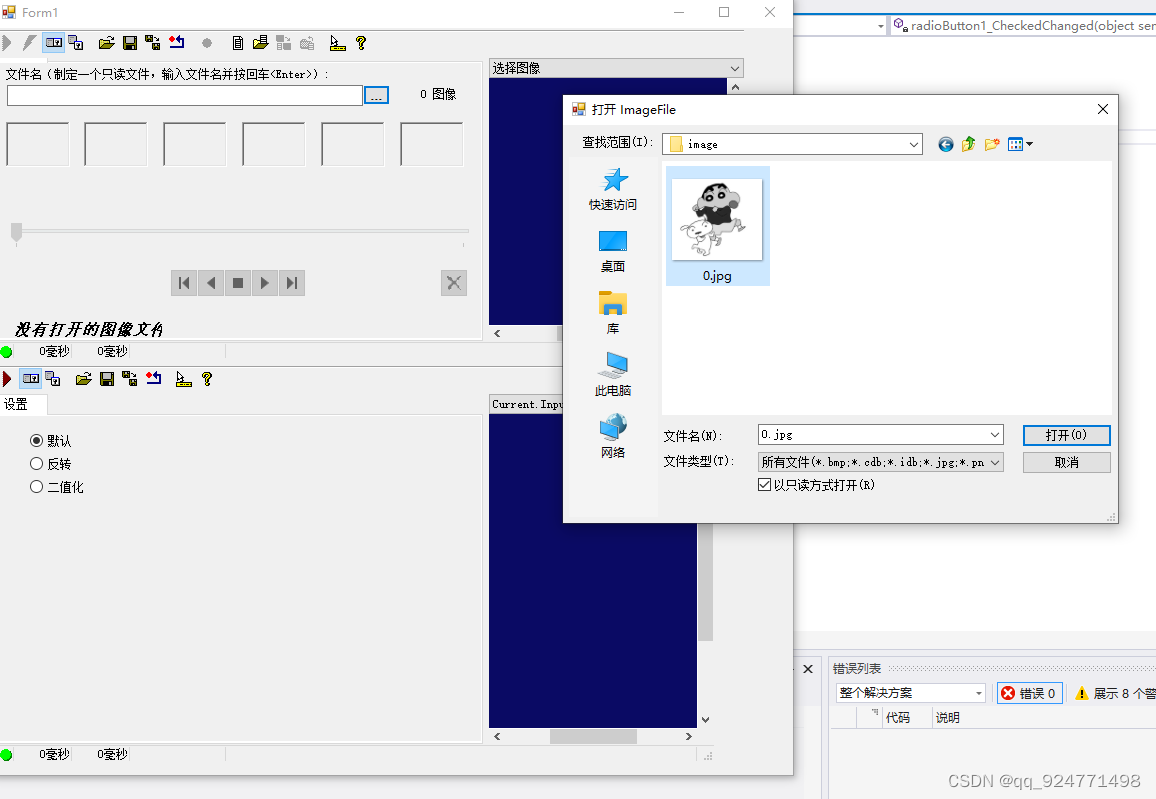
1、从解决方案中添加一个新建的Windows窗体应用
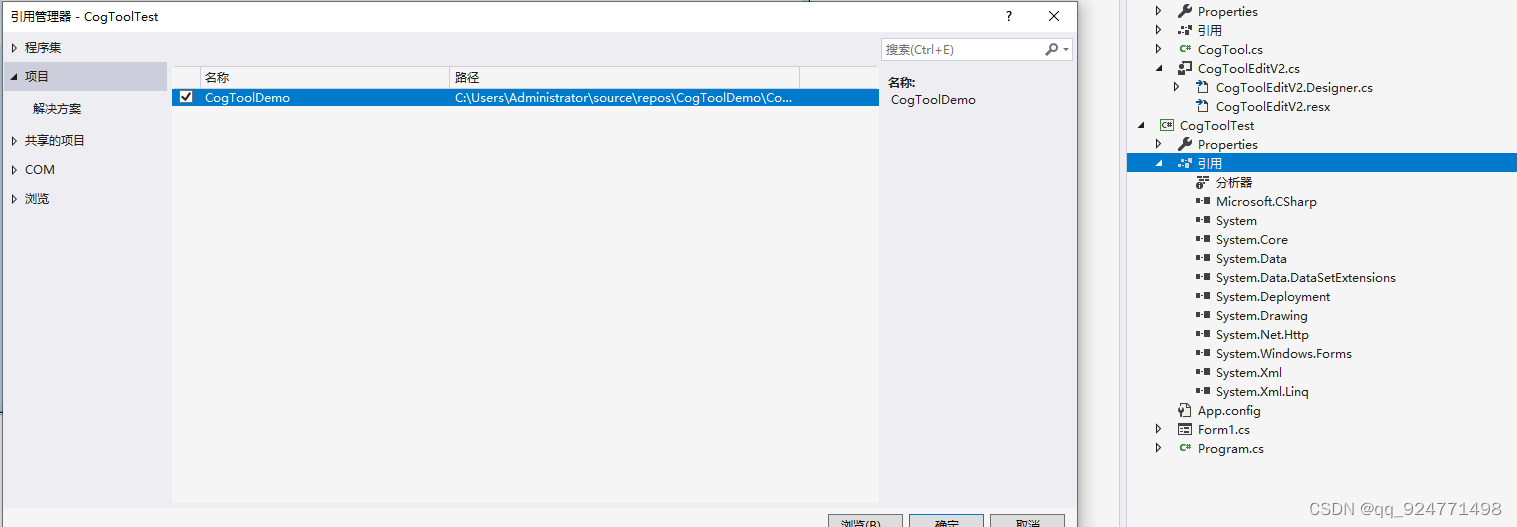
2、添加引用
3、在窗体加入CogToolEditV21控件、CogTool、CogImageFileEditV2(传输图像,测试写的自定义工具)
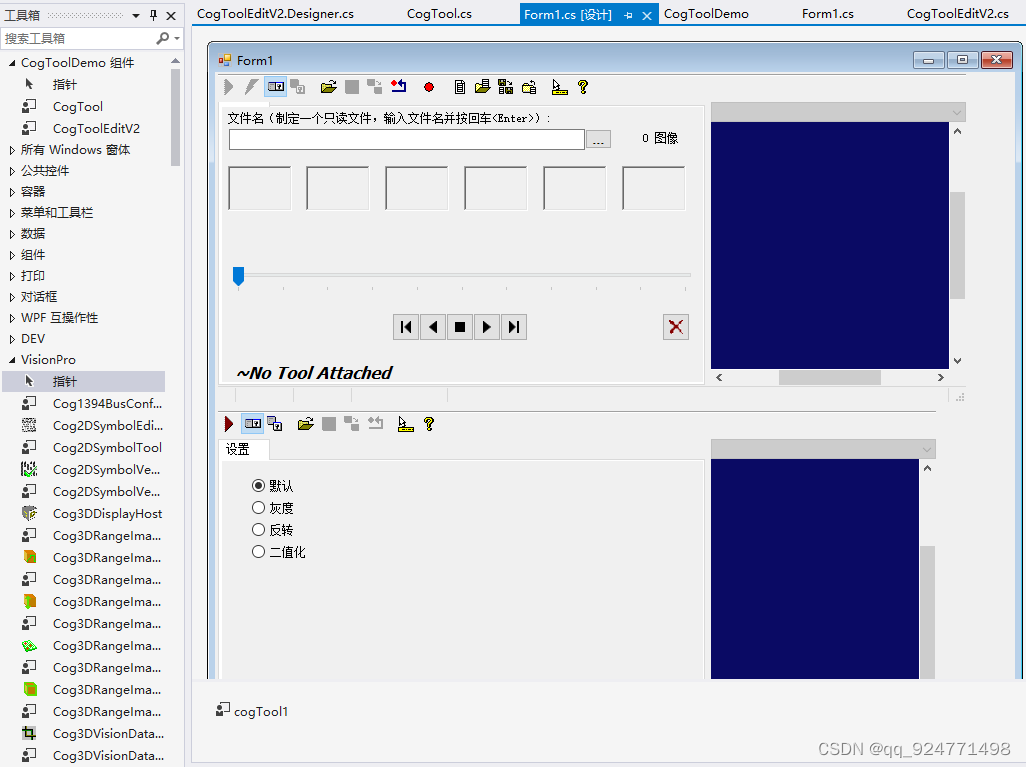
记得添加引用
4、生成VTT文件,通过CogImageFileEditV2传入图片
    public partial class Form1 : Form
    {
        public Form1()
        {
            InitializeComponent();
            cogImageFileEditV21.Subject.Ran += new EventHandler(Subject_Ran);
            //生成VTT
            CogSerializer.SaveObjectToFile(cogTool1, Directory.GetCurrentDirectory() + "\\CogTool.vtt");
        }

        void Subject_Ran(object sender, EventArgs e)
        {
            //将cogImageFile里的图像输入进cogToolEdit里
            cogToolEditV21.Subject.InputImage = cogImageFileEditV21.Subject.OutputImage;
        }
    }
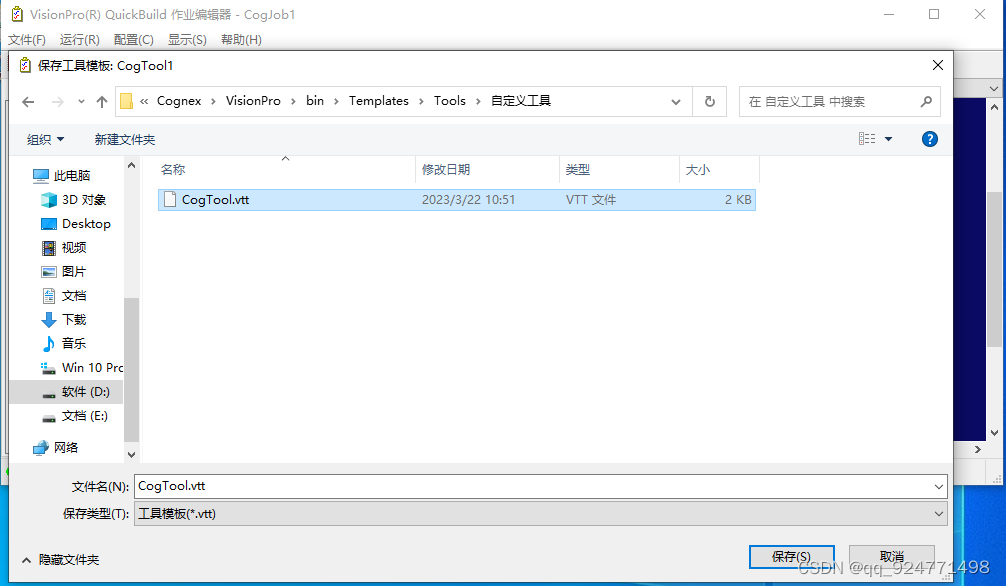
5、执行后,在项目的bin\debug中找到VTT文件
6、运行窗体、测试工具功能

三、将自定义工具加入到Vision pro中
1、创建一个16x16像素的图标,文件格式为.ico
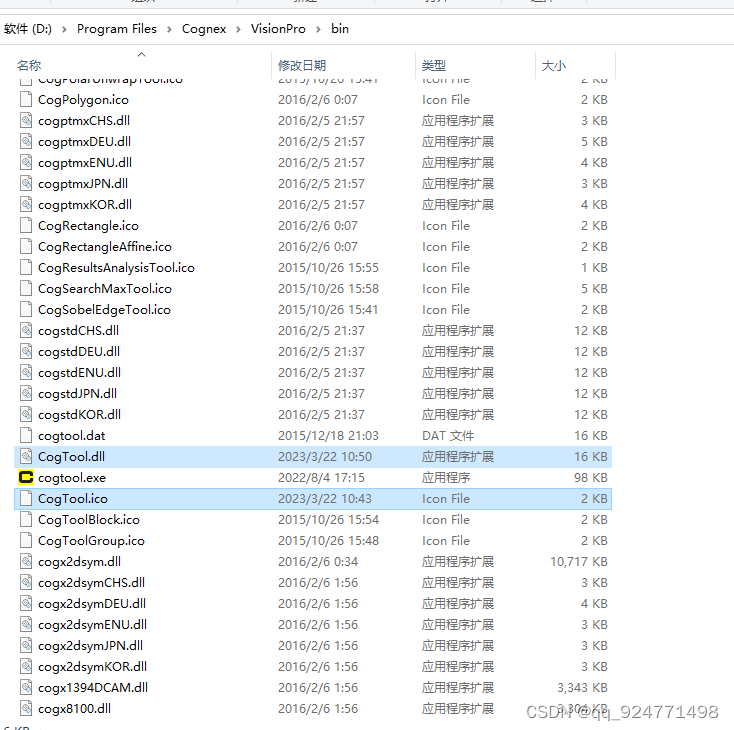
2、打开vision pro文件位置

3、ico、dll:放在vision pro文件所在位置
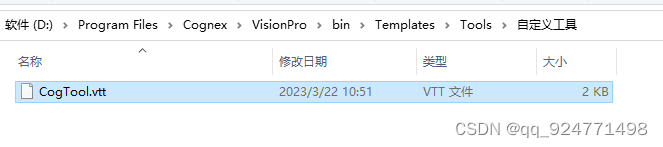
4、vtt:放在vision pro文件所在位置下的Templates \ Tools
也可自己新建文件夹将VTT文件放入
5、将工具添加输入输出图像的终端
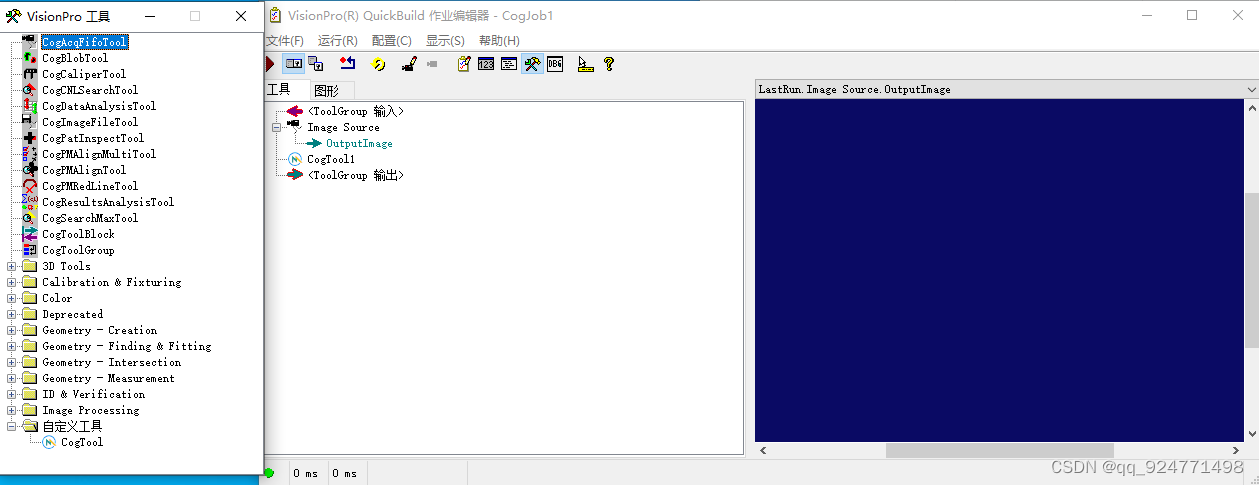
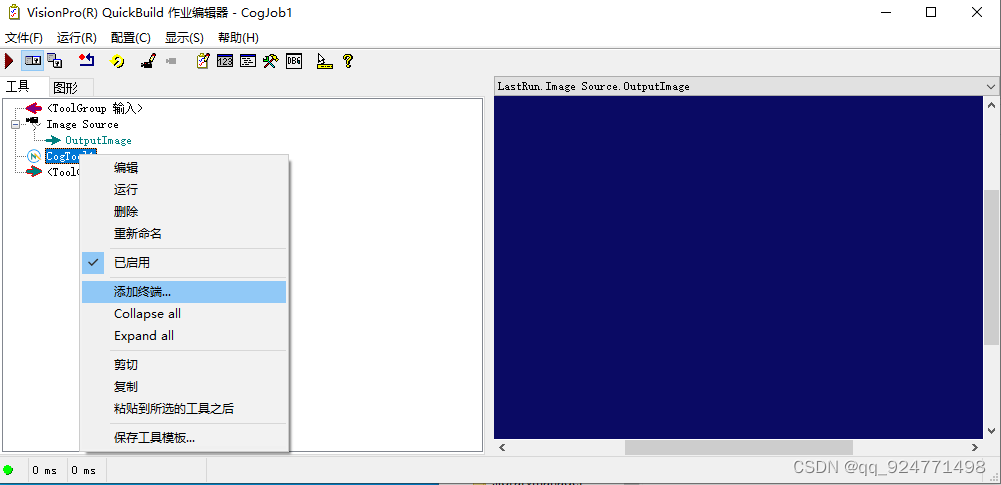
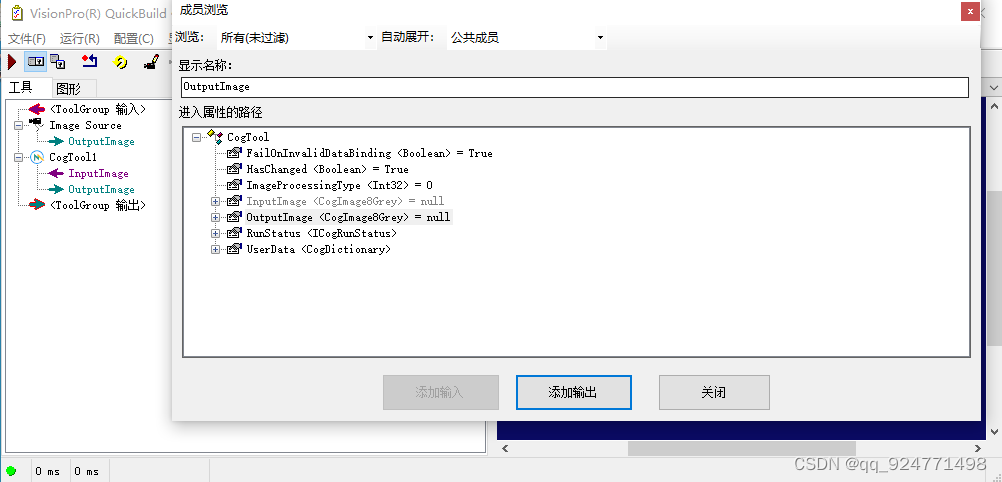
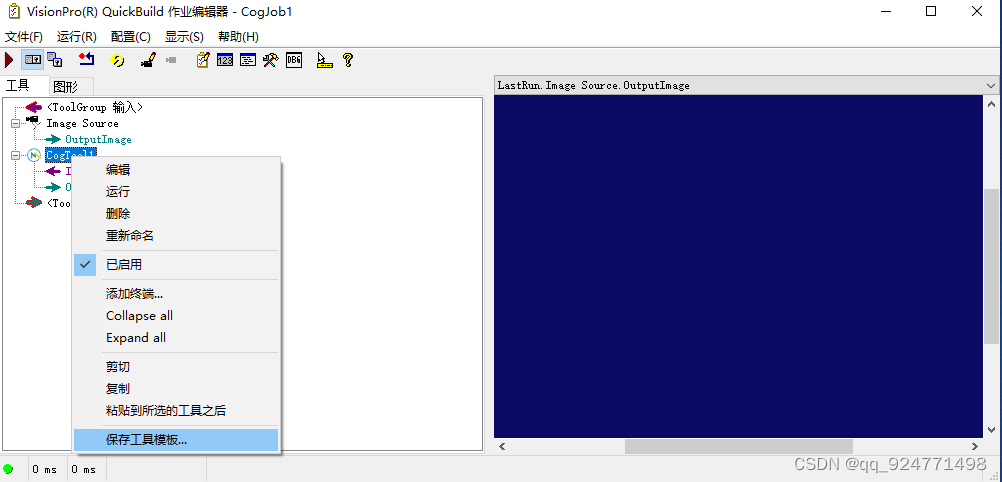
保存后重新启动VisionPro
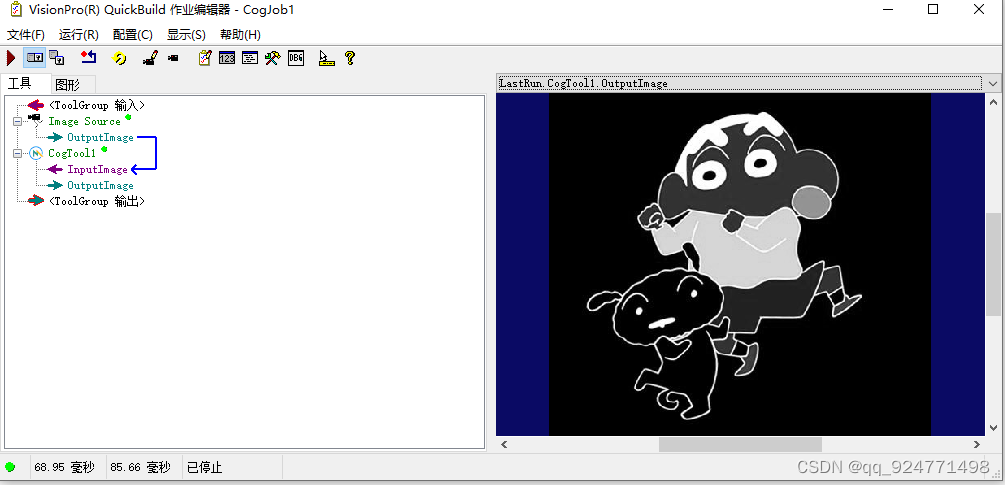
5、展示
四、下载地址(VisionPro所需要的dll、ico、图片都在源代码里)
很多人找我要源码,Github又不太好上传大文件,我就把我的网站新增了下载功能,如果下载接口出现问题请大家评论区回复一下,谢谢。


 561
561


 被折叠的 条评论
为什么被折叠?
被折叠的 条评论
为什么被折叠?
 到【灌水乐园】发言


