


AI_WEB
链接:resnet分类模型
提取码:nh4r
查看nginx错误日志

cat /var/log/nginx/error.log
- 1.基础环境和软件库需求
- 2.Xshell远程连接服务器
- 3.安装Linux版本的Anaconda
- 4.安装并测试Django
- 5.Git使用
- 6.服务器拉取仓库代码
- 7.规范django开发文件
- 8.配置settings.py文件
- 9.复习一遍git,将修改后的代码上传远程仓库
- 10.使用django进行简单的网页开发
- 11.安装windows-CPU版pytorch
- 12.测试运行ResNet分类模型
- 13.将Resnet模型集成在django
- 14.Linux服务器端安装pytorch cpu版
- 15.代码上传和远程服务器git代码拉取
- 16.测试运行,报错调整
- 17.项目部署
- 18.使用Ngnix进行静态资源部署
- 19.用supervisor管理uwsgi进程
基础环境和软件库需求
服务器购买:
- 阿里云学生云服务器
- 或者腾讯云学生云服务器
记住是云服务器,原生的服务器,不要安装什么php node mysql 等的轻量级web服务器
买了之后,把防火墙设置一下,tcp全开,否则浏览器访问不了
价格是10元左右一个月
1个月就行,建议买4个月
所需软件:
百度云盘地址
提取码: kh2f
Xsehll : 远程连接工具
Anaconda : python工具集成环境
PyCharm: python编程集成环境
Xshell远程连接服务器
1. 输入远程连接命令
ssh root@115.29.***.***

2.输入密码

3.连接成功

安装Linux版本的Anaconda
1.上传Linux版本的Anaconda
- 安装上传文件的软件:
WinSCP-5.15.9-Setup - 使用
WinSCP-5.15.9-Setup
1.远程连接

2.连接成功

3.上传文件
由左向右拖动即可


安装
cd
ls
sh Anaconda3-5.1.0-Linux-x86_64.sh

回车
直到下图
输入
yes


回车后会报错


安装bzip2
yum install -y bzip2

安装完成后,再次输入
sh Anaconda3-5.1.0-Linux-x86_64.sh

再报错


rm -rf anaconda3/


再次输入
sh Anaconda3-5.1.0-Linux-x86_64.sh
#记得回车

yes


no


重启服务器
reboot
输入conda命令,显示入下图,即安装成功

conda

安装并测试Django
1.安装Django2.0
# 安装
 pip install django==2.0

安装成功!
2.创建Django项目
django-admin startproject Ai_Web

 cd Ai_Web/
 ls

3.测试运行
python manage.py runserver 0.0.0.0:8000

在浏览器中输入地址
http://115.29.205.215:8000/

显示报错页面,表示初步成功,否则就是404

Git使用
个人自然强烈建议学着这个用用,当然对这个项目影响不是很大
1.注册 码云gitee
注册成功后的个人界面

这个也算是最后的初成品吧:https://gitee.com/major_s/AI_WEB.git
实际网站如下图

2.创建代码仓库
点击仓库 右边的 “+”号,新建仓库


--------------------------------------------------------------》
之后可以照下面填:

之后 点击创建:

创建之后:

克隆/下载:的复制地址就是仓库地址

3.上传代码进仓库
- (1)安装windows上的开发环境
- (2)安装windows的django
pip install django==2.0
- (3)使用PyCharm开启Django项目
使用cmd命令行界面新建django项目
django-admin startproject Ai_Web

pycharm打开项目:

选择编译器,即安装Anaconda的目录下的python.exe

测试运行:
python manage.py runserver

结果:

(4)安装git
百度网盘里有
(5)上传:
进入Ai_Web文件夹

右击 选择git bash here

输入命令:
git init

设置远程仓库地址
git remote add origin https://gitee.com/major_s/AiWeb.git
拉取远程仓库:
git pull origin master

添加上传
git add .
git commit -m "第一次提交"
git push origin master -f
填入账号密码


上传成功

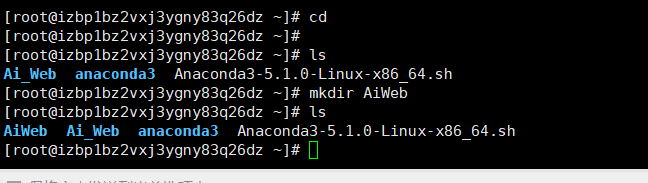
服务器拉取仓库代码
1.创建文件夹
cd
ls
mkdir AiWeb
ls
2. 初始化服务器端Git仓库并拉取远程仓库代码
cd AiWeb/
yum -y install git # 下载git

# 初始化仓库
git init

# 关联远程仓库
git remote add origin https://gitee.com/major_s/AiWeb.git
# 拉取代码
git pull origin master
# 查看当前文件夹
ls

测试运行
python manage.py runserver 0.0.0.0:8000

浏览器输入
http://115.29.205.215:8000/

显示如图界面表示可用,否则404
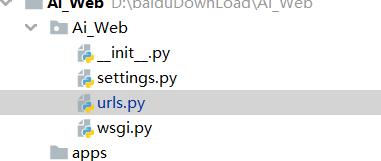
规范django开发文件
1.原文件目录

修改目录


修改后目录

配置settings.py文件
1.修改settings.py文件
- 原文件
"""
Django settings for Ai_Web project.

Generated by 'django-admin startproject' using Django 2.0.

For more information on this file, see
https://docs.djangoproject.com/en/2.0/topics/settings/

For the full list of settings and their values, see
https://docs.djangoproject.com/en/2.0/ref/settings/
"""

import os

# Build paths inside the project like this: os.path.join(BASE_DIR, ...)
BASE_DIR = os.path.dirname(os.path.dirname(os.path.abspath(__file__)))


# Quick-start development settings - unsuitable for production
# See https://docs.djangoproject.com/en/2.0/howto/deployment/checklist/

# SECURITY WARNING: keep the secret key used in production secret!
SECRET_KEY = 'na4$ef7#ro8!74&(-mrlljjo+plqcl!(n8(8g6q-^v96!zqu8v'

# SECURITY WARNING: don't run with debug turned on in production!
DEBUG = True

ALLOWED_HOSTS = []


# Application definition

INSTALLED_APPS = [
    'django.contrib.admin',
    'django.contrib.auth',
    'django.contrib.contenttypes',
    'django.contrib.sessions',
    'django.contrib.messages',
    'django.contrib.staticfiles',
]

MIDDLEWARE = [
    'django.middleware.security.SecurityMiddleware',
    'django.contrib.sessions.middleware.SessionMiddleware',
    'django.middleware.common.CommonMiddleware',
    'django.middleware.csrf.CsrfViewMiddleware',
    'django.contrib.auth.middleware.AuthenticationMiddleware',
    'django.contrib.messages.middleware.MessageMiddleware',
    'django.middleware.clickjacking.XFrameOptionsMiddleware',
]

ROOT_URLCONF = 'Ai_Web.urls'

TEMPLATES = [
    {
        'BACKEND': 'django.template.backends.django.DjangoTemplates',
        'DIRS': [],
        'APP_DIRS': True,
        'OPTIONS': {
            'context_processors': [
                'django.template.context_processors.debug',
                'django.template.context_processors.request',
                'django.contrib.auth.context_processors.auth',
                'django.contrib.messages.context_processors.messages',
            ],
        },
    },
]

WSGI_APPLICATION = 'Ai_Web.wsgi.application'


# Database
# https://docs.djangoproject.com/en/2.0/ref/settings/#databases

DATABASES = {
    'default': {
        'ENGINE': 'django.db.backends.sqlite3',
        'NAME': os.path.join(BASE_DIR, 'db.sqlite3'),
    }
}


# Password validation
# https://docs.djangoproject.com/en/2.0/ref/settings/#auth-password-validators

AUTH_PASSWORD_VALIDATORS = [
    {
        'NAME': 'django.contrib.auth.password_validation.UserAttributeSimilarityValidator',
    },
    {
        'NAME': 'django.contrib.auth.password_validation.MinimumLengthValidator',
    },
    {
        'NAME': 'django.contrib.auth.password_validation.CommonPasswordValidator',
    },
    {
        'NAME': 'django.contrib.auth.password_validation.NumericPasswordValidator',
    },
]


# Internationalization
# https://docs.djangoproject.com/en/2.0/topics/i18n/

LANGUAGE_CODE = 'en-us'

TIME_ZONE = 'UTC'

USE_I18N = True

USE_L10N = True

USE_TZ = True


# Static files (CSS, JavaScript, Images)
# https://docs.djangoproject.com/en/2.0/howto/static-files/

STATIC_URL = '/static/'
2.解释修改
1 1 1
ALLOWED_HOSTS = []
添加可被访问的地址,及开发机ip(127.0.0.1)和服务端ip(115.29.205.215)
ALLOWED_HOSTS = ['127.0.0.1','115.29.205.215']
2 2 2
MIDDLEWARE = [
    'django.middleware.security.SecurityMiddleware',
    'django.contrib.sessions.middleware.SessionMiddleware',
    'django.middleware.common.CommonMiddleware',
    'django.middleware.csrf.CsrfViewMiddleware',
    'django.contrib.auth.middleware.AuthenticationMiddleware',
    'django.contrib.messages.middleware.MessageMiddleware',
    'django.middleware.clickjacking.XFrameOptionsMiddleware',
]
注释一条防护csrf攻击
MIDDLEWARE = [
    'django.middleware.security.SecurityMiddleware',
    'django.contrib.sessions.middleware.SessionMiddleware',
    'django.middleware.common.CommonMiddleware',
    #'django.middleware.csrf.CsrfViewMiddleware',
    'django.contrib.auth.middleware.AuthenticationMiddleware',
    'django.contrib.messages.middleware.MessageMiddleware',
    'django.middleware.clickjacking.XFrameOptionsMiddleware',
]
3 3 3
TEMPLATES = [
    {
        'BACKEND': 'django.template.backends.django.DjangoTemplates',
        'DIRS': [],
        'APP_DIRS': True,
        'OPTIONS': {
            'context_processors': [
                'django.template.context_processors.debug',
                'django.template.context_processors.request',
                'django.contrib.auth.context_processors.auth',
                'django.contrib.messages.context_processors.messages',
            ],
        },
    },
]
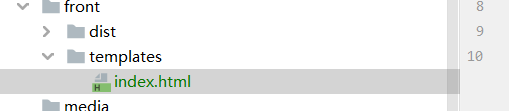
添加快捷static引入,同时添加模板地址
TEMPLATES = [
    {
        'BACKEND': 'django.template.backends.django.DjangoTemplates',
        'DIRS': [os.path.join(BASE_DIR,'front', 'templates')] # 模板地址
        ,
        'APP_DIRS': True,
        'OPTIONS': {
            'context_processors': [
                'django.template.context_processors.debug',
                'django.template.context_processors.request',
                'django.contrib.auth.context_processors.auth',
                'django.contrib.messages.context_processors.messages',
            ],
            'builtins': [   # 添加快捷static引入
                'django.templatetags.static'
            ]
        },
    },
]
4
4
4
锁定静态文件和媒体文件地址,可添加在最后
STATIC_ROOT = os.path.join(BASE_DIR,'static_dist')
STATICFILES_DIRS=[
    os.path.join(BASE_DIR,'front','dist')
]

MEDIA_ROOT = os.path.join(BASE_DIR, 'media')
MEDIA_URL = '/media/'
3.修改完成后的settings.py文件
"""
Django settings for Ai_Web project.

Generated by 'django-admin startproject' using Django 2.0.

For more information on this file, see
https://docs.djangoproject.com/en/2.0/topics/settings/

For the full list of settings and their values, see
https://docs.djangoproject.com/en/2.0/ref/settings/
"""

import os

# Build paths inside the project like this: os.path.join(BASE_DIR, ...)
BASE_DIR = os.path.dirname(os.path.dirname(os.path.abspath(__file__)))


# Quick-start development settings - unsuitable for production
# See https://docs.djangoproject.com/en/2.0/howto/deployment/checklist/

# SECURITY WARNING: keep the secret key used in production secret!
SECRET_KEY = 'na4$ef7#ro8!74&(-mrlljjo+plqcl!(n8(8g6q-^v96!zqu8v'

# SECURITY WARNING: don't run with debug turned on in production!
DEBUG = True

ALLOWED_HOSTS = ['127.0.0.1','115.29.205.215']


# Application definition

INSTALLED_APPS = [
    'django.contrib.admin',
    'django.contrib.auth',
    'django.contrib.contenttypes',
    'django.contrib.sessions',
    'django.contrib.messages',
    'django.contrib.staticfiles',
]

MIDDLEWARE = [
    'django.middleware.security.SecurityMiddleware',
    'django.contrib.sessions.middleware.SessionMiddleware',
    'django.middleware.common.CommonMiddleware',
    #'django.middleware.csrf.CsrfViewMiddleware',
    'django.contrib.auth.middleware.AuthenticationMiddleware',
    'django.contrib.messages.middleware.MessageMiddleware',
    'django.middleware.clickjacking.XFrameOptionsMiddleware',
]

ROOT_URLCONF = 'Ai_Web.urls'

TEMPLATES = [
    {
        'BACKEND': 'django.template.backends.django.DjangoTemplates',
        'DIRS': [os.path.join(BASE_DIR,'front', 'templates')]
        ,
        'APP_DIRS': True,
        'OPTIONS': {
            'context_processors': [
                'django.template.context_processors.debug',
                'django.template.context_processors.request',
                'django.contrib.auth.context_processors.auth',
                'django.contrib.messages.context_processors.messages',
            ],
            'builtins': [
                'django.templatetags.static'
            ]
        },
    },
]

WSGI_APPLICATION = 'Ai_Web.wsgi.application'


# Database
# https://docs.djangoproject.com/en/2.0/ref/settings/#databases

DATABASES = {
    'default': {
        'ENGINE': 'django.db.backends.sqlite3',
        'NAME': os.path.join(BASE_DIR, 'db.sqlite3'),
    }
}


# Password validation
# https://docs.djangoproject.com/en/2.0/ref/settings/#auth-password-validators

AUTH_PASSWORD_VALIDATORS = [
    {
        'NAME': 'django.contrib.auth.password_validation.UserAttributeSimilarityValidator',
    },
    {
        'NAME': 'django.contrib.auth.password_validation.MinimumLengthValidator',
    },
    {
        'NAME': 'django.contrib.auth.password_validation.CommonPasswordValidator',
    },
    {
        'NAME': 'django.contrib.auth.password_validation.NumericPasswordValidator',
    },
]


# Internationalization
# https://docs.djangoproject.com/en/2.0/topics/i18n/

LANGUAGE_CODE = 'en-us'

TIME_ZONE = 'UTC'

USE_I18N = True

USE_L10N = True

USE_TZ = True


# Static files (CSS, JavaScript, Images)
# https://docs.djangoproject.com/en/2.0/howto/static-files/

STATIC_URL = '/static/'
STATIC_ROOT = os.path.join(BASE_DIR,'static_dist')
STATICFILES_DIRS=[
    os.path.join(BASE_DIR,'front','dist')
]

MEDIA_ROOT = os.path.join(BASE_DIR, 'media')
MEDIA_URL = '/media/'
如果你要完全搬我这个,记得留用自己的,这个每个项目要不一样
SECRET_KEY = 'na4$ef7#ro8!74&(-mrlljjo+plqcl!(n8(8g6q-^v96!zqu8v'
4.测试运行
点击三角


浏览器查看:

成功
复习一遍git,将修改后的代码上传远程仓库
1.进入 项目地址,右击进入 Git bash here

2.输入命令
git add .
git commit -m "第二次提交"
git push origin master -f
3.输入账号密码


4.上传后

但是文件夹没有给我上传上去,我有点懵,算了,先放着
5.服务器拉取代码
全局配置
git config --global user.email "1171657161@qq.com"
git config --global user.name "major_S"
通过git stash将工作区恢复到上次提交的内容,同时备份本地所做的修改,之后就可以正常git pull了
cd
ls
cd AiWeb/
git stash
git pull origin master


# 查看
cat settings.py

成功
服务器测试运行
python manage.py runserver 0.0.0.0:8000


成功显示:在这里就不是之前的访问错误,因为我们设置了ALLOWED_HOSTS = ['127.0.0.1','115.29.205.215']

使用django进行简单的网页开发
1.明确三个名词 URL 、视图函数、视图
url:就是访问的网址
http://115.29.205.215:8000/
视图函数:就是算法实现的地方,就是时常写代码的地方
class ResNet(View):

    def get(self,request):
        return render(request, 'CV/ResNet_Test.html')

    def post(self,request):

        #model_path = r"D:\PycharmProjects\AiWeb\media\checkpoint_14_epoch.pkl"
        model_path=os.path.join(BASE_DIR,'..' ,'media', 'checkpoint_14_epoch.pkl')
        # 2. model
        resnet18 = get_model(model_path, True)
        resnet18.to(device)
        resnet18.eval()


        img1=request.FILES.get('img1')
        img_rgb = imim.open(img1).convert('RGB')
        # step 2/4 : img --> tensor
        img_tensor = img_transform(img_rgb, inference_transform)
        img_tensor.unsqueeze_(0)
        img_tensor = img_tensor.to(device)

        # step 3/4 : tensor --> vector
        time_tic = time.time()
        outputs = resnet18(img_tensor)
        time_toc = time.time()

        # step 4/4 : visualization
        _, pred_int = torch.max(outputs.data, 1)
        pred_str = classes[int(pred_int)]

        return HttpResponse(pred_str)
视图:就是页面
index.html
<!DOCTYPE html>
<html lang="en">
<head>
    <meta charset="UTF-8">
    <title>Title</title>
</head>
<body>
   <h1>hello MajorS_S</h1>
</body>
</html>
三者关系如下:
url–>视图函数–>视图

url调用视图函数,视图函数调用页面

实例:
path(‘book/’,views.book_list) :左侧为url , 右侧为视图函数
2.进行简单页面开发
- 先写url和视图函数
进入urls.py
from django.contrib import admin
from django.urls import path,include
from django.http import HttpResponse
from django.conf.urls.static import static
from django.conf import settings
from django.shortcuts import render

def index(request):  # 视图函数
    return render(request,'index.html')

urlpatterns = [
    path('admin/', admin.site.urls),
    path('', index),  # ‘’代表127.0.0.1:8000的url,index和视图函数的def index(request):中的index保持一致

]
2.写index.html
进入templates
<!DOCTYPE html>
<html lang="en">
<head>
    <meta charset="UTF-8">
    <title>Title</title>
</head>
<body>
   <h1>hello MajorS_S</h1>
</body>
</html>

安装windows-CPU版pytorch
安装包在我百度云里,在下载目录下,输入cmd ,然后输入下面命令
pip install "torch-1.2.0+cpu-cp36-cp36m-win_amd64.whl"
pip install "torchvision-0.4.0+cpu-cp36-cp36m-win_amd64.whl"
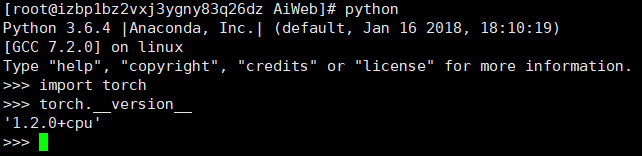
检验是否安装成功:
import torch
print(torch.__version__)
有输出就是成功
测试运行ResNet分类模型
测试代码、模型在我百度云里
import os
import time
import torch.nn as nn
import torch
import torchvision.transforms as transforms
from PIL import Image
from matplotlib import pyplot as plt
import torchvision.models as models
BASE_DIR = os.path.dirname(os.path.abspath(__file__))
device = torch.device("cuda" if torch.cuda.is_available() else "cpu")
device = torch.device("cpu")

# config
vis = True
# vis = False
vis_row = 4

norm_mean = [0.485, 0.456, 0.406]
norm_std = [0.229, 0.224, 0.225]

inference_transform = transforms.Compose([
    transforms.Resize(256),
    transforms.CenterCrop(224),
    transforms.ToTensor(),
    transforms.Normalize(norm_mean, norm_std),
])

classes = ["ants", "bees"]


def img_transform(img_rgb, transform=None):
    """
    将数据转换为模型读取的形式
    :param img_rgb: PIL Image
    :param transform: torchvision.transform
    :return: tensor
    """

    if transform is None:
        raise ValueError("找不到transform!必须有transform对img进行处理")

    img_t = transform(img_rgb)
    return img_t


def get_img_name(img_dir, format="jpg"):
    """
    获取文件夹下format格式的文件名
    :param img_dir: str
    :param format: str
    :return: list
    """
    file_names = os.listdir(img_dir)
    img_names = list(filter(lambda x: x.endswith(format), file_names))

    if len(img_names) < 1:
        raise ValueError("{}下找不到{}格式数据".format(img_dir, format))
    return img_names


def get_model(m_path, vis_model=False):

    resnet18 = models.resnet18()
    num_ftrs = resnet18.fc.in_features
    resnet18.fc = nn.Linear(num_ftrs, 2)

    checkpoint = torch.load(m_path)
    resnet18.load_state_dict(checkpoint['model_state_dict'])

    if vis_model:
        from torchsummary import summary
        summary(resnet18, input_size=(3, 224, 224), device="cpu")

    return resnet18


if __name__ == "__main__":

    img_dir = os.path.join("." ,"bees")
    model_path = "./checkpoint_14_epoch.pkl"
    time_total = 0
    img_list, img_pred = list(), list()

    # 1. data
    img_names = get_img_name(img_dir)
    num_img = len(img_names)

    # 2. model
    resnet18 = get_model(model_path, True)
    resnet18.to(device)
    resnet18.eval()

    with torch.no_grad():
        for idx, img_name in enumerate(img_names):

            path_img = os.path.join(img_dir, img_name)

            # step 1/4 : path --> img
            img_rgb = Image.open(path_img).convert('RGB')

            # step 2/4 : img --> tensor
            img_tensor = img_transform(img_rgb, inference_transform)
            img_tensor.unsqueeze_(0)
            img_tensor = img_tensor.to(device)

            # step 3/4 : tensor --> vector
            time_tic = time.time()
            outputs = resnet18(img_tensor)
            time_toc = time.time()

            # step 4/4 : visualization
            _, pred_int = torch.max(outputs.data, 1)
            pred_str = classes[int(pred_int)]

            if vis:
                img_list.append(img_rgb)
                img_pred.append(pred_str)

                if (idx+1) % (vis_row*vis_row) == 0 or num_img == idx+1:
                    for i in range(len(img_list)):
                        plt.subplot(vis_row, vis_row, i+1).imshow(img_list[i])
                        plt.title("predict:{}".format(img_pred[i]))
                    plt.show()
                    plt.close()
                    img_list, img_pred = list(), list()

            time_s = time_toc-time_tic
            time_total += time_s

            print('{:d}/{:d}: {} {:.3f}s '.format(idx + 1, num_img, img_name, time_s))

    print("\ndevice:{} total time:{:.1f}s mean:{:.3f}s".
          format(device, time_total, time_total/num_img))
成功运行

将Resnet模型集成在django
集成代码:
1.urls.py

"""Ai_Web URL Configuration

The `urlpatterns` list routes URLs to views. For more information please see:
    https://docs.djangoproject.com/en/2.0/topics/http/urls/
Examples:
Function views
    1. Add an import:  from my_app import views
    2. Add a URL to urlpatterns:  path('', views.home, name='home')
Class-based views
    1. Add an import:  from other_app.views import Home
    2. Add a URL to urlpatterns:  path('', Home.as_view(), name='home')
Including another URLconf
    1. Import the include() function: from django.urls import include, path
    2. Add a URL to urlpatterns:  path('blog/', include('blog.urls'))
"""
from django.contrib import admin
from django.urls import path,include
from django.http import HttpResponse
from django.conf.urls.static import static
from django.conf import settings
from django.shortcuts import render
from django.views.generic import View

import os
import time
import torch.nn as nn
import torch
import torchvision.transforms as transforms
from PIL import Image as img_pil
from matplotlib import pyplot as plt
import torchvision.models as models
BASE_DIR = os.path.dirname(os.path.abspath(__file__))
#device = torch.device("cuda" if torch.cuda.is_available() else "cpu")
device = torch.device("cpu")


def index(request):
    return render(request,'index.html')

def resnet(request):
    return render(request, 'resnet.html')
#def resnet(request):

# config
vis = True
# vis = False
vis_row = 4

norm_mean = [0.485, 0.456, 0.406]
norm_std = [0.229, 0.224, 0.225]

inference_transform = transforms.Compose([
    transforms.Resize(256),
    transforms.CenterCrop(224),
    transforms.ToTensor(),
    transforms.Normalize(norm_mean, norm_std),
])

classes = ["ants", "bees"]


def img_transform(img_rgb, transform=None):
    """
    将数据转换为模型读取的形式
    :param img_rgb: PIL Image
    :param transform: torchvision.transform
    :return: tensor
    """

    if transform is None:
        raise ValueError("找不到transform!必须有transform对img进行处理")

    img_t = transform(img_rgb)
    return img_t


def get_img_name(img_dir, format="jpg"):
    """
    获取文件夹下format格式的文件名
    :param img_dir: str
    :param format: str
    :return: list
    """
    file_names = os.listdir(img_dir)
    img_names = list(filter(lambda x: x.endswith(format), file_names))

    if len(img_names) < 1:
        raise ValueError("{}下找不到{}格式数据".format(img_dir, format))
    return img_names


def get_model(m_path, vis_model=False):

    resnet18 = models.resnet18()
    num_ftrs = resnet18.fc.in_features
    resnet18.fc = nn.Linear(num_ftrs, 2)

    checkpoint = torch.load(m_path)
    resnet18.load_state_dict(checkpoint['model_state_dict'])

    if vis_model:
        from torchsummary import summary
        summary(resnet18, input_size=(3, 224, 224), device="cpu")

    return resnet18


class ResNet(View):

    def get(self,request):
        return render(request, 'resnet.html')

    def post(self,request):
        model_path=os.path.join(BASE_DIR,'..' ,'media', 'checkpoint_14_epoch.pkl')
        # 2. model
        resnet18 = get_model(model_path, True)
        resnet18.to(device)
        resnet18.eval()


        img1=request.FILES.get('img1')
        img_rgb = img_pil.open(img1).convert('RGB')
        # step 2/4 : img --> tensor
        img_tensor = img_transform(img_rgb, inference_transform)
        img_tensor.unsqueeze_(0)
        img_tensor = img_tensor.to(device)

        # step 3/4 : tensor --> vector
        time_tic = time.time()
        outputs = resnet18(img_tensor)
        time_toc = time.time()

        # step 4/4 : visualization
        _, pred_int = torch.max(outputs.data, 1)
        pred_str = classes[int(pred_int)]

        return HttpResponse(pred_str)

def resnet_test(request):
    return render(request, 'resnet.html')

urlpatterns = [
    path('admin/', admin.site.urls),
    path('', index),
    path('Resnet_Test/', ResNet.as_view(),name='test_resnet'),
    path('resnet_test',resnet_test,name='view_resnet')

]
2. index.html
<!DOCTYPE html>
<html lang="en">
<head>
    <meta charset="UTF-8">
    <title>Title</title>
</head>
<body>

<li><a href="{% url "view_resnet" %}">ResNet_Test</a></li>

</body>
</html>
3.resnet.html
<!doctype html>
<html lang="en">
<head>
    <meta charset="UTF-8">
    <meta name="viewport"
          content="width=device-width, user-scalable=no, initial-scale=1.0, maximum-scale=1.0, minimum-scale=1.0">
    <meta http-equiv="X-UA-Compatible" content="ie=edge">
    <title>ResNet_Test</title>
</head>
<body>
<form action="{% url "test_resnet" %}" method="post" enctype="multipart/form-data">

    <input type="file" name="img1">
    <input type="submit" value="提交">

</form>

<div>
    <a href="/">返回首页</a>
</div>

</body>
</html
4.上传模型:

运行成功测试:


Linux服务器端安装pytorch cpu版
pip install torch==1.2.0+cpu torchvision==0.4.0+cpu -f https://download.pytorch.org/whl/torch_stable.html

代码上传和远程服务器git代码拉取
1.代码上传
git add .
git commit -m "第三次提交"
git push origin master -f


2.远程服务器git代码拉取
ls
cd AiWeb/
ls
git stash
git pull origin master

测试运行 ,报错调整
1.测试运行
python manage.py runserver 0.0.0.0:8000

2.报错调整
将anaconda3中的libstdc++.so.6拷贝复制到系统/lib64相应地方
cd anaconda3/lib/
cp -a ./libstdc++.so.6 /usr/lib64/
yes

cd
cd AiWeb/
python manage.py runserver 0.0.0.0:8000

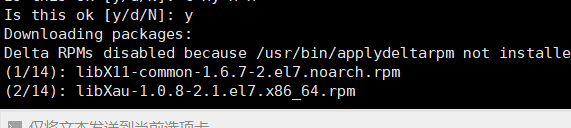
yum install mesa-libGL.x86_64

后面安装途中输入y
python manage.py runserver 0.0.0.0:8000


报错:

pip install torchsummary

python manage.py runserver 0.0.0.0:8000


成功
项目部署
pip install --upgrade pip  # 更新一波
python manage.py makemigrations # 这两步目前没啥意义,没使用数据库
python manage.py migrate
# python manage.py collectstatic  # 收集静态文件
# 安装部署库uwsgi
pip install uwsgi

# 在/srv/zfx目录下创建文件
touch uwsgi.ini
vi  uwsgi.ini # 填写配置内容
[uwsgi]
http = :80 # 访问网址
master =true
chmod-socket = 666
vacuum = true
chdir = /root/AiWeb/  # 项目位置
wsgi-file = Ai_Web/wsgi.py  # 项目中wsgi.py的位置
processes = 4
threads = 2
stats = 127.0.0.1:9191
uwsgi --ini uwsgi.ini
报错

cp -arf  /root/anaconda3/lib/libssl.so.1.0.0 /usr/lib64/
uwsgi --ini uwsgi.ini

cp -arf  /root/anaconda3/lib/libcrypto.so.1.0.0 /usr/lib64/
uwsgi --ini uwsgi.ini

cp -arf  /root/anaconda3/lib/libicui18n.so.58 /usr/lib64/
uwsgi --ini uwsgi.ini

emmmmmm,蒙b???
还是报错
cd /usr/lib64
ll

原来是没找到源文件,一般不会这样

cd /root/anaconda3/lib/
ll

复制源文件libicui18n.so.58.2
cp -arf  /root/anaconda3/lib/libicui18n.so.58.2 /usr/lib64/
cd /root/AiWeb/
uwsgi --ini uwsgi.ini

cp -arf  /root/anaconda3/lib/libicuuc.so.58 /usr/lib64/
uwsgi --ini uwsgi.ini
# 报同样的错,难道我记错命令了?

cd /usr/lib64
ll

cd /root/anaconda3/lib
ll

cp -arf  /root/anaconda3/lib/libicuuc.so.58.2 /usr/lib64/
cd /root/AiWeb/
uwsgi --ini uwsgi.ini

cp -arf  /root/anaconda3/lib/libicudata.so.58 /usr/lib64/
cp -arf  /root/anaconda3/lib/libicudata.so.58.2 /usr/lib64/
cd /root/AiWeb/
uwsgi --ini uwsgi.ini

vi uwsgi.ini
# 将注释删了
改成下图
[uwsgi]
http = 0.0.0.0:80
master =true
chmod-socket = 666
vacuum = true
chdir = /root/AiWeb/
wsgi-file = Ai_Web/wsgi.py
processes = 4
threads = 2
stats = 127.0.0.1:9191
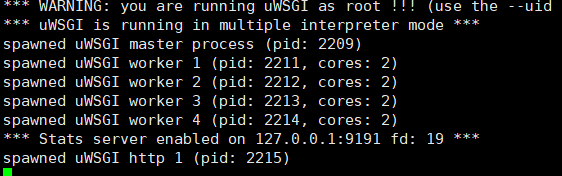
uwsgi --ini uwsgi.ini

浏览器访问:
http://115.29.205.215/
报错:

cp -arf  /root/anaconda3/lib/libz.so.1 /usr/lib64/
cp -arf  /root/anaconda3/lib/libz.so.1.2.11 /usr/lib64/
uwsgi --ini uwsgi.ini
浏览器访问:
http://115.29.205.215/


成功初步部署
关闭远程连接
直接关闭远程连接


再次访问
http://115.29.205.215/
依旧可以正常访问,即初步部署成功
补充:关闭远程连接,不是关机或者重启,如果关机和重启会导致服务关闭

特此声明,本项目只求快,不讲究编程规范
小企业级别开发
中小企业级别开发
uwsgi库问题
cp -arf  /root/anaconda3/lib/libicui18n.so.58 /usr/lib64/
cp -arf  /root/anaconda3/lib/libicui18n.so.58.2 /usr/lib64/

cp -arf  /root/anaconda3/lib/libicuuc.so.58 /usr/lib64/
cp -arf  /root/anaconda3/lib/libicuuc.so.58.2 /usr/lib64/

cp -arf  /root/anaconda3/lib/libstdc++.so.6 /usr/lib64/
cp -arf  /root/anaconda3/lib/libstdc++.so.6.0.24 /usr/lib64/


 1409
1409


 被折叠的 条评论
为什么被折叠?
被折叠的 条评论
为什么被折叠?
 到【灌水乐园】发言


