


本文章基础为 ESP32 无线调参功能文章修改而来。其 无线调参 的基本实现就是通过调用函数。
无线调参:ESP32超详细学习记录:实现无线调参的简单方法(提供源码)_喜暖知寒的博客-CSDN博客esp32的无线调参功能简单实现,提供源码。https://blog.csdn.net/qq_41650023/article/details/125024210?spm=1001.2014.3001.5501🚚 🚚 🚚 本质来说相差不大。

假设需要执行的函数为:
void function_A(void)
{
    //函数功能
}

void function_B(void)
{
    //函数功能
}
函数处理
通过注册函数列表来调用函数。
typedef void (* CommandCallback)(char*);     //回调函数指针

CommandCallback call_list[20];               //回调函数指针列表
char* call_ids[20];                          //回调函数代名列表
int call_count;                              //用于计算有多少函数写入序列
注册函数到函数列表
void Command_add(char* id, CommandCallback onCommand)
{
  call_list[call_count] = onCommand;
  call_ids[call_count] = id;
  call_count++;
}
调用函数
void Command_run(char* str)
{
    for(int i=0; i < call_count; i++)
    {
        if(isSentinel(call_ids[i],str))
        {
          call_list[i];         //回调函数
          break;
        }
    }
}

bool Command_isSentinel(char* ch,char* str)
{
    char s[strlen(ch)+1];
    strncpy(s,str,strlen(ch));
    s[strlen(ch)] = '\0';
    if(strcmp(ch, s) == 0)
       return true;
    else
       return false;
}
和wifi&UDP相关
AsyncUDP udp;                     //创建UDP实例
unsigned int localUdpPort = 2333; //本地端口号
IPAddress apIP(192, 168, 4, 4);   //设置AP的IP地址

const char *ssid = "esp32";             //账号
const char *password = "12345678";      //密码

WiFi.mode(WIFI_AP);   //设置为接入点模式AP
WiFi.softAPConfig(apIP, apIP, IPAddress(255, 255, 255, 0));
while(!WiFi.softAP(ssid, password)){}; //启动AP,函数获取并打印软AP的IP
Serial.println("AP启动成功");
while (!udp.listen(localUdpPort)){}; //等待udp监听设置成
udp.onPacket(onPacketCallBack); //注册收到数据包事件
代码例程(已验证)
(我自己写的,可能有部分不足之处。比如没验证开启AP,端口设置什么的都没有验证)
#include <WiFi.h>
#include <AsyncUDP.h> //引用以使用异步UDP
typedef void (* CommandCallback)(void); //回调函数指针
CommandCallback call_list[20]; //回调函数指针列表
char* call_ids[20]; //回调函数代名列表
int call_count; //用于计算有多少函数写入序列
AsyncUDP udp; //创建UDP实例
unsigned int localUdpPort = 2333; //本地端口号
const char *ssid = "esp32"; //账号
const char *password = "12345678"; //密码
IPAddress apIP(192, 168, 4, 4); //设置AP的IP地址
void Command_add(char* id, CommandCallback onCommand)
{
call_list[call_count] = onCommand;
call_ids[call_count] = id;
call_count++;
}
bool Command_isSentinel(char* ch,char* str)
{
char s[strlen(ch)+1];
strncpy(s,str,strlen(ch));
s[strlen(ch)] = '\0';
if(strcmp(ch, s) == 0)
return true;
else
return false;
}
void Command_run(char* str)
{
for(int i=0; i < call_count; i++)
{
if(Command_isSentinel(call_ids[i],str))
{
call_list[i](); //回调函数
break;
}
}
}
void function_A(void)
{
Serial.println("功能A执行");
}
void function_B(void)
{
Serial.println("功能B执行");
}
void onPacketCallBack(AsyncUDPPacket packet)
{
char* da;
da= (char*)(packet.data());
Serial.print("读到信息:");
Serial.println(da);
Command_run(da);
}
void setup()
{
Serial.begin(115200);
WiFi.mode(WIFI_AP); //设置为接入点模式AP
WiFi.softAPConfig(apIP, apIP, IPAddress(255, 255, 255, 0));
while(!WiFi.softAP(ssid, password)){}; //启动AP,函数获取并打印软AP的IP
Serial.println("AP启动成功");
while (!udp.listen(localUdpPort)){}; //等待udp监听设置成
udp.onPacket(onPacketCallBack); //注册收到数据包事件
Command_add("FUNA",function_A);
Command_add("FUNB",function_B);
Serial.println("IP:192.168.4.4");
Serial.println("输入FUNA或者FUNB");
}
void loop()
{
while(1);
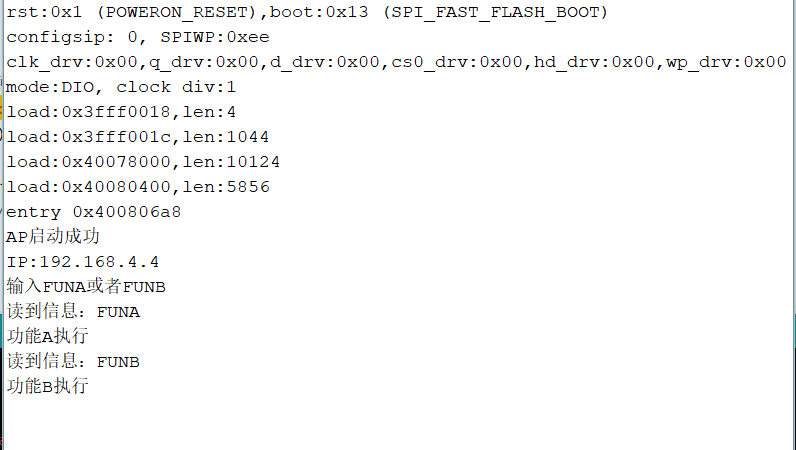
}说明:运行结果
通过UDP发送FUNA,串口打印 功能A执行 。通过UDP发送FUNB,串口打印 功能B执行 。
串口打印:(是在UDP写入FUNA和FUNB之后的结果)
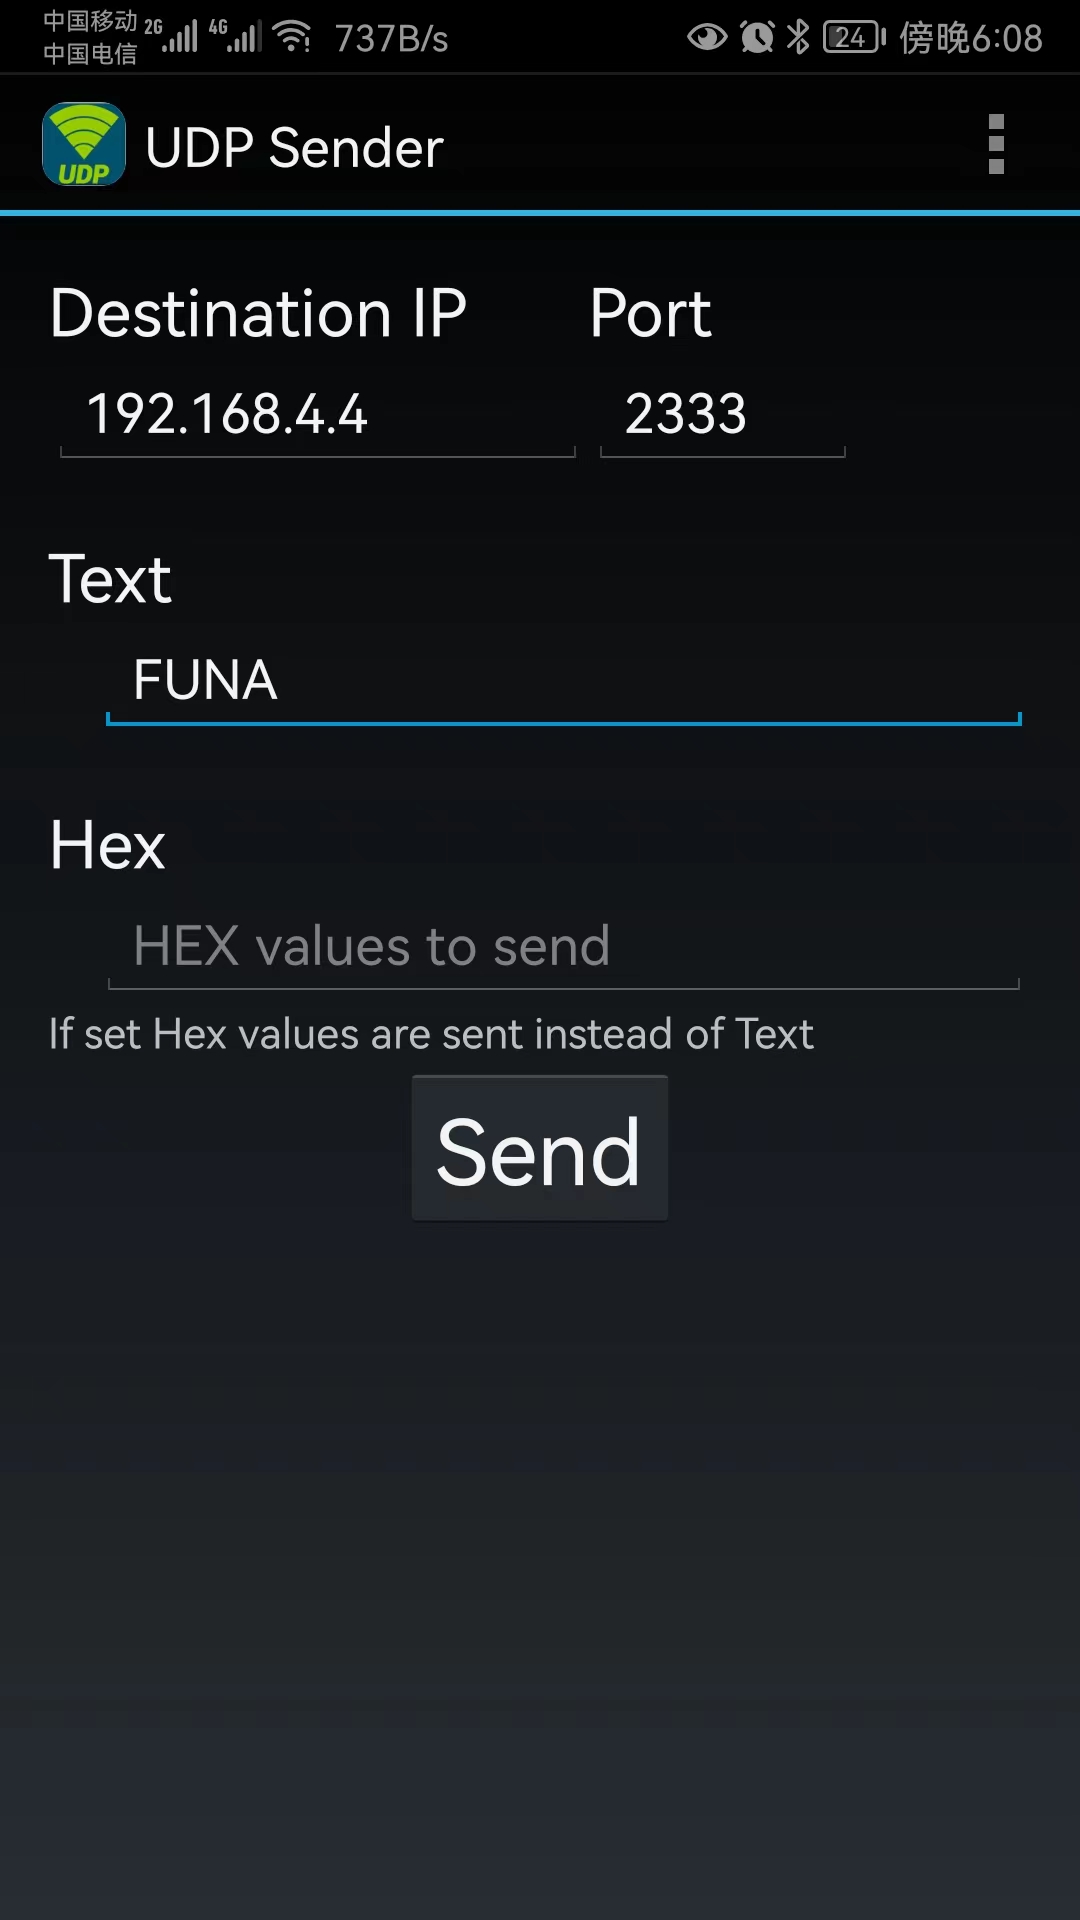
手机UDP助手:连接IP 192.168.4.4 ,端口号:2333。
OK,这样基本功能就实现了。并且也间接验证了无线调参功能。
UDP_Sender文件下载:(0积分)


 224
224


 被折叠的 条评论
为什么被折叠?
被折叠的 条评论
为什么被折叠?
 到【灌水乐园】发言


