


创建TimeLine
第一种方法:在Assets目录下,右键Create—>TimeLine,
双击创建的TimeLine文件,就可以打开TimeLine窗口

第二种方法:
找到右上角的菜单Window
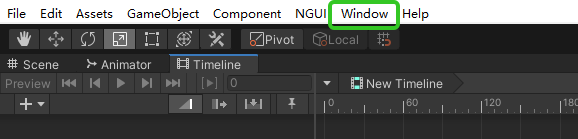
找到Sequencing—>TimeLine
打开TimeLine窗口
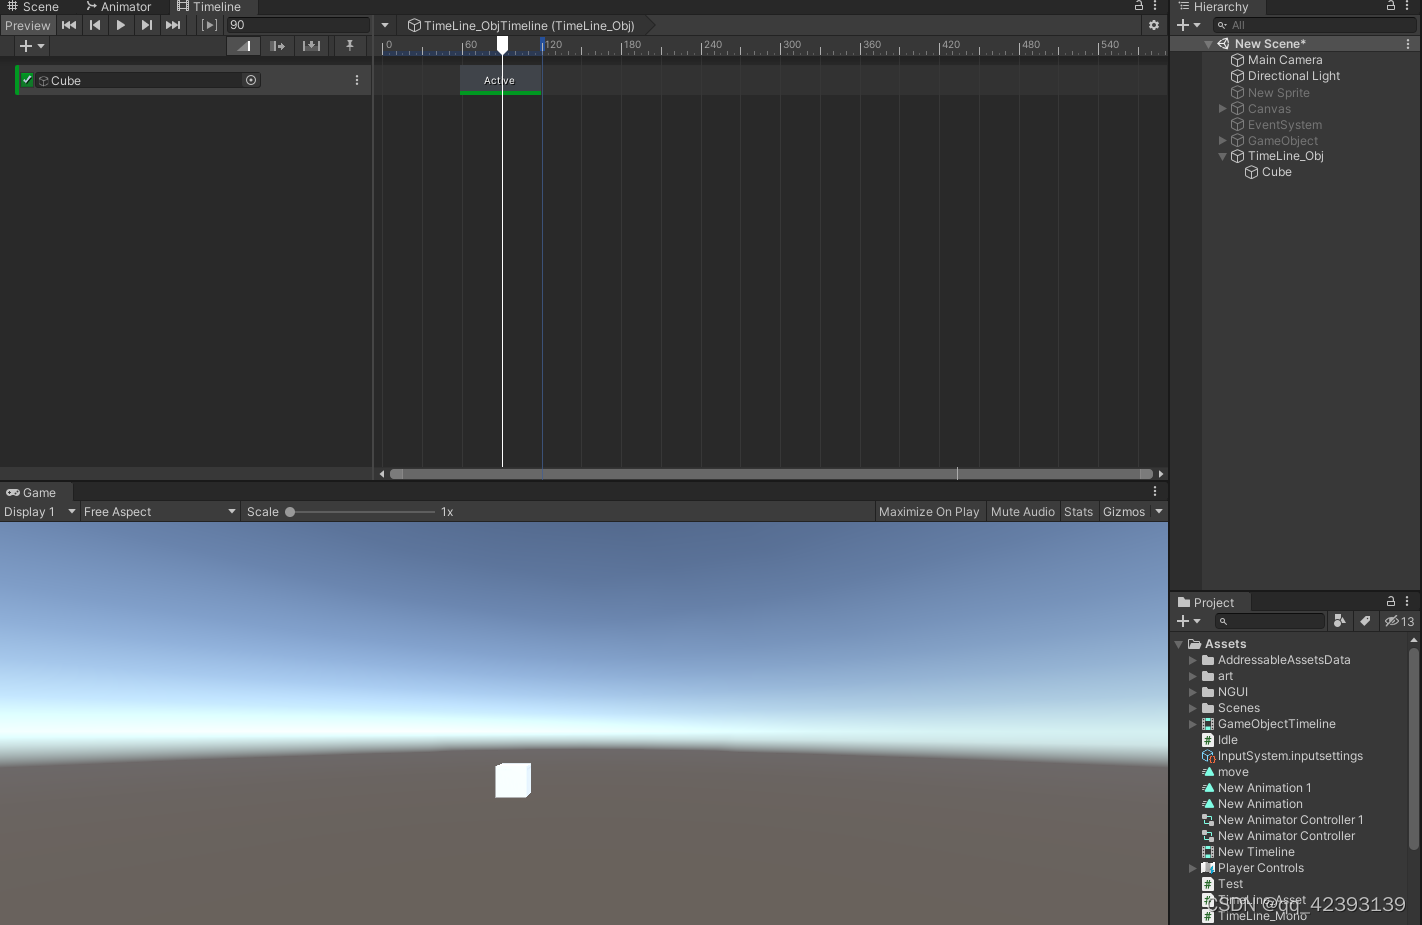
由于TimeLine必须依附于一个游戏对象上的Playable Director组件,所以创建一个空物体,并选中它,点击TimeLine窗口中的Create

系统会自动为这个空物体挂载Animator和Playable Director组件

将TimeLine窗口中的TimeLine_Obj(Animator)删掉,我们不需要它(后面其实也可以自己创建)
ActivationTrack
用来设置物体的激活状态
只要动画播放到ActivationTrack的轨道上,物体就会被激活,在这之外全部为失活状态
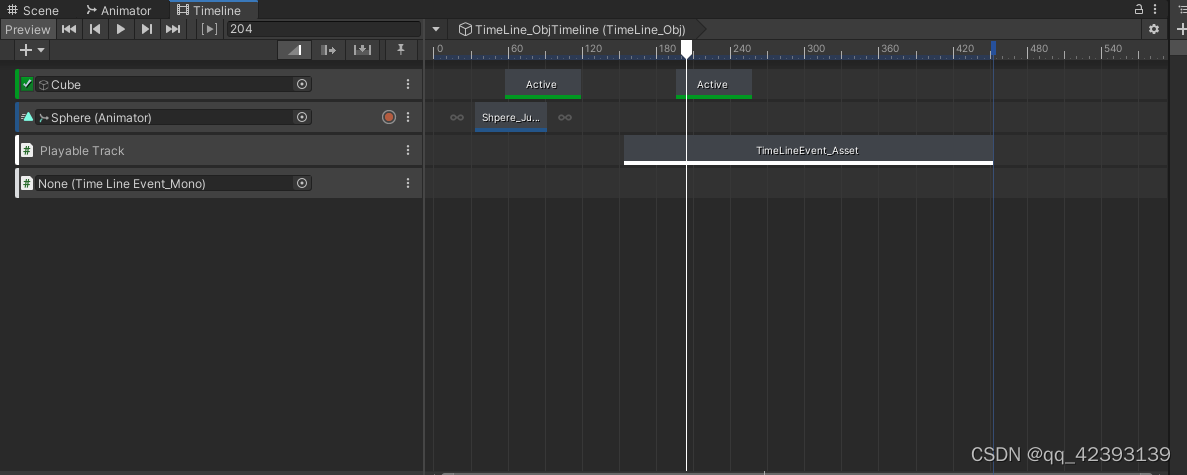
如图,用Cube做例子

点击选中ActivationTrack的这条轨道,Inspector面板上其实是可以对动画播放之后的处理进行设置的

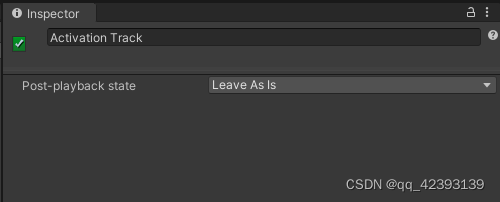
Active:设置为激活的(active=true),当Timeline资源播放完后,物体始终会保持激活状态(运行之后才能看到效果)。
Inactive :播放Timeline完后,设置为非激活(active=false)。
Revert :在Timeline播放完后,GameObject.active=播放前的GameObject.active的去反值。
也就是说,播放TimeLine之前是激活的,播放完后就是失活的(active=false)
Leave As Is: 设置active的状态是依赖Timeline资源播放完后active的值是什么就保持为什么。
例如,Timeline播放完后物体是失活的(active=false),那么物体就就保持为失活状态了(active=false)。
Animation Track
动画轨道,必须依附于Animator才能使用
创建一个Sphere球体,并给它挂载Animator
通过Animation录一段简单的位移动画

我录了一段上下位移的动画,命名为Sphere_Jump
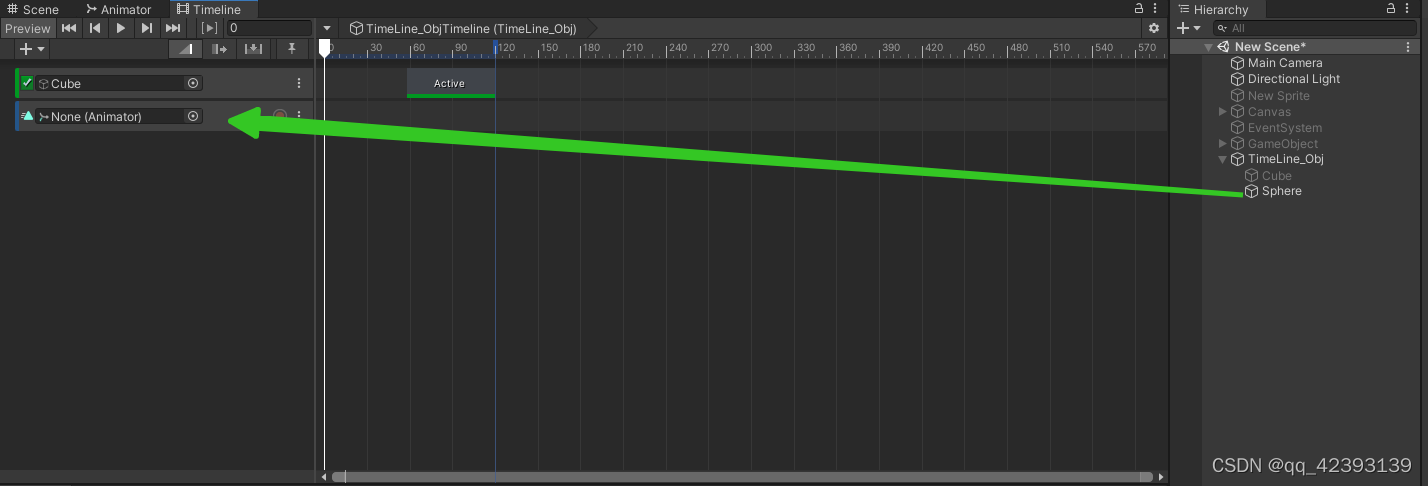
在TimeLine中创建一个AnimationTrack,将刚刚的Sphere拖进去,因为Sphere上带有Animator,可以直接赋值,然后将刚刚录制的动画片段拖到轨道上
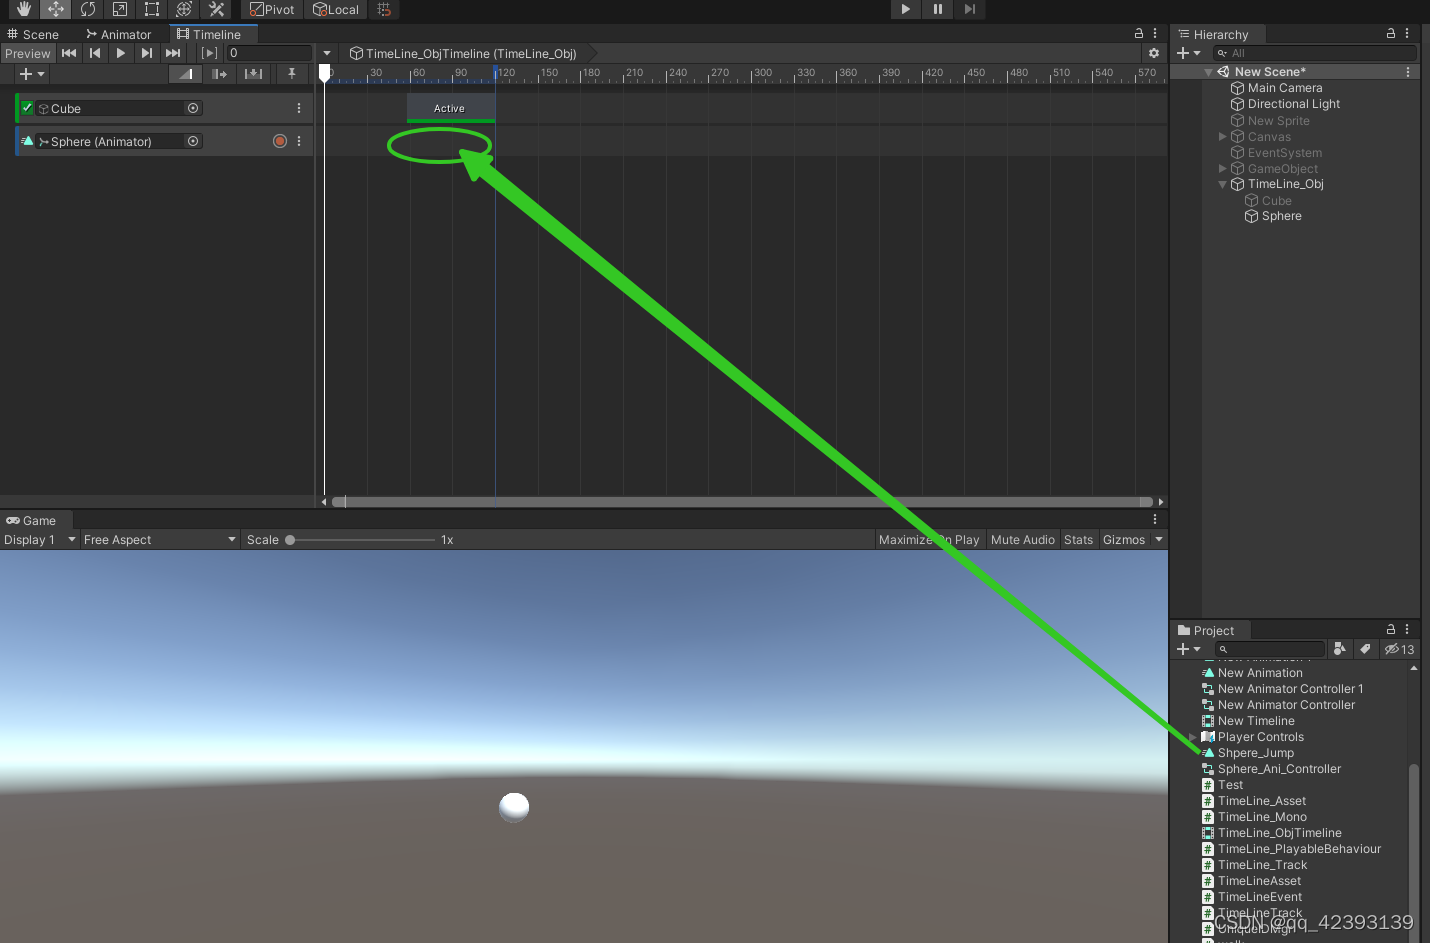

播放后,在Sphere跳起的过程中,Cube会被激活
Playable Track
可播放轨道,可以用来执行C#脚本中的方法
但是不同于Animtion中的事件,写法不同
我们需要两个成对的脚本,缺一不可,一个是
PlayableAsset
PlayableBehaviour
我们要用来执行的脚本,必须要继承这两个类
我们可以直接在Asset文件夹下右键
Create—>Playables分别创建这两个脚本
我这里命名为:
TimeLineEvent_Asset.cs
TimeLineEvent_Behaviour.cs
代码内容分别为:
using System.Collections;
using System.Collections.Generic;
using UnityEngine;
using UnityEngine.Playables;

[System.Serializable]
public class TimeLineEvent_Asset : PlayableAsset
{
    // Factory method that generates a playable based on this asset
    public override Playable CreatePlayable(PlayableGraph graph, GameObject go)
    {
        return Playable.Create(graph);
    }
}
using System.Collections;
using System.Collections.Generic;
using UnityEngine;
using UnityEngine.Playables;

// A behaviour that is attached to a playable
public class TimeLineEvent_Behaviour : PlayableBehaviour
{
    // Called when the owning graph starts playing
    public override void OnGraphStart(Playable playable)
    {

    }

    // Called when the owning graph stops playing
    public override void OnGraphStop(Playable playable)
    {

    }

    // Called when the state of the playable is set to Play
    public override void OnBehaviourPlay(Playable playable, FrameData info)
    {

    }

    // Called when the state of the playable is set to Paused
    public override void OnBehaviourPause(Playable playable, FrameData info)
    {

    }

    // Called each frame while the state is set to Play
    public override void PrepareFrame(Playable playable, FrameData info)
    {

    }
}
这里来写一个简单的功能
创建一个Capsule胶囊体,通过TimeLine来改变它的颜色
将TimeLineEvent_Behaviour .cs中的代码进行精简后,编写如下,在播放的时候将胶囊体的材质设置为红色,暂停为白色
using System.Collections;
using System.Collections.Generic;
using UnityEngine;
using UnityEngine.Playables;

// A behaviour that is attached to a playable
public class TimeLineEvent_Behaviour : PlayableBehaviour
{
    public GameObject target;
    // Called when the state of the playable is set to Play
    public override void OnBehaviourPlay(Playable playable, FrameData info)
    {
        target.GetComponent<MeshRenderer>().material.color = Color.red;
    }

    // Called when the state of the playable is set to Paused
    public override void OnBehaviourPause(Playable playable, FrameData info)
    {
        target.GetComponent<MeshRenderer>().material.color = Color.white;
    }

}
在TimeLineEvent_Asset.cs中编写代码:
using System.Collections;
using System.Collections.Generic;
using UnityEngine;
using UnityEngine.Playables;

[System.Serializable]
public class TimeLineEvent_Asset : PlayableAsset
{
    //这是为了设置TimeLineEvent_Behaviour 中的target属性的值
    public ExposedReference<GameObject> target;
    // Factory method that generates a playable based on this asset
    public override Playable CreatePlayable(PlayableGraph graph, GameObject go)
    {
        var p = ScriptPlayable<TimeLineEvent_Behaviour>.Create(graph);
        //获取面版上的赋值
        p.GetBehaviour().target = target.Resolve(graph.GetResolver());
        return p;
    }
}

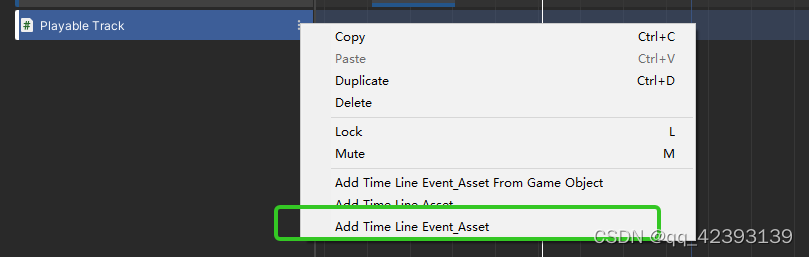
在TimeLine窗口上右键创建Playable Track,再点击旁边的三个点,选择TimeLine_Event_Asset,其他的是我之前写的,不用在意
创建之后,选择轨道上的片段
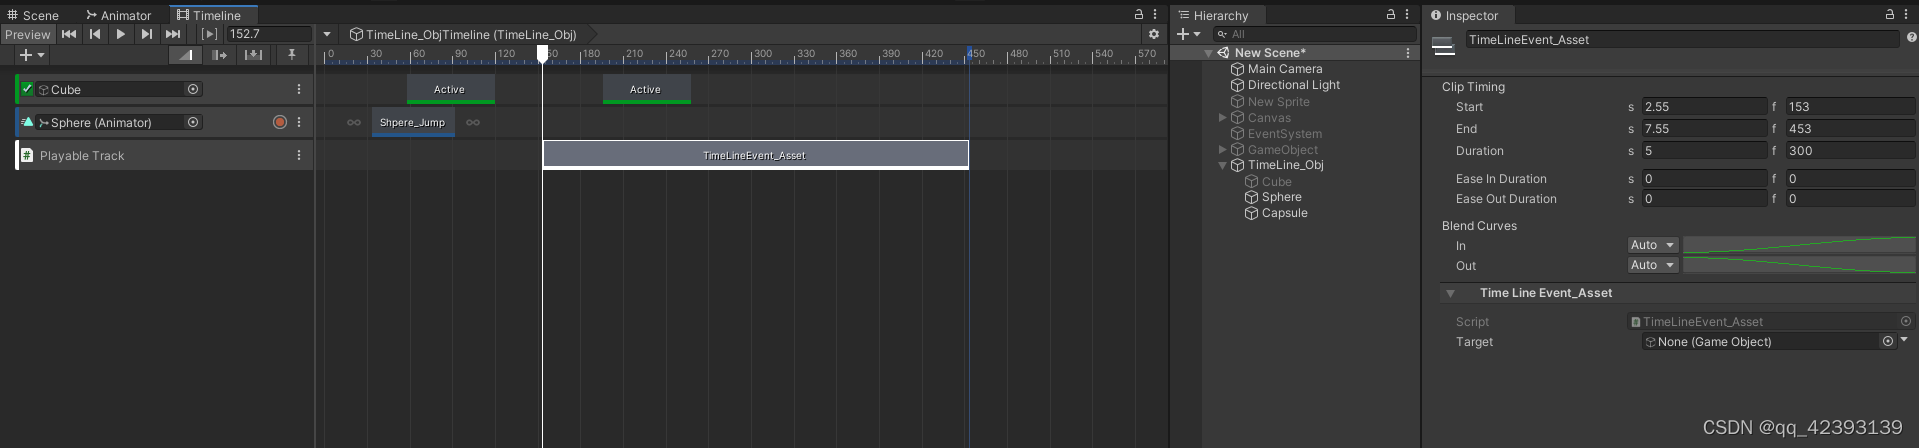
右侧会出现我们刚刚写的暴露出来的Target,这个其实就是

将创建的胶囊体拖拽过去

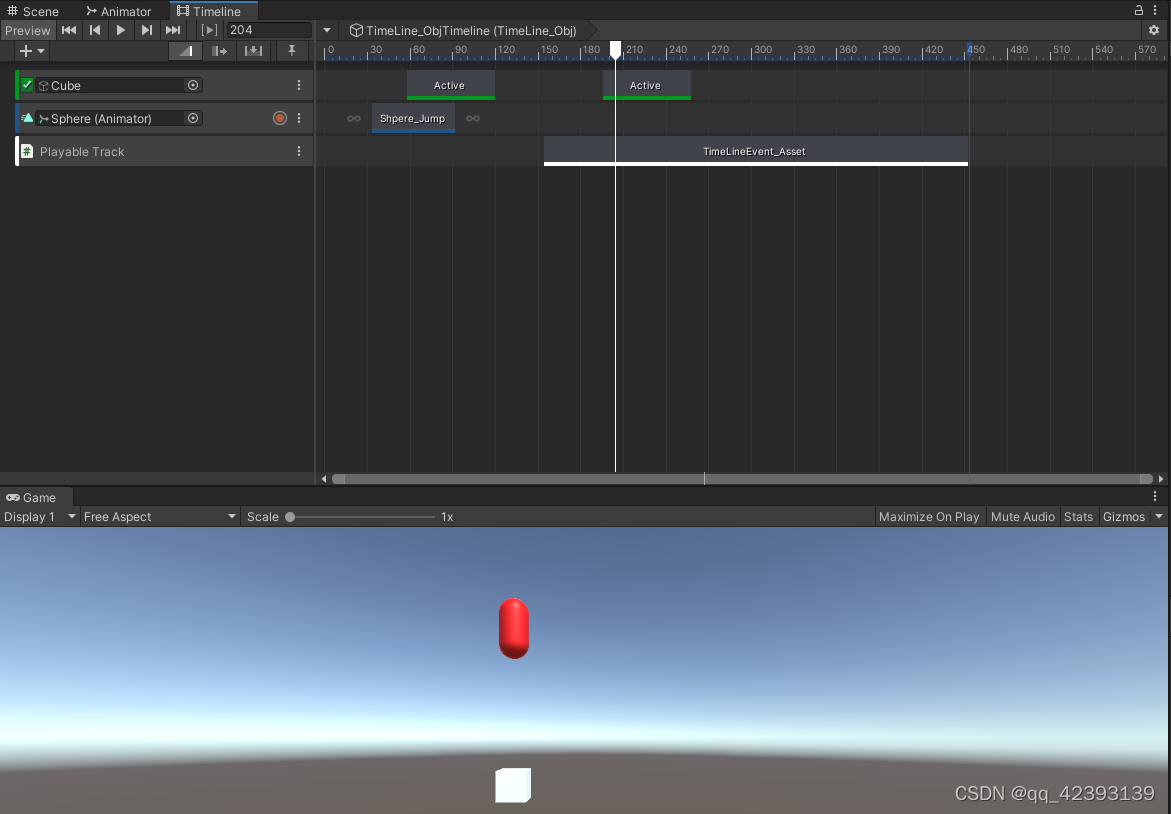
播放TimeLine

当播放到Playable Track上的片段时,胶囊体就变成了红色
但是,这样并不方便我们对动画进行调试,有时候我们想要在物体身上挂载脚本然后进行调试,这时候,需要加入第三个脚本
TrackAsset
创建一个继承MonoBehaviour的脚本,实现一个功能,将一个列表中的所有物体全部变成红色
using System.Collections;
using System.Collections.Generic;
using UnityEngine;

public class TimeLineEvent_Mono : MonoBehaviour
{
    public List<GameObject> objs = new List<GameObject>();

    public void SetObjColor(bool isRed)
    {
        for (int i = 0; i < objs.Count; i++)
        {
            if(isRed)
            {
                objs[i].GetComponent<MeshRenderer>().material.color = Color.red;
            }
            else
            {
                objs[i].GetComponent<MeshRenderer>().material.color = Color.white;
            }

        }
    }

}
创建一个类继承TrackAsset
using System.Collections;
using System.Collections.Generic;
using UnityEngine;
using UnityEngine.Playables;
using UnityEngine.Timeline;
//这个一定要是继承PlayableAsset的类
[TrackClipType(typeof(TimeLineEvent_Asset))]
//这个一定是继承MonoBehaviour的类
[TrackBindingType(typeof(TimeLineEvent_Mono))]
public class TimeLineEvent_Track : TrackAsset
{
    public override Playable CreateTrackMixer(PlayableGraph graph, GameObject go, int inputCount)
    {
        return ScriptPlayable<TimeLineEvent_Behaviour>.Create(graph, inputCount);
    }

}
将TimeLineEvent_Asset脚本进行修改
using System.Collections;
using System.Collections.Generic;
using UnityEngine;
using UnityEngine.Playables;

[System.Serializable]
public class TimeLineEvent_Asset : PlayableAsset
{
    public ExposedReference<TimeLineEvent_Mono> target;
    // Factory method that generates a playable based on this asset
    public override Playable CreatePlayable(PlayableGraph graph, GameObject go)
    {
        var p = ScriptPlayable<TimeLineEvent_Behaviour>.Create(graph);
        p.GetBehaviour().target = target.Resolve(graph.GetResolver());
        return p;
    }
}
对TimeLineEvent_Behaviour进行修改
using System.Collections;
using System.Collections.Generic;
using UnityEngine;
using UnityEngine.Playables;

// A behaviour that is attached to a playable
public class TimeLineEvent_Behaviour : PlayableBehaviour
{
    //public GameObject target;
    public TimeLineEvent_Mono target;
    // Called when the state of the playable is set to Play
    public override void OnBehaviourPlay(Playable playable, FrameData info)
    {
        target.SetObjColor(false);
    }

    // Called when the state of the playable is set to Paused
    public override void OnBehaviourPause(Playable playable, FrameData info)
    {
        target.SetObjColor(true);
    }

}
保存后,回到TimeLine窗口(最好关闭TimeLine窗口再打开,有时候不会刷新),右键会多了一个TimeLineEvent_Track的选项,选中它

这个时候就可以将挂载TimeLineEvent_Mono 的物体拖入进去了
在场景中创建一个空物体,和4个胶囊体,在空物体上挂载TimeLineEvent_Mono 脚本,将四个胶囊体拖入列表中,

将Test物体拖入到TimeLine中
再将Test拖入到轨道上

播放后,播放到相应片段上胶囊体变白,其他时候是红色的


 3618
3618


 被折叠的 条评论
为什么被折叠?
被折叠的 条评论
为什么被折叠?
 到【灌水乐园】发言


