


 文章介绍了如何在Cesium项目中通过Cesium的PostProcessStage和自定义fragmentShader实现雪、雨和雾的实时天气效果,包括参数调整和统一管理这些效果的添加和移除方法。
项目中使用到cesium,为了让立体效果更好看,更应景,为此里面也涉及到了天气效果,其实网上也有一大堆,我也只是其中的一个复制者,唯一不同的是可以通过参数来改变雨雪的大小等等
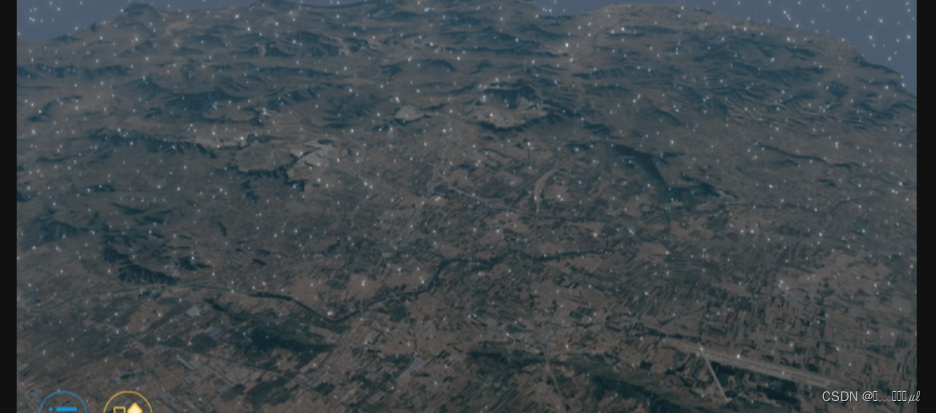
实现雪的效果
let lastStage = null;
const FS_Snow = `uniform sampler2D colorTexture;
in vec2 v_textureCoordinates;
uniform float rainSpeed;
float snow(vec2 uv,float scale){
float time = czm_frameNumber / rainSpeed;
float w=smoothstep(1.,0.,-uv.y*(scale/10.));if(w<.1)return 0.;
uv+=time/scale;uv.y+=time*2./scale;uv.x+=sin(uv.y+time*.5)/scale;
uv*=scale;vec2 s=floor(uv),f=fract(uv),p;float k=3.,d;
p=.5+.35*sin(11.*fract(sin((s+p+scale)*mat2(7,3,6,5))*5.))-f;d=length(p);k=min(d,k);
k=smoothstep(0.,k,sin(f.x+f.y)*0.01);
return k*w;
}
out vec4 vFragColor;
void main(void){
vec2 resolution = czm_viewport.zw;
vec2 uv=(gl_FragCoord.xy*2.-resolution.xy)/min(resolution.x,resolution.y);
vec3 finalColor=vec3(0);
float c = 0.0;
c+=snow(uv,50.)*.0;
c+=snow(uv,30.)*.0;
c+=snow(uv,10.)*.0;
c+=snow(uv,5.);
c+=snow(uv,4.);
c+=snow(uv,3.);
c+=snow(uv,2.);
finalColor=(vec3(c));
vFragColor = mix(texture(colorTexture, v_textureCoordinates), vec4(finalColor,1), 0.3);
}
`;
//雪
const handleSnow = (rainSpeed) => {
removeStage();
var rain = new Cesium.PostProcessStage({
name: "hi_snow",
fragmentShader: FS_Snow,
uniforms: {
rainSpeed, //雪速
},
});
viewer.scene.postProcessStages.add(rain);
lastStage = rain;
};
// handleSnow(90.0); //调用方式
//移除
const removeStage = () => {
lastStage && viewer.scene.postProcessStages.remove(lastStage),
(lastStage = null);
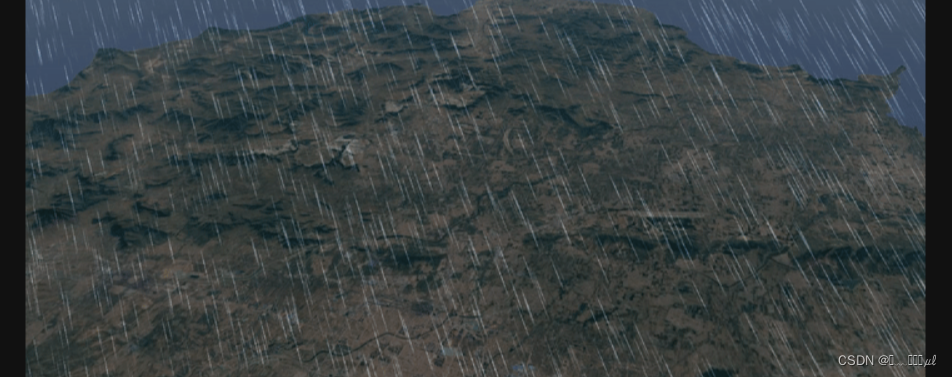
};实现雨的效果
let lastStage = null;

// 雨
const FS_Rain = `uniform sampler2D colorTexture;
			 in vec2 v_textureCoordinates;
       uniform float tiltAngle;
       uniform float rainSize;
       uniform float rainWidth;
       uniform float rainSpeed;
			 float hash(float x){
					return fract(sin(x*233.3)*13.13);
			 }
       out vec4 vFragColor;
			void main(void){
				float time = czm_frameNumber / rainSpeed;
			  vec2 resolution = czm_viewport.zw;
			  vec2 uv=(gl_FragCoord.xy*2.-resolution.xy)/min(resolution.x,resolution.y);
			  vec3 c=vec3(1.0,1.0,1.0);
			  float a= tiltAngle;
			  float si=sin(a),co=cos(a);
			  uv*=mat2(co,-si,si,co);
			  uv*=length(uv+vec2(0,4.9))*rainSize + 1.;
			  float v = 1.0 - abs(sin(hash(floor(uv.x * rainWidth)) * 2.0));
			  float b=clamp(abs(sin(20.*time*v+uv.y*(5./(2.+v))))-.95,0.,1.)*20.;
			  c*=v*b;
        vFragColor = mix(texture(colorTexture, v_textureCoordinates), vec4(c,.3), .3);
			}
`;

// 添加雨
const handleRain = (rainWidth, rainSpeed) => {
  removeStage();
  var rain = new Cesium.PostProcessStage({
    name: "hi_rain",
    fragmentShader: FS_Rain,
    uniforms: {
      tiltAngle: 0.5, // 倾斜角度
      rainSize: 0.6, // 雨大小
      rainWidth, //雨长度
      rainSpeed, //雨速
    },
  });
  viewer.scene.postProcessStages.add(rain);
  lastStage = rain;
};

// handleRain(20.0, 90.0);    //调用方式

//移除
const removeStage = () => {
  lastStage && viewer.scene.postProcessStages.remove(lastStage),
    (lastStage = null);
};
实现雾的效果
let lastStage = null;


// 大雾
const FS_Fog = `float getDistance(sampler2D depthTexture, vec2 texCoords)
  {
      float depth = czm_unpackDepth(texture(depthTexture, texCoords));
      if (depth == 0.0) {
          return czm_infinity;
      }
      vec4 eyeCoordinate = czm_windowToEyeCoordinates(gl_FragCoord.xy, depth);
      return -eyeCoordinate.z / eyeCoordinate.w;
  }
  //根据距离,在中间进行插值
  float interpolateByDistance(vec4 nearFarScalar, float distance)
  {
      //根据常识,雾应该是距离远,越看不清,近距离内的物体可以看清
      //因此近距离alpha=0,远距离的alpha=1.0
      //本例中设置可见度为200米
      //雾特效的起始距离
      float startDistance = nearFarScalar.x;
      //雾特效的起始alpha值
      float startValue = nearFarScalar.y;
      //雾特效的结束距离
      float endDistance = nearFarScalar.z;
      //雾特效的结束alpha值
      float endValue = nearFarScalar.w;
      //根据每段距离占总长度的占比,插值alpha,距离越远,alpha值越大。插值范围0,1。
      float t = clamp((distance - startDistance) / (endDistance - startDistance), 0.0, 1.0);
      return mix(startValue, endValue, t);
  }
  vec4 alphaBlend(vec4 sourceColor, vec4 destinationColor)
  {
      return sourceColor * vec4(sourceColor.aaa, 1.0) + destinationColor * (1.0 - sourceColor.a);
  }
  uniform sampler2D colorTexture;
  uniform sampler2D depthTexture;
  uniform vec4 fogByDistance;
  uniform vec4 fogColor;
  in vec2 v_textureCoordinates;
  void main(void)
  {
      //获取地物距相机的距离
      float distance = getDistance(depthTexture, v_textureCoordinates);
      //获取场景原本的纹理颜色
      vec4 sceneColor = texture(colorTexture, v_textureCoordinates);
      //根据距离,对alpha进行插值
      float blendAmount = interpolateByDistance(fogByDistance, distance);
      //将alpha变化值代入雾的原始颜色中,并将雾与场景原始纹理进行融合
      vec4 finalFogColor = vec4(fogColor.rgb, fogColor.a * blendAmount);
      out_FragColor = alphaBlend(finalFogColor, sceneColor);
  }`;


const handleBigFog = () => {
  removeStage();
  var rain = new Cesium.PostProcessStage({
    name: "hi_fog",
    fragmentShader: FS_Fog,
    uniforms: {
      fogByDistance: new Cesium.Cartesian4(500, 0.0, 4000, 0.8), //
      fogColor: Cesium.Color.WHITE,
    },
  });
  viewer.scene.postProcessStages.add(rain);
  lastStage = rain;
};

const removeStage = () => {
  lastStage && viewer.scene.postProcessStages.remove(lastStage),
    (lastStage = null);
};
这里需要注意的是,函数中有时候会因为cesium版本不同,导致报错,但是这些错都可以解决,网上都有对应的解决方式我这里就不记录了,当然如有问题笔者愿为解答。


 671
671


 被折叠的 条评论
为什么被折叠?
被折叠的 条评论
为什么被折叠?
 到【灌水乐园】发言


