


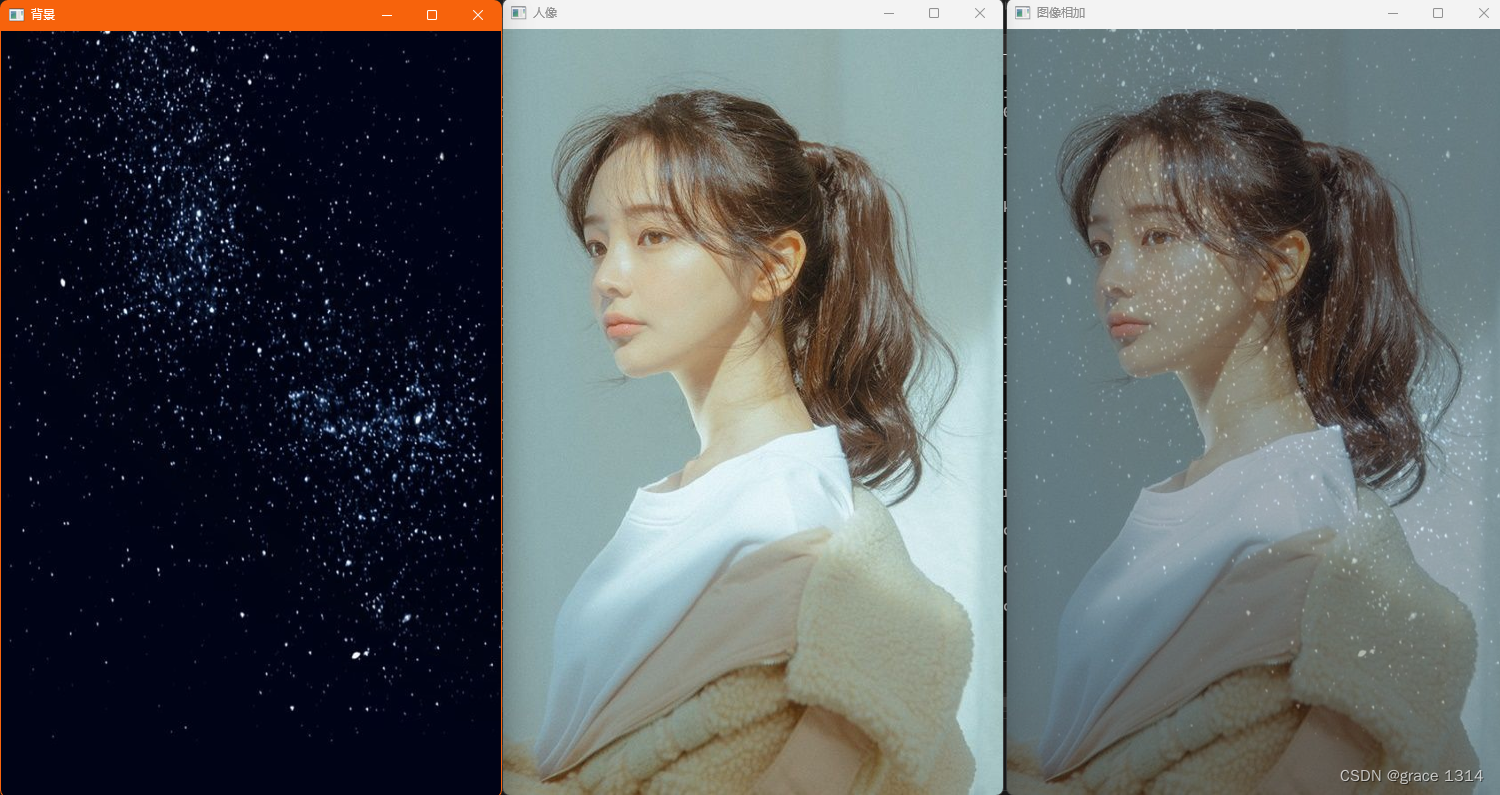
1.图像加法
基础算法,算是图像融合的一种,将两张图叠加起来。图像加法数学公式:
看看代码:
#include "cuda_runtime.h"
#include "device_launch_parameters.h"
#include<cuda.h>
#include<cuda_device_runtime_api.h>
#include <opencv2/core/cuda.hpp>
#include<opencv2/opencv.hpp>
#include<opencv.hpp>
#include <stdio.h>
#include<iostream>

using namespace std;
using namespace cv;
using namespace cuda;

template<int nthreads>
__global__ void compute_kernel(int height, int width, const PtrStepb img1, const PtrStepb img2, PtrStepb dst) {
	const int x = blockIdx.x * blockDim.x + threadIdx.x;
	const int y = blockIdx.y * blockDim.y + threadIdx.y;

	const uchar* src_y1 = (const uchar*)(img1 + y * img1.step);
	const uchar* src_y2 = (const uchar*)(img2 + y * img2.step);
	uchar* dst_y = (uchar*)(dst + y * dst.step);

	if (x < width && y < height) {
		dst_y[3 * x] = src_y1[3 * x] * 0.3 + src_y2[3 * x] * 0.7;
		dst_y[3 * x + 1] = src_y1[3 * x + 1] * 0.3 + src_y2[3 * x + 1] * 0.7;
		dst_y[3 * x + 2] = src_y1[3 * x + 2] * 0.3 + src_y2[3 * x + 2] * 0.7;

	}

}

void showImg(Mat Img, string windowname, int height, int width);
int main() {

	//读图
	Mat a = imread("C:/Users/1/Pictures/Camera Roll/背景.jpg");
	Mat b = imread("C:/Users/1/Pictures/Camera Roll/人像.jpg");
	//获取人像图像大小
	int height = b.rows;
	int width = b.cols;
	//将背景图resize成人像图像大小,这里是因为两张图大小不同
	resize(a, a, Size(width,height));
	cout << a.size() << endl;
	//showImg(a, "背景",height,width);

	//建立Gpu数据
	GpuMat d_a(a);
	GpuMat d_b(b);
	GpuMat d_dst(d_b.size(), CV_8UC3);


	//核函数执行参数配置
	const int nthreads = 256;

	dim3 bdim(nthreads, 1);
	dim3 gdim(divUp(width, bdim.x), divUp(height, bdim.y));

	compute_kernel<nthreads> << <gdim, bdim >> >(height, width, d_a, d_b, d_dst);

	//下载Gpu结果
	Mat dst(d_dst);

	imwrite("fusion.jpg", dst);
	showImg(a, "背景", height, width);
	showImg(b, "人像", height, width);
	showImg(dst, "图像相加",height,width);

	waitKey();

	return 0;
}

void showImg(Mat Img, string windowname,int height,int width) {

	namedWindow(windowname, WINDOW_NORMAL);
	resizeWindow(windowname,  width,height);
	imshow(windowname, Img);
}
结果:
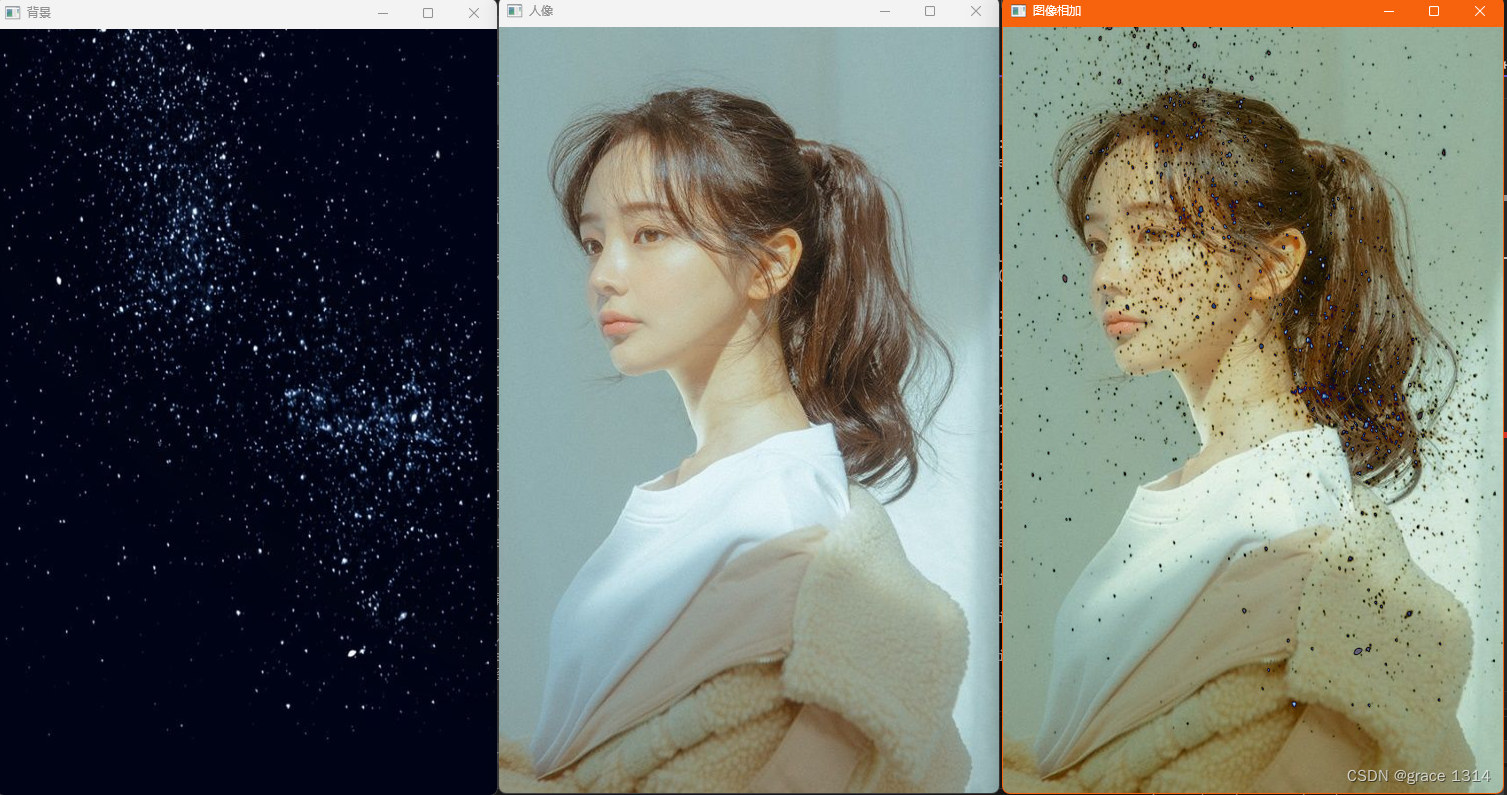
2.图像减法
#include "cuda_runtime.h"
#include "device_launch_parameters.h"
#include<cuda.h>
#include<cuda_device_runtime_api.h>
#include <opencv2/core/cuda.hpp>
#include<opencv2/opencv.hpp>
#include<opencv.hpp>
#include <stdio.h>
#include<iostream>

using namespace std;
using namespace cv;
using namespace cuda;

template<int nthreads>
__global__ void compute_kernel2(int height, int width, const PtrStepb img1, const PtrStepb img2, PtrStepb dst) {
	const int x = blockIdx.x * blockDim.x + threadIdx.x;
	const int y = blockIdx.y * blockDim.y + threadIdx.y;

	const uchar* src_y1 = (const uchar*)(img1 + y * img1.step);
	const uchar* src_y2 = (const uchar*)(img2 + y * img2.step);
	uchar* dst_y = (uchar*)(dst + y * dst.step);

	if (x < width && y < height) {
		dst_y[3 * x] = 255 - abs(src_y1[3 * x] - src_y2[3 * x]);
		dst_y[3 * x + 1] = 255 - abs(src_y1[3 * x + 1] - src_y2[3 * x + 1]);
		dst_y[3 * x + 2] = 255 - abs(src_y1[3 * x + 2] - src_y2[3 * x + 2]);

	}

}

void showImg(Mat Img, string windowname, int height, int width);
int main() {

	//读图
	Mat a = imread("C:/Users/1/Pictures/Camera Roll/背景.jpg");
	Mat b = imread("C:/Users/1/Pictures/Camera Roll/人像.jpg");
	//获取人像图像大小
	int height = b.rows;
	int width = b.cols;
	//将背景图resize成人像图像大小,这里是因为两张图大小不同
	resize(a, a, Size(width, height));
	cout << a.size() << endl;
	//showImg(a, "背景",height,width);

	//建立Gpu数据
	GpuMat d_a(a);
	GpuMat d_b(b);
	GpuMat d_dst(d_b.size(), CV_8UC3);


	//核函数执行参数配置
	const int nthreads = 256;

	dim3 bdim(nthreads, 1);
	dim3 gdim(divUp(width, bdim.x), divUp(height, bdim.y));

	compute_kernel2<nthreads> <<<gdim, bdim >>> (height, width, d_a, d_b, d_dst);

	//下载Gpu结果
	Mat dst(d_dst);

	imwrite("fusion.jpg", dst);
	showImg(a, "背景", height, width);
	showImg(b, "人像", height, width);
	showImg(dst, "图像相减", height, width);

	waitKey();

	return 0;
}

void showImg(Mat Img, string windowname, int height, int width) {

	namedWindow(windowname, WINDOW_NORMAL);
	resizeWindow(windowname, width, height);
	imshow(windowname, Img);
}
结果:

template<int nthreads>
__global__ void compute_kernel2(int height, int width, const PtrStepb img1, const PtrStepb img2, PtrStepb dst) {
	const int x = blockIdx.x * blockDim.x + threadIdx.x;
	const int y = blockIdx.y * blockDim.y + threadIdx.y;

	const uchar* src_y1 = (const uchar*)(img1 + y * img1.step);
	const uchar* src_y2 = (const uchar*)(img2 + y * img2.step);
	uchar* dst_y = (uchar*)(dst + y * dst.step);

	if (x < width && y < height) {
		dst_y[3 * x] = abs(src_y1[3 * x] - src_y2[3 * x]);
		dst_y[3 * x + 1] = abs(src_y1[3 * x + 1] - src_y2[3 * x + 1]);
		dst_y[3 * x + 2] = abs(src_y1[3 * x + 2] - src_y2[3 * x + 2]);

	}

}
首先映入眼帘的是CUDA核函数,这里我们看到是将核函数定义为模板函数,模板参数是nthreads,用于指定线程块的大小。
其他核函数内的参数我就不细说了,height,width是为了防止线程多申请的线程参与运算。这里因为我们的图像大小可能不是一个完整的线程块的倍数,所以在申请网格Grid_size时采用的时divup函数,即向上取整。如果图像的长宽除以bdim的两个维度有多余的数字,那么网格块的大小向上取整。这个后面详细讲divup函数。
那么这里由于线程块可能会大于图像大小,使用if语句来确保线程只处理图像内的像素。
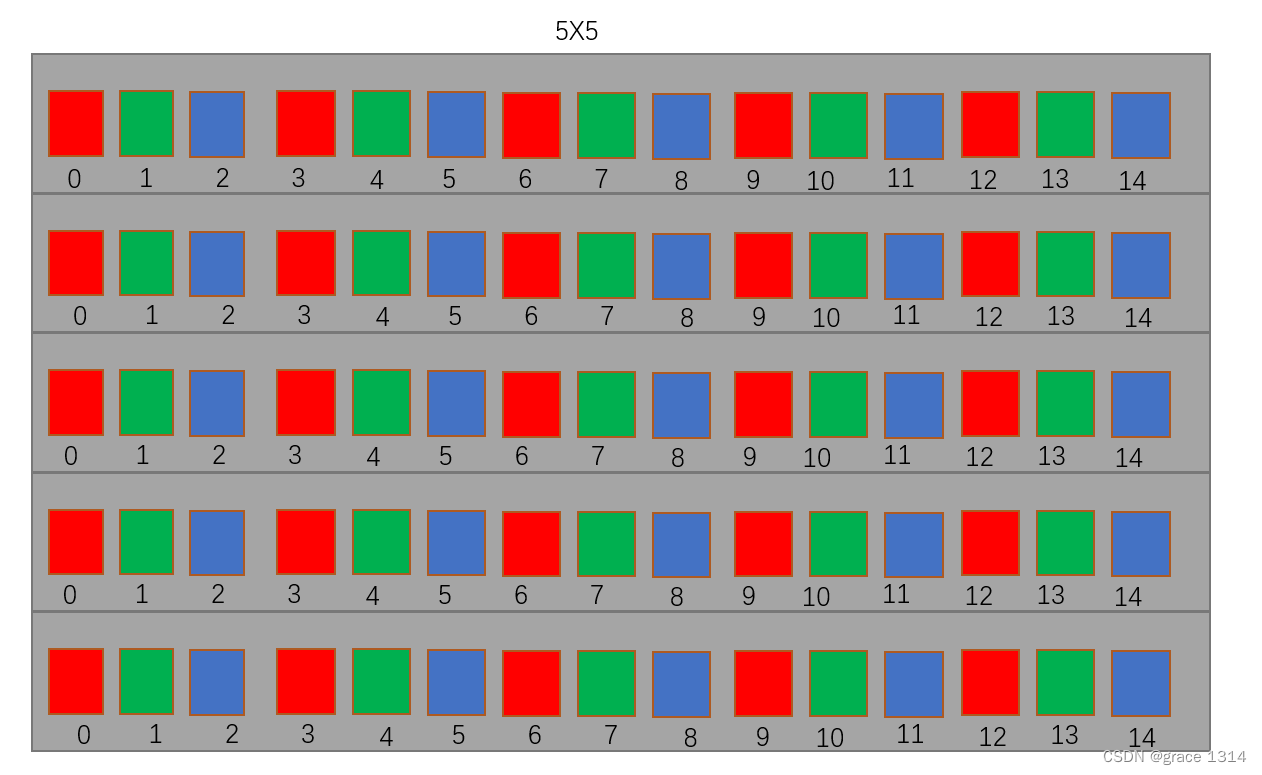
在opencv中Mat类包含一个重要的元素,stride,即步幅,步幅指定了在内存中每行数据之间的字节数,以及在每个通道(例如,RGB颜色通道)之间的字节数。步幅信息对于访问图像数据和进行像素操作非常有用,尤其在处理多通道、多维图像或对图像进行裁剪、缩放和滤波时。
先来看一个使用这个stride信息进行图像处理的小例子
1.获取图像某个位置处的像素值
如果你有一个Mat对象 image,并且想要获取坐标为 (x, y) 处的像素值,你可以使用以下代码:
uchar* pixel = image.ptr<uchar>(y);
int b = pixel[x * image.channels()]; // 获取蓝色通道值
int g = pixel[x * image.channels() + 1]; // 获取绿色通道值
int r = pixel[x * image.channels() + 2]; // 获取红色通道值
在这里,image.ptr<uchar>(y) 返回指向行 y 的数据的指针,然后根据通道数(image.channels())和像素的 x 坐标来获取通道值。
2.处理ROI
步幅信息对于处理感兴趣区域非常有用,因为它们允许你访问部分图像数据而不必复制整个图像。
int x = 100; // ROI 左上角 x 坐标
int y = 50;  // ROI 左上角 y 坐标
int roiWidth = 200;  // ROI 的宽度
int roiHeight = 150; // ROI 的高度

// 创建一个 ROI(感兴趣区域)
cv::Mat roi(image, cv::Rect(x, y, roiWidth, roiHeight));

// 使用 ROI 的步幅信息进行像素操作
for (int j = 0; j < roiHeight; j++) {
    uchar* pixel = roi.ptr<uchar>(j);
    for (int i = 0; i < roiWidth; i++) {
        // 处理像素值
    }
}
3.多通道图像操作
如果你处理多通道图像,步幅信息非常有用。你可以使用通道数来导航不同通道的像素值。例如,对于一个3通道的图像:
int b = pixel[x * image.channels()]; // 获取蓝色通道值
int g = pixel[x * image.channels() + 1]; // 获取绿色通道值
int r = pixel[x * image.channels() + 2]; // 获取红色通道值
有了以上铺垫再来看看我们写的:
	const uchar* src_y1 = (const uchar*)(img1 + y * img1.step);
	const uchar* src_y2 = (const uchar*)(img2 + y * img2.step);
	uchar* dst_y = (uchar*)(dst + y * dst.step);
其中src_y1,src_y2,dsr_y,就相当于上面的step;img1是本质是一个指针,知道图像的起点,但是我们是对图像每个像素点操作,那么与线程索引相同,我们也需要一个图像的指针索引。
y表示图像的某一行,这里加上了图像每行的数据长度step,那么就可以得到图像中任一行索引。
先看看x,y索引:这是线程的索引
	const int x = blockIdx.x * blockDim.x + threadIdx.x;
	const int y = blockIdx.y * blockDim.y + threadIdx.y;
首先我们的图片是放在内存里的,并不是直接放在线程里,线程是我们的运算工具,为了进行运算需要从内存读数据,计算,然后放进内存:
		dst_y[3 * x] = abs(src_y1[3 * x] - src_y2[3 * x]);
		dst_y[3 * x + 1] = abs(src_y1[3 * x + 1] - src_y2[3 * x + 1]);
		dst_y[3 * x + 2] = abs(src_y1[3 * x + 2] - src_y2[3 * x + 2]);
那么在内存中我们的图像数据是什么样的?
a 是总的数据量,
b 是每个块中处理的数据数量。
divUp 宏的目的是将
a 划分成若干块,每块包含
b 个数据元素,同时确保不会漏掉任何数据。这在确定要启动的线程块数量时非常有用。用该函数在确定线程块大小后可以计算网格大小。这个函数在cuda编程中经常用到。


 1772
1772


 被折叠的 条评论
为什么被折叠?
被折叠的 条评论
为什么被折叠?
 到【灌水乐园】发言


