


一、简介
Protocol Buffers,是Google公司开发的一种数据格式,类似于XML能够将结构化数据序列化,可用于数据存储、通信协议等方面。它不依赖于语言和平台并且可扩展性极强。
protobuf仓库:
https://github.com/protocolbuffers/protobuf
protobuf-c仓库: protobuf-c是对于protobuf的仓库的补充
https://github.com/protobuf-c/protobuf-c
不错的参考文章
干货 | protobuf-c之嵌入式平台使用
Protobuf:一种更小、更快、更高效的协议
STM32 | protobuf在STM32平台的移植使用
【嵌入式Nanopb协议】——[1]总览
二、安装protubuf
参考教程:ubuntu安装protobuf ,protobuf 安装, Linux安装protobuf(C++)和简单使用
环境: linux 5.4 荔枝派全志H3 SOC 。如果安装不成功,需要换源:[Linux 换源方法](https://www.jianshu.com/p/20f2186d9cbb)
sudo apt-get install libprotobuf-dev protobuf-compiler
sudo apt-get install autoconf
sudo apt-get install automake
sudo apt-get install libtool
sudo wget https://github.com/protocolbuffers/protobuf/releases/download/v3.19.4/protobuf-all-3.19.4.tar.gz
解压
sudo tar -zxvf protobuf-all-3.19.4.tar.gz
自动生成configure配置文件:
cd protobuf-3.19.4
sudo ./autogen.sh
配置环境:
sudo ./configure
编译安装
sudo make
sudo make check
sudo make install
sudo ldconfig    # 刷新共享库缓存
安装成功
protoc --version //查看版本
三、测试
在一个目录下面新建一个文件夹:
.
├── bulid/文件夹
├── CMakeLists.txt
├── control.proto
└── main.cpp
1、control.proto 文件内容:
syntax = "proto3"; // 如果不加默认使用proto2的版本 proto3与proto2的语法不兼容

package XGrobot; // 可选的package声明符,用来防止不同的消息类型有命名冲突。包的声明符会根据使用语言的不同影响生成的代码。对于C++,产生的类会被包装在C++的命名空间中。

enum MoveMode {
    highSpeed = 0;
    mediumSpeed = 1;
    lowSpeed = 2;
  }

message MoveCmd {
    MoveMode movemode = 1; //机器人的移动速度挡位
    int32 moveSpeed = 2;//速度
    int32 direction = 3;//方向
}
Could NOT find Protobuf (missing: Protobuf_INCLUDE_DIR)—— Linux解决方法
在命令行输入:
protoc --cpp_out=. control.proto
通过指令得到两个文件:在工程文件中导入头文件和源文件就可以使用protobuf了
control.pb.cc
control.pb.h
2、main.cpp文件内容:
#include <iostream>
#include <fstream>
#include "control.pb.h"
//protoc --cpp_out=. control.proto
#include <google/protobuf/io/zero_copy_stream_impl.h>
#include <google/protobuf/text_format.h>

using namespace std;

int main(int argc, char *argv[])
{
    using google::protobuf::TextFormat;
    using google::protobuf::io::FileInputStream;
    using google::protobuf::io::ZeroCopyInputStream;

    XGrobot::MoveCmd moveCmd;
    moveCmd.set_movespeed(100);
    moveCmd.set_movemode(XGrobot::highSpeed);

    return 0;
}
3、 CMakeLists.txt文件内容
# VERSION需要和本机安装的Cmake对应
cmake_minimum_required(VERSION 3.13.4)

# 设置工程名称,最后输出的可执行文件名称
project(App)

find_package(Protobuf REQUIRED)

# 添加可执行文件添加需要编译的文件
add_executable(App  control.pb.cc main.cpp)
target_link_libraries(App protobuf::libprotobuf)

#g++ control.pb.cc main.cpp -o App -lprotobuf -lpthread -std=gnu++11
4、编译
进入bulid文件夹内,使用cmake指令创建makefile文件
cmake..
通过makefile文件进行编译
make
运行测试文件
./App
以上是基础的protobuf使用
四、串口收发protobuf——SOC
前面发的文章讲解具体的linux使用串口协议的基础:浅浅的 linux 串口驱动应用
这里我使用的依旧是香橙派 全志H3的芯片,linux5.4的官方系统。
在原本的文件内新建串口使用的文件,文件命名为 driver_usart.cpp 和 driver_usart.h
1、driver_usart.cpp:
主要封装了串口驱动的类函数,使用的是H3的串口3的驱动。通过串口连接到单片机即可通信
#include "stdio.h"
#include <errno.h> /* Error number definitions */
#include <fcntl.h> /* File control definitions */
#include <stdio.h>
#include <string.h>
#include <termios.h> /* POSIX terminal control definitions */
#include <unistd.h>  /* UNIX standard function definitions */
#include <poll.h>

#include <fcntl.h>
#include <linux/serial.h>
#include <poll.h>
#include <sys/ioctl.h>

#include <iostream>
#include<vector>

#include "driver_usart.h"

SerialDriver::SerialDriver()
{
  struct termios term;

  fd = open("/dev/ttyS3", O_RDWR | O_NOCTTY | O_NDELAY);
  if (fd == -1)
  {
    printf("Err INfo: open ttyS3 error!\n");
  }

  if(tcgetattr(fd, &term) != 0) // 用于获取与终端相关的参数
  {
      printf("tcgetattr error\n");
  }

  cfmakeraw(&term); // 使得串口工作于RAW模式,为原始模式

  /* 计算得到具体的参数配置 */
  term.c_cflag &= ~CSTOPB; // 1位停止位
	//term.c_cflag |= CSTOPB; // 2位停止位

  term.c_cflag &= ~PARENB; // 无校验
	//term.c_cflag |= PARENB; // 开校验

	//term.c_cflag &= ~PARODD; // 表示奇校验
	//term.c_cflag |= PARODD; // 无校验

	term.c_cflag &= ~CSIZE; // 去掉数据位屏蔽
	term.c_cflag |= CS8; // 8位数据位 可选CS7

  /* set timeout in deciseconds for noncanonical read */
  term.c_cc[VTIME] = 0;
  /* set minimum number of bytes to read */
  term.c_cc[VMIN] = 0;

  /* 清空缓冲区 */
  tcflush(fd ,TCIFLUSH);/* tcflush清空终端未完成的输入/输出请求及数据;TCIFLUSH表示清空正收到的数据,且不读取出来 */

	/* 常见的波特率:
	B115200
	B9600
	*/
  if(cfsetspeed(&term, B115200) < 0) // 配置串口波特率
  {
      printf("cfsetspeed error\r");
  }

	/*
	TCSANOW - 立即生效
	TCSADRAIN - 输入输出完成后生效
	TCSAFLUSH - 刷新缓冲区后生效
	前面已经完成了对 struct termios 结构体各个成员进行配置,但是配置还未生效,需要将配置参数
	写入到串口,使其生效。通过 tcsetattr()函数将配置参数写入到硬件设备。
	*/
  if(tcsetattr(fd, TCSADRAIN, &term) < 0) // 写入配置
	{
    printf("tcsetattr error\r");
  }

    /* 设置低延迟模式 */
	struct serial_struct serial_info;

	ioctl(fd, TIOCGSERIAL, &serial_info);

  serial_info.flags |= ASYNC_LOW_LATENCY;

  ioctl(fd, TIOCSSERIAL, &serial_info);

  //close(fd);
}

SerialDriver::~SerialDriver()
{
  close(fd);
}

int SerialDriver::ReadBytes(uint8_t *rev_buf, int rev_len)
{
    struct pollfd fds[1];
    if(fd < 0)
    {
        printf("error\n");
    }

    fds[0].fd = fd;
    fds[0].events = POLLIN; // 使用阻塞中断 监听事件

    int poll_return = poll(fds, 1, 1000);
    if (poll_return == 0)
    {
        //printf(" Timed out while waiting for data. \n");
        return REV_TIOMEOUT;
    }
    else if (poll_return < 0)
    {
        int error_num = errno;
        switch (error_num)
        {
            case EINTR:
                return REV_NULL;
            default:
                printf("Error polling serial port");
                return REV_ERROR;
        }
    }

    memset(rev_buf, 0x00, rev_len);
    int result = read(fd, rev_buf, rev_len);

    return REV_TRUE;
}


int SerialDriver::Write(const std::vector<uint8_t>& input)
{
  return write(fd, input.data(), input.size());
}

int SerialDriver::Write(const std::string& _input)
{
  return write(fd, _input.data(), _input.size());
}

int SerialDriver::Write(uint8_t *pinput, uint32_t pinput_size)
{
  return write(fd, pinput, pinput_size);
}
2、driver_usart.h
完成对串口驱动的声明
#ifndef DRIVER_USART_H
#define DRIVER_USART_H

#include <vector>
enum rev
{
    REV_NULL = 0,
    REV_TIOMEOUT ,
    REV_ERROR ,
    REV_TRUE,

};

class SerialDriver {
public:
    SerialDriver();
    ~SerialDriver();
    int ReadBytes(uint8_t *rev_buf, int rev_len=64)  ;
    int Write(const std::vector<uint8_t>& input);
    int Write(const std::string& _input) ;
    int Write(uint8_t *pinput, uint32_t pinput_size);
private:
    int fd;
};

#endif
新的main文件
#include <iostream>
#include <fstream>
#include "control.pb.h"
//protoc --cpp_out=. control.proto
#include <google/protobuf/io/zero_copy_stream_impl.h>
#include <google/protobuf/text_format.h>
#include <vector>

#include "driver_usart.h"

using namespace std;

int main(int argc, char *argv[])
{
    XGrobot::MoveCmd moveCmd;
    moveCmd.set_movespeed(100);
    moveCmd.set_movemode(XGrobot::highSpeed);

    SerialDriver serial; //串口初始化
    string buffer;
    moveCmd.SerializeToString(&buffer); //将数据进行编码
    printf("moveCmd.size:%s",buffer);
    for(int i=0; i<sizeof(buffer); i++)
    {
        printf("%x ",buffer[i]); //打印编码后的16进制数据
    }
    serial.Write(buffer); //将编码后的数据发送出去

    XGrobot::MoveCmd moveCmd2;
    moveCmd2.ParseFromString(buffer); //将数据进行解码
    printf("%d \n",moveCmd2.movespeed());
    return 0;
}
新的Cmakelists
# VERSION需要和本机安装的Cmake对应
cmake_minimum_required(VERSION 3.13.4)

# 设置工程名称,最后输出的可执行文件名称
project(app)

find_package(Protobuf REQUIRED)

# 查找指定目录下的所有.cpp与.h文件 并存放到指定变量名SC_FILES中
FILE(GLOB SC_FILES "*.cpp" "*.h" "*.cc")


# 添加可执行文件添加需要编译的文件
add_executable(${PROJECT_NAME} ${SC_FILES})
target_link_libraries(${PROJECT_NAME} protobuf::libprotobuf)

#g++ control.pb.cc main.cpp -o App -lprotobuf -lpthread -std=gnu++11
五、单片机端
1、下载使用nanopb
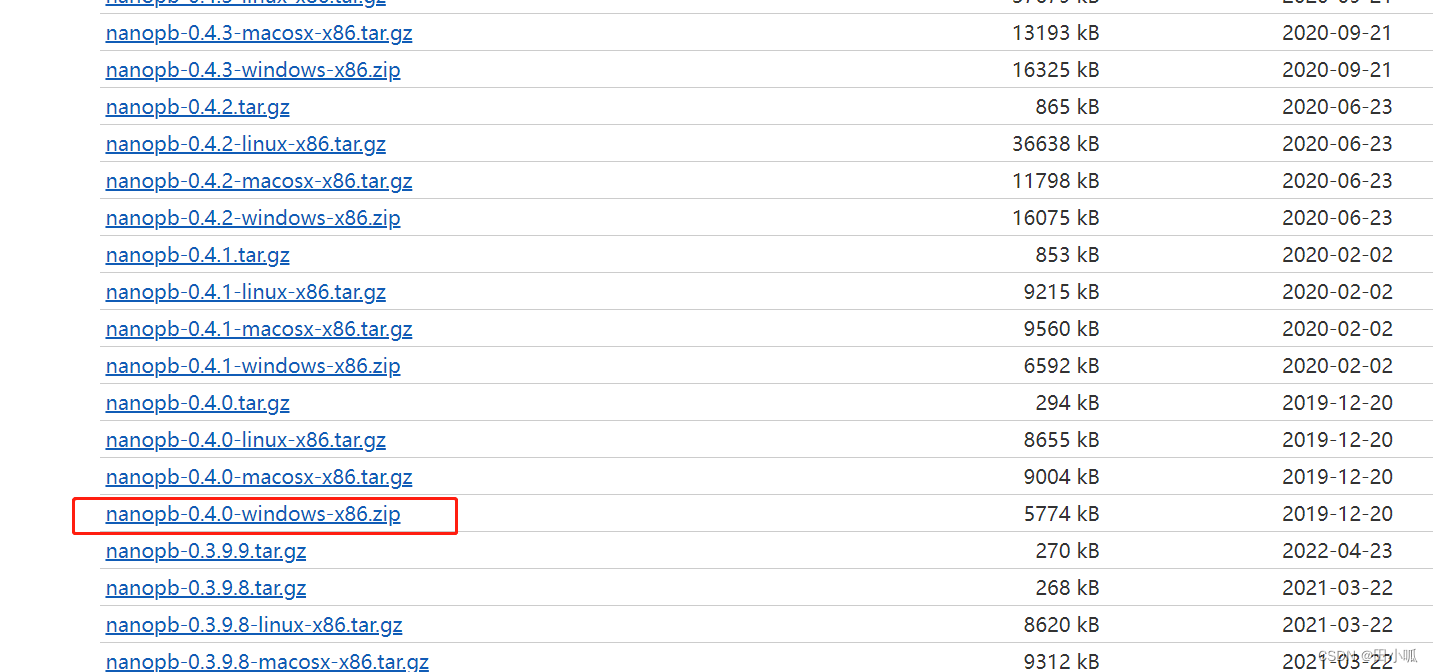
nanopb可以适配单片机的使用,同时可以生成对应的C文件,这里使用windows系统!
nanobp下载地址:https://jpa.kapsi.fi/nanopb/download/
我下载的版本是0.4.0版本的x86架构的版本
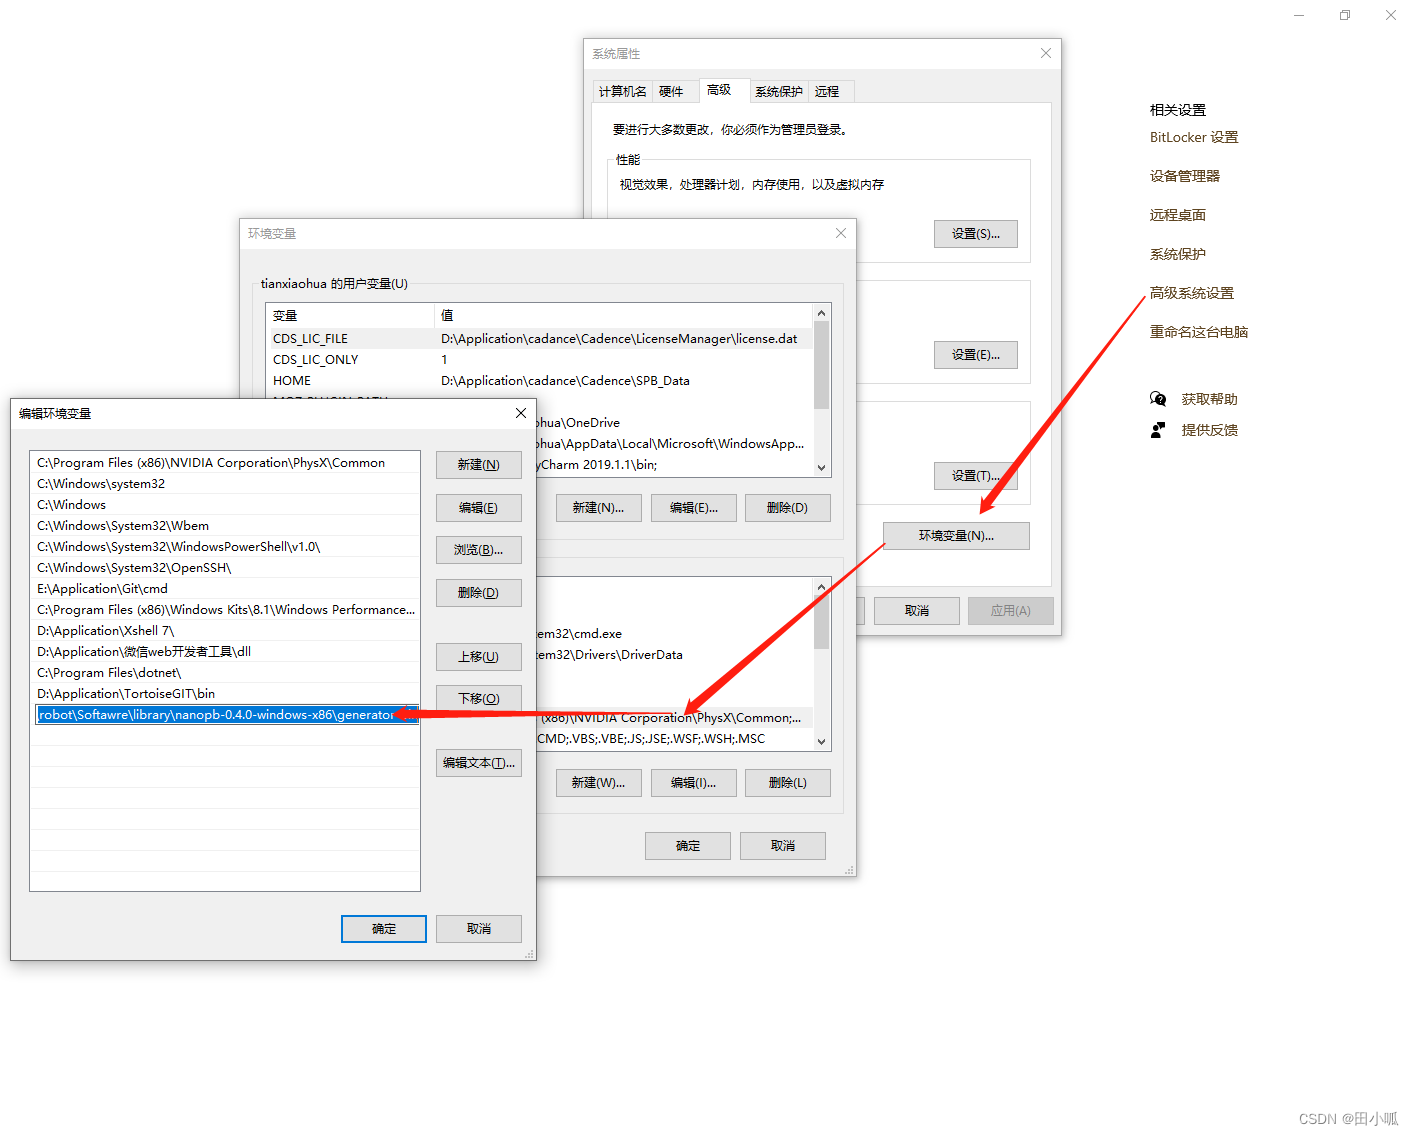
下载后解压到合适的位置,打开windows的环境变量,添加解压出来的路径:
D:\nanopb-0.4.0-windows-x86\generator-bin
将自己的路径添加到环境变量中:
2、创建文件
新建一个proto文件:control.proto ,文件内容和上文相同:!注意这里的编码格式为UTF-8
syntax = "proto3";

package XGrobot;

enum MoveMode {
    highSpeed = 0;
    mediumSpeed = 1;
    lowSpeed = 2;
  }

message MoveCmd {
    MoveMode movemode = 1;
    int32 moveSpeed = 2;
    int32 direction = 3;
}
使用键盘快捷指令win+R打开命令行窗口,进入到proto文件存放的目标文件内,使用指令创建文件:
protoc --nanopb_out=. control.proto
在目标文件夹内会生成源文件和头文件即可使用。
3、适配文件
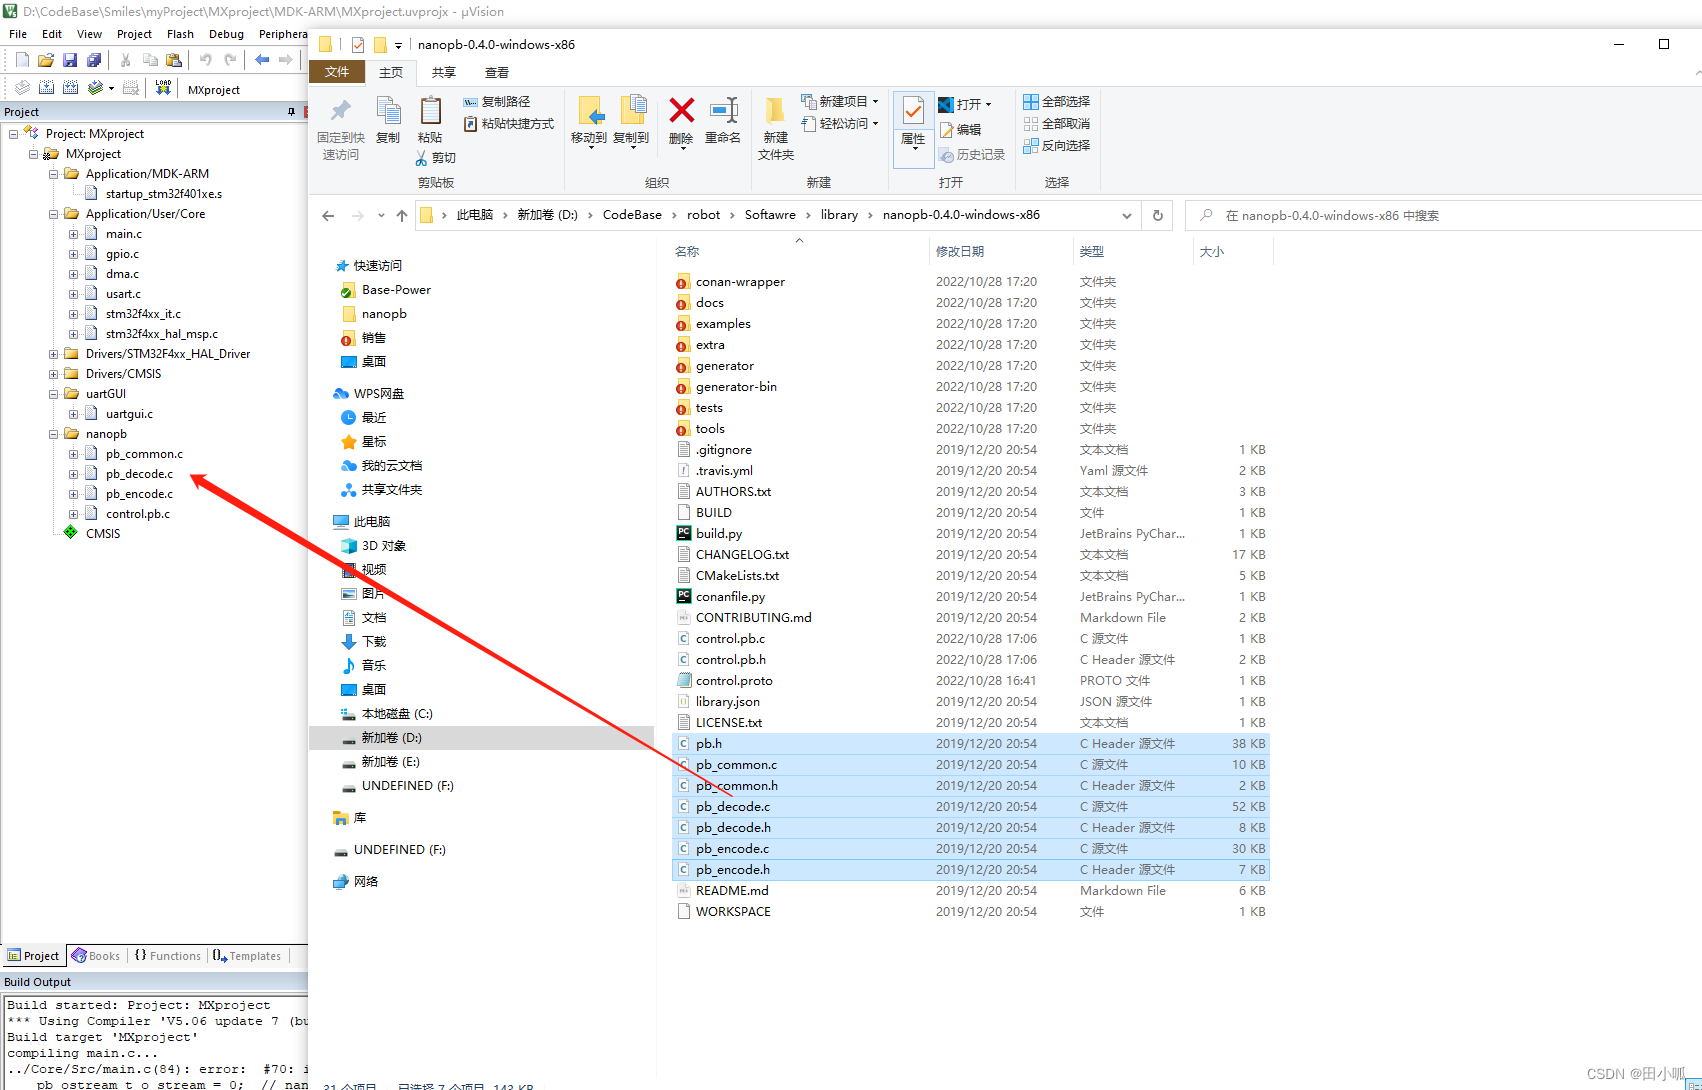
在keil工程的目录下新建一个用于存放protobuf的工程目录,命名为nanopb
讲nanopb的安装目录下的如下文件复制到keil下的nanopb目录:
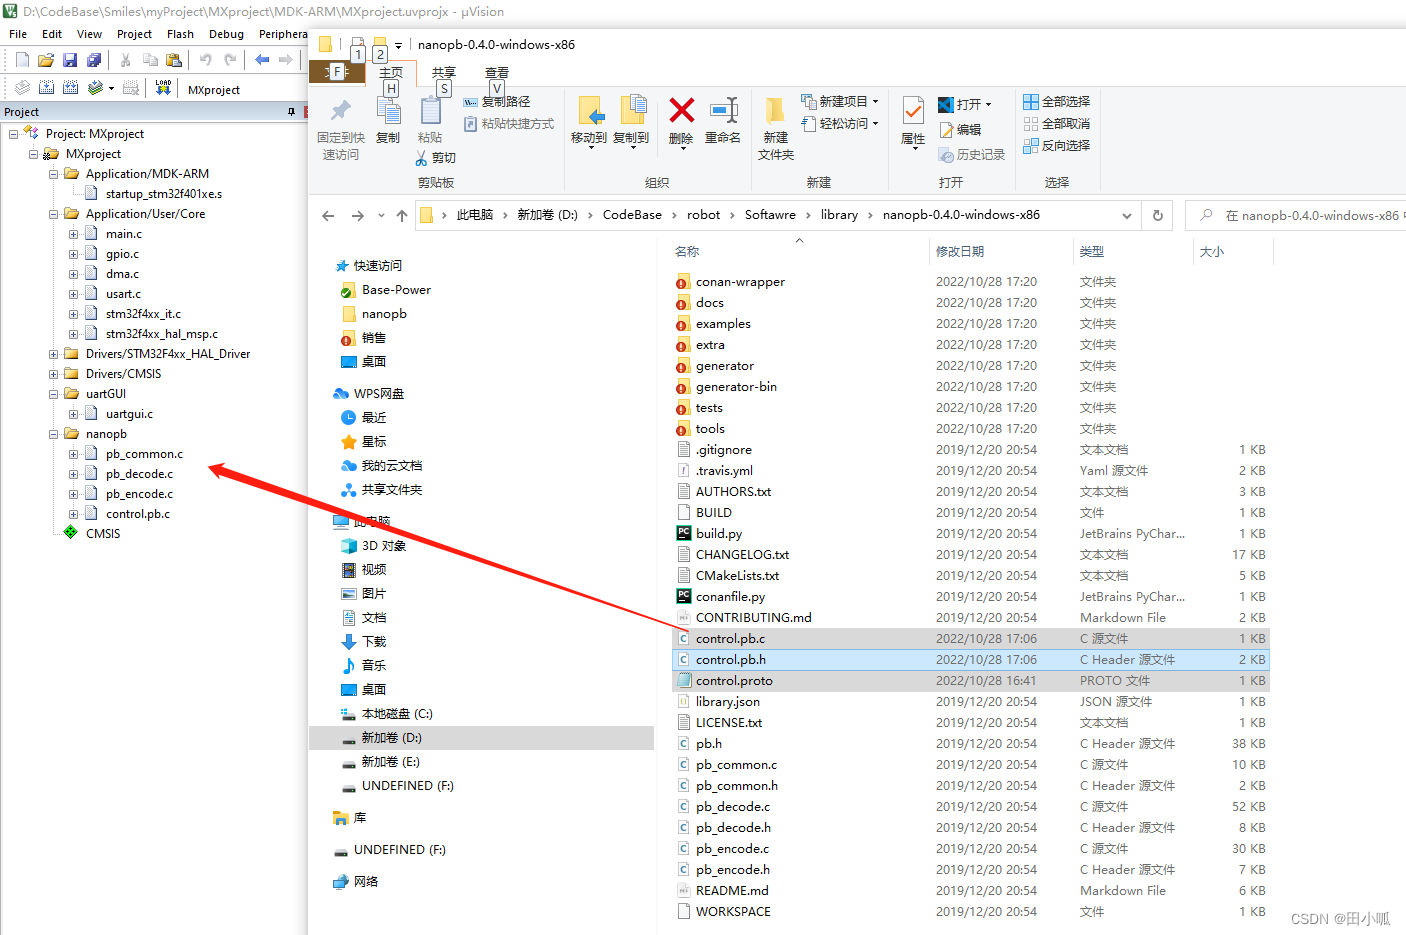
再将刚刚新建好的control的源文件和头文件也移动早这里:
在keil工程内添加头文件和源文件后,在main函数内添加头文件引用:
#include "pb.h"
#include "pb_decode.h"
#include "pb_encode.h"
#include "pb_common.h"
#include "control.pb.h"
在下面的main函数内添加下面语句
uint8_t buffer[64] = {0};
XGrobot_MoveCmd movecmd = {0};
XGrobot_MoveCmd movecmd2 = {0};

pb_ostream_t o_stream = {0};
pb_istream_t i_stream = {0};

// 组包
movecmd.movemode  = XGrobot_MoveMode_highSpeed;
movecmd.moveSpeed = 90;
movecmd.direction = 99;
o_stream = pb_ostream_from_buffer(buffer, sizeof(buffer));
pb_encode(&o_stream, XGrobot_MoveCmd_fields, &movecmd);

// 解包
i_stream = pb_istream_from_buffer(buffer, sizeof(buffer));
pb_decode(&i_stream, XGrobot_MoveCmd_fields, &movecmd2);
printf("movemode = %d\r\n", movecmd.movemode);
printf("moveSpeed = %d\r\n", movecmd.moveSpeed);
printf("direction = %d\r\n", movecmd.direction);
可以通过串口完成测试;
六、完整的代码测试工程:
测试时在linux上生成一个protobud数据,通过编码后经过串口发送给单片机,单片机串口接收到数据后再通过nanopb解码得到数据,再将解码得到的数据重新编码成protobuf数据,通过串口返回给Linux。linux接收到新的数据后通过解码后打印出数据内容完成测试;
已经上传到git的完整代码:https://gitee.com/tianxiaohuahua/Note/tree/master/protobuf
1、main.cpp文件
protobuf的使用主要需要以下几个函数:
bool SerializeToString(string* output) const;把message编码进output。
bool ParseFromString(const string& data);从string解码到message
bool SerializeToArray(char* buf,int size) const;把message编码进数组buf.
bool ParseFromArray(const char* buf,int size);把buf解码到message。
此解码方法效率较ParseFromString高很多,所以一般用这种方法解码,而且IO函数一般是以char交流的,不是string。
bool SerializeToOstream(ostream output) const;把message编码进ostream
bool ParseFromIstream(istream* input);从istream解码到message
#include <iostream>
#include <fstream>
#include "control.pb.h" //包含protobuf的头文件
#include <google/protobuf/io/zero_copy_stream_impl.h>
#include <google/protobuf/text_format.h>
#include <vector>
#include "driver_usart.h"
using namespace std;
int main(int argc, char *argv[])
{
    XGrobot::MoveCmd moveCmd;     // 一个储存protobuf数据的实例1
    XGrobot::MoveCmd moveCmd_REV; // 一个储存protobuf数据的实例2

    moveCmd.set_movespeed(666);    // 给一个数据的元素赋值
    moveCmd.set_movemode(XGrobot::lowSpeed);
    moveCmd.set_direction(66);

    SerialDriver serial; // 串口驱动对象,包含了对串口的初始化

    const int proto_len = moveCmd.ByteSizeLong(); // 获取数据的长度
    uint8_t proto_buffer[proto_len]; // 根据数据的长度定义一个数组

    moveCmd.SerializeToArray(proto_buffer, proto_len); // 讲数据通过编码写入到buf内
    serial.Write(proto_buffer, proto_len); // 通过串口将数据发送给单片机
    while(1)
    {
        if(REV_TRUE == serial.ReadBytes(proto_buffer, sizeof(proto_buffer))) // 通过阻塞方式接收串口数据中断
            break;
    }
    moveCmd_REV.ParseFromArray(proto_buffer, proto_len); // 将接收到的串口数据重新解析成为protobuf数据
    std::cout <<"movespeed: "<< moveCmd_REV.movespeed() << std::endl; // 打印数据内容
    std::cout <<"movemode: "<< moveCmd_REV.movemode() << std::endl;
    std::cout <<"direction: "<< moveCmd_REV.direction() << std::endl;
    return 0;
}
另外,最终的makefile文件和串口驱动函数和上文一致。
2、单片机端:
在main函数内需要完成接收串口数据,将数据解码,打印得到的信息,然后重新编码以后再将数据返回回去;
int main()
{
	printf("程序开始\r\n");
	uint8_t buffer[64] = {0};
	XGrobot_MoveCmd movecmd = {0};
	XGrobot_MoveCmd movecmd2 = {0};

	pb_ostream_t o_stream = {0};
    pb_istream_t i_stream = {0};
  while (1)
  {

		if(Rx_Flag)    	// Receive flag
		{
			Rx_Flag=0;	// clean flag
			HAL_UART_Transmit_DMA(&huart2, Rx_Buf, Rx_Len);
		}
 		if(Rx2_Flag)//如果接收到了linux接收到的数据
		{
			Rx2_Flag=0;	// clean flag
			// 将数据进行解包
			i_stream = pb_istream_from_buffer(Rx2_Buf, sizeof(Rx2_Buf));
			pb_decode(&i_stream, XGrobot_MoveCmd_fields, &movecmd2);
			printf("movemode = %d\r\n", movecmd2.movemode);
			printf("moveSpeed = %d\r\n", movecmd2.moveSpeed);
			printf("direction = %d\r\n", movecmd2.direction);

			// 组包
			movecmd.movemode  = movecmd2.movemode;
			movecmd.moveSpeed = movecmd2.moveSpeed;
			movecmd.direction = movecmd2.direction;
			o_stream = pb_ostream_from_buffer(buffer, sizeof(buffer));
			pb_encode(&o_stream, XGrobot_MoveCmd_fields, &movecmd);

			HAL_UART_Transmit_DMA(&huart2, buffer, sizeof(buffer));

		}
  }
}
stm32
【嵌入式Nanopb协议】——[1]总览
STM32 | protobuf在STM32平台的移植使用
相关文章:
浅浅的 C++ 11
浅浅的 Protobuf通信协议
浅浅的 linux 串口驱动应用
浅浅的 linux开发板 驱动的使用 SPI IIC IO
浅浅的 Cmake


 5272
5272


 被折叠的 条评论
为什么被折叠?
被折叠的 条评论
为什么被折叠?
 到【灌水乐园】发言


