


n:nginx web支持庞大的并发访问
更换光盘为DVD1:
umount /dev/cdrom
umount /dev/cdrom
mount /dev/cdrom /media
cd /media
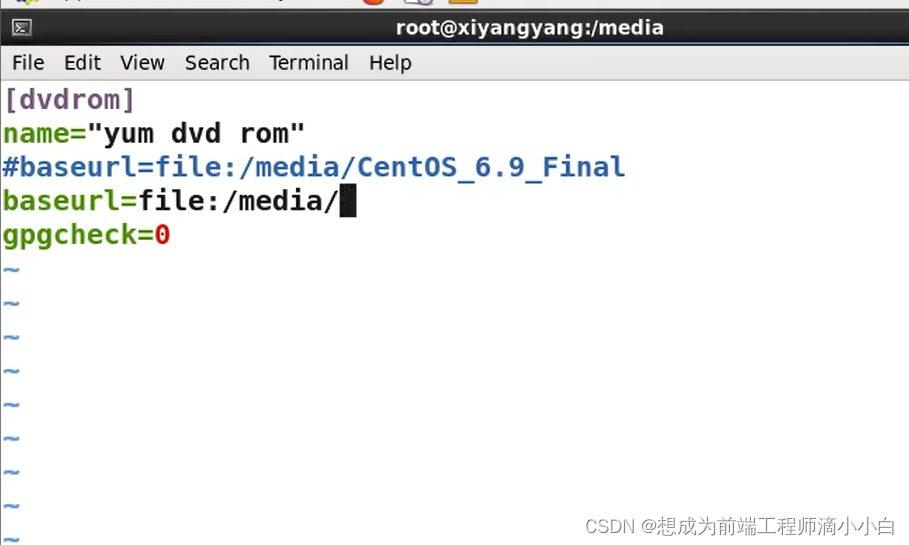
更换光盘后要修改yum源路径:
vim /etc/yum.repos.d/dvd.repo
注释:#baseurl=file:/media/CentOS_6.9_Final
baseurl=file:/media/
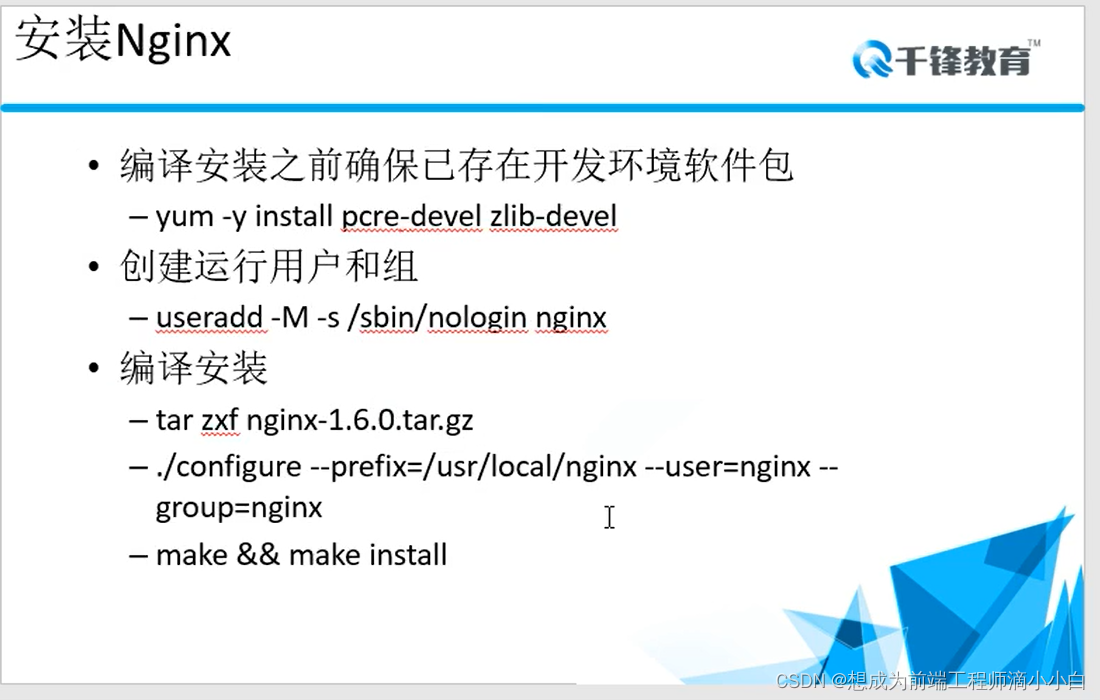
yum -y install pcre-devel zlib-devel
useradd -M -s /sbin/nologin nginx
主程序包拷入虚拟机 rginx_1.6.0.tar.gz
cd /
cd /root/Desktop/
tar xf nginx…
ls
cd nginx_1.6.0
ls
./configure --prefix=/usr/local/nginx --user=nginx -group=nginx
生成Makefile文件:
make编译
make install安装
cd /usr/local/nginx/
ls
cd sbin/
ls
./nginx -h //查看关于nginx的信息
./nginx //启动无提示,怎么验证启动成功,查看端口
ss -antpl | grep 80
ip addr
本机浏览器访问本机:192.168.1.254
cd …
ls
cd html/
pwd
cat index.html
cd …
ls
cd sbin
./nginx -s stop
ss -antpl | grep 80
ls
cd …
ls
cd conf/
ls
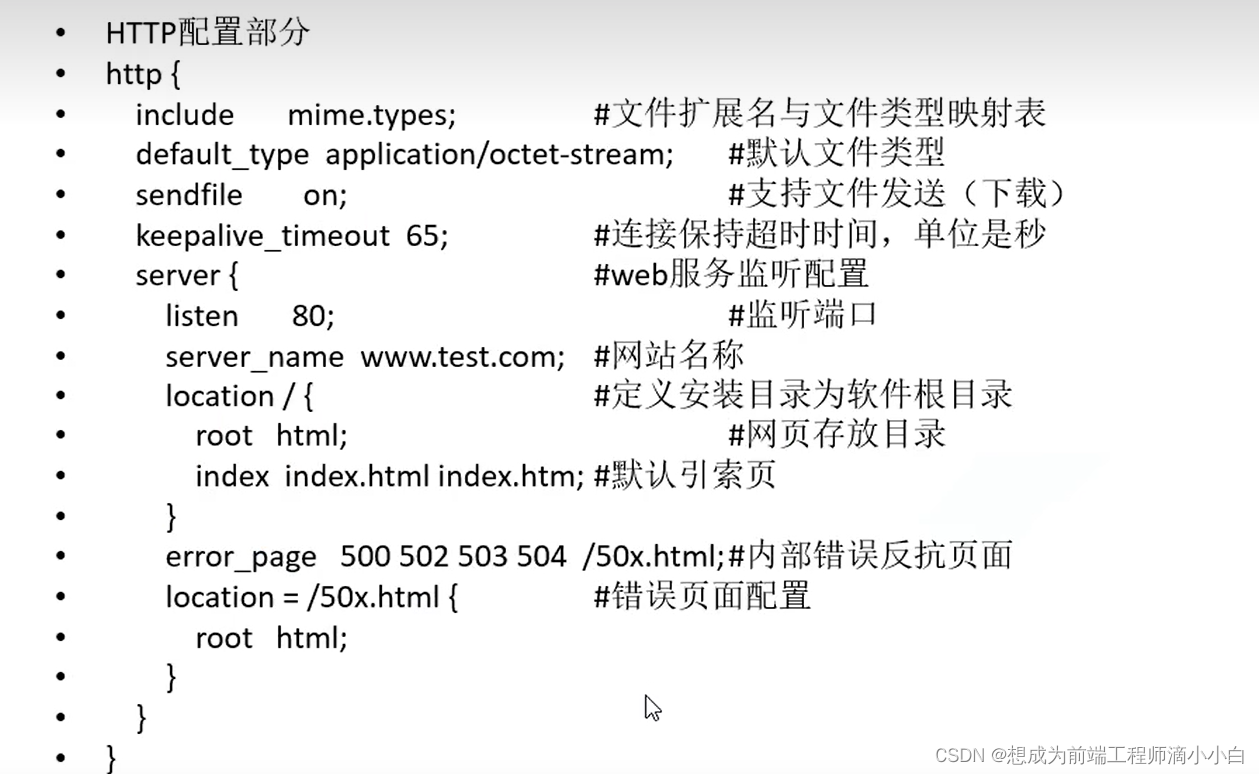
vim nginx.conf
 cd …
cd …
ls
cd html/
vim index.php
要确认nginx读取
本机浏览器:192.168.1.254/index.php显示不了这个页面?why?被当成了下载文件可能会跳出来下载的界面

php -v(php版本)
php压缩包php-5.3.28.tar.gz
cd /root/Desktop/
ls
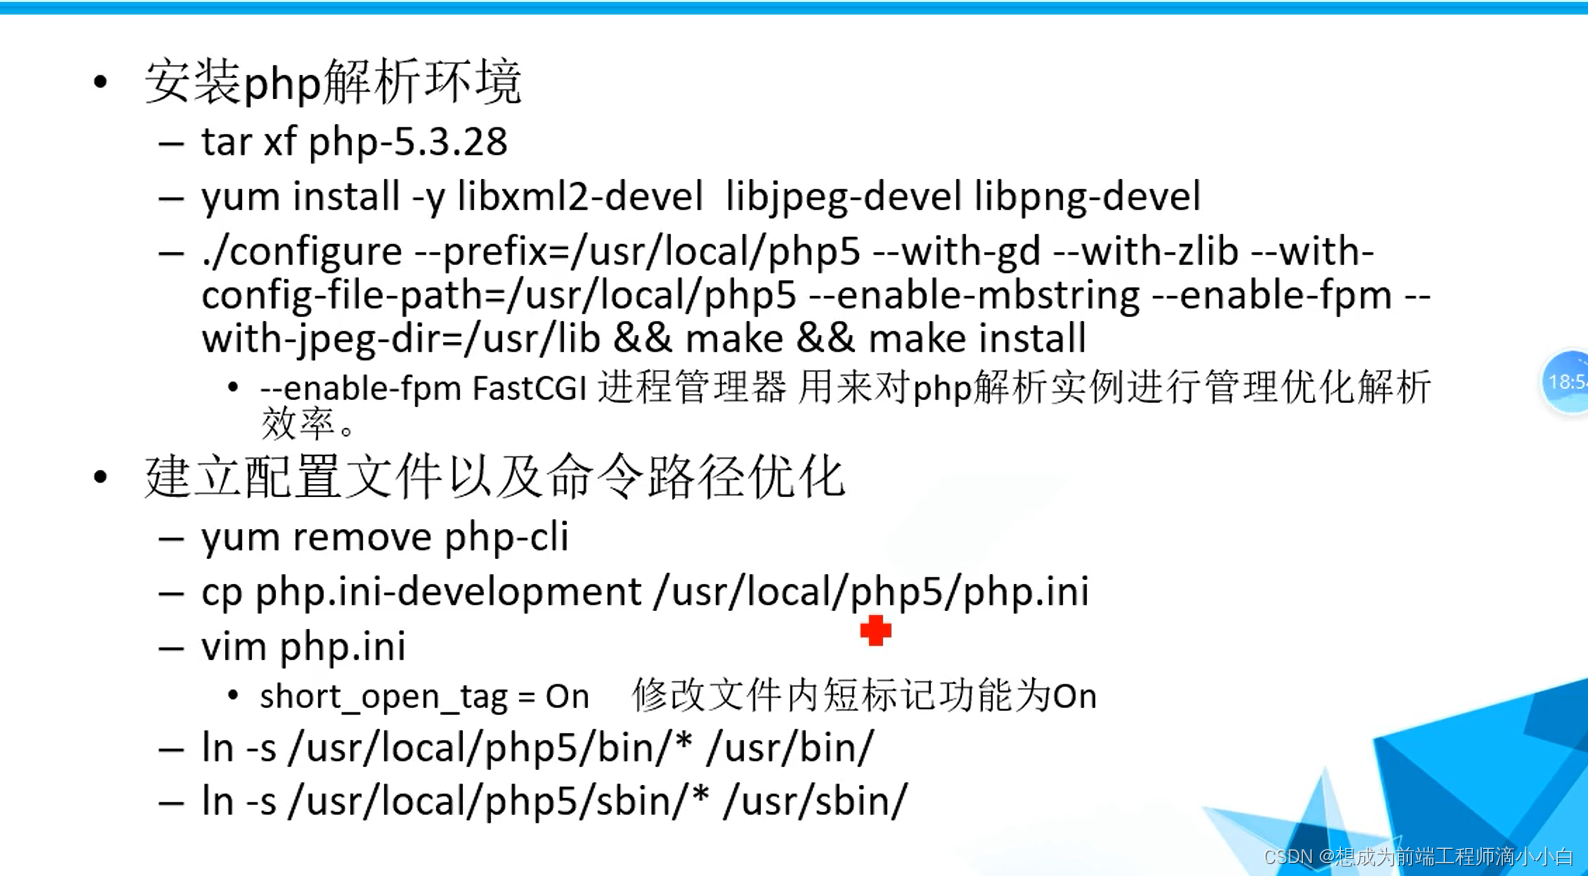
tar xf php-5.3.28.tar.gz
ls
cd php-5.3.28
yum install -y libxml2-devel libjpeg-devel libpng-devel
makefile文件生成:
./configure --prefix=/usr/local/php5 --with-gd --with-zlib --with-config-file-path=/usr/local/php5 --enable-mbstring --enable-fpm --with-jpeg-dir=/usr/lib
make
make install
cd /usr/local/php5
ls
cd bin/
ls
./php -v //查看php版本号
卸载原来下载的php功能:
yum remove php-cli
php -v //确认卸载之后php命令不可使用
ln -s /usr/local/php5/bin/* /usr/bin/
ln -s /usr/local/php5/sbin/* /usr/sbin
php -v //发现php命令可用了
cd …
ls
cd /root/Desktop/php-5.3.28/
ls
cp php.ini-development /usr/local/php5/
ls
ls
ll
mv php.ini-development php.ini
ls
ll
vim php.ini
/short //搜索以short开头的
short_open_tag=off
:set nu //查看这一行的行号226
将of改为On
short_open_tag=On
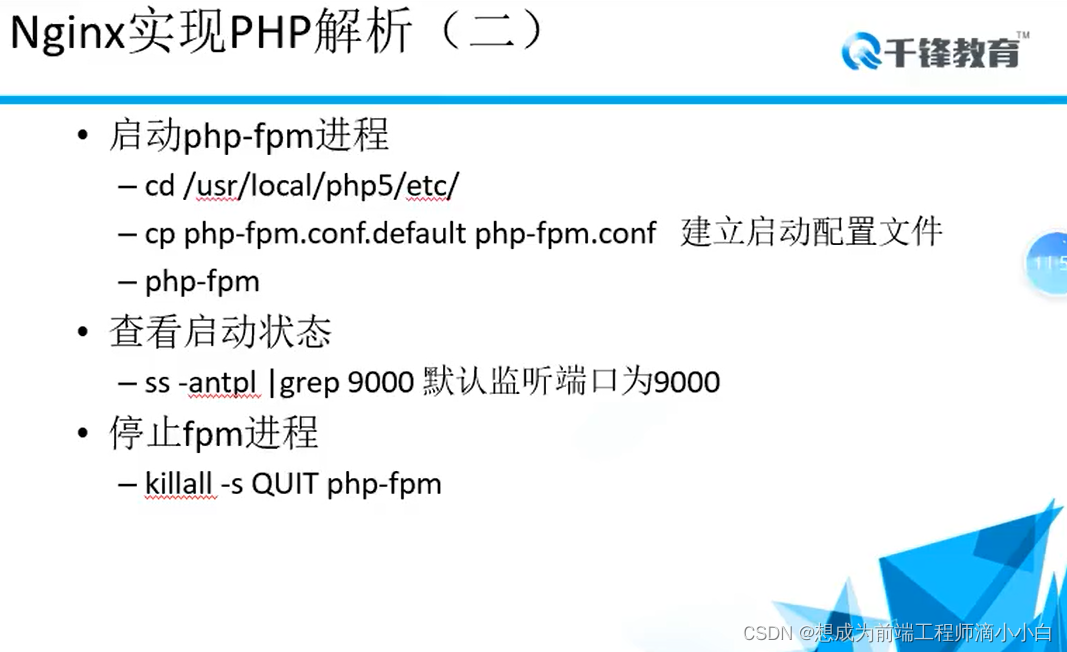
cd /usr/local/php5/etc
ls
php-fpm.conf.default php-fpm.conf
ls
vim php-fpm.conf
cd …
ls
php-fpm
//php默认开启9000端口,可以查看一下启动php后是否开启了9000端口号
ss -antpl | grep 9000
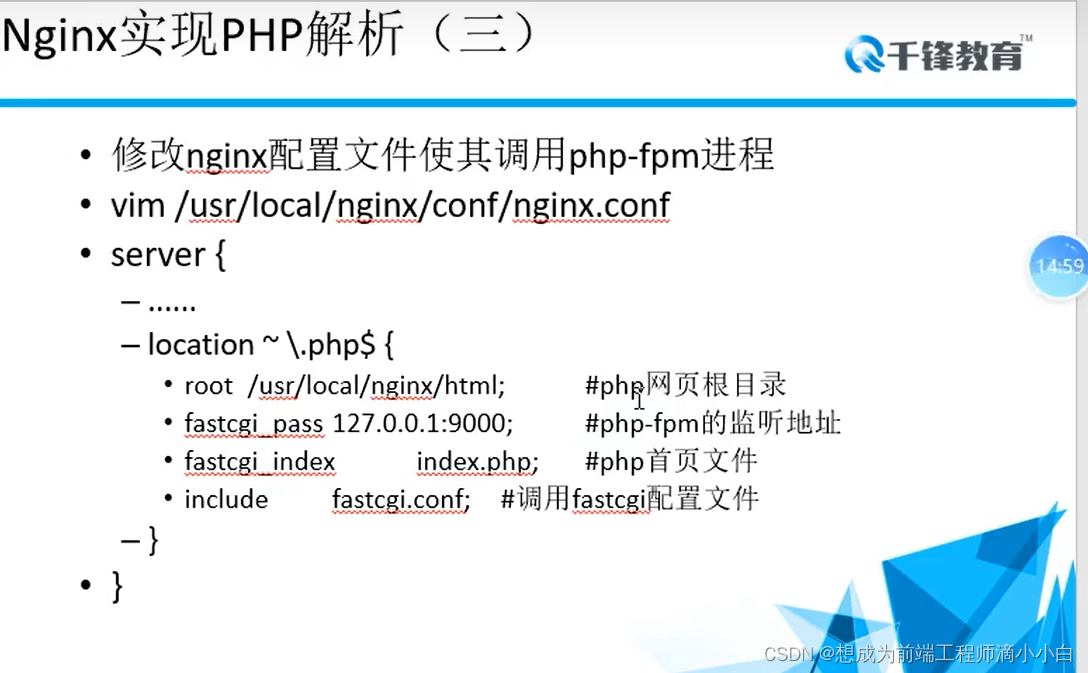
vim /usr/local/nginx/conf/nginx.conf
找到server在第65行,可以使用:set nu的方式查看行号
location ~ .php${
}
这一部分去掉注释#,然后注释{}内的fatcgi_param… 以及注释include fastcgi_param;再在{}内写入include fastcgi.conf;因为沿用的是C语言的语法习惯,所以记得最后要写英文分号
php-fpm -h //查看php的帮助命令
killall php-fpm //结束php
/usr/local/nginx/sbin/nginx -s stop //如果刚才的{}内写入include fastcgi.conf;,忘了加英文分号会报错,加上就好了
php-fpm /usr/local/nginx/sbin/nginx //重新启动nginx
本机浏览器:192.168.1.254/index.php
附:https://www.php.net/releases/(php-5.3.28.tar.gz下载网址)
java web框架
jsp tomcat
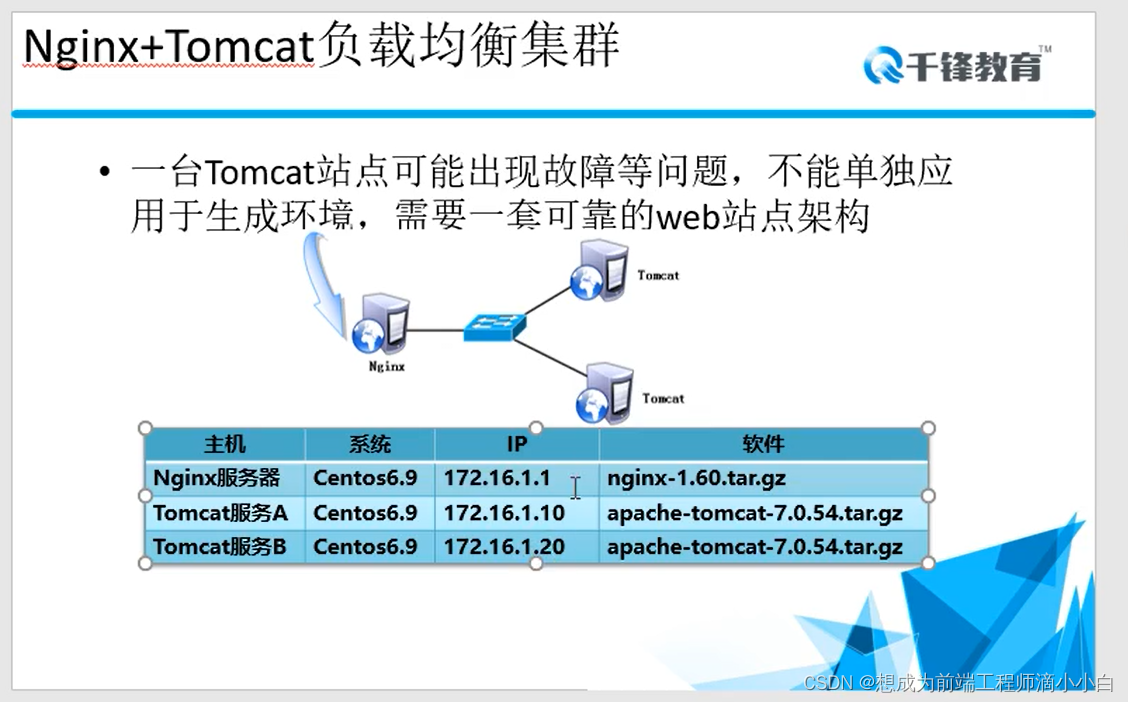
nginx 功能负载均衡
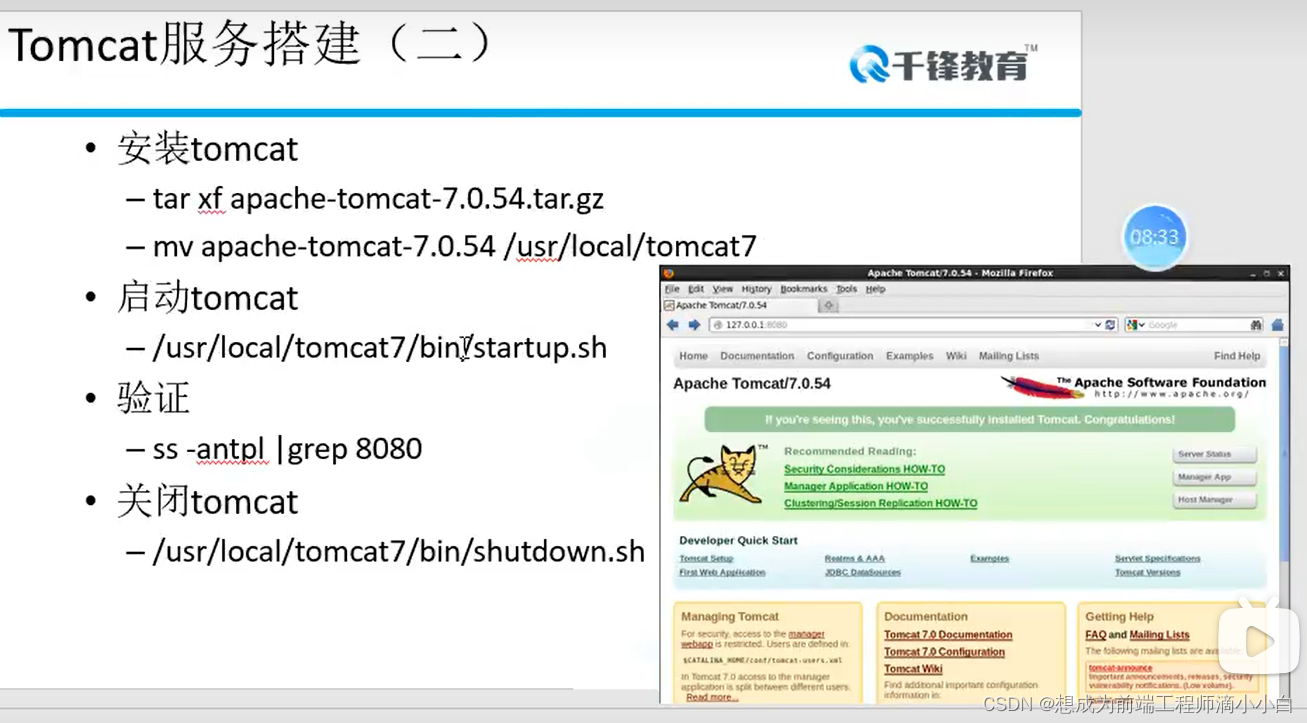
apache-tomcat-7.0.54.tar.gz安装包
ls
tar xf apache-tomcat…
ls
mv apache-tomcat-7.0.54 /usr/local/tomcat7
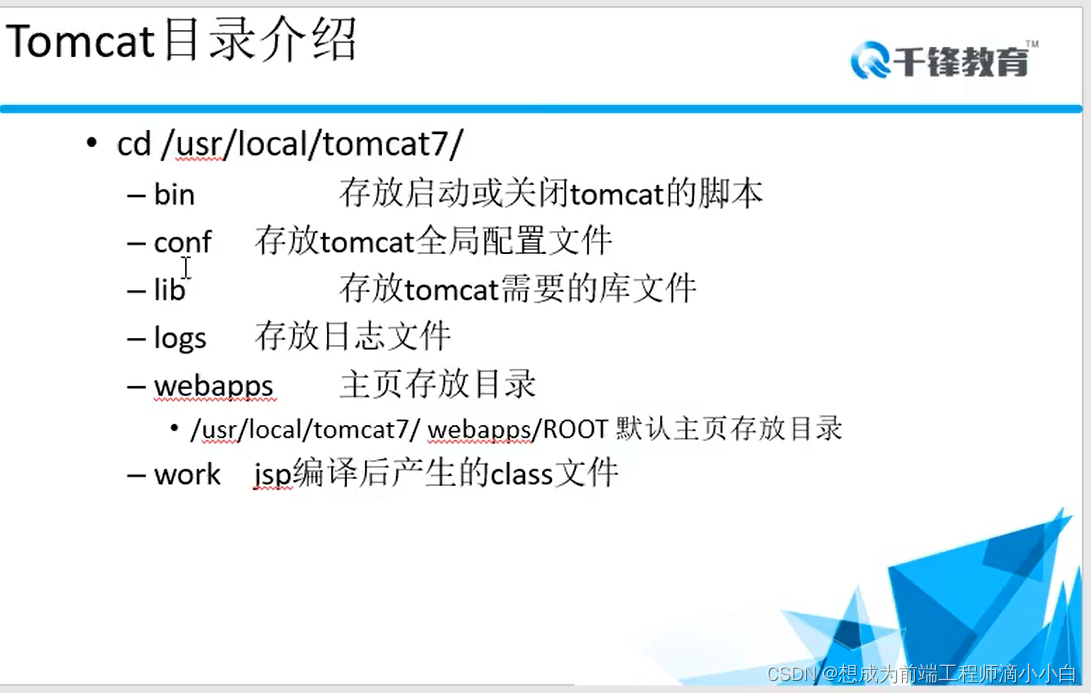
cd /usr/local/tomcat7/
ls
cd bin/
./startup.sh
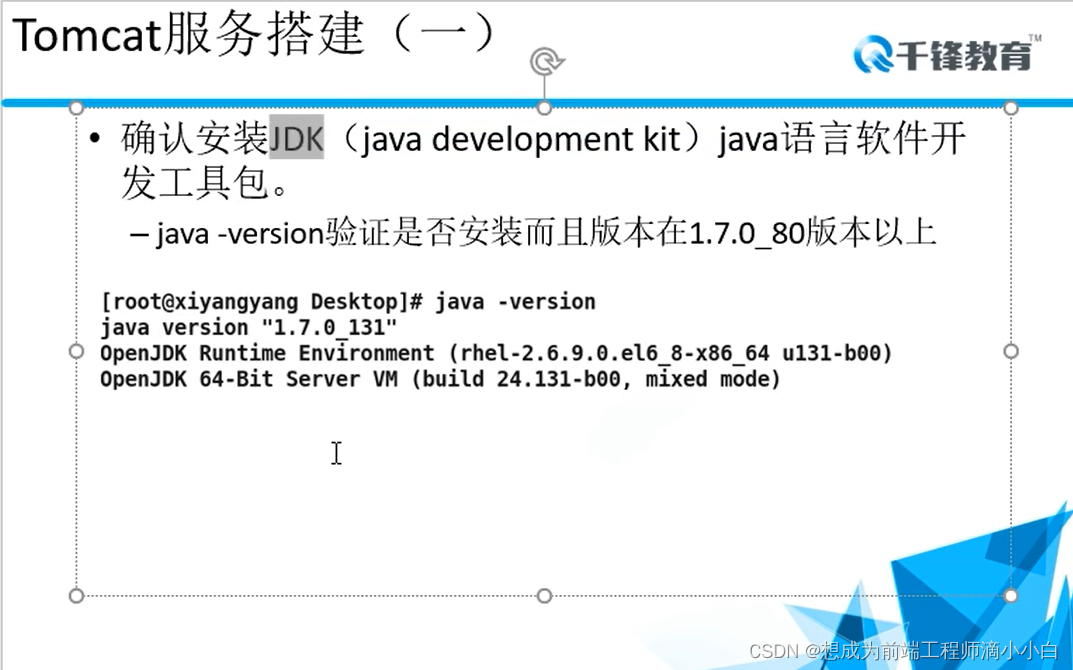
Java -version //查看java版本
which java //查看java路径
rpm -qf /usr/bin/java //看属于谁
java -version //安装Linux系统自带,或可用源码包方式下载安装
ss -antpl | grep 8080 //查看java是否启动
浏览器:输入127.0.0.1回环地址,网页无法显示原因浏览器默认端口不是8080
127.0.0.1:8080 //显示tomcat主页
cd …
cd …
退回到tomcat下查看有无路径ROOT
cd ROOT/
ls
cd …
ls
mv ROOT/ ROOTBAK
ls
mkdir ROOT
cd ROOT
ls
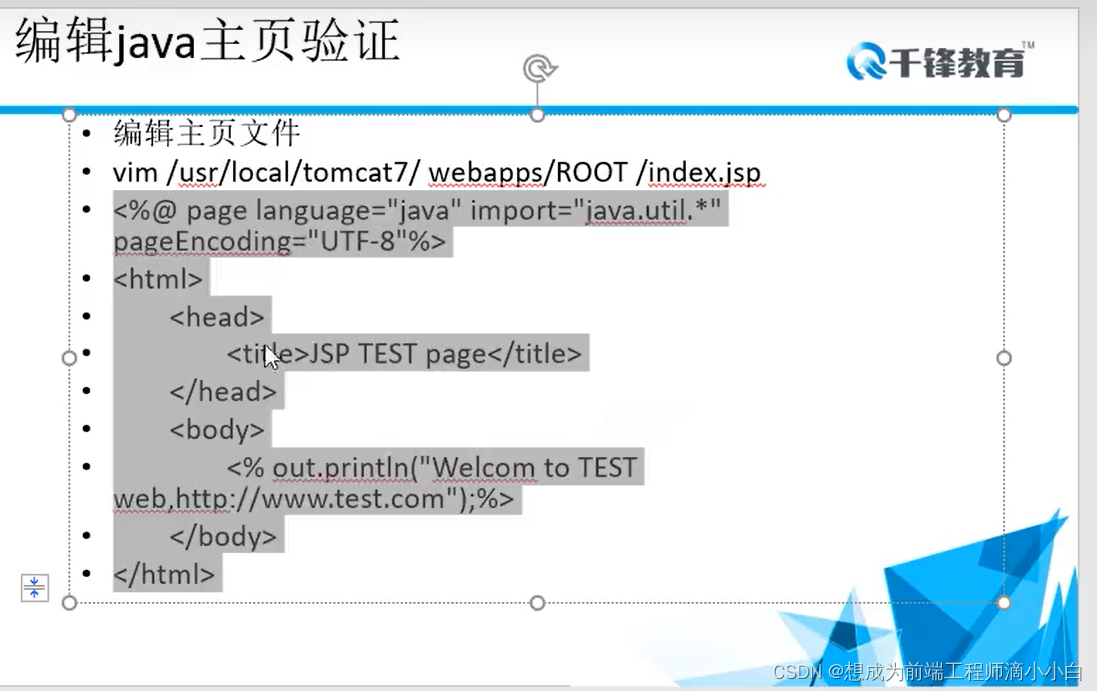
vim index.jsp
<%@page language="java" import="java.util.*" pageEncoding="UTF-8"%>
<html>
<head>
<title>JSP TEST1 Page</title>
</head>
<body>
<%out.println("Welcome to TEST1 web,http://www/test.com");%>
</body>
</html>
浏览器:127.0.0.1:8080
ip addr
vim /etc/sysconfig/network-scripts/ifcfg-eth1
地址改为172.16.1.10
保存
ifdown eth1
ifup eth1
ip addr
另一个tomcat2已经配置好了
tomcat 1 ping 172.16.1.20可通
172.16.1.20:8080
ls
nginx-1.6.0.tar.gz拷贝过来
重新编译:
./configure --prefix=/usr/local/nginx --user=nginx --group=nginx --with-file-aio --with-http_stub_status_module --with-http_gzip_static_module --with-http_flv_module --with-http_ssl_module
class1:tar xf nginx-1.6.0.tar.gz
ls
./configure --prefix=/usr/local/nginx --user=nginx --group=nginx --with-file-aio --with-http_stub_status_module --with-http_gzip_static_module --with-http_flv_module --with-http_ssl_module
报错的话根据错误调整,如果是缺少什么东西的话安装就好了
yum install openssl //报错已安装
yum install openssl-devel
vim /etc/yum.repos.d/dvd.repo
yum install openssl
./configure --prefix=/usr/local/nginx --user=nginx --group=nginx --with-file-aio --with-http_stub_status_module --with-http_gzip_static_module --with-http_flv_module --with-http_ssl_module
make & make install
cd /usr/local/nginx/
ls
cd conf/
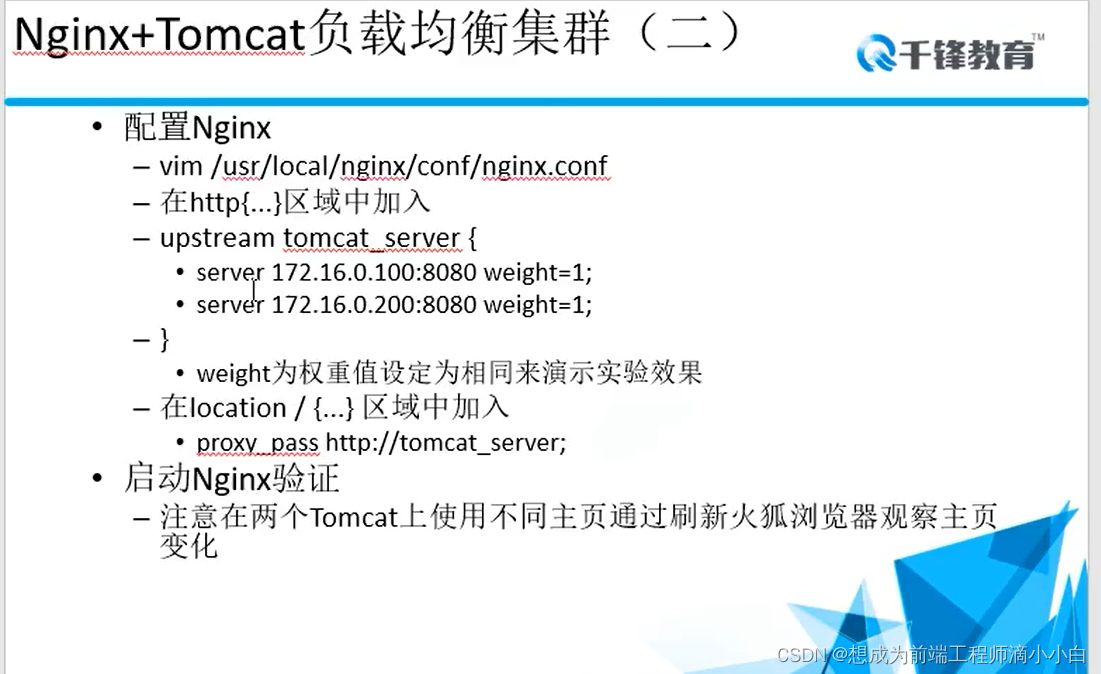
vim nginx.conf
http区域在最后一个}上头写:
upstream tomcat_server{
server 172.16.1.10:8080 weight=1;
server 172.16.1.20:8080 weight=1;
}
weight为权重值,设定为相同来演示实验效果,也就是tomcat1和tomcat2被分配的机率相同
在location/{…}区域中加入:
proxy_pass http://tomcat_server;
cd …
ls
cd sbin/
./nginx
127.0.0.1 刷新页面test1,test2交替调整


 1498
1498


 被折叠的 条评论
为什么被折叠?
被折叠的 条评论
为什么被折叠?
 到【灌水乐园】发言


