


Centos7.9中使用Docker安装云崽机器人

前面我写了如何普通版搭建云崽教程,今天我们来使用docker来安装,感谢docker镜像源作者:如青桑(QQ: 1666633887)
普通版教程:https://blog.hanhanz.top/?p=309
镜像源地址:https://hub.docker.com/r/moeta233/yunzai-chatgpt
Ubuntu版docker安装云崽教程:https://err0r.top/article/Yunzai-chatgptPlugin/
使用docker的前提是你得有docker,怎么看你是否已经安装了呢,在终端输入docker version ,如果提示未找到命令,那就是没安装,如果有输出内容,那就太棒啦,你可以跳过安装docker部分啦~请前往下方安装云崽部分
前提条件
Docker要求系统为64位、Linux系统内核版本为3.8以上
cat /etc/redhat-release

uname -r
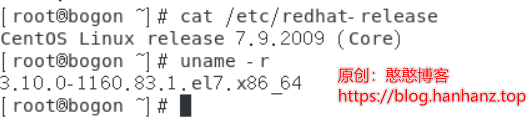
参考我的系统是Centos7.9,内核版本为3.10,是64位的。
安装Docker
安装软件包
yum install -y yum-utils device-mapper-persistent-data lvm2
设置yum源
#二选一,也可以不选
yum-config-manager --add-repo http://download.docker.com/linux/centos/docker-ce.repo(中央仓库)

yum-config-manager --add-repo http://mirrors.aliyun.com/docker-ce/linux/centos/docker-ce.repo(阿里仓库)
docker的版本选择和安装
-
查看版本
yum list docker-ce --showduplicates | sort -r
这里我选择安装第一个23.0.1的版本
-
选择好版本进行安装
yum -y install docker-ce-23.0.1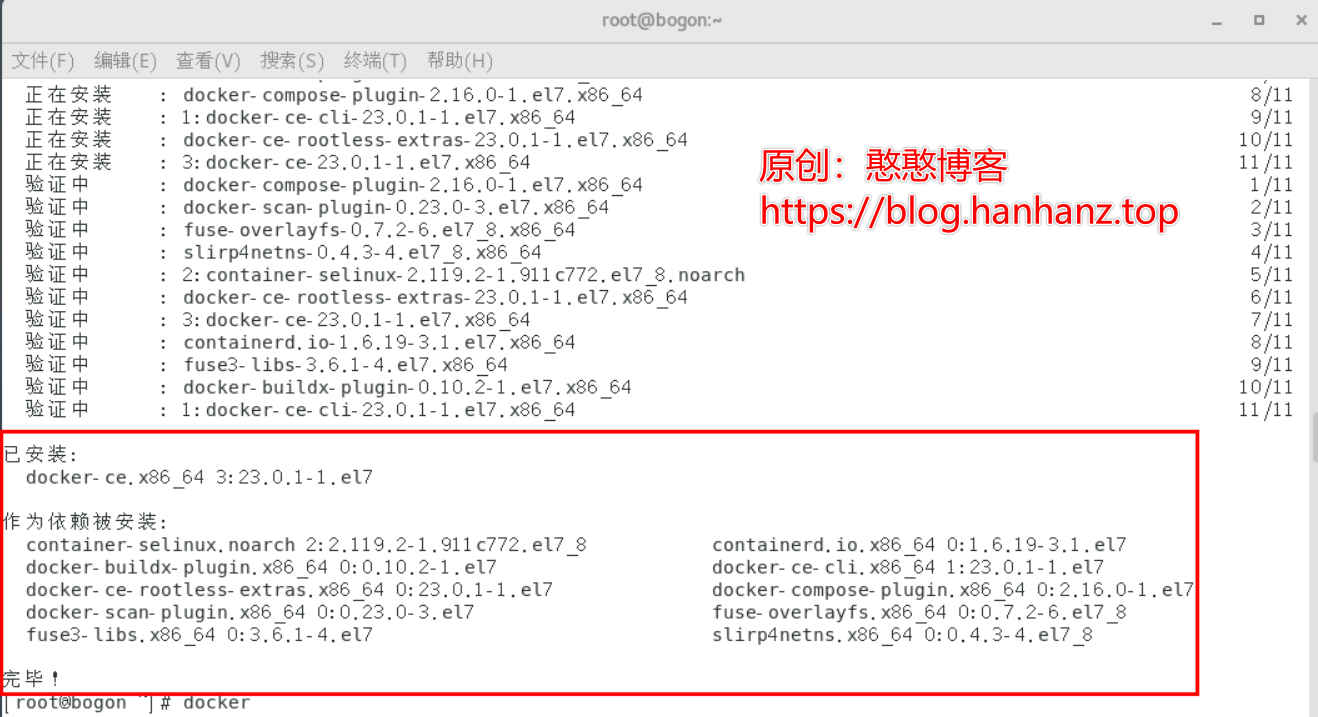
不报错就说明安装好了
-
启动docker
systemctl start docker -
检查已安装的docker
docker version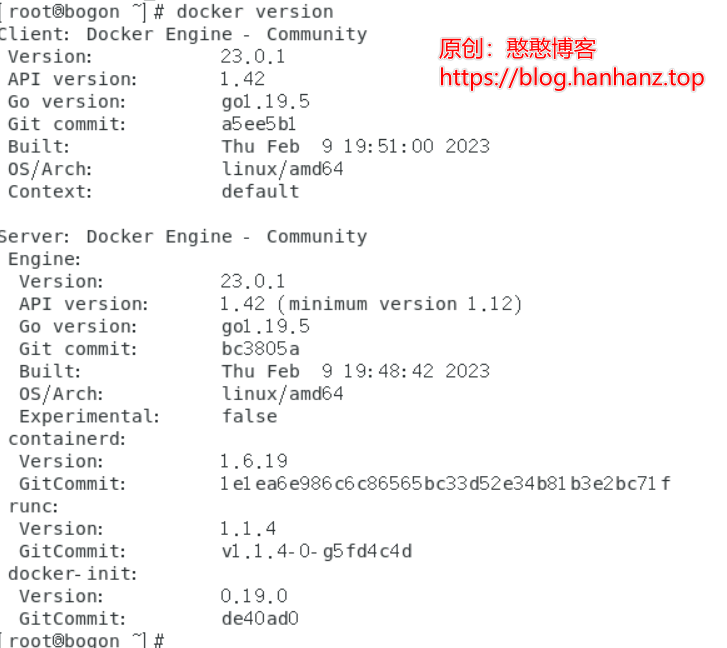 ](https://imgloc.com/i/iDKobN)
 -
设置开机自启
systemctl enable docker
安装云崽
上面我们安装好了docker,现在可以安装云崽了
镜像介绍
一个开箱即用的云崽Bot,集成锅巴插件和
ChatGPT插件。已配置好所有依赖和
ffmpeg。默认用户:root,密码:password。请务必在连接后使用
passwd root,更改root账户的密码。
使用方法
请直接运行:
docker run -it -p {SSH端口}:22 -p {锅巴端口}:50831 --name {容器名称} moeta233/yunzai-chatgpt
例如:
docker run -it -p 22:22 -p 50831:50831 --name yunzai moeta233/yunzai-chatgpt
国内镜像
镜像较大,建议使用国内镜像:registry.cn-beijing.aliyuncs.com/moeta/yunzai-chatgpt
docker run -it -p 22:22 -p 50831:50831 --name yunzai registry.cn-beijing.aliyuncs.com/moeta/yunzai-chatgpt
运行之后先是会拉取镜像,一切正常的话,会提示你配置QQ号还有密码以及登录协议主人QQ等配置项,登录成功后会出现下面界面,这样就算成功了,在QQ聊天界面给机器人发送**#重启就可以后台运行了,配置ChatGPT插件的话,私聊机器人#锅巴登录**去锅巴里面进行配置,当然如果你是大神或者你就要自己配置,请参考我的另一篇教程:https://blog.hanhanz.top/?p=309


后台运行的方法
-
第一种
发送重启后,直接
Ctrl+P+Q就退出docker了,后台也会继续运行 -
第二种
这种方法适用于你的QQ号登录没有出现问题的时候
发送重启后,会出现下面界面,然后输入
exit退出docker,然后发送docker start yunzai命令运行刚刚创建的docker容器,如果要查看日志的话,输入docker attach yunzai进入查看(只能查看attach以后的日志,我本人docker小白,不太懂docker,可能也有其他方法,可以指正)

教程到这结束了。
其他问题
当云崽退出后会进入bash命令行,因此可能不支持意外退出自动重启,但容器开启会自动运行。您可以在 /app/yunzai.sh 自定义启动脚本。
如果您初次配置出现问题,可以删除容器重建,或重新启动容器并立刻附加,以容器名yunzai为例:
Linux:
docker start yunzai && docker attach yunzai
Windows Powershell:
docker start yunzai; docker attach yunzai
Dockerfile
FROM node:bullseye
VOLUME ["/app"]
RUN sed -i 's/deb.debian.org/mirrors.ustc.edu.cn/g' /etc/apt/sources.list && mkdir -p /app
WORKDIR /app
RUN apt-get update && apt-get install -y curl wget vim git cmake redis-server dialog openssh-server ssh vim
RUN echo "root:password" | chpasswd  \
    && sed -i 's/PermitRootLogin prohibit-password/PermitRootLogin yes/' /etc/ssh/sshd_config \
    && sed -i 's/^#\(PermitRootLogin.*\)/\1/' /etc/ssh/sshd_config \
    && /etc/init.d/ssh start
EXPOSE 22
RUN npm install pnpm --registry=https://registry.npm.taobao.org -g
RUN git clone --depth=1 -b main https://gitee.com/yoimiya-kokomi/Yunzai-Bot.git
WORKDIR /app/Yunzai-Bot
RUN pnpm install -P
RUN git clone --depth=1 https://gitee.com/guoba-yunzai/guoba-plugin.git ./plugins/Guoba-Plugin/
RUN pnpm install --filter=guoba-plugin
EXPOSE 50831
RUN git clone --depth=1 https://gitee.com/ikechan/chatgpt-plugin.git ./plugins/chatgpt-plugin/
WORKDIR /app/Yunzai-Bot/plugins/chatgpt-plugin
RUN pnpm install
RUN apt-get install -yq gconf-service libasound2 libatk1.0-0 libc6 libcairo2 libcups2 libdbus-1-3 \
    libexpat1 libfontconfig1 libgcc1 libgconf-2-4 libgdk-pixbuf2.0-0 libglib2.0-0 libgtk-3-0 libnspr4 \
    libpango-1.0-0 libpangocairo-1.0-0 libstdc++6 libx11-6 libx11-xcb1 libxcb1 libxcomposite1 libxcursor1 \
    libxdamage1 libxext6 libxfixes3 libxi6 libxrandr2 libxrender1 libxss1 libxtst6 libgbm-dev libnss3 \
    ca-certificates fonts-liberation lsb-release xdg-utils wget ttf-wqy-zenhei
RUN fc-cache -fv
WORKDIR /usr/share/
ADD https://johnvansickle.com/ffmpeg/releases/ffmpeg-release-amd64-static.tar.xz /usr/share/
RUN tar -xf /usr/share/ffmpeg-release-amd64-static.tar.xz \
    && mv /usr/share/ffmpeg-6.0-amd64-static /usr/share/ffmpeg \
    && rm -rf /usr/share/ffmpeg-release-amd64-static.tar.xz \
    && chmod 755 /usr/share/ffmpeg/ffmpeg \
    && chmod 755 /usr/share/ffmpeg/ffprobe \
    && ln -s /usr/share/ffmpeg/ffmpeg /usr/bin/ffmpeg \
    && ln -s /usr/share/ffmpeg/ffprobe /usr/bin/ffprobe \
    && chmod 755 /usr/bin/ffmpeg \
    && chmod 755 /usr/bin/ffprobe
WORKDIR /app/Yunzai-Bot
COPY ./yunzai.sh /app/yunzai.sh
ENTRYPOINT [ "/app/yunzai.sh" ]
启动脚本 yunzai.sh
#!/bin/bash
service ssh start
echo -e "\033[0;96m登录后您可以在QQ发送 #重启 命令使Bot转入后台,进入终端。\033[0m"
cd "/app/Yunzai-Bot" || exit
node app
bash
原创地址
憨憨博客:https://blog.hanhanz.top/?p=434
转载请标明原创地址,谢谢配合


 1912
1912


 被折叠的 条评论
为什么被折叠?
被折叠的 条评论
为什么被折叠?
 到【灌水乐园】发言


