


当像我一样的菜鸡在使用开源的深度学习代码时,对于输出的pth模型文件,在预测时使用开源的predict.py文件进行部署,但是使用pth文件有一个问题,就是每次他都要重新加载一次模型,而且不方便移植,所以,想使用onnx进行部署,特此记录
pth2onnx
import torch
from ptsemseg.models import get_model

# 设置device
device = torch.device('cuda:0' if torch.cuda.is_available() else 'cpu')
# torch.onnx.export的两个参数input和output
input=["input"]
output=['output']

# 加载模型model
model = get_model('pspnet', 150, version = 'ade20k')
model = model.eval().to(device)

# 构造一个输入图像Tensor为x
x = torch.randn(1, 3, 256, 256).to(device)
# 导出为onnx
torch.onnx.export(model, x, "pspnet.onnx256", verbose=True, input_names=input, output_names=output, opset_version=11)
preonnx
参照使用pth文件进行预测的predict.py,这里我新建了一个preonnx.py来使用onnx文件来进行预测
两个文件的核心是tensor和numpy数据类型的转换以及维度变换
使用pth进行预测
import numpy as np

from skimage.transform import resize
import cv2

import torch
import time
import onnx
import onnxruntime as ort
from ptsemseg.models import get_model
from ptsemseg.utils import convert_state_dict


device = torch.device("cuda:0" if torch.cuda.is_available() else "cpu")
weight_path = "../../pspnet_50_ade20k.pth"


def color_map(N=256, normalized=False):
    """
    Return Color Map in PASCAL VOC format (rgb)
    \param N (int) number of classes
    \param normalized (bool) whether colors are normalized (float 0-1)
    \return (Nx3 numpy array) a color map
    """
    def bitget(byteval, idx):
        return ((byteval & (1 << idx)) != 0)
    dtype = 'float32' if normalized else 'uint8'
    cmap = np.zeros((N, 3), dtype=dtype)
    for i in range(N):
        r = g = b = 0
        c = i
        for j in range(8):
            r = r | (bitget(c, 0) << 7-j)
            g = g | (bitget(c, 1) << 7-j)
            b = b | (bitget(c, 2) << 7-j)
            c = c >> 3
        cmap[i] = np.array([r, g, b])
    cmap = cmap/255.0 if normalized else cmap
    return cmap

def decode_segmap(temp, n_classes, cmap):
    """
    Given an image of class predictions, produce an bgr8 image with class colors
    \param temp (2d numpy int array) input image with semantic classes (as integer)
    \param n_classes (int) number of classes
    \cmap (Nx3 numpy array) input color map
    \return (numpy array bgr8) the decoded image with class colors
    """
    r = temp.copy()
    g = temp.copy()
    b = temp.copy()
    for l in range(0, n_classes):
        r[temp == l] = cmap[l,0]
        g[temp == l] = cmap[l,1]
        b[temp == l] = cmap[l,2]
    bgr = np.zeros((temp.shape[0], temp.shape[1], 3))
    bgr[:, :, 0] = b
    bgr[:, :, 1] = g
    bgr[:, :, 2] = r
    return bgr.astype(np.uint8)

def predict_max(img):
        """
        Do semantic prediction for max fusion
        \param img (numpy array rgb8)
        """
        class_probs = predict(img)
        # Take best prediction and confidence
        pred_confidence, pred_label = class_probs.max(1)
        pred_confidence = pred_confidence.squeeze(0).cpu().numpy()
        pred_label = pred_label.squeeze(0).cpu().numpy()
        pred_label = resize(pred_label, (375, 500), order = 0, mode = 'reflect', anti_aliasing=False, preserve_range = True) # order = 0, nearest neighbour
        pred_label = pred_label.astype(np.int64)
        # Add semantic color
        semantic_color = decode_segmap(pred_label, 150, cmap)
        pred_confidence = resize(pred_confidence, (375, 500),  mode = 'reflect', anti_aliasing=True, preserve_range = True)
        return (semantic_color, pred_confidence)

def predict(img):
        """
        Do semantic segmantation
        \param img: (numpy array bgr8) The input cv image
        """
        img = img.copy() # Make a copy of image because the method will modify the image
        #orig_size = (img.shape[0], img.shape[1]) # Original image size
        # Prepare image: first resize to CNN input size then extract the mean value of SUNRGBD dataset. No normalization
        img = resize(img, cnn_input_size, mode = 'reflect', anti_aliasing=True, preserve_range = True) # Give float64
        img = img.astype(np.float32)
        img -= mean
        # Convert HWC -> CHW
        img = img.transpose(2, 0, 1)
        # Convert to tensor
        img = torch.tensor(img, dtype = torch.float32)
        img = img.unsqueeze(0) # Add batch dimension required by CNN
        with torch.no_grad():
            img = img.to(device)
            # Do inference
            since = time.time()
            outputs = model(img) #N,C,W,H
            # Apply softmax to obtain normalized probabilities
            outputs = torch.nn.functional.softmax(outputs, 1)
            return outputs

if __name__ == '__main__':
    cmap = color_map(N = 150, normalized = False)
    color_img = cv2.imread("./include/2007_000661.jpg")
    weight_dict = torch.load(weight_path, map_location={'cuda:0':'cpu'})

    cnn_input_size = (473, 473)
    mean = np.array([104.00699, 116.66877, 122.67892]) # Mean value of dataset

    model = get_model("pspnet",150, version = 'ade20k')
    state = torch.load(weight_path, map_location={'cuda:0':'cpu'})
    model.load_state_dict(convert_state_dict(state['model_state'])) # Remove 'module' from dictionary keys

    model = model.to(device)
    model.eval().to(device)

    semantic_color, pred_confidence = predict_max(color_img)
    while(1):
        cv2.imshow("semantic_color", semantic_color)
        if cv2.waitKey(0) & 0xFF == ord('q'):
            break
使用onnx进行预测
import numpy as np
from skimage.transform import resize
import cv2
import onnxruntime as ort
import torch
import time

device = torch.device("cuda:0" if torch.cuda.is_available() else "cpu")

# Load the ONNX model
onnx_model_path = "./pspnet473.onnx"
ort_session = ort.InferenceSession(onnx_model_path)

def color_map(N=256, normalized=False):
    """
    Return Color Map in PASCAL VOC format (rgb)
    \param N (int) number of classes
    \param normalized (bool) whether colors are normalized (float 0-1)
    \return (Nx3 numpy array) a color map
    """
    def bitget(byteval, idx):
        return ((byteval & (1 << idx)) != 0)
    dtype = 'float32' if normalized else 'uint8'
    cmap = np.zeros((N, 3), dtype=dtype)
    for i in range(N):
        r = g = b = 0
        c = i
        for j in range(8):
            r = r | (bitget(c, 0) << 7-j)
            g = g | (bitget(c, 1) << 7-j)
            b = b | (bitget(c, 2) << 7-j)
            c = c >> 3
        cmap[i] = np.array([r, g, b])
    cmap = cmap/255.0 if normalized else cmap
    return cmap

def decode_segmap(temp, n_classes, cmap):
    """
    Given an image of class predictions, produce an bgr8 image with class colors
    \param temp (2d numpy int array) input image with semantic classes (as integer)
    \param n_classes (int) number of classes
    \cmap (Nx3 numpy array) input color map
    \return (numpy array bgr8) the decoded image with class colors
    """
    r = temp.copy()
    g = temp.copy()
    b = temp.copy()
    for l in range(0, n_classes):
        r[temp == l] = cmap[l,0]
        g[temp == l] = cmap[l,1]
        b[temp == l] = cmap[l,2]
    bgr = np.zeros((temp.shape[0], temp.shape[1], 3))
    bgr[:, :, 0] = b
    bgr[:, :, 1] = g
    bgr[:, :, 2] = r
    return bgr.astype(np.uint8)

if __name__ == '__main__':
    cmap = color_map(N=150, normalized=False)
    color_img = cv2.imread("./2007_000661.jpg")

    # Resize image to match the model's input size
    input_size = (473, 473)  #473 256
    color_img_resized = cv2.resize(color_img, input_size)

    # Preprocess the image
    img = color_img_resized.astype(np.float32)
    img -= np.array([104.00699, 116.66877, 122.67892])  # Mean value of dataset
    img = img.transpose(2, 0, 1)
    img = np.expand_dims(img, axis=0)

    # Perform inference
    outputs = ort_session.run(None, {'input': img})
    class_probs = outputs[0]

    # Process the output to get semantic color and confidence
    pred_confidence, pred_label = np.max(class_probs, axis=1), np.argmax(class_probs, axis=1)
    pred_label = pred_label.squeeze(0)
    pred_label = resize(pred_label, (375, 500), order=0, mode='reflect', anti_aliasing=False, preserve_range=True)
    pred_label = pred_label.astype(np.int64)
    semantic_color = decode_segmap(pred_label, 150, cmap)
    pred_confidence = resize(pred_confidence, (375, 500), mode='reflect', anti_aliasing=True, preserve_range=True)

    # Display the result
    while(1):
        cv2.imshow("semantic_color", semantic_color)
        if cv2.waitKey(0) & 0xFF == ord('q'):
            break
成功案例
使用pth进行预测(不重要)
相关代码为(主要关注tensor维度变化和处理方式)
    def detect_image(self, image, count=False, name_classes=None):
        #   在这里将图像转换成RGB图像,防止灰度图在预测时报错。
        #   代码仅仅支持RGB图像的预测,所有其它类型的图像都会转化成RGB
        image       = cvtColor(image)
        #   对输入图像进行一个备份,后面用于绘图
        old_img     = copy.deepcopy(image)
        orininal_h  = np.array(image).shape[0]
        orininal_w  = np.array(image).shape[1]
        #   给图像增加灰条,实现不失真的resize
        #   也可以直接resize进行识别
        image_data, nw, nh  = resize_image(image, (self.input_shape[1],self.input_shape[0]))
        #   添加上batch_size维度
        image_data  = np.expand_dims(np.transpose(preprocess_input(np.array(image_data, np.float32)), (2, 0, 1)), 0)

        with torch.no_grad():
            images = torch.from_numpy(image_data)
            if self.cuda:
                images = images.cuda()

            #   图片传入网络进行预测
            pr = self.net(images)[0]                                    # tensor:[21,512,512]
            #   取出每一个像素点的种类,使用pr.permute(1,2,0)进行维度转换,并转为numpy
            pr = F.softmax(pr.permute(1,2,0),dim = -1).cpu().numpy()    # numpy:[512,512,21]
            #   将灰条部分截取掉
            pr = pr[int((self.input_shape[0] - nh) // 2) : int((self.input_shape[0] - nh) // 2 + nh), \
                    int((self.input_shape[1] - nw) // 2) : int((self.input_shape[1] - nw) // 2 + nw)]
            #   进行图片的resize
            pr = cv2.resize(pr, (orininal_w, orininal_h), interpolation = cv2.INTER_LINEAR)
            #   取出每一个像素点的种类
            pr = pr.argmax(axis=-1)                                     # numpy:[512,512]
            seg_img = np.reshape(np.array(self.colors, np.uint8)[np.reshape(pr, [-1])], [orininal_h, orininal_w, -1])
            #   将新图片转换成Image的形式
            image   = Image.fromarray(np.uint8(seg_img))
            #   将新图与原图及进行混合
            image   = Image.blend(old_img, image, 0.7)
            return image
推理时间
使用onnx进行预测(完整)
相关代码为(主要看操作的数据类型和操作方法)
import time
import copy
import colorsys
import onnx
import onnxruntime as ort

import cv2
import numpy as np
from PIL import Image
from utils.utils import cvtColor, preprocess_input, resize_image, show_config

import torch
from torch import nn
import torch.nn.functional as F

name_classes = ["background", "aeroplane", "bicycle", "bird", "boat", "bottle", "bus", "car", "cat", "chair", "cow",
                "diningtable", "dog", "horse", "motorbike", "person", "pottedplant", "sheep", "sofa", "train",
                "tvmonitor"]

device = torch.device("cuda:0" if torch.cuda.is_available() else "cpu")

# Load the ONNX model
onnx_model_path = "./model_data/models.onnx"
ort_session = ort.InferenceSession(onnx_model_path)

mix_type = 0
colors = [(0, 0, 0), (128, 0, 0), (0, 128, 0), (128, 128, 0), (0, 0, 128), (128, 0, 128), (0, 128, 128),
          (128, 128, 128), (64, 0, 0), (192, 0, 0), (64, 128, 0), (192, 128, 0), (64, 0, 128), (192, 0, 128),
          (64, 128, 128), (192, 128, 128), (0, 64, 0), (128, 64, 0), (0, 192, 0), (128, 192, 0), (0, 64, 128),
          (128, 64, 12)]


def onnx_detect(image):
    image = cvtColor(image)
    old_img = copy.deepcopy(image)
    orininal_h = np.array(image).shape[0]
    orininal_w = np.array(image).shape[1]
    image_data, nw, nh = resize_image(image, (512, 512))
    image_data = np.expand_dims(np.transpose(preprocess_input(np.array(image_data, np.float32)), (2, 0, 1)), 0)

    outputs = ort_session.run(None, {'images': image_data})
    # 获取想要的信息
    pr = outputs[0]                # numpy:[1,21,512,512]
    # 将由tensor转换成的numpy的多余维度去掉,使用np.squeeze方法
    pr = np.squeeze(pr, axis=0)    # numpy:[21,512,512]
    # 改变numpy维度顺序,将类别信息放在最后一维
    pr = np.transpose(pr,(1,2,0))  # numpy:[512,512,21]
    pr = np.exp(pr) / np.sum(np.exp(pr), axis=-1, keepdims=True)
    pr = pr[int((512 - nh) // 2): int((512 - nh) // 2 + nh), \
         int((512 - nw) // 2): int((512 - nw) // 2 + nw)]
    # 进行图片的resize
    pr = cv2.resize(pr, (orininal_w, orininal_h), interpolation=cv2.INTER_LINEAR)
    # 取出每一个像素点的种类
    pr = pr.argmax(axis=-1)  # numpy:[512,512]

    seg_img = np.reshape(np.array(colors, np.uint8)[np.reshape(pr, [-1])], [orininal_h, orininal_w, -1])
    # ------------------------------------------------#
    #   将新图片转换成Image的形式
    # ------------------------------------------------#
    image = Image.fromarray(np.uint8(seg_img))
    # ------------------------------------------------#
    #   将新图与原图及进行混合
    # ------------------------------------------------#
    image = Image.blend(old_img, image, 0.7)

    return image


while True:
    frame = cv2.imread("/home/pc/文档/deeplabv3-plus-pytorch-main/img/street.jpg")

    frame = cv2.cvtColor(frame, cv2.COLOR_BGR2RGB)
    # 转变成Image
    frame = Image.fromarray(np.uint8(frame))
    # 进行检测
    frame = np.array(onnx_detect(frame))
    # RGBtoBGR满足opencv显示格式
    frame = cv2.cvtColor(frame, cv2.COLOR_RGB2BGR)

    cv2.imshow("video", frame)
    if cv2.waitKey(1) & 0xff == ord('q'):
        break
思路解释
1.首先将输入的待处理图片resize为模型要求的尺寸(512,512)
image_data, nw, nh = resize_image(image, (512, 512))2.对图像数据进行预处理,并将其转换为适合模型输入的格式。
np.transpose(..., (2, 0, 1)):将预处理后的图像数据的维度进行转置。原始图像数据的维度可能是(高度,宽度,通道数),而模型通常要求输入数据的维度为(通道数,高度,宽度)。通过转置操作,可以将数据维度调整为符合模型要求的格式。np.expand_dims(..., 0):在转置后的图像数据的第一个维度上增加一个新的维度。这样做是为了将单张图像扩展为一个批次(batch)的形式,因为模型通常接受批量的输入数据。
image_data = np.expand_dims(np.transpose(preprocess_input(np.array(image_data, np.float32)), (2, 0, 1))3.onnx推理,得到的outputs为list,再使用pr=outputs[0]得到信息数据,pr为numpy数据
outputs = ort_session.run(None, {'images': image_data})
pr = outputs[0]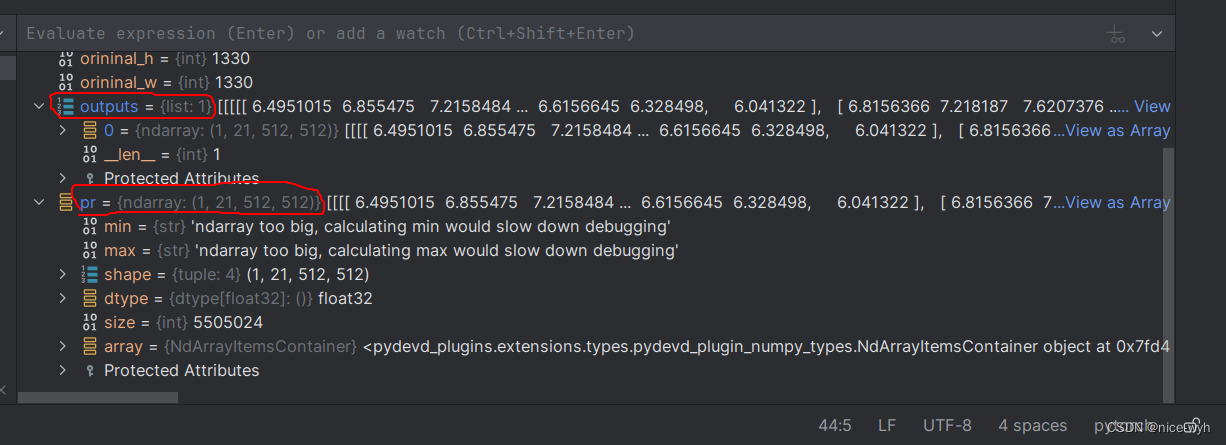
4. 对pr维度进行调整,去掉多余的第一维(batch),此时pr为[21,512,512],对应[类别数,宽,高]
pr = np.squeeze(pr, axis=0)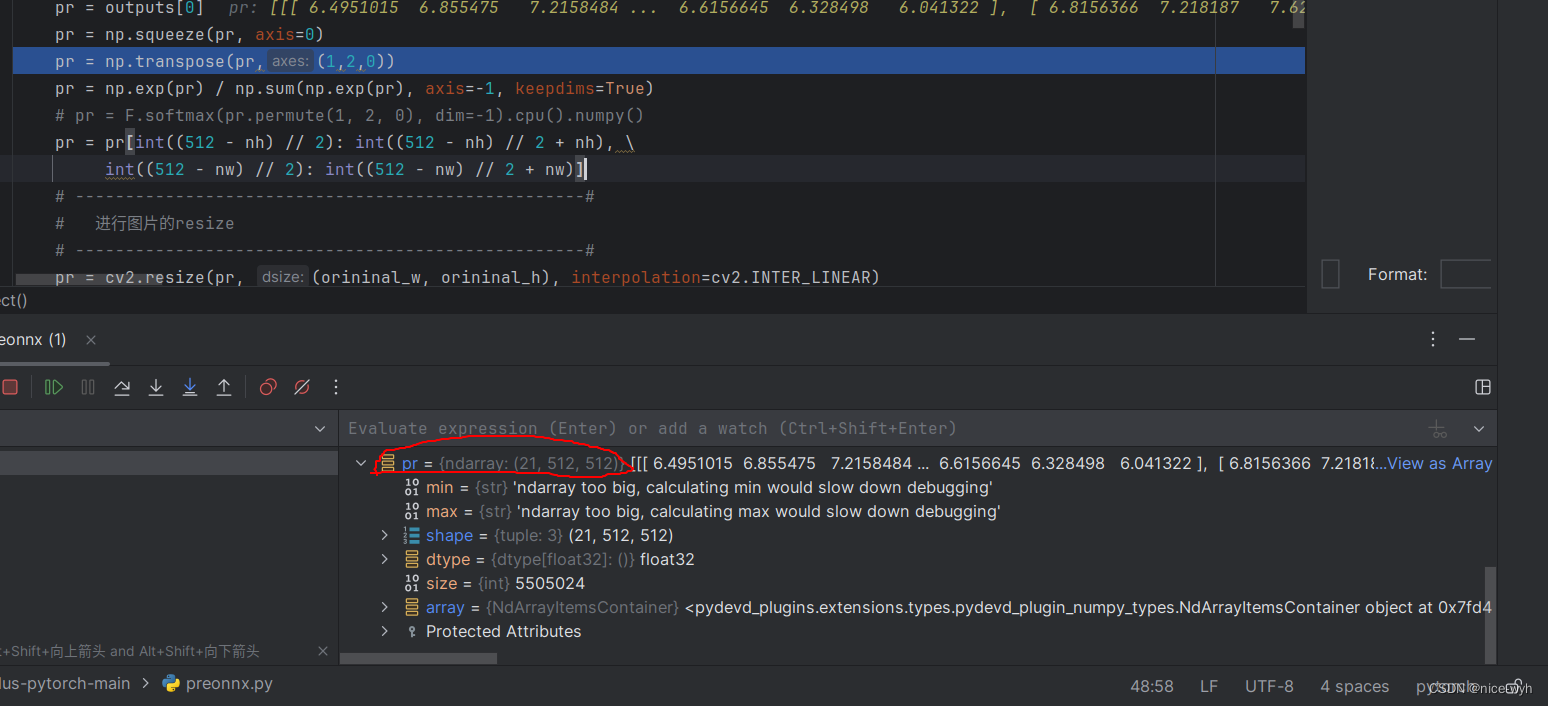
5. 进行维度变换,把[类别数,宽,高]改为[宽,高,类别数]
pr = np.transpose(pr,(1,2,0))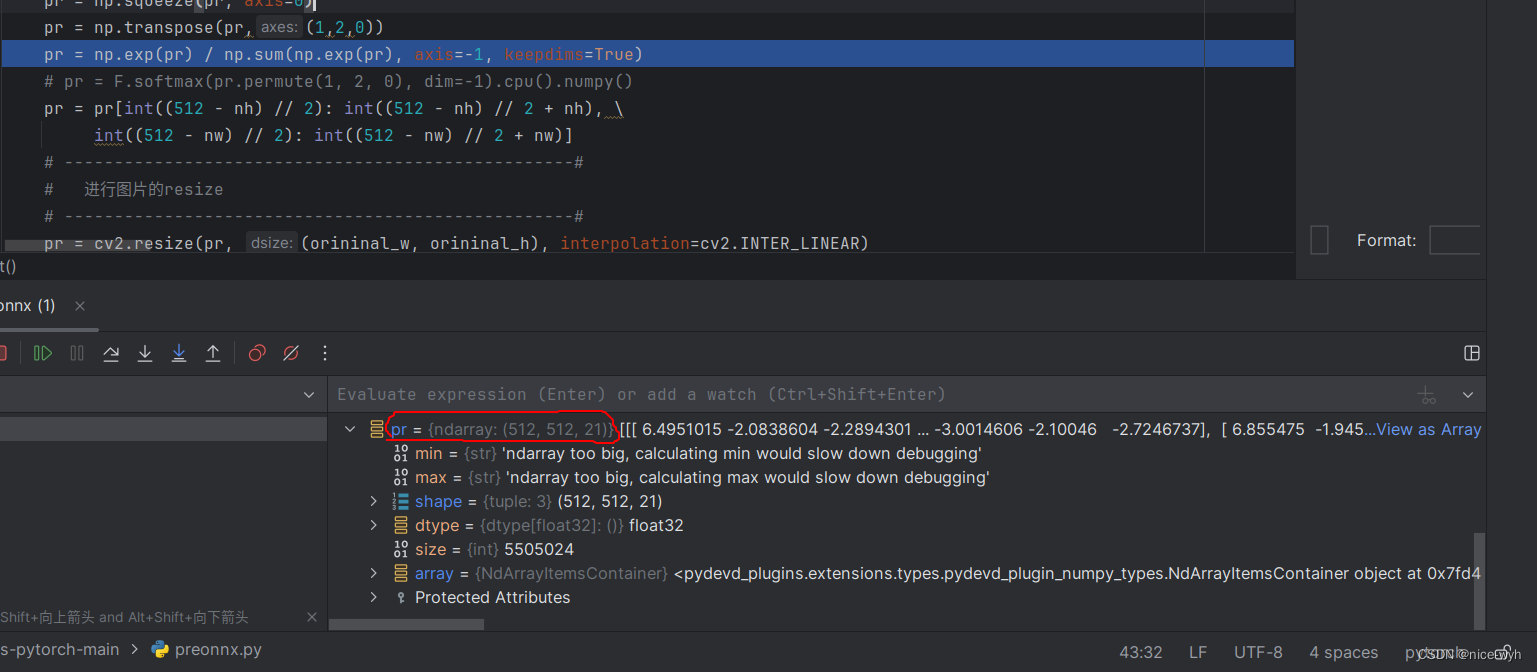
6. 归一化
pr = np.exp(pr) / np.sum(np.exp(pr), axis=-1, keepdims=True)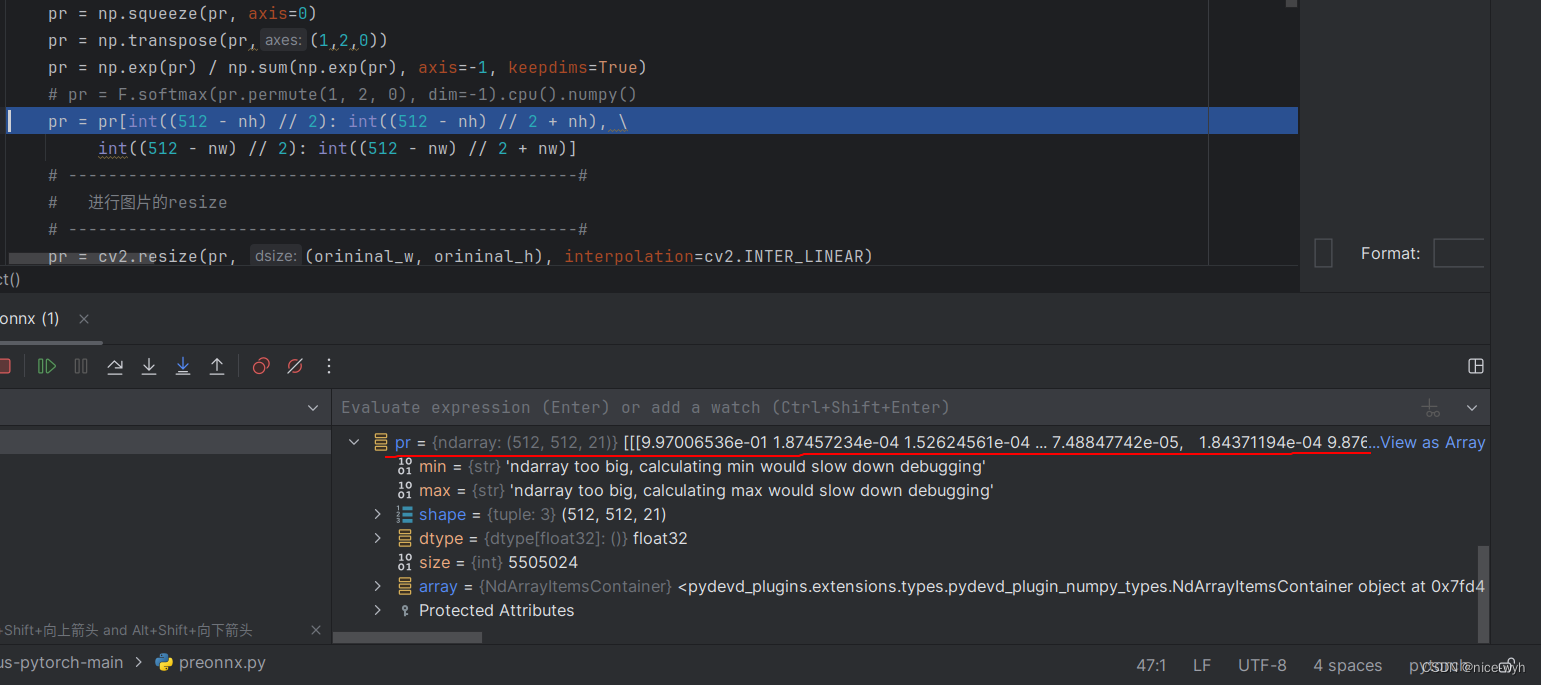
7.这段代码的作用是对图像数据进行裁剪,以适应模型的输入要求。
int((512 - nh) // 2):计算裁剪后的图像高度的起始位置。假设原始图像的高度为nh,而模型要求的输入高度为512,那么需要将图像在高度方向上居中裁剪,使得裁剪后的图像高度为512。这里使用整除运算符//来确保结果为整数。int((512 - nh) // 2 + nh):计算裁剪后的图像高度的结束位置。通过起始位置加上原始图像的高度nh,可以得到裁剪后的图像高度的结束位置。int((512 - nw) // 2):计算裁剪后的图像宽度的起始位置。同样地,假设原始图像的宽度为nw,而模型要求的输入宽度为512,那么需要将图像在宽度方向上居中裁剪,使得裁剪后的图像宽度为512。int((512 - nw) // 2 + nw):计算裁剪后的图像宽度的结束位置。通过起始位置加上原始图像的宽度nw,可以得到裁剪后的图像宽度的结束位置。
pr = pr[int((512 - nh) // 2): int((512 - nh) // 2 + nh), int((512 - nw) // 2): int((512 - nw) // 2 + nw)]8.将图片resize成原尺寸
pr = cv2.resize(pr, (orininal_w, orininal_h), interpolation=cv2.INTER_LINEAR)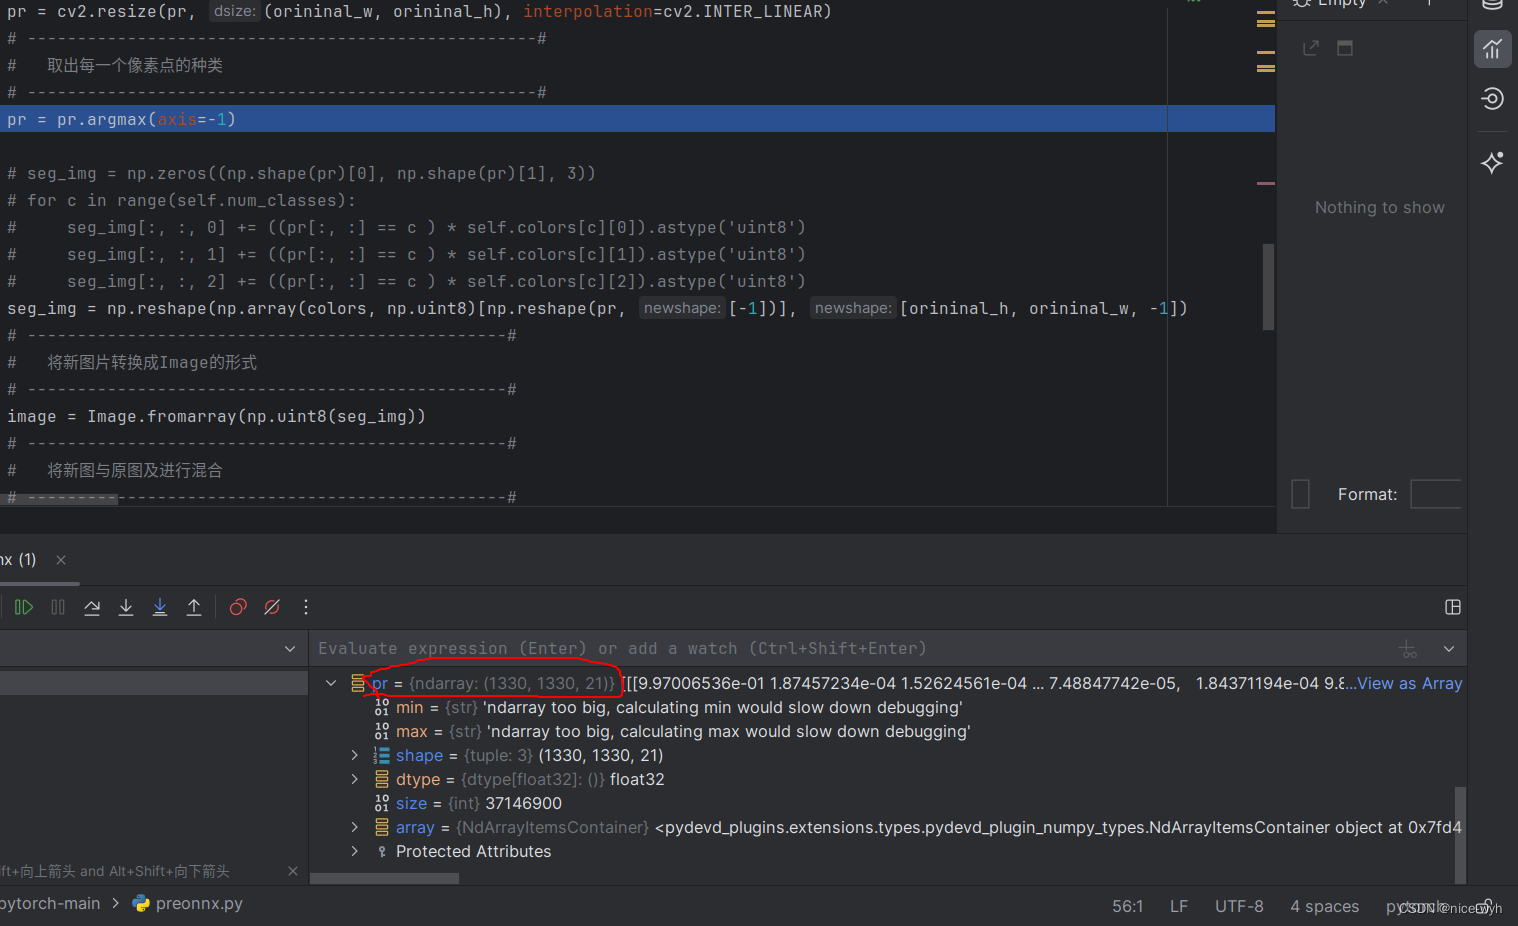
9. 取出每一个像素的类别,因为axis=-1代表最后一维,也就是类别这一维,然后对每一个像素取argmax,得到对应的置信度最大的类别作为这个像素的类别
pr = pr.argmax(axis=-1) 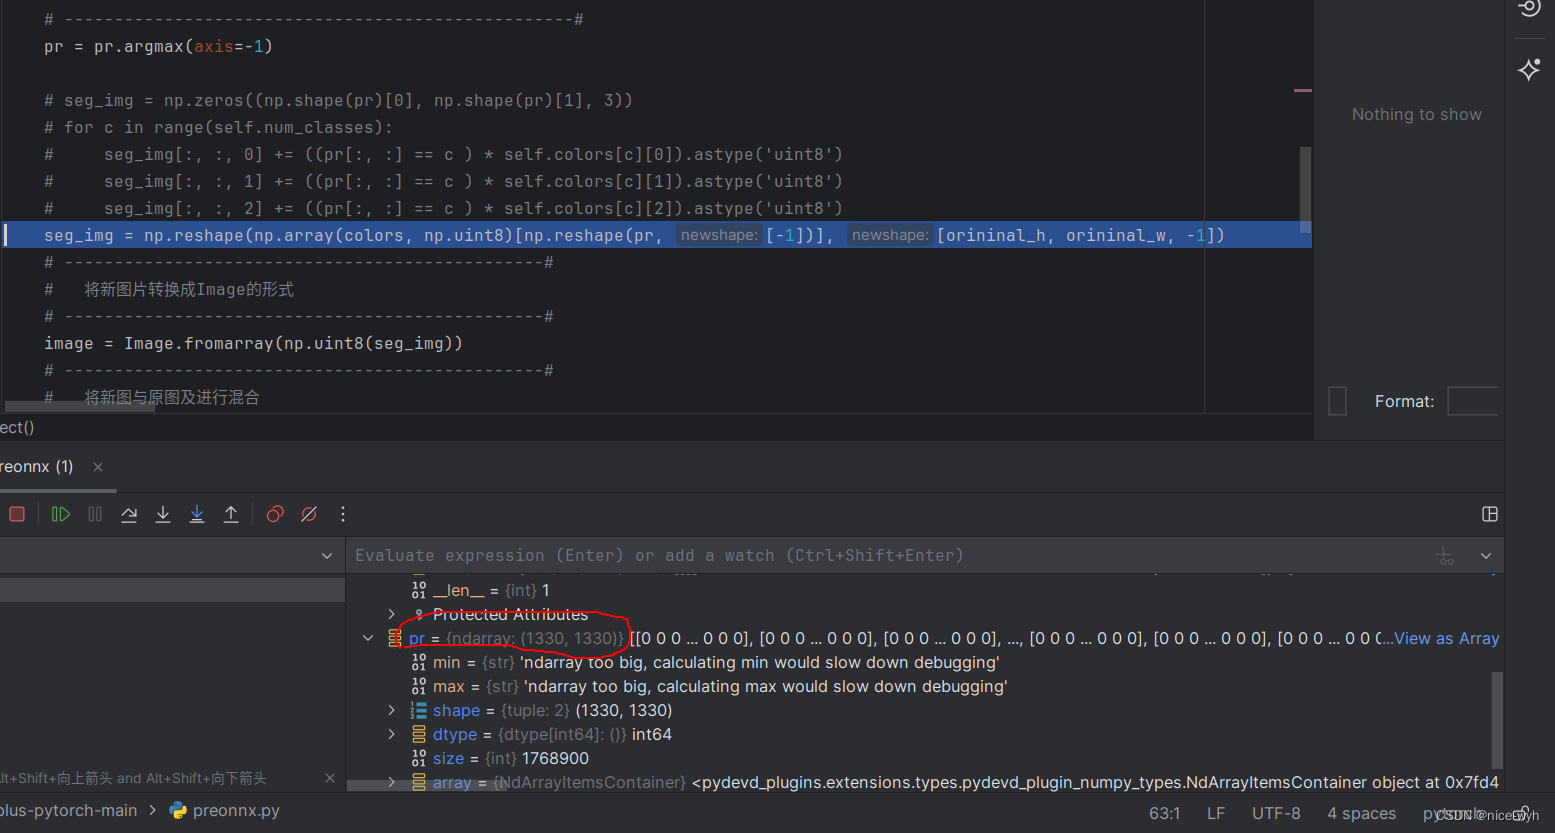
10.这段代码的作用是将预测结果(pr)转换为彩色图像(seg_img)。具体解释如下:
np.reshape(pr, [-1]):将预测结果(pr)展平为一维数组。[-1]表示自动计算展平后的维度大小,即原始数组的元素总数。np.array(colors, np.uint8):将颜色列表(colors)转换为NumPy数组,并将数据类型设置为uint8。np.array(colors, np.uint8)[np.reshape(pr, [-1])]:使用展平后的预测结果作为索引,从颜色数组中获取对应的颜色值。这样可以得到与预测结果相同大小的彩色值数组。np.reshape(..., [orininal_h, orininal_w, -1]):将彩色值数组重新调整为原始图像的高度和宽度,以及通道数(这里使用-1表示自动计算通道数)。- 综上所述,这段代码的目的是将预测结果转换为彩色图像,以便可视化分割结果
seg_img = np.reshape(np.array(colors, np.uint8)[np.reshape(pr, [-1])], [orininal_h, orininal_w, -1])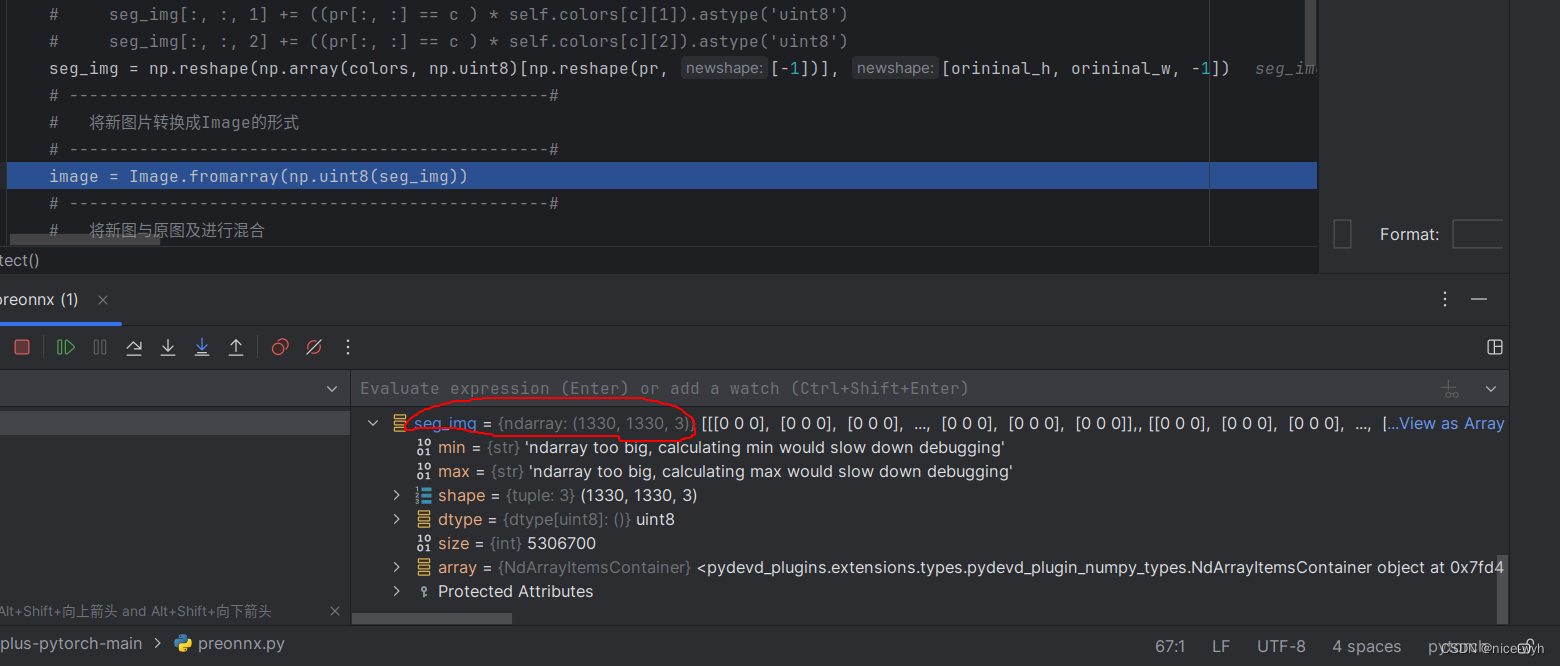
11.这段代码的作用是将彩色图像(seg_img)转换为PIL.Image对象(image)。具体解释如下:
np.uint8(seg_img):将彩色图像数组的数据类型转换为uint8,以确保像素值在0到255的范围内。Image.fromarray(...):使用NumPy数组作为输入,创建一个PIL.Image对象。这个对象可以用于显示、保存或进一步处理图像。
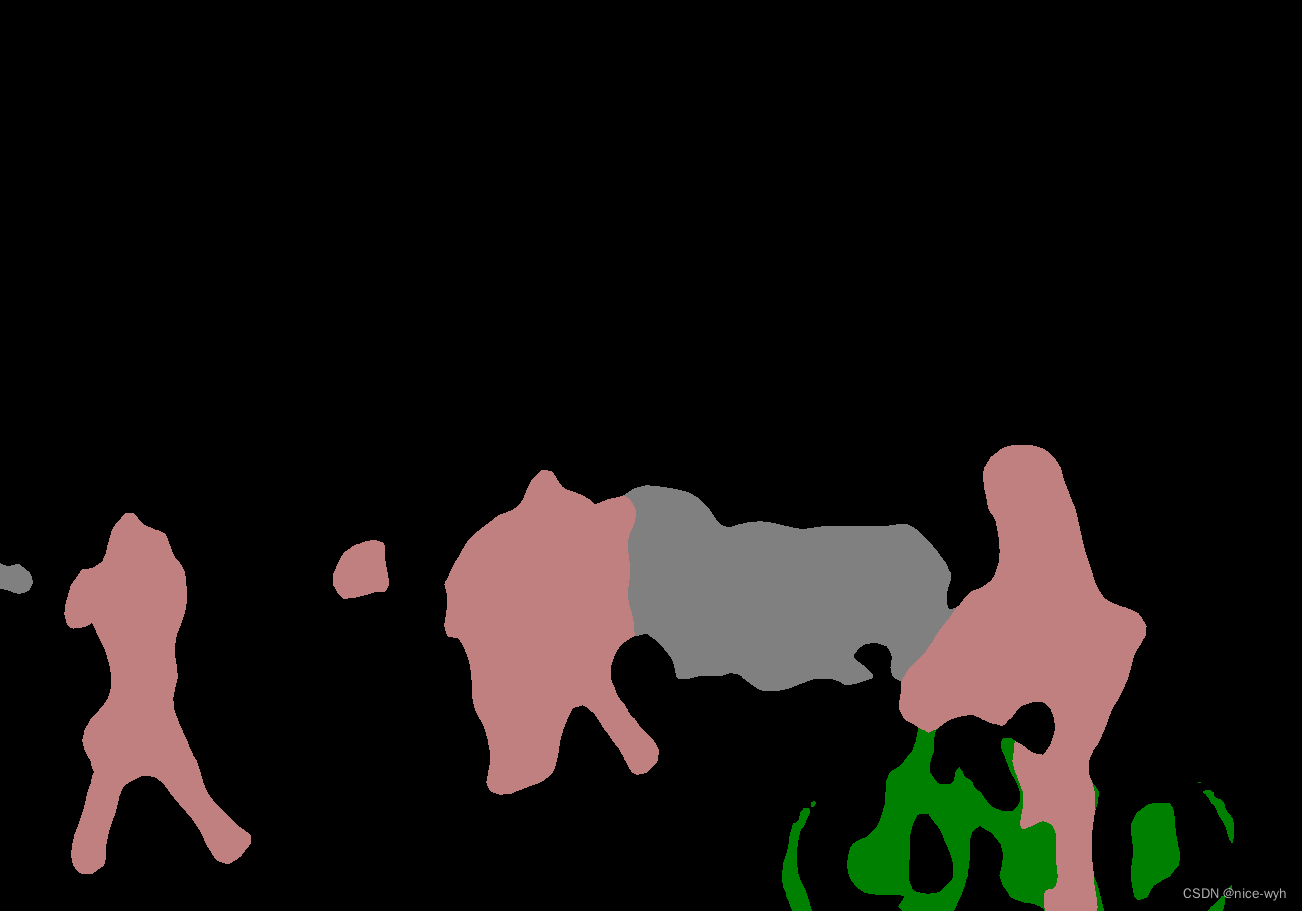
image = Image.fromarray(np.uint8(seg_img))12将原图和新图混合
image = Image.blend(old_img, image, 0.7)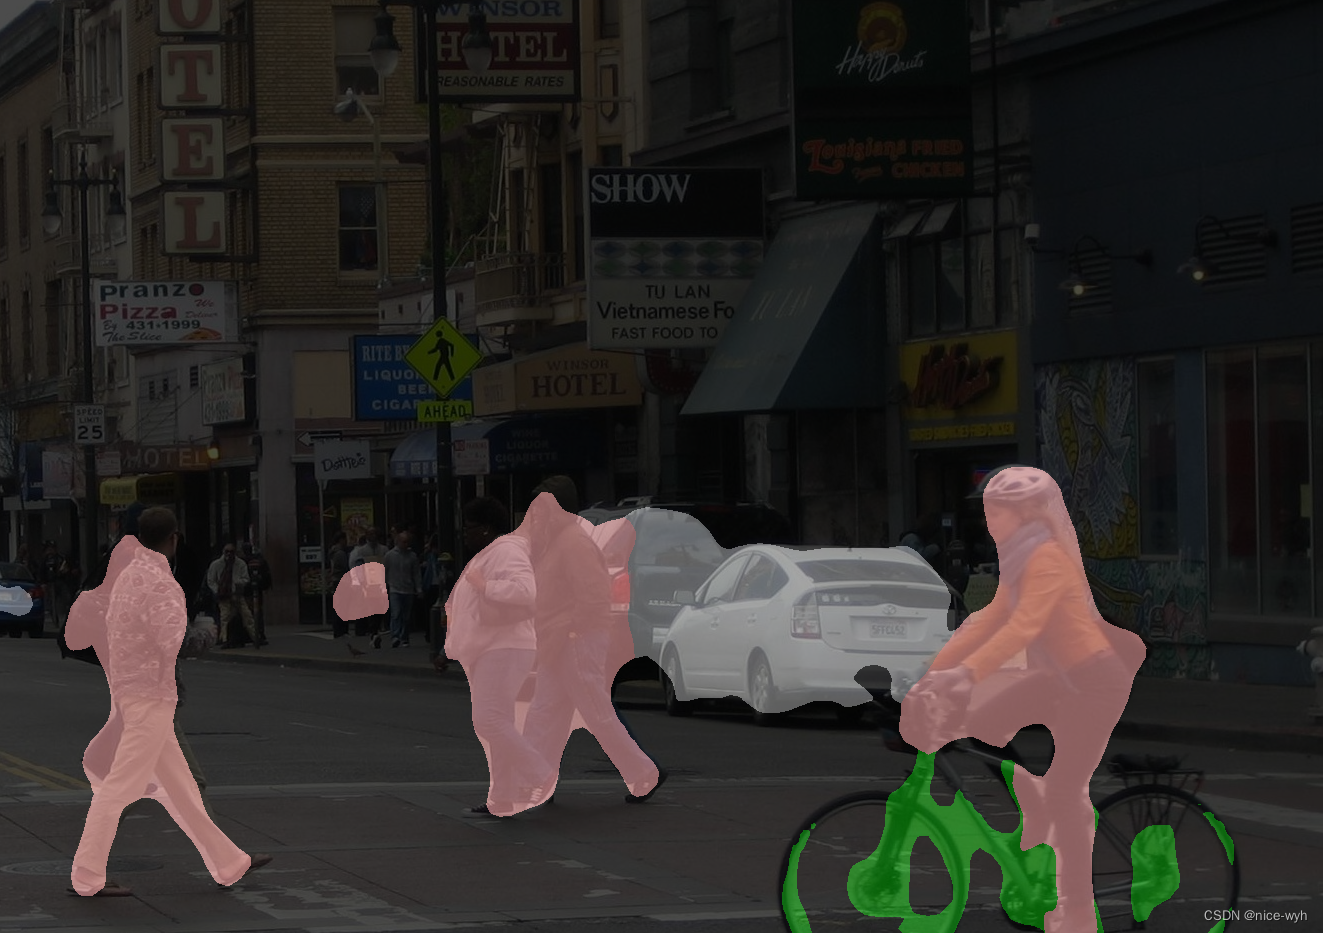
如果没有这一行,则是这样
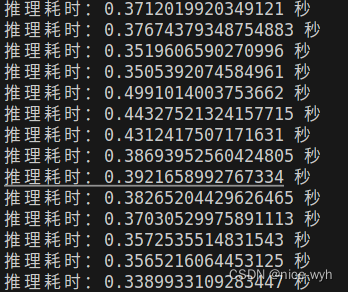
推理时间

使用openvino进行推理加速(好像有问题,推理速度没怎么加速)
代码
import time
import copy
import colorsys
import numpy as np
from PIL import Image
from utils.utils import cvtColor, preprocess_input, resize_image, show_config
import torch
from torch import nn
import torch.nn.functional as F
import openvino
from openvino.inference_engine import IECore
import cv2
from openvino.inference_engine import IECore
name_classes = ["background", "aeroplane", "bicycle", "bird", "boat", "bottle", "bus", "car", "cat", "chair", "cow",
"diningtable", "dog", "horse", "motorbike", "person", "pottedplant", "sheep", "sofa", "train",
"tvmonitor"]
device = torch.device("cuda:0" if torch.cuda.is_available() else "cpu")
# Load the OpenVINO IR model
ir_model_path = "./model_data/models.xml"
ie = IECore()
net = ie.read_network(model=ir_model_path)
exec_net = ie.load_network(network=net, device_name="CPU")
mix_type = 0
colors = [(0, 0, 0), (128, 0, 0), (0, 128, 0), (128, 128, 0), (0, 0, 128), (128, 0, 128), (0, 128, 128),
(128, 128, 128), (64, 0, 0), (192, 0, 0), (64, 128, 0), (192, 128, 0), (64, 0, 128), (192, 0, 128),
(64, 128, 128), (192, 128, 128), (0, 64, 0), (128, 64, 0), (0, 192, 0), (128, 192, 0), (0, 64, 128),
(128, 64, 12)]
def openvino_detect(image):
image = cvtColor(image)
old_img = copy.deepcopy(image)
orininal_h = np.array(image).shape[0]
orininal_w = np.array(image).shape[1]
image_data, nw, nh = resize_image(image, (512, 512))
image_data = np.expand_dims(np.transpose(preprocess_input(np.array(image_data, np.float32)), (2, 0, 1)), 0)
input_blob = next(iter(net.input_info))
output_blob = next(iter(net.outputs))
res = exec_net.infer(inputs={input_blob: image_data})
pr = res[output_blob]
pr = np.squeeze(pr, axis=0) # numpy:[21,512,512]
# 改变numpy维度顺序,将类别信息放在最后一维
pr = np.transpose(pr,(1,2,0)) # numpy:[512,512,21]
pr = np.exp(pr) / np.sum(np.exp(pr), axis=-1, keepdims=True)
pr = pr[int((512 - nh) // 2): int((512 - nh) // 2 + nh), int((512 - nw) // 2): int((512 - nw) // 2 + nw)]
pr = cv2.resize(pr, (orininal_w, orininal_h), interpolation=cv2.INTER_LINEAR)
pr = pr.argmax(axis=-1)
seg_img = np.reshape(np.array(colors, np.uint8)[np.reshape(pr, [-1])], [orininal_h, orininal_w, -1])
image = Image.fromarray(np.uint8(seg_img))
# image = Image.blend(old_img, image, 0.7)
return image
if __name__ == "__main__":
while True:
frame = cv2.imread("/home/pc/文档/deeplabv3-plus-pytorch-main/img/street.jpg")
frame = cv2.cvtColor(frame, cv2.COLOR_BGR2RGB)
frame = Image.fromarray(np.uint8(frame))
start_time = time.time()
frame = np.array(openvino_detect(frame))
end_time = time.time()
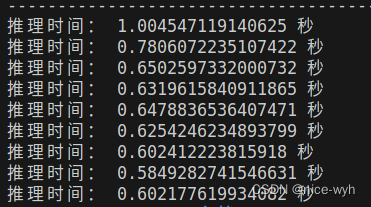
print(f"推理耗时:{end_time - start_time} 秒")
frame = cv2.cvtColor(frame, cv2.COLOR_RGB2BGR)
cv2.imshow("video", frame)
if cv2.waitKey(1) & 0xff == ord('q'):
break
输出
推理时间
总结
在使用 pth进行预测时,他的操作方法主要是通过torch自带的预测推理函数得出输出为tensor,转换维度后进行softmax,再转为numpy,再得出输出;而在使用onnx进行预测时,他的操作方法主要是通过onnxruntime的函数outputs = ort_session.run(None, {'images': image_data}),这里images'为转换为onnx时使用的input_name,image_data为输入图片,得到outputs后,pr = outputs[0]得到想要的信息,这里此时的pr为numpy,再根据pth预测时的操作,使用numpy的相关函数即可。


 7192
7192

 被折叠的 条评论
为什么被折叠?
被折叠的 条评论
为什么被折叠?
 到【灌水乐园】发言


