


 本文介绍了HarmonyOS中AdvancedNotificationService(ANS)如何管理通知,包括基础类型通知的发布流程、不同类型(如普通文本、长文本、多行文本和图片)的结构示例以及开发步骤,包括如何构造和发布NotificationRequest对象。
通知简介
应用可以通过通知接口发送通知消息,终端用户可以通过通知栏查看通知内容,也可以点击通知来打开应用。
通知常见的使用场景:
显示接收到的短消息、即时消息等。
显示应用的推送消息,如广告、版本更新等。
显示当前正在进行的事件,如下载等。
HarmonyOS通过ANS(Advanced Notification Service,通知系统服务)对通知类型的消息进行管理,支持多种通知类型,如基础类型通知、进度条类型通知。
通知业务流程
通知业务流程由通知子系统、通知发送端、通知订阅端组成。一条通知从通知发送端产生,通过IPC通信发送到通知子系统,再由通知子系统分发给通知订阅端。
通知发送端:可以是三方应用或系统应用。开发者重点关注。
通知订阅端:只能为系统应用,比如通知中心。通知中心默认会订阅手机上所有应用对当前用户的通知。开发者无需关注。

发布基础类型通知
基础类型通知主要应用于发送短信息、提示信息、广告推送等,支持普通文本类型、长文本类型、多行文本类型和图片类型。
基础类型通知中的内容分类
NOTIFICATION_CONTENT_BASIC_TEXT
普通文本类型
NOTIFICATION_CONTENT_LONG_TEXT
长文本类型
NOTIFICATION_CONTENT_MULTILINE
多行文本类型
NOTIFICATION_CONTENT_PICTURE
图片类型
目前系统仅通知栏订阅了通知,将通知显示在通知栏里。基础类型通知呈现效果示意图如下所示

开发步骤
导入模块
import NotificationManager from '@ohos.notificationManager';
构造NotificationRequest对象,并发布通知
通知发布接口如下表所示,不同发布类型通知由NotificationRequest的字段携带不同的信息

接口说明
发布通知
publish(request: NotificationRequest, callback: AsyncCallback<void>): void
取消指定的通知
cancel(id: number, label: string, callback: AsyncCallback<void>): void
取消所有该应用发布的通知
cancelAll(callback: AsyncCallback<void>): void;
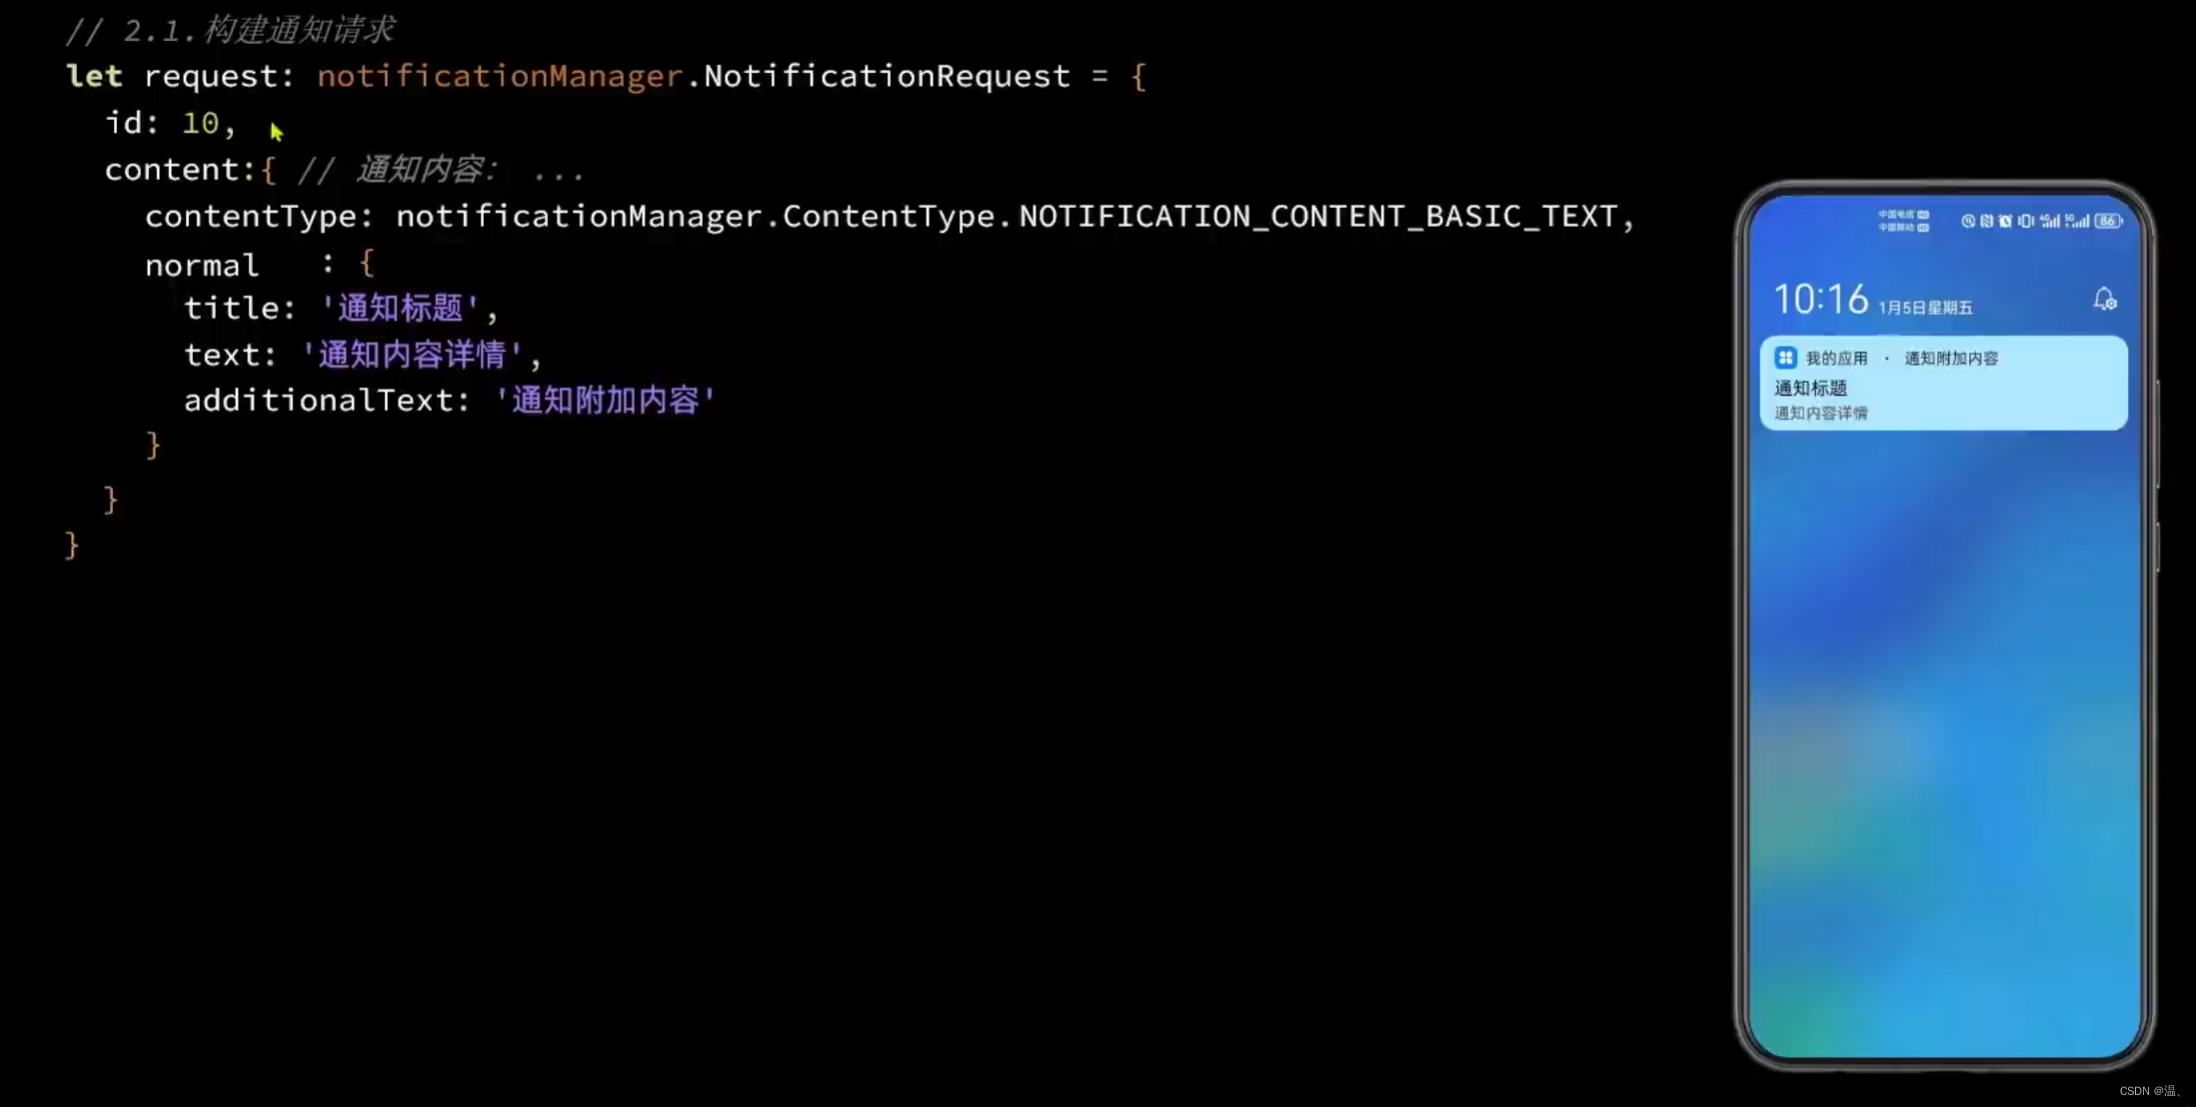
普通文本类型
通知由标题、文本内容和附加信息三个字段组成,其中标题和文本内容是必填字段
示例
let notificationRequest = {
  id: 1,
  content: {
    contentType: NotificationManager.ContentType.NOTIFICATION_CONTENT_BASIC_TEXT, // 普通文本类型通知
    normal: {
      title: 'test_title',
      text: 'test_text',
      additionalText: 'test_additionalText',
    }
  }
}

NotificationManager.publish(notificationRequest, (err) => {
    if (err) {
        console.error(`[ANS] failed to publish, error[${err}]`);
        return;
    }
    console.info(`[ANS] publish success`);
});
运行效果如下图

另一个示例
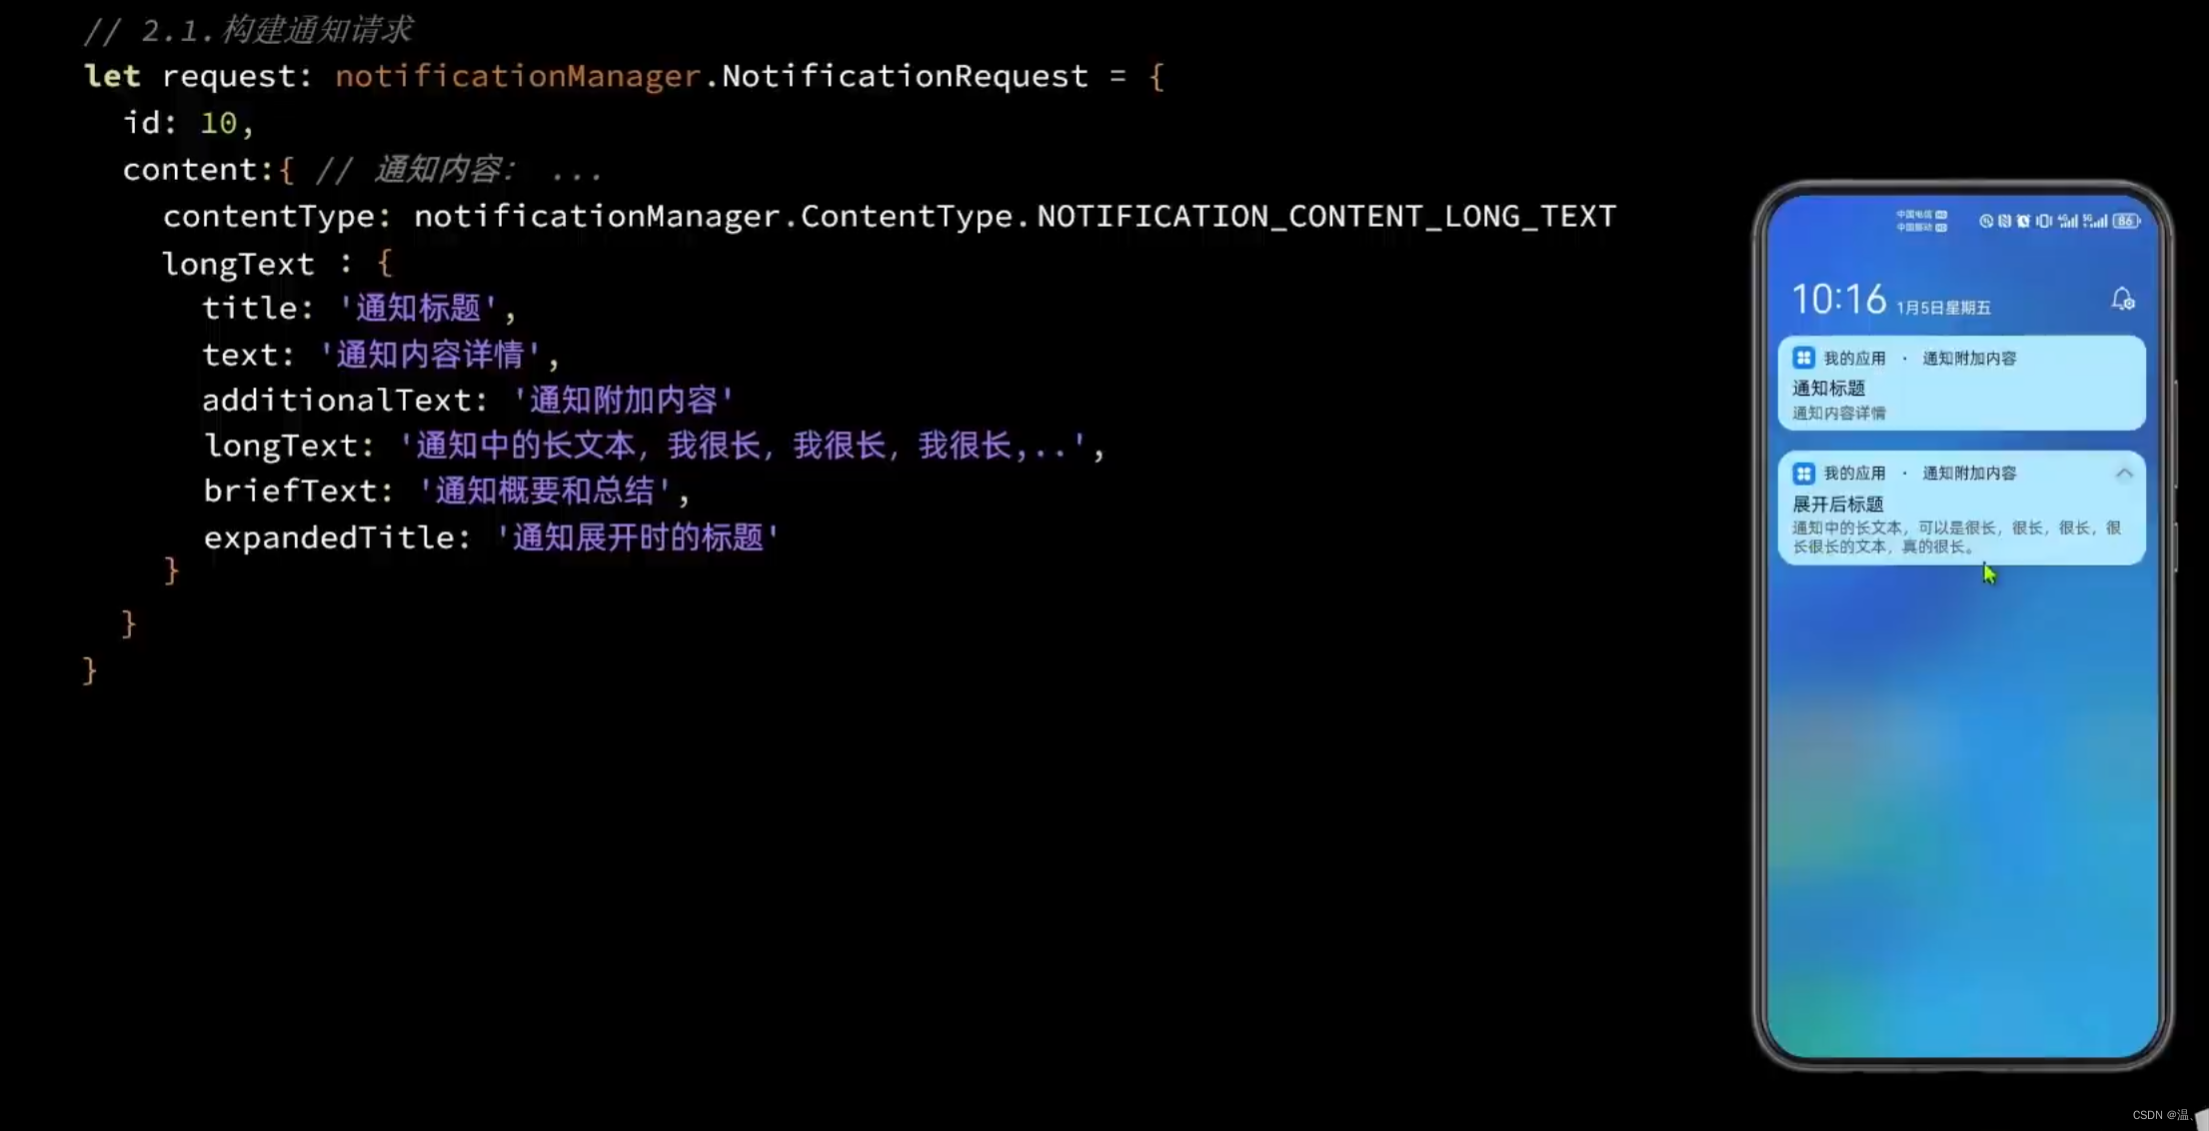
长文本类型通知
继承了普通文本类型的字段,同时新增了长文本内容、内容概要和通知展开时的标题。通知默认显示与普通文本相同,展开后,标题显示为展开后标题内容,内容为长文本内容。
let notificationRequest = {
  id: 1,
  content: {
    contentType: NotificationManager.ContentType.NOTIFICATION_CONTENT_LONG_TEXT, // 长文本类型通知
    longText: {
      title: 'test_title',
      text: 'test_text',
      additionalText: 'test_additionalText',
      longText: 'test_longText',
      briefText: 'test_briefText',
      expandedTitle: 'test_expandedTitle',
    }
  }
}

// 发布通知
NotificationManager.publish(notificationRequest, (err) => {
    if (err) {
        console.error(`[ANS] failed to publish, error[${err}]`);
        return;
    }
    console.info(`[ANS] publish success`);
});
运行效果如下图

另一个示例
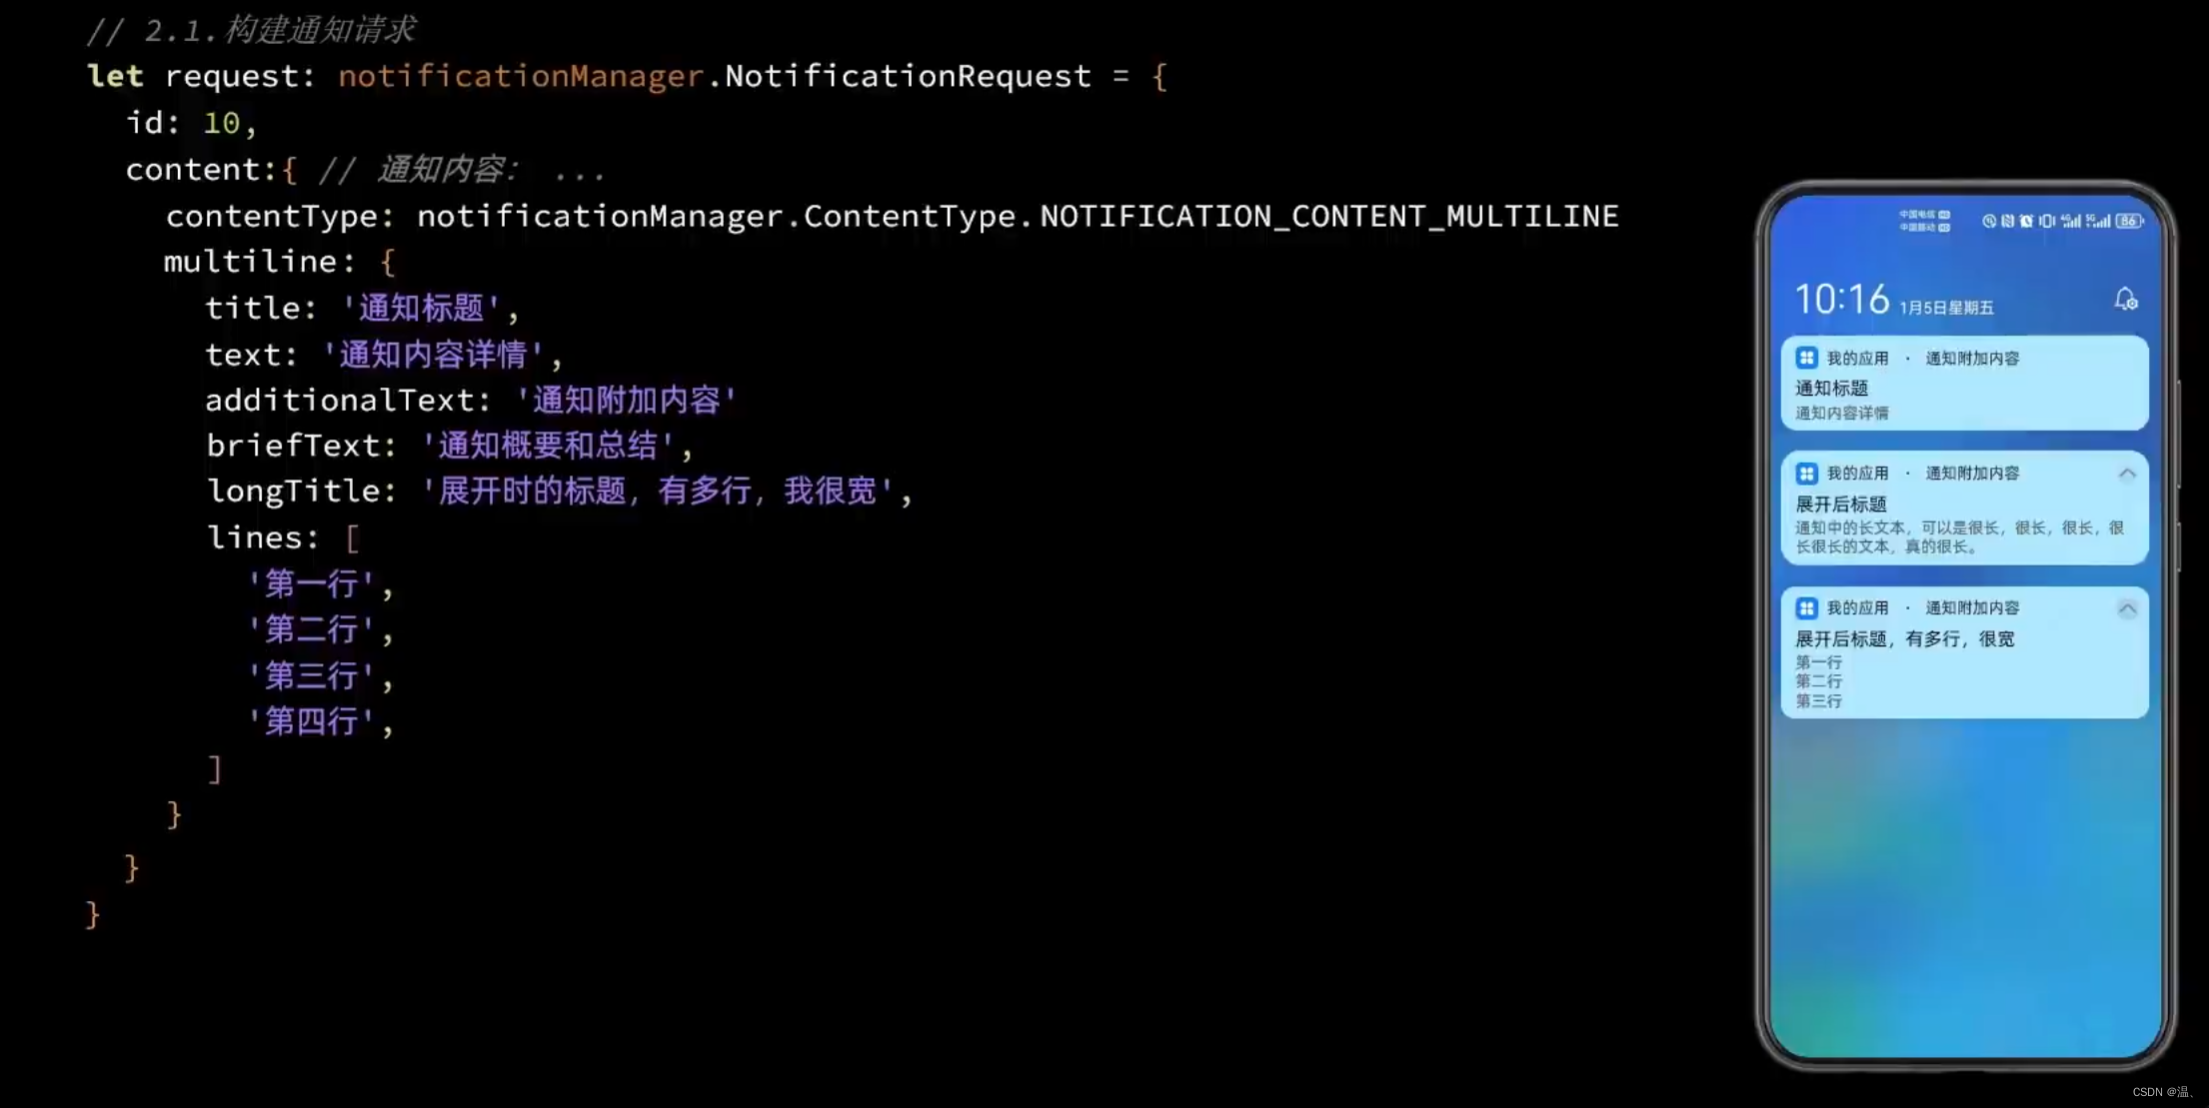
多行文本类型
继承了普通文本类型的字段,同时新增了多行文本内容、内容概要和通知展开时的标题。通知默认显示与普通文本相同,展开后,标题显示为展开后标题内容,多行文本内容多行显示。
let notificationRequest = {
  id: 1,
  content: {
    contentType: NotificationManager.ContentType.NOTIFICATION_CONTENT_MULTILINE, // 多行文本类型通知
    multiLine: {
      title: 'test_title',
      text: 'test_text',
      briefText: 'test_briefText',
      longTitle: 'test_longTitle',
      lines: ['line_01', 'line_02', 'line_03', 'line_04'],
    }
  }
}

// 发布通知
NotificationManager.publish(notificationRequest, (err) => {
  if (err) {
    console.error(`[ANS] failed to publish, error[${err}]`);
    return;
  }
  console.info(`[ANS] publish success`);
});
运行效果如下图

另一个示例
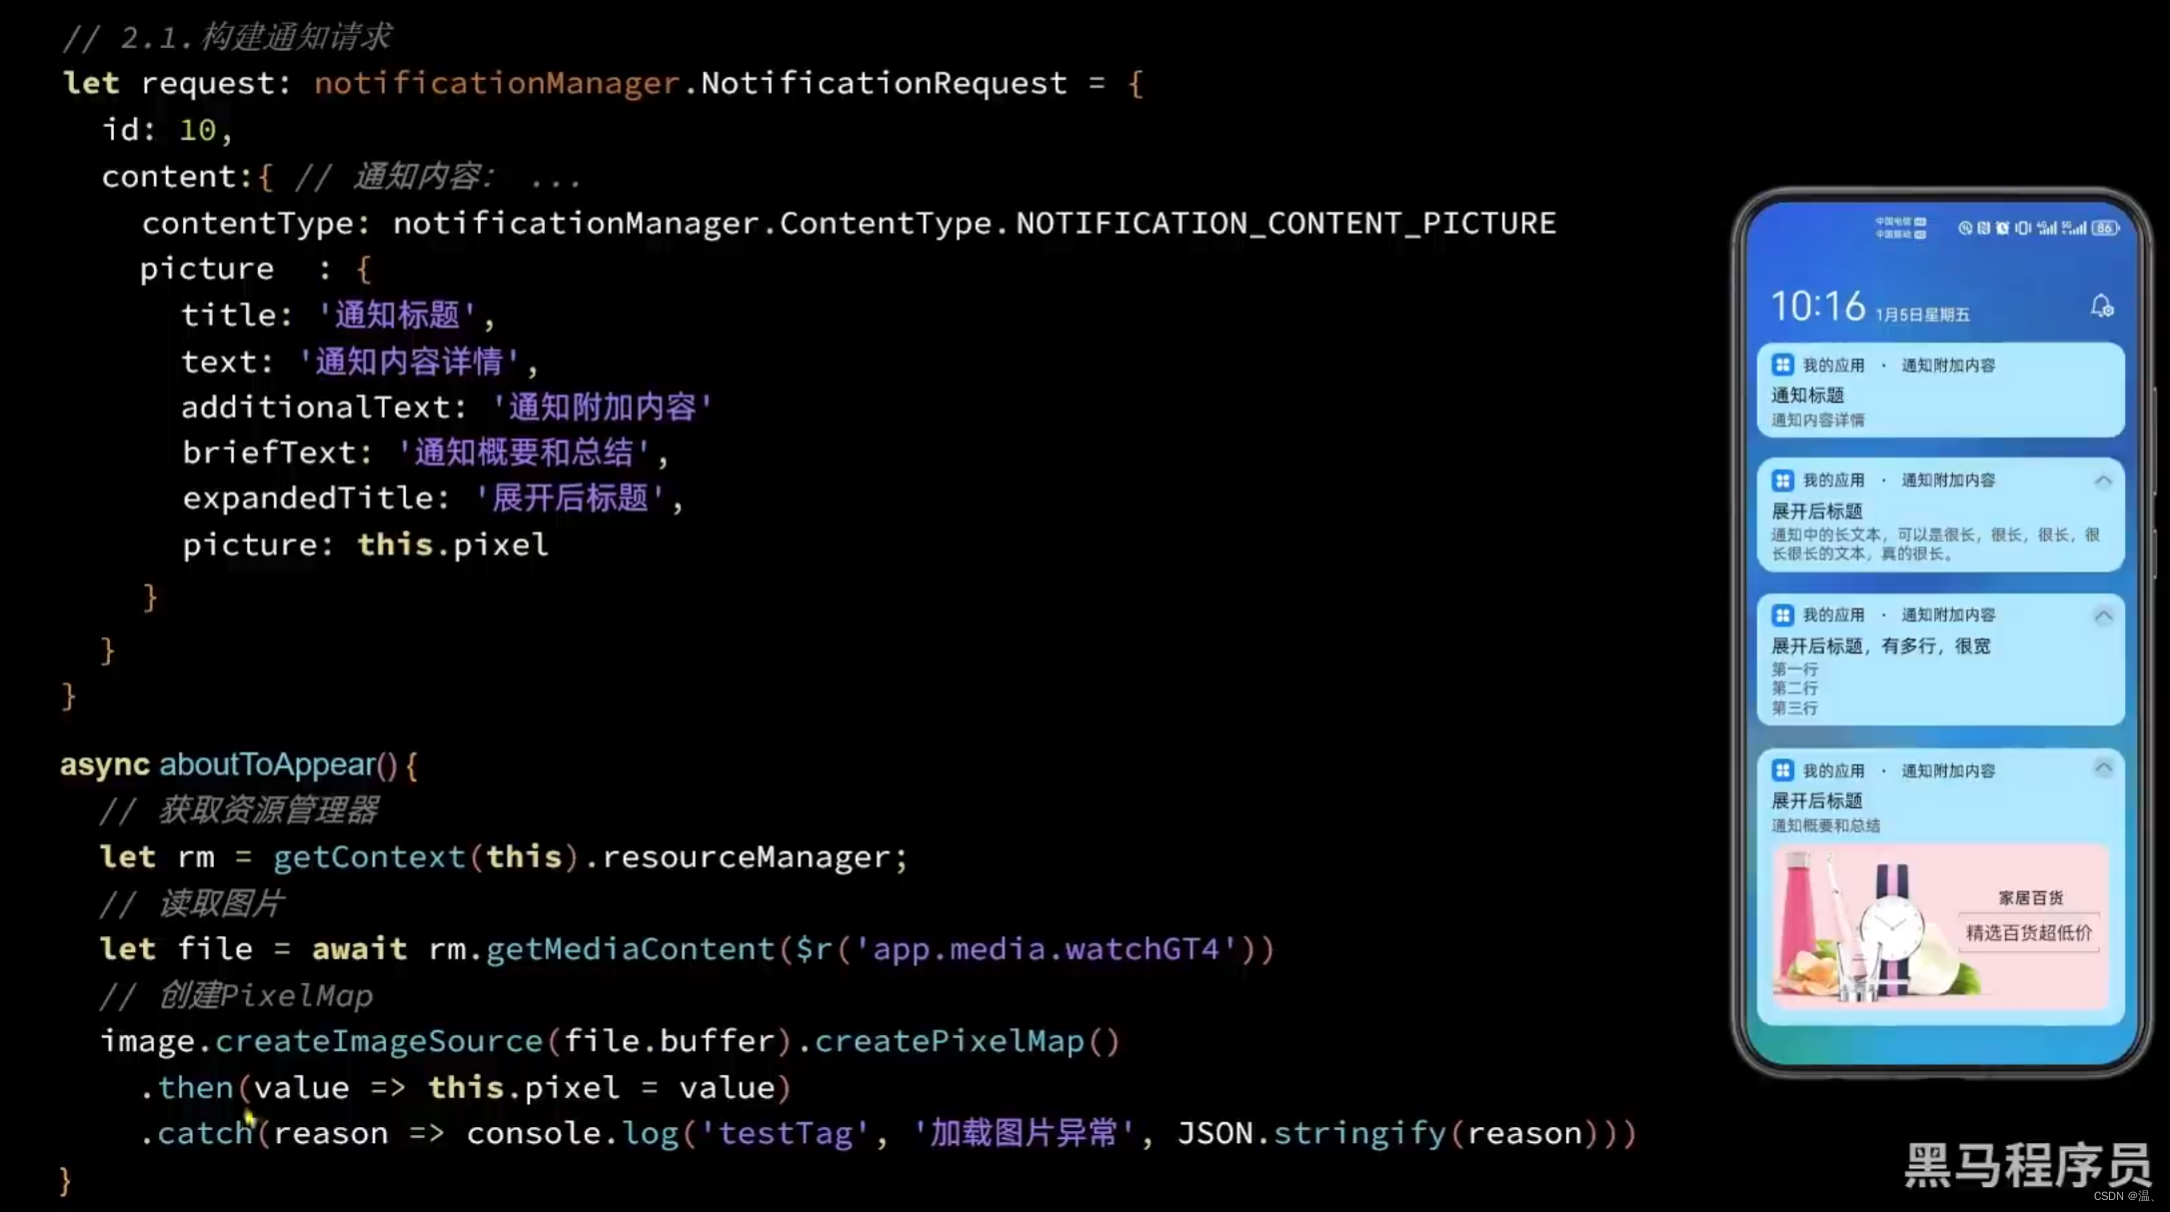
图片类型通知
继承了普通文本类型的字段,同时新增了图片内容、内容概要和通知展开时的标题,图片内容为PixelMap型对象,其大小不能超过2M。
let imagePixelMap: PixelMap = undefined; // 需要获取图片PixelMap信息
let notificationRequest: notificationManager.NotificationRequest = {
  id: 1,
  content: {
    contentType: notificationManager.ContentType.NOTIFICATION_CONTENT_PICTURE,
    picture: {
      title: 'test_title',
      text: 'test_text',
      additionalText: 'test_additionalText',
      briefText: 'test_briefText',
      expandedTitle: 'test_expandedTitle',
      picture: imagePixelMap
    }
  }
};

// 发布通知
notificationManager.publish(notificationRequest, (err) => {
  if (err) {
    console.error(`Failed to publish notification. Code is ${err.code}, message is ${err.message}`);
    return;
  }
  console.info('Succeeded in publishing notification.');
});
运行效果如下图

另一个示例
开发示例-对资源文件中的图片变成PixelMap对象
//获取resourceManager资源管理。
const context = getContext(this);

// 获取resourceManager资源管理
const resourceMgr = context.resourceManager;

//获取rawfile文件夹下test.jpg的ArrayBuffer。
const fileData = await resourceMgr.getRawFileContent('test.jpg');

// 获取图片的ArrayBuffer
const buffer = fileData.buffer;

//创建imageSource
const imageSource = image.createImageSource(buffer);

//创建PixelMap
const pixelMap = await imageSource.createPixelMap();


 876
876

 被折叠的 条评论
为什么被折叠?
被折叠的 条评论
为什么被折叠?
 到【灌水乐园】发言


