一、线性布局
- 线性布局(LinearLayout)是一种比较常用且简单的布局方式。在这种布局中,所有的子元素都是按照垂直或水平的顺序排列在界面上。如果是垂直排列,每个子元素占一行,如果是水平排列,则每个子元素占一列。线性布局可以支持布局样式嵌套实现复杂的布局样式。
1、常用属性
| 属性 |
含义 |
| layout_height |
高度,单位:dp (wrap_content(根据内容确定高度), match_parent(填满整个界面)) |
| layout_weight |
宽度,单位:dp (wrap_content, match_parent) |
| orietation |
方向(vertical,horizontal) |
| gravity |
对齐方式(left, right, center, top, bottom…) |
| background |
背景(颜色[color]、图片[drawable]、选择器[selector]) |
| weight |
比重(用于瓜分手机屏幕) |
| padding |
内边距 (paddingLeft, paddingRight, paddingTop, paddingBottom) |
| margin |
外边距 (marginLeft, marginRight, marginTop, marginBottom) |
二、案例(线性布局属性)
1、创建安卓应用
- 基于Empty Activity模板创建安卓应用 - LinearLayoutDemo
2、主布局资源文件
- 将约束布局改为线性布局,删掉默认的标签
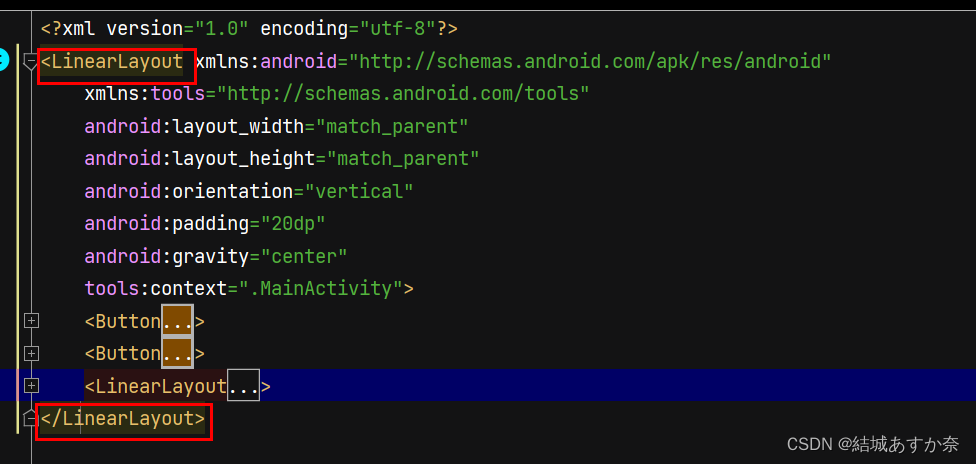
- 添加两个按钮
<?xml version="1.0" encoding="utf-8"?>
<LinearLayout xmlns:android="http://schemas.android.com/apk/res/android"
    xmlns:tools="http://schemas.android.com/tools"
    android:layout_width="match_parent"
    android:layout_height="match_parent"
    tools:context=".MainActivity">
    <Button
        android:layout_width="wrap_content"
        android:layout_height="wrap_content"
        android:text="按钮1"/>
    <Button
        android:layout_width="wrap_content"
        android:layout_height="wrap_content"
        android:text="按钮2"/>
</LinearLayout>
3、字符串资源文件
<resources>
    <string name="app_name">线性布局演示</string>
</resources>
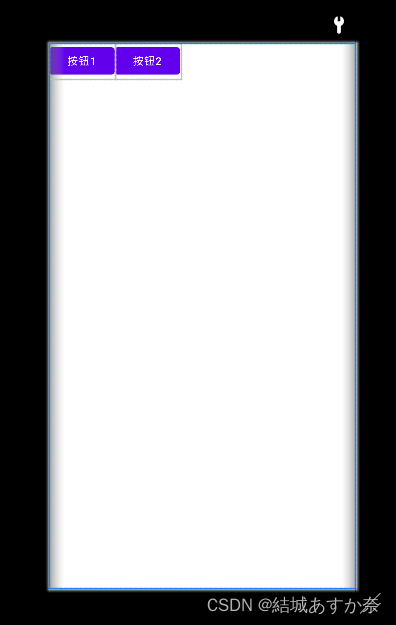
4、预览效果
- 查看效果,发现两个按钮水平摆放,在窗口左上角
5、设置布局属性,查看效果
(1)设置线性布局方向
<?xml version="1.0" encoding="utf-8"?>
<LinearLayout xmlns:android


 这篇博客详细介绍了线性布局在安卓开发中的使用,包括如何设置布局方向、内边距、对齐方式和背景,以及如何实现边框渐变色效果。通过实例展示了线性布局的属性设置,并讲解了线性布局的嵌套应用,帮助开发者创建更复杂的界面布局。
 最低0.47元/天 解锁文章


 4744
4744

 被折叠的 条评论
为什么被折叠?
被折叠的 条评论
为什么被折叠?
 到【灌水乐园】发言


