


实际操作1:
-
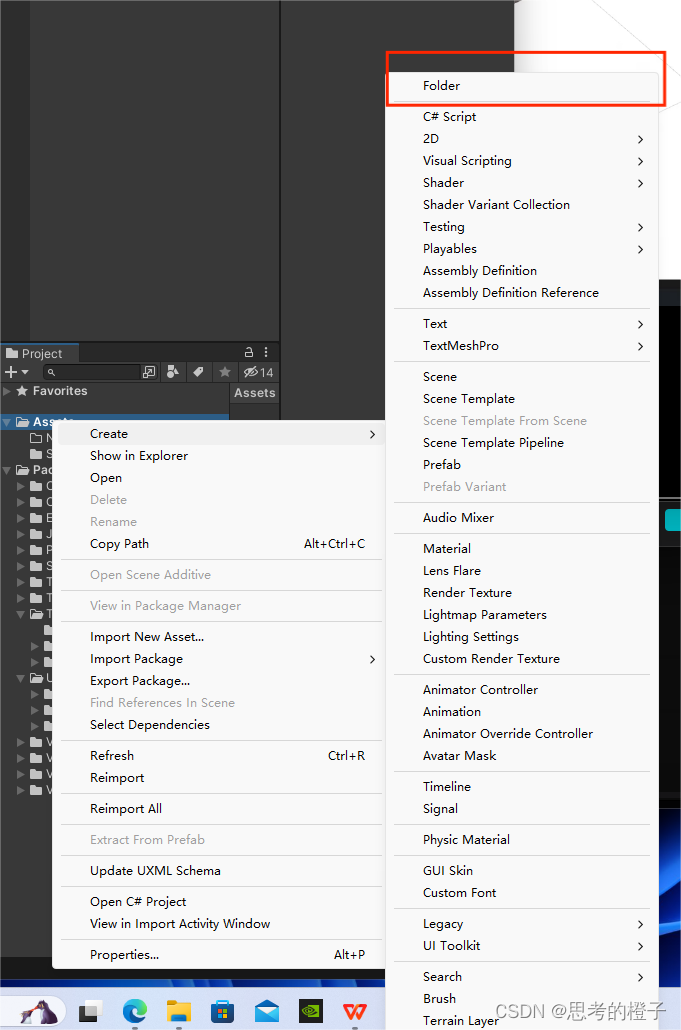
创建地面
一般都以plane为地面

-
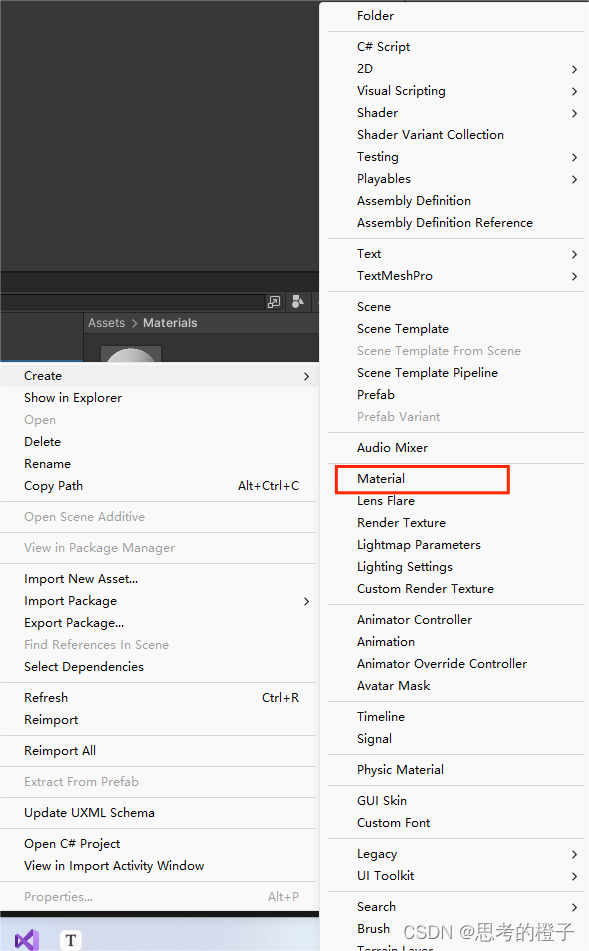
改变地面材质
在Assets文件夹下创建materials文件来储存样例中物体的材质,现在先创建地面的材质(Ground)

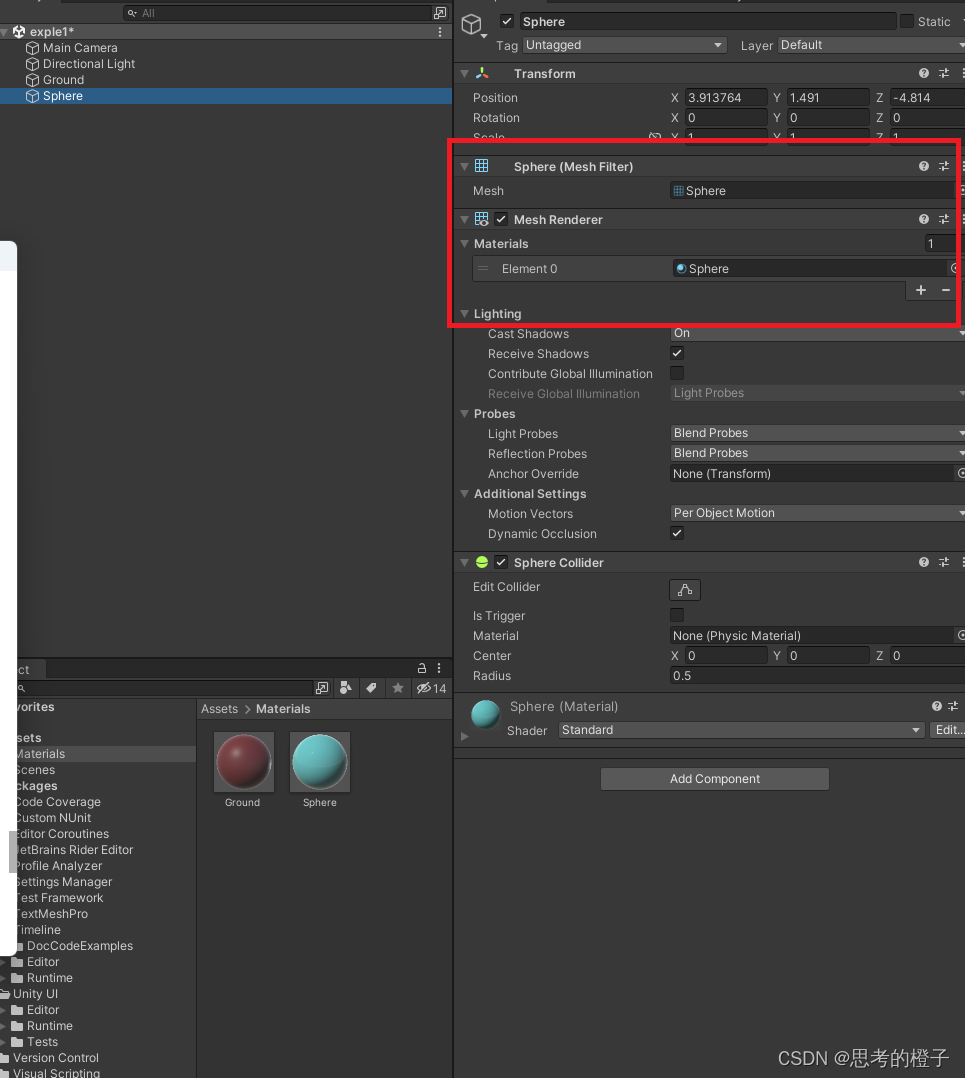
- 现在将Ground文件拖到Ground物体里
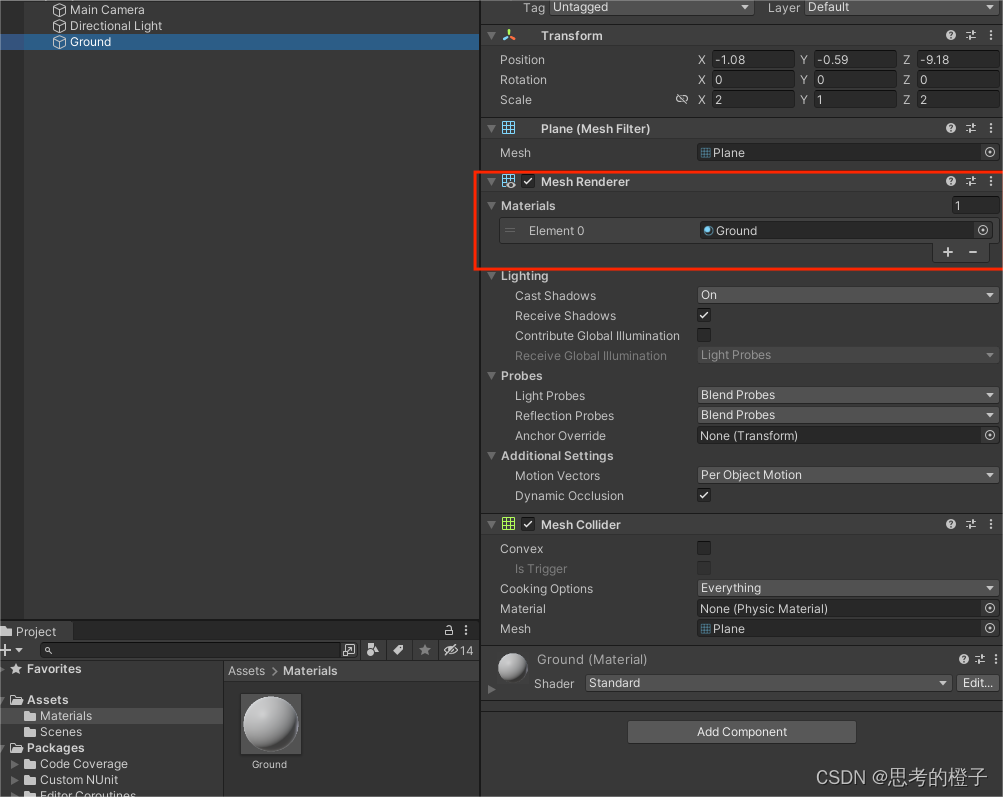
提示:创建的Materials组件也可以直接拖动到场景里的任何物件
也可以点击目标物体在“Inspector”面板,Materials属性进行添加
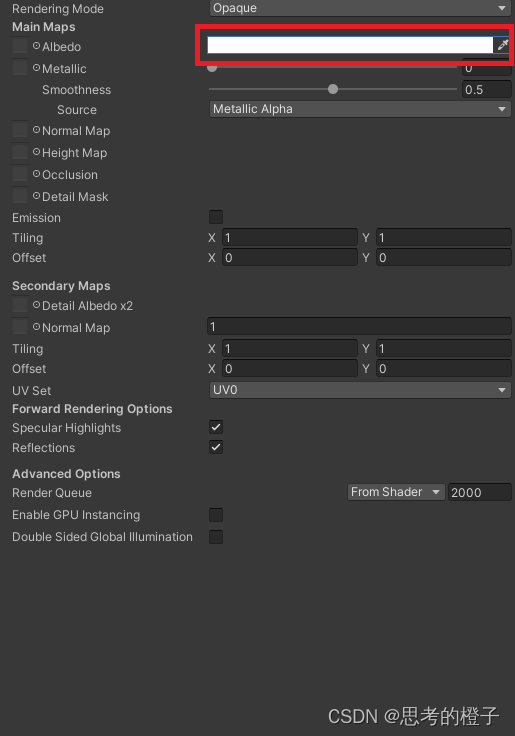
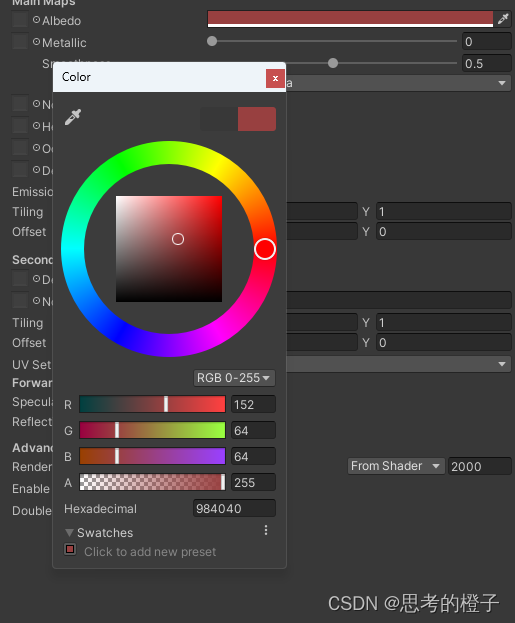
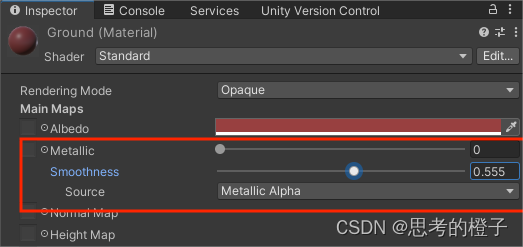
- 改变Materials下的Ground文件的材质颜色属性
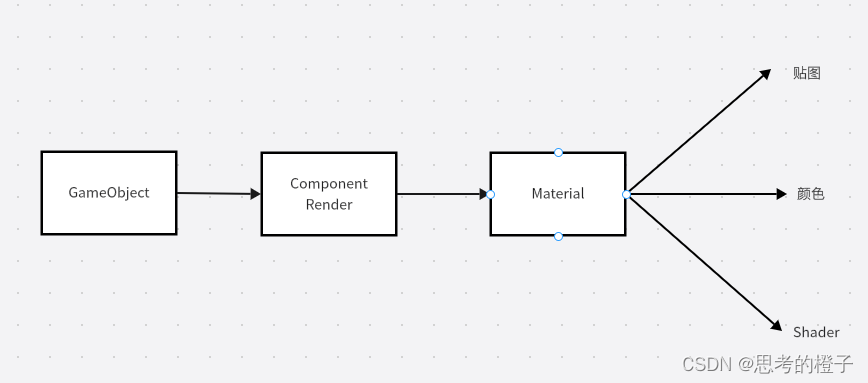
Mesh Filter:控制形状模型 (画出3D图形所需要的网格)
Mesh Renderer:在网格上渲染 (根据网格进行相应的渲染)
smooththness:控制光滑程度(值越大越光滑)
相关板块之间的关系
-
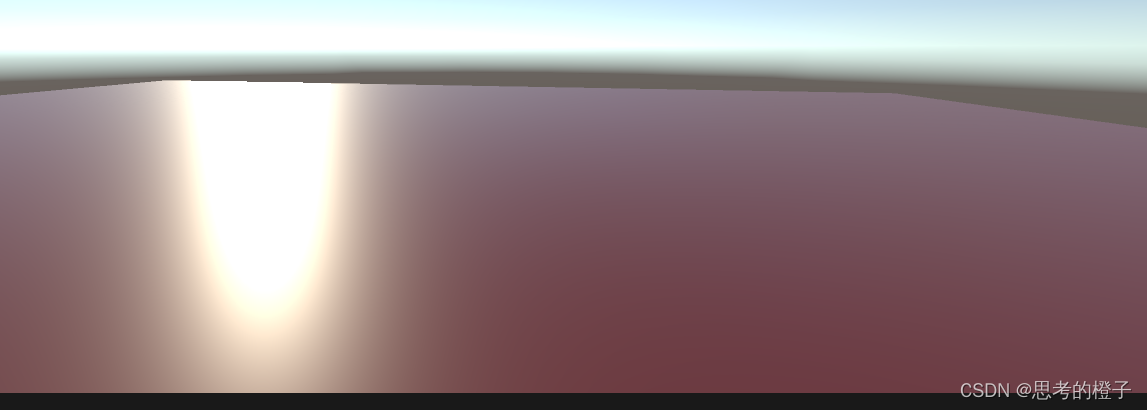
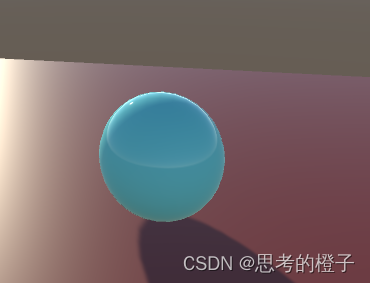
现在创造一个小球
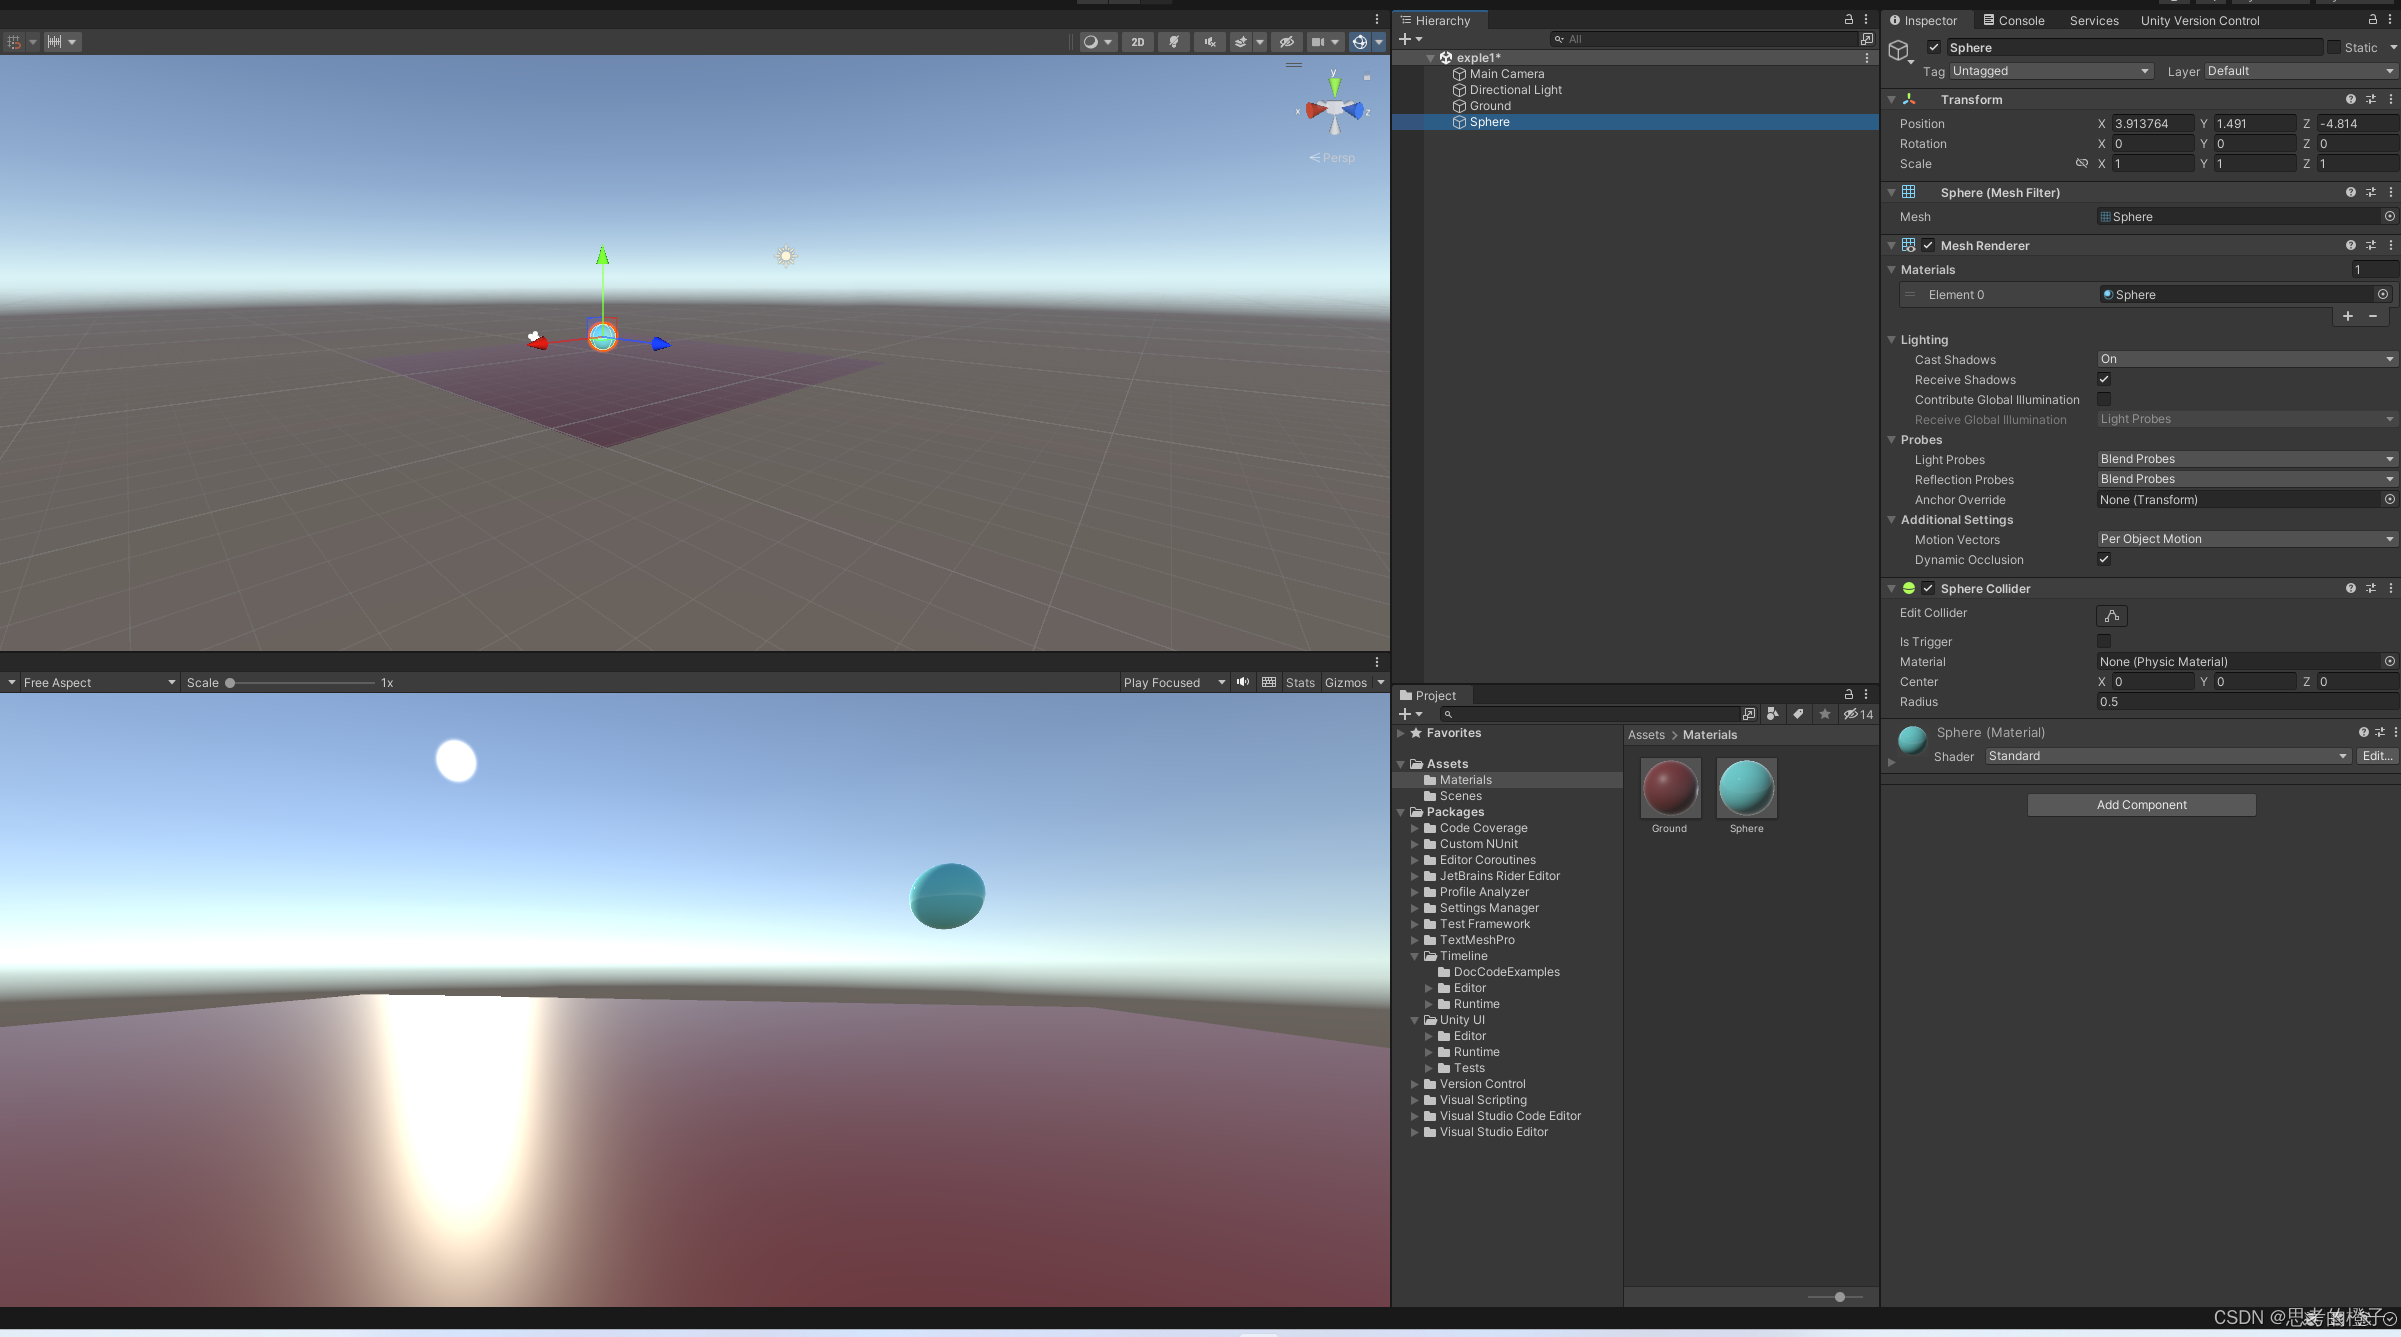
调成其光滑度(Smoothness),观察光滑度0和一的区别
光滑度0:

光滑度1:
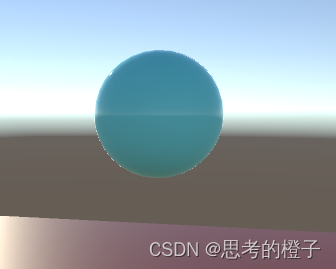
通过对比可看出明显区别
游戏设计底层逻辑
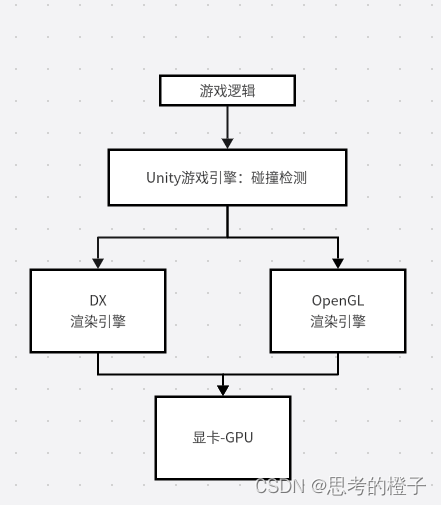
-
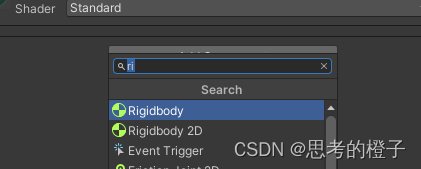
现在为小球进行一个施加重力的效果,使其下落
先添加一个原件(component)
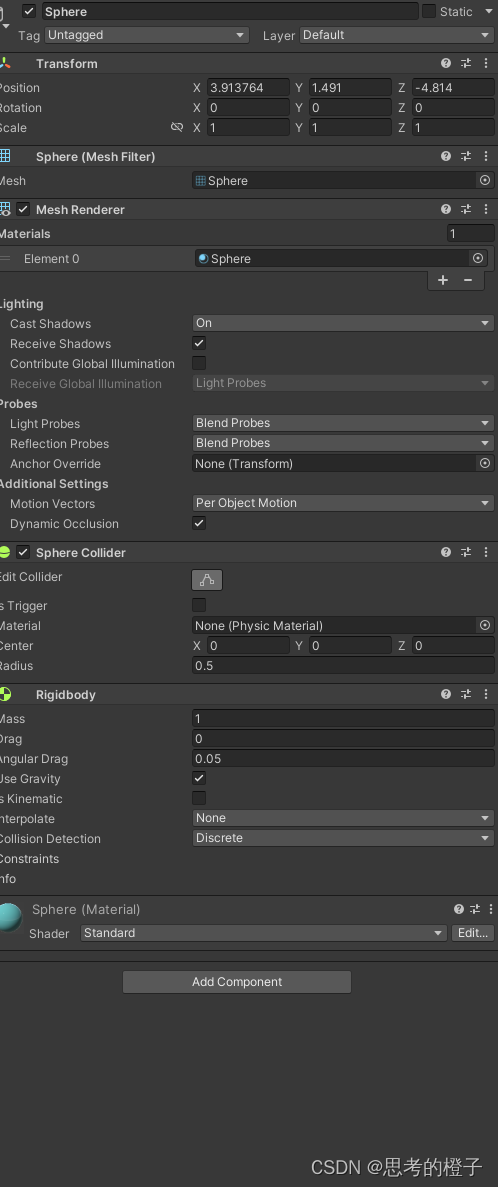

现在进行播放
可看出小球下坠到地面(Ground)
-
现在通过C#语言在unity引擎窗口显示start
using System.Collections;
using System.Collections.Generic;
using UnityEngine;

public class Sphere_move : MonoBehaviour
{
    public Rigidbody rd;
    // Start is called before the first frame update
    void Start()
    {
        Debug.Log("start");
    }

    // Update is called once per frame
    void Update()
    {

    }
}

现在通过c#控制球的刚体运动
using System.Collections;
using System.Collections.Generic;
using UnityEngine;

public class Sphere_move : MonoBehaviour
{
    public Rigidbody rd;
    // Start is called before the first frame update
    void Start()
    {
        Debug.Log("start");
        rd = GetComponent<Rigidbody>();
    }

    // Update is called once per frame
    void Update()
    {
        rd.AddForce(Vector3.right);
    }
}
注:一定要在Update函数里进行rd.AddForce(Vector3.right);,不能再Start函数里进行,因为start只在程序开始时运行一次,Update是在程序开始后一直运行
现在证明以上说法
using System.Collections;
using System.Collections.Generic;
using UnityEngine;

public class Sphere_move : MonoBehaviour
{
    public Rigidbody rd;
    // Start is called before the first frame update
    void Start()
    {
        Debug.Log("start");
        rd = GetComponent<Rigidbody>();
    }

    // Update is called once per frame
    void Update()
    {
        Debug.Log("go ");
        rd.AddForce(Vector3.right);
    }
}
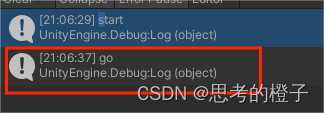
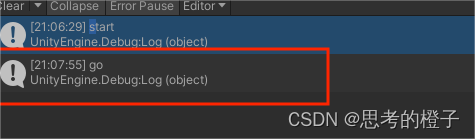
从上面两图可知,属于go字符的命令行一直在跳动,并且时间戳一直不断的在更新,可知Update一直在运行
物体运动
添加力(AddForce)
rd.AddForce(Vector3.forward)知识点1:方法调用
x.AddForce 也可以叫做调用指令,调用指令的时候需要通过()传递参数。
知识点2:三维向量(x,y,z)
Vector3.forward 等于(0,0,1)
(0.0.1)(0.0,4)向量两个要素(方向,长度)
知识点3:一些常用的向量
Vector3.right Vector3.left Vector3,forward Vector3.back Vector3.up Vector3.down
如上面所示,要通过编程语言C#使小球运动,需通过
知识点4:怎么创建向量
new Vectpr3(x,y,z)
using System.Collections;
using System.Collections.Generic;
using UnityEngine;

public class Sphere_move : MonoBehaviour
{
    public Rigidbody rd;
    // Start is called before the first frame update
    void Start()
    {
        Debug.Log("start");
        rd = GetComponent<Rigidbody>();
    }

    // Update is called once per frame
    void Update()
    {
        Debug.Log("go ");
        rd.AddForce(Vector3.right);
    }
}
其中
rd.AddForce(Vector3.right);代表对小球向右施加一个一牛的力
此时对应对(x,y,z)施加的力的参数为(1,0,0)
若想使小球移动的更快,例如向右施加两牛的力,则代码为
rd.AddForce(new Vector3(2,0,0));现在通过键盘的指令使小球运动,就要引出如下函数
Input.GetAxis("")
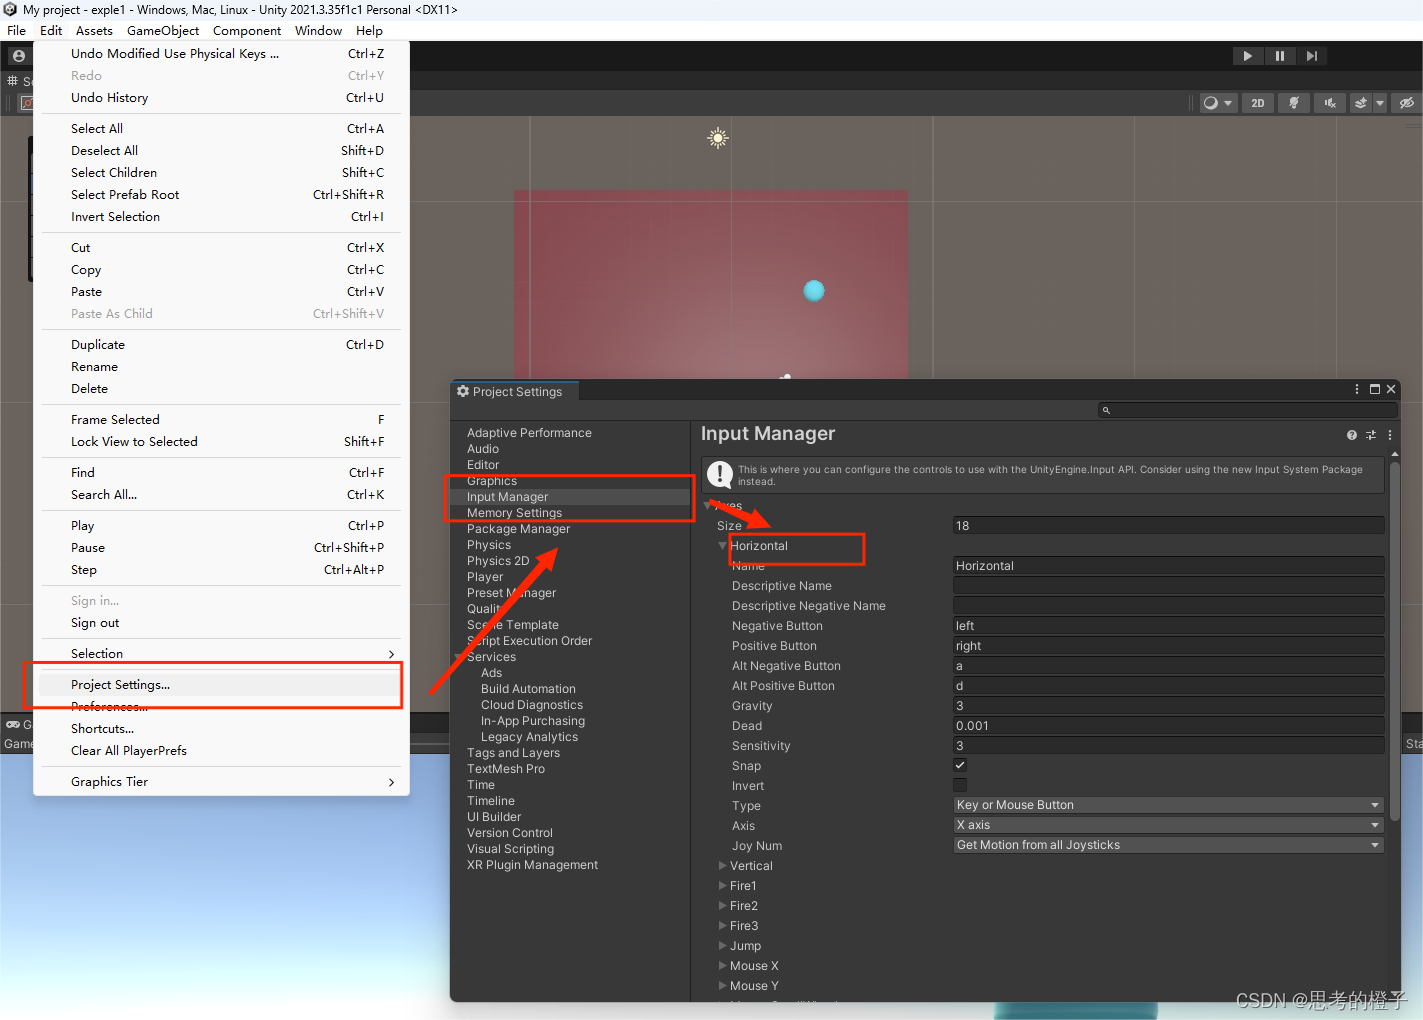
Input.GetAxis("") 是 Unity 引擎中的一个方法,用于获取游戏玩家在键盘或游戏手柄上输入的某个轴(Axis)的值
在 Unity 中,有多种轴类型,如 "Horizontal"(水平轴)、"Vertical"(垂直轴)、"Mouse X"(鼠标水平滚轮轴)和 "Mouse Y"(鼠标垂直滚轮轴)等。这些轴的值可以用来控制游戏角色的移动、缩放或旋转等动作。这些数值都处于-1 到1 之间
01 "Horizontal"
以 "Horizontal" 为例,Input.GetAxis("Horizontal") 方法会返回一个值,表示玩家在水平方向上输入的值。如果玩家向左移动键盘或游戏手柄,该值将为负;如果玩家向右移动,该值将为正。
该轴默认是由A、D以及方向键左右箭头来触发!
02 "Vertical" 轴
类似地,对于 "Vertical" 轴
该轴默认是由W、S以及方向键上下箭头来触发!
03 "Mouse X" 轴和 "Mouse Y" 轴
返回的值分别表示玩家在垂直方向、鼠标水平滚轮和鼠标垂直滚轮上的输入。
实例:
使小球前后左右运动
 void Update()
    {
        Debug.Log("go ");
        float x = Input.GetAxis("Horizontal");
        Debug.Log(x);
        float z = Input.GetAxis("Vertical");
        rd.AddForce(new Vector3(x,0,z));
    }
若是对按键有特殊的需求,可向下图一样进行改键
控制相机跟随物体移动
思路:
1. 计算出相机跟小球之间的位置差(偏移)
2. 实时设置相机的位置使其和小球的距离一直那等于位置差
首先得到相机位置(transform),在物体相机中创建新的C#Script组件
因为Follow_Sphere上的是固定在相机身上的,所以直接得到自身物体的transform组件位置就行
using System.Collections;
using System.Collections.Generic;
using UnityEngine;
public class Follow_Sphere : MonoBehaviour
{
public Vector3 offset;
public Transform Sphere_Transfrom;
// Start is called before the first frame update
void Start()
{
offset = transform.position - Sphere_Transfrom.position;
}
// Update is called once per frame
void Update()
{
transform.position = offset + Sphere_Transfrom.position;
}
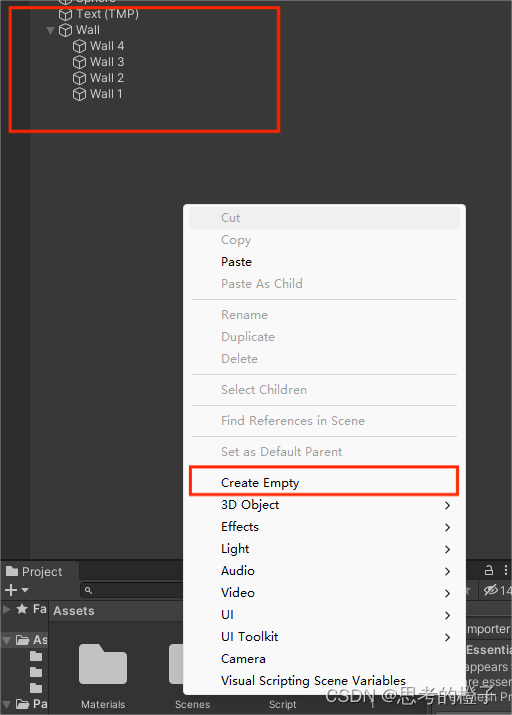
}添加墙
1. 在Hierarchy面板中右键3D object>Cuba
2. 建立一个立方体重命名为“wall”,调整立方体的“Scale”并根据需添加材质
empty
将所有的wall(1-4)全部拖入empty物体里
注:empty只有Transform组件,可以对相似元素进行统一管理
预制体:
在“Hierarchy”面板下创建一个物体,重命名为“wall调整好各个参数”
1. 创建一个文件“Prefabs”用于存放预制体
2. 将物体拖动在文件下,需要用到相同物体可以直接拖出预制体

3. 若对预制体进行参数修改,他的子物体也会进行相应的修改
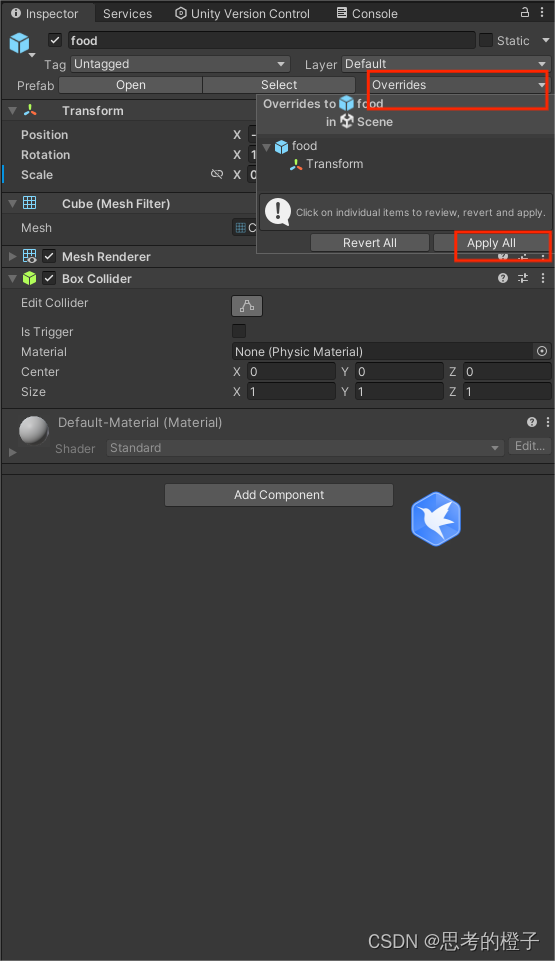
4. 可以单独修改一个子物体的属性,若想将此子物体的属性应用到其他所有的的子物体上,只需如下即可(只有修改Scale时有效)
如图所示创建了如下场景

控制物体旋转(transform.Rotate)
using System.Collections;
using System.Collections.Generic;
using UnityEngine;

public class Swing : MonoBehaviour
{
    // Start is called before the first frame update
    void Start()
    {

    }

    // Update is called once per frame
    void Update()
    {
        transform.Rotate(Vector3.up);
    }
}
这里的旋转并不是物理意义上的旋转,而是向一个方向不停地设置角度,就如上面所示,一直向up方向转一度,因为Update一秒转60次左右,所以从视觉效果上来看,物体在旋转
碰撞测试——检测小球碰撞到物体
系统事件检测物体发生碰撞(OnCollisionEnter)
OnCollisionEnter(Collision collision)
这个函数用于检测两个物体之间的碰撞事件,当两个物体发生碰撞时被调用。其中,参数collision包含了碰撞的详细信息,例如碰撞点、碰撞法线等等。
OnCollisionStay(Collision collision)
这个函数用于检测两个物体之间的持续碰撞事件,当两个物体持续发生碰撞时被调用。其中,参数collision包含了碰撞的详细信息,例如碰撞点、碰撞法线等等。
OnCollisionExit(Collision collision)
这个函数用于检测两个物体之间的碰撞事件结束,当两个物体之间的碰撞结束时被调用。其中,参数collision包含了碰撞的详细信息,例如碰撞点、碰撞法线等等。
using System.Collections;
using System.Collections.Generic;
using UnityEngine;

public class Sphere_move : MonoBehaviour
{
    public Rigidbody rd;
    // Start is called before the first frame update
    void Start()
    {
        Debug.Log("start");
        rd = GetComponent<Rigidbody>();
    }

    // Update is called once per frame
    void Update()
    {
        Debug.Log("go ");
        float x = Input.GetAxis("Horizontal");
        Debug.Log(x);
        float z = Input.GetAxis("Vertical");
        rd.AddForce(new Vector3(x,0,z));
    }
    private void OnCollisionEnter(Collision collision)
    {
        Debug.Log("bong!!!");
    }
}
此时开始程序进行试验
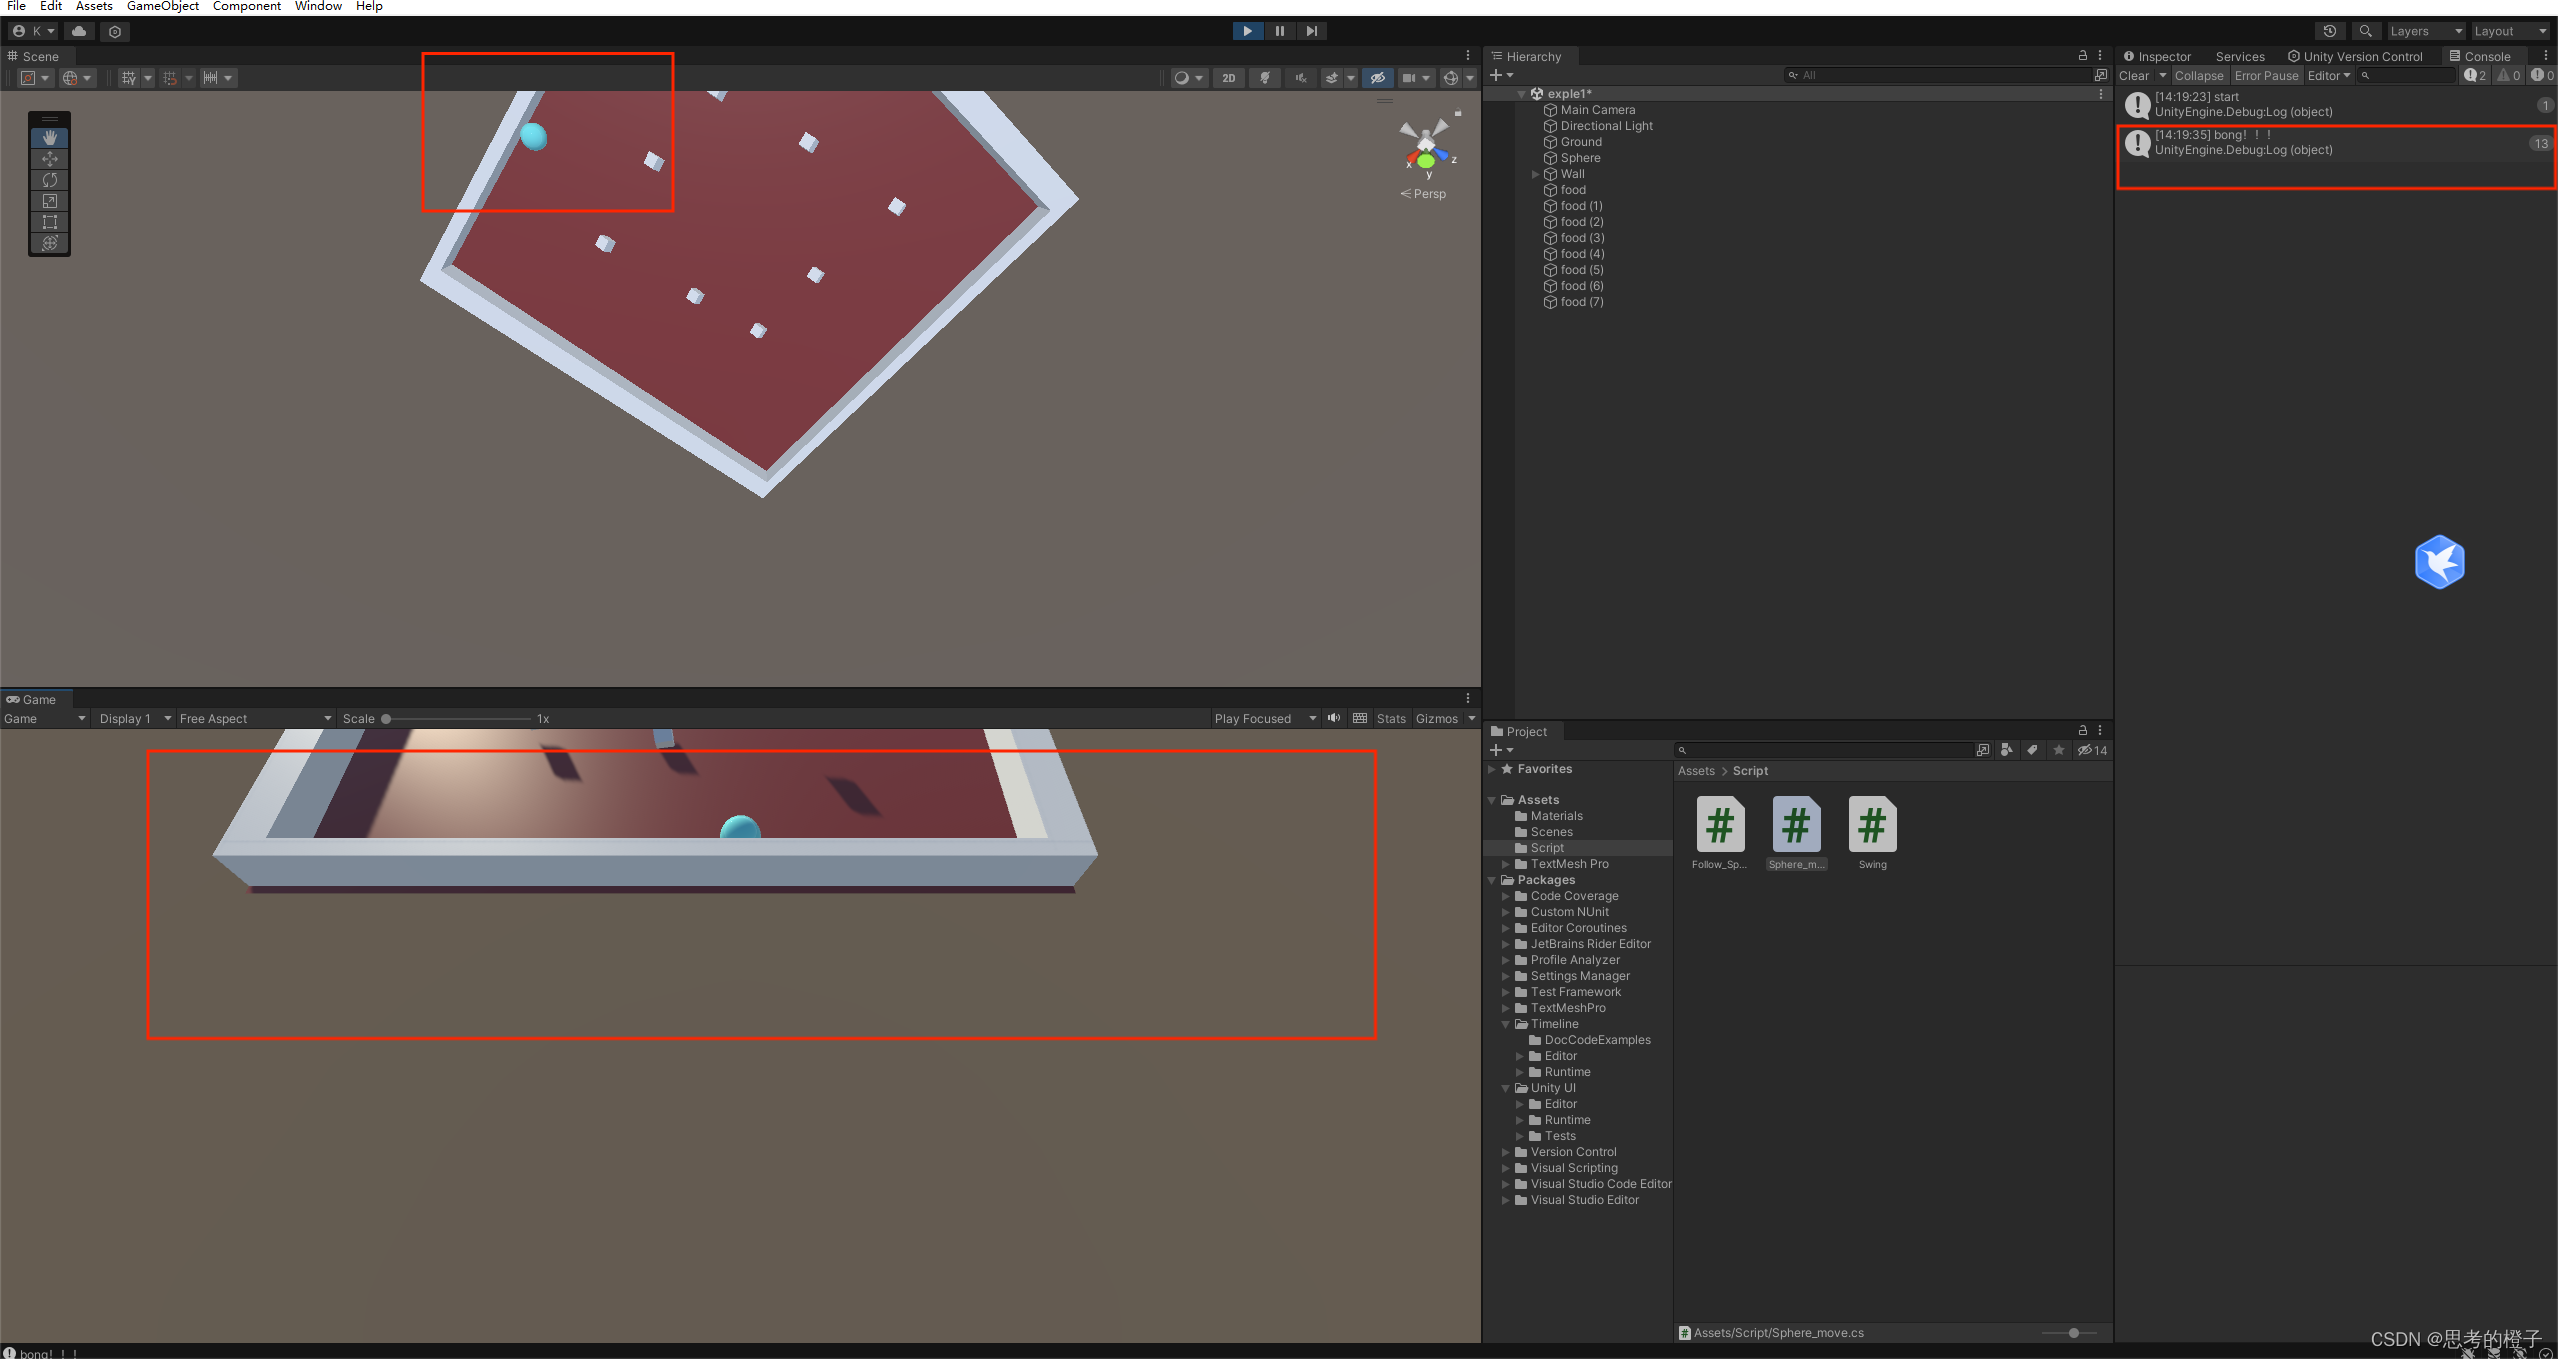
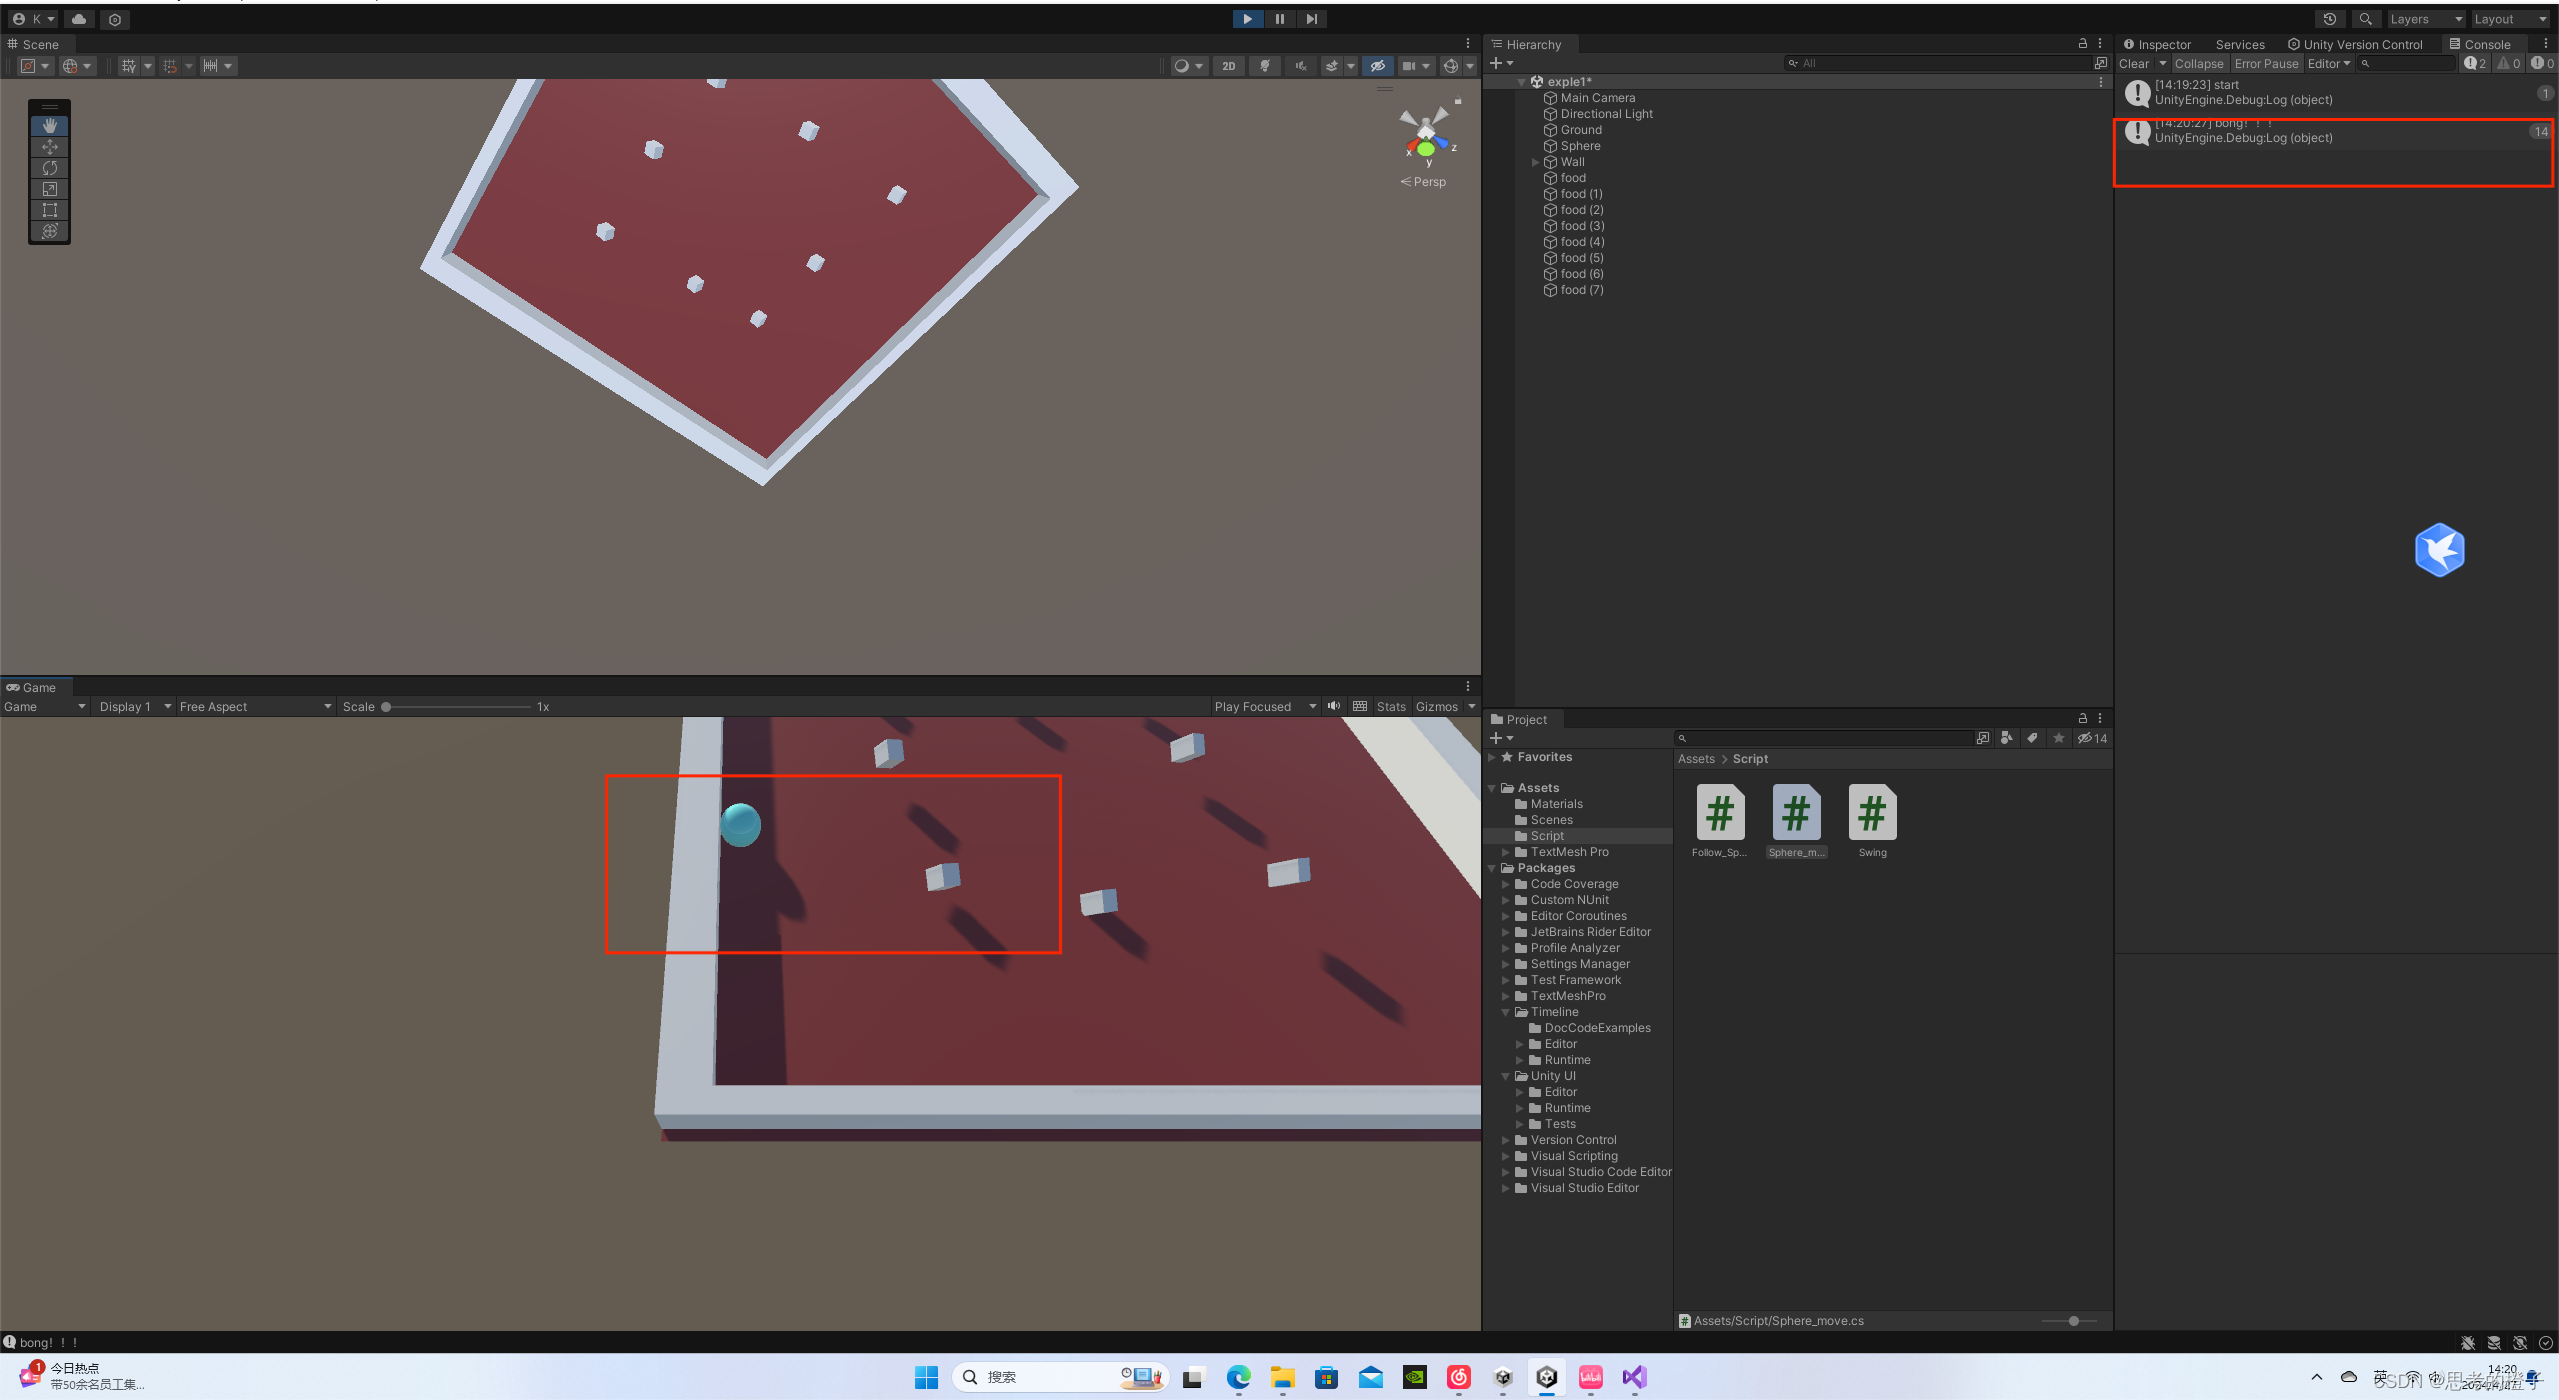
通过上面两图可以看出小球在不同位置发生了碰撞,并且系统也发生了响应(上面运用了Debug.Log())来进行测试系统的碰撞检测
碰撞并销毁物体
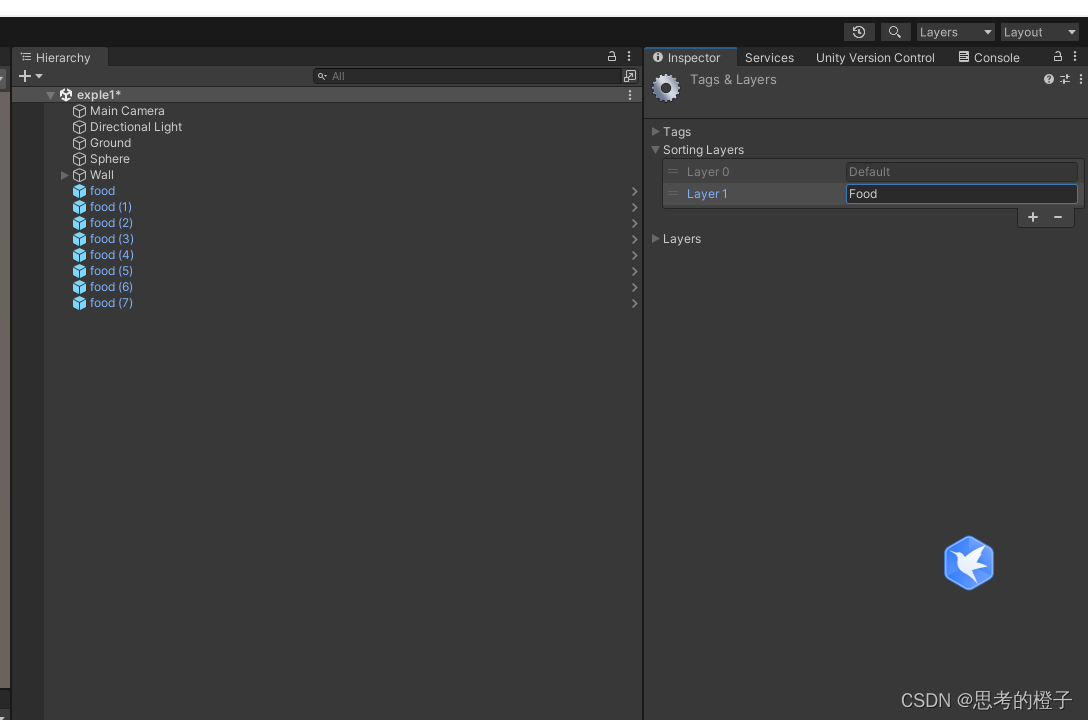
标签(Tag)
为碰撞到我们制定的物体并销毁,同常有两种思路,一是指定物体的名字,但在unity中要对每个物体的名字进行设置太过于麻烦(虽然可以将我们想要销毁的一类物体全部设置成同一个名字并进行销毁,但还是过于麻烦麻烦),所以就引出了第二种方法--标签,
先为一个子物体创建标签
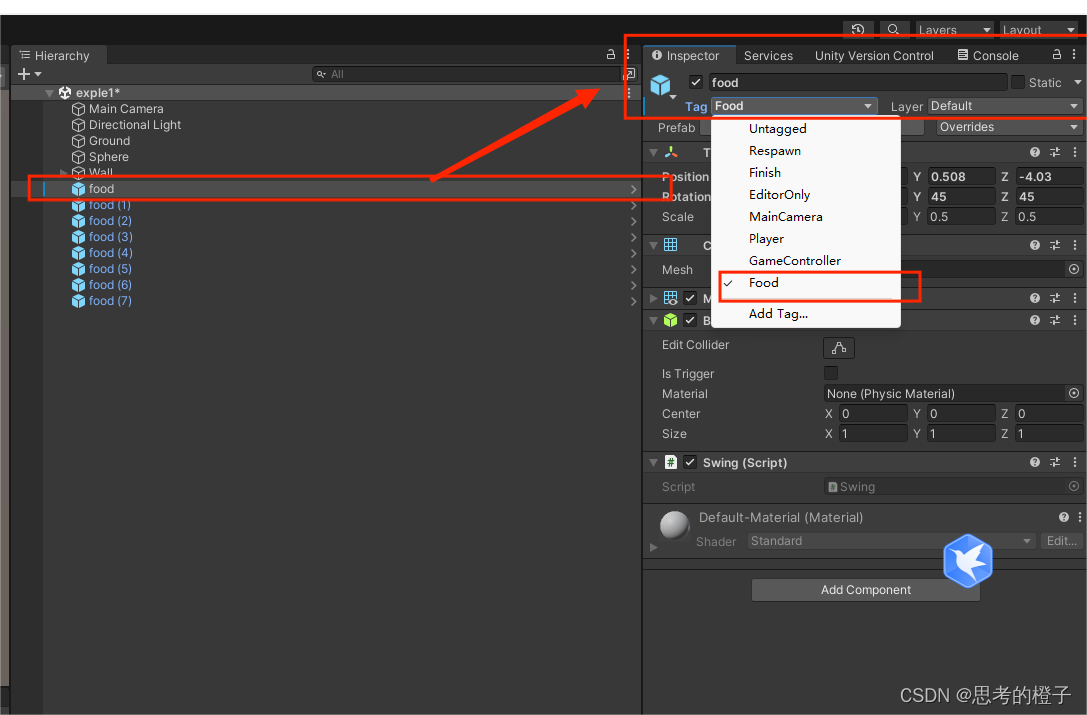
此时就可以将profab文件food也设置上相同的标签,这样其他的子物体也会被打上相同的标签,或者如上面(预制体中所讲)所示,直接将重写(Overrides)设置(Apply ALL)也可以达到相同效果
获取标签的两种方式
1. 通过碰撞物体的碰撞器获取标签
Collison.collider.Tag
2. 通过碰撞物体的游戏物体获取标签
Collison.gameobject.Tag
现在进行编写实现碰撞并销毁物体
using System.Collections;
using System.Collections.Generic;
using UnityEngine;

public class Sphere_move : MonoBehaviour
{
    public Rigidbody rd;
    // Start is called before the first frame update
    void Start()
    {
        Debug.Log("start");
        rd = GetComponent<Rigidbody>();
    }

    // Update is called once per frame
    void Update()
    {
        /*Debug.Log("go ");*/
        float x = Input.GetAxis("Horizontal");
        /*Debug.Log(x);*/
        float z = Input.GetAxis("Vertical");
        rd.AddForce(new Vector3(x,0,z));
    }
    private void OnCollisionEnter(Collision collision)
    {
        Debug.Log("bong!!!");
        if(collision.gameObject.tag == "Food")
        {
            GameObject.Destroy(collision.gameObject);
        }
    }
}
触发检测(Tigger)
在实际开发中,有事物体的碰撞并不需要碰撞效果,就例如上面对物体进行销毁时不需要碰撞效果,所以就要用到触发检测
介绍
- 触发事件——当绑定了碰撞体的游戏对象进入到另一个游戏对象的触发范围内
- 触发事件发生时,不会发生直接的碰撞,而是——只要进入了触发器区域就会执行某些操作
现在将Food母体文件设置为触发器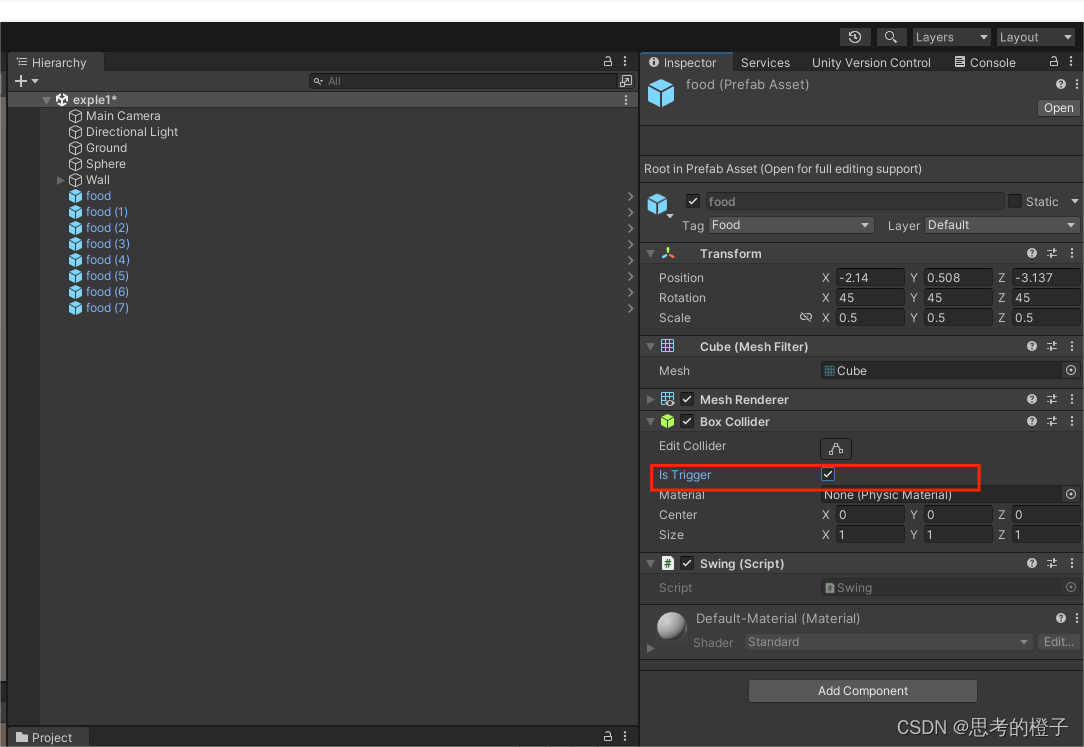
现在进行相应的编码
using System.Collections;
using System.Collections.Generic;
using UnityEngine;

public class Sphere_move : MonoBehaviour
{
    public Rigidbody rd;
    // Start is called before the first frame update
    void Start()
    {
        Debug.Log("start");
        rd = GetComponent<Rigidbody>();
    }

    // Update is called once per frame
    void Update()
    {
        /*Debug.Log("go ");*/
        float x = Input.GetAxis("Horizontal");
        /*Debug.Log(x);*/
        float z = Input.GetAxis("Vertical");
        rd.AddForce(new Vector3(x,0,z));
    }
    /* private void OnCollisionEnter(Collision collision)
     {
         Debug.Log("bong!!!");
         if(collision.gameObject.tag == "Food")
         {
             GameObject.Destroy(collision.gameObject);
         }
     }*/
    private void OnTriggerEnter(Collider other)
    {
        if(other.tag == "Food")
        {
            GameObject.Destroy(other.gameObject);
        }
    }
}
注:
碰撞器(Collision)和触发器(Collider)不能共存
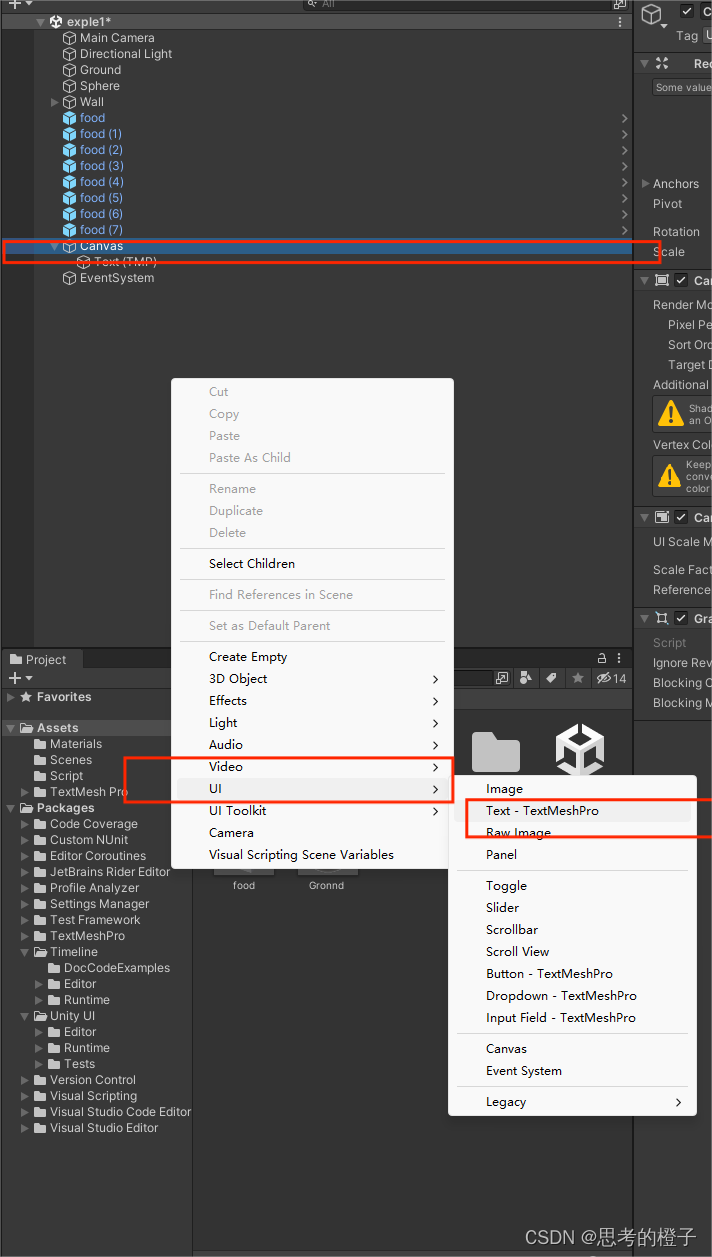
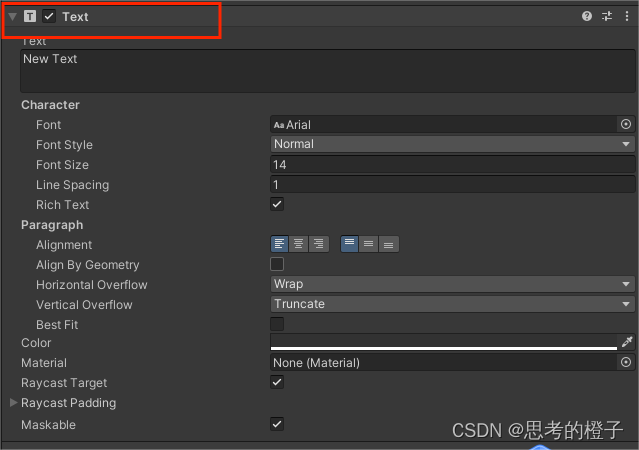
通过UI显示得分
创建一个UI类物体text
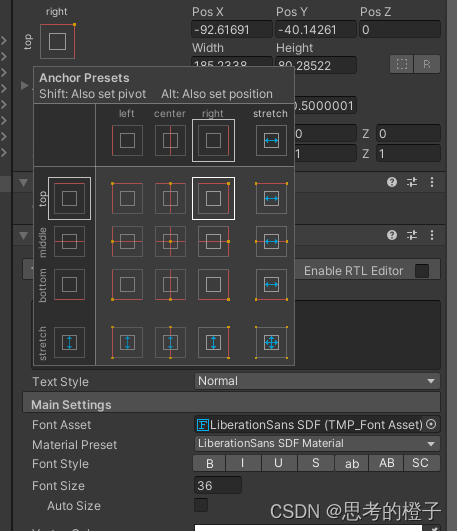
使text一直显示在右上角
现在编写代码使Sphere物体与text关联,首先创建score进行计分,并在创造一个Text类型的变量scoretext显示得分,使用这类变量,需要引入UnityEngine.UI库中的变量,代码如下
using System.Collections;
using System.Collections.Generic;
using UnityEngine;
using UnityEngine.UI;
public class Sphere_move : MonoBehaviour
{
    public Rigidbody rd;
    // Start is called before the first frame update
    public int score = 0;
    public Text scoretext;
    void Start()
    {
        Debug.Log("start");
        rd = GetComponent<Rigidbody>();
    }

    // Update is called once per frame
    void Update()
    {
        /*Debug.Log("go ");*/
        float x = Input.GetAxis("Horizontal");
        /*Debug.Log(x);*/
        float z = Input.GetAxis("Vertical");
        rd.AddForce(new Vector3(x,0,z));
    }
    /* private void OnCollisionEnter(Collision collision)
     {
         Debug.Log("bong!!!");
         if(collision.gameObject.tag == "Food")
         {
             GameObject.Destroy(collision.gameObject);
         }
     }*/
    private void OnTriggerEnter(Collider other)
    {
        if(other.tag == "Food")
        {
            GameObject.Destroy(other.gameObject);
            score++;
            scoretext.text = "分数:" + score;
        }
    }
}
显示游戏胜利(销毁所有Food物体)
创建text类Win物体
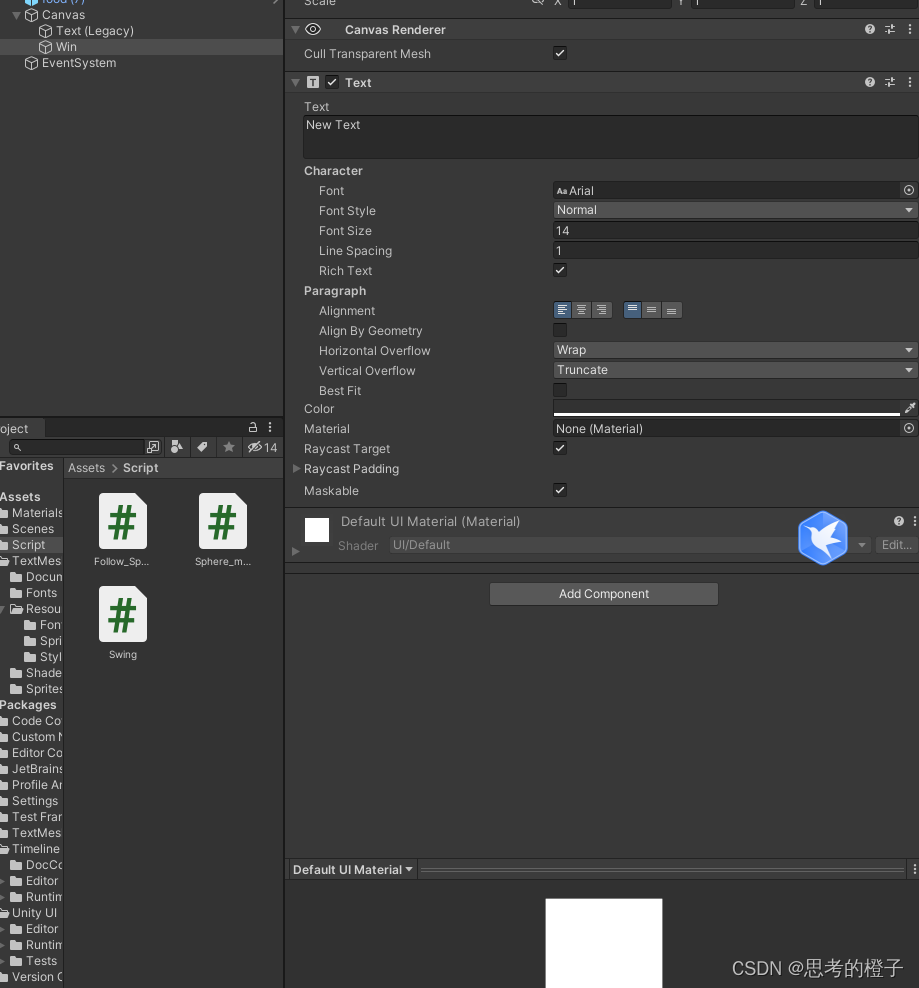
思路:在销毁所有物体之前不禁用win物体
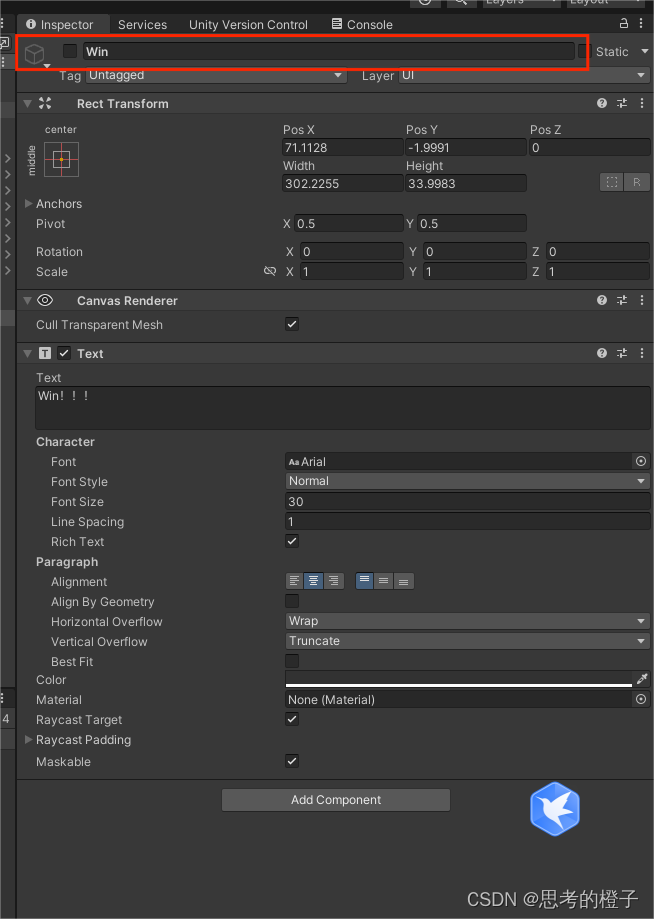
销毁完成后不禁用Win物体
private void OnTriggerEnter(Collider other)
{
if(other.tag == "Food")
{
GameObject.Destroy(other.gameObject);
score++;
scoretext.text = "分数:" + score;
if(score == 8)
{
Win.SetActive(true);
}
}
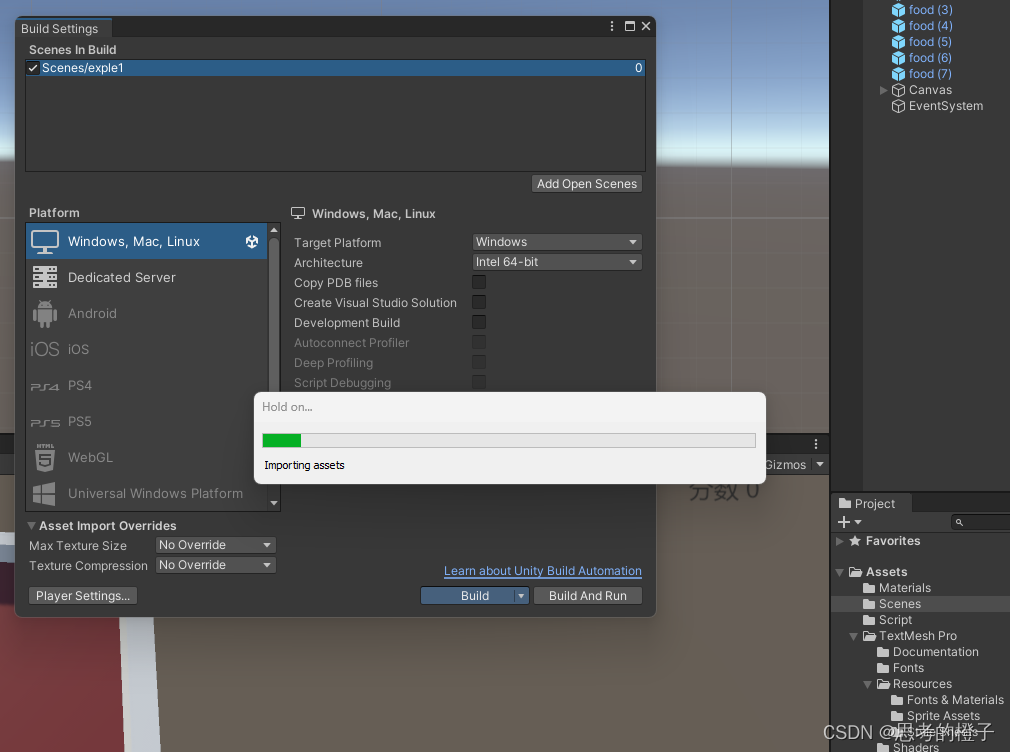
}游戏打包
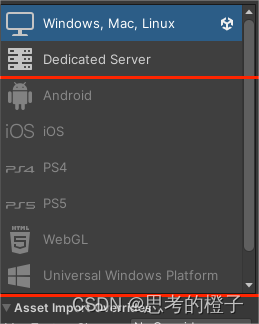
在做完一个游戏后需要对其打包发布到平台上操作如下
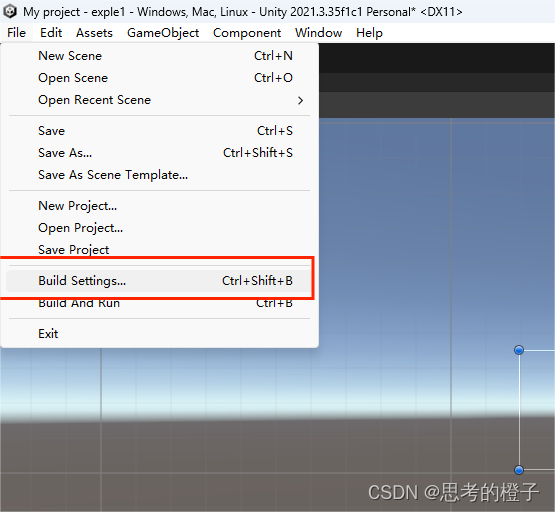
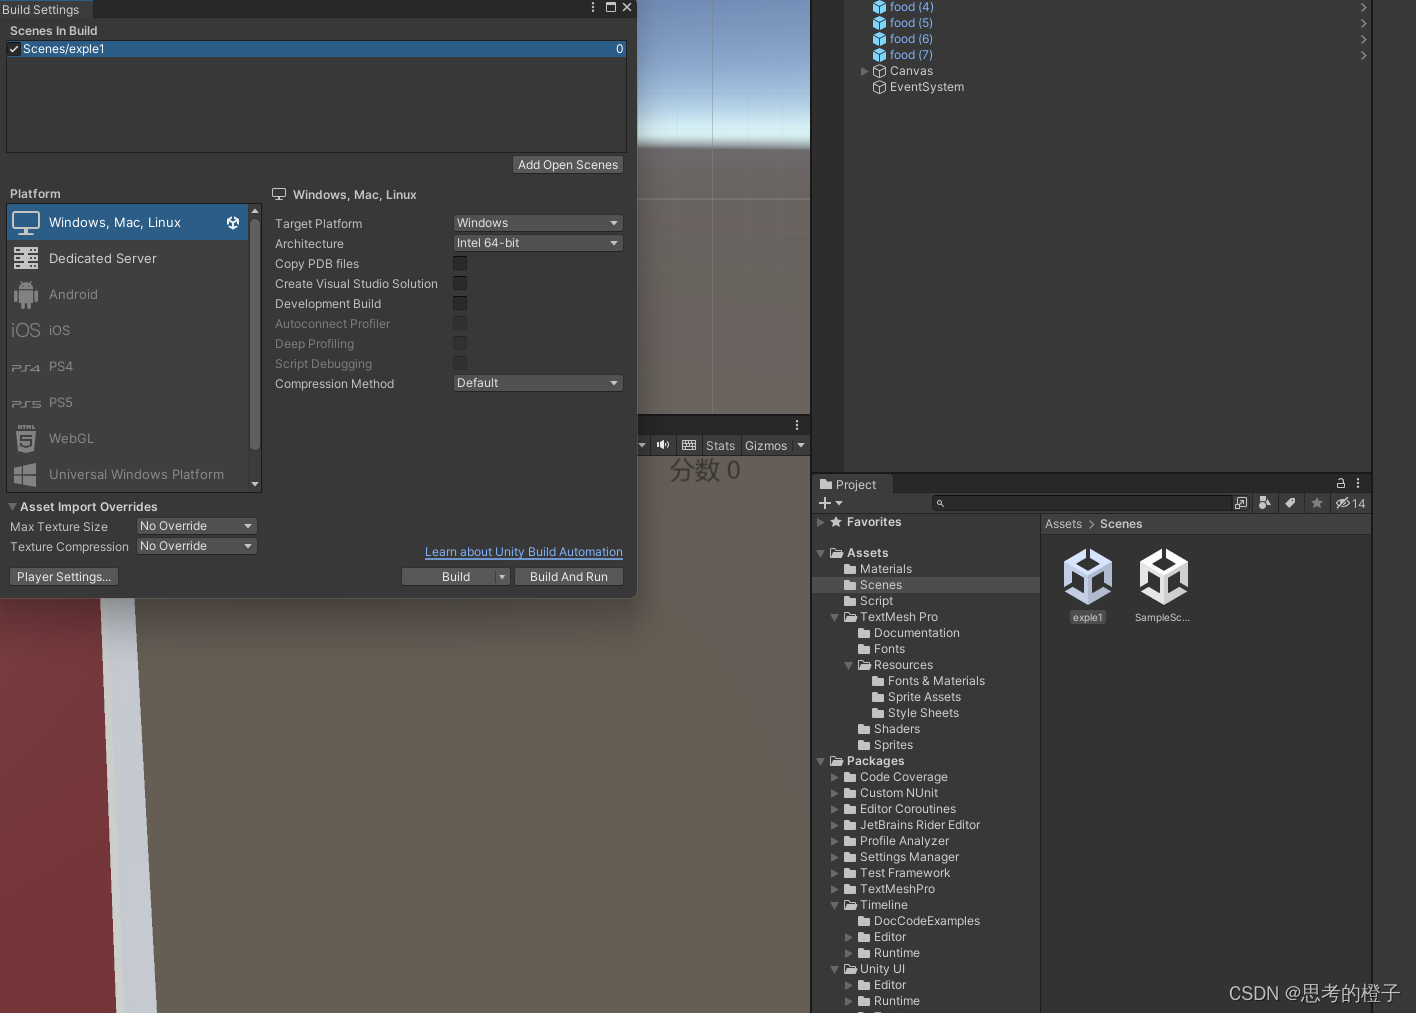
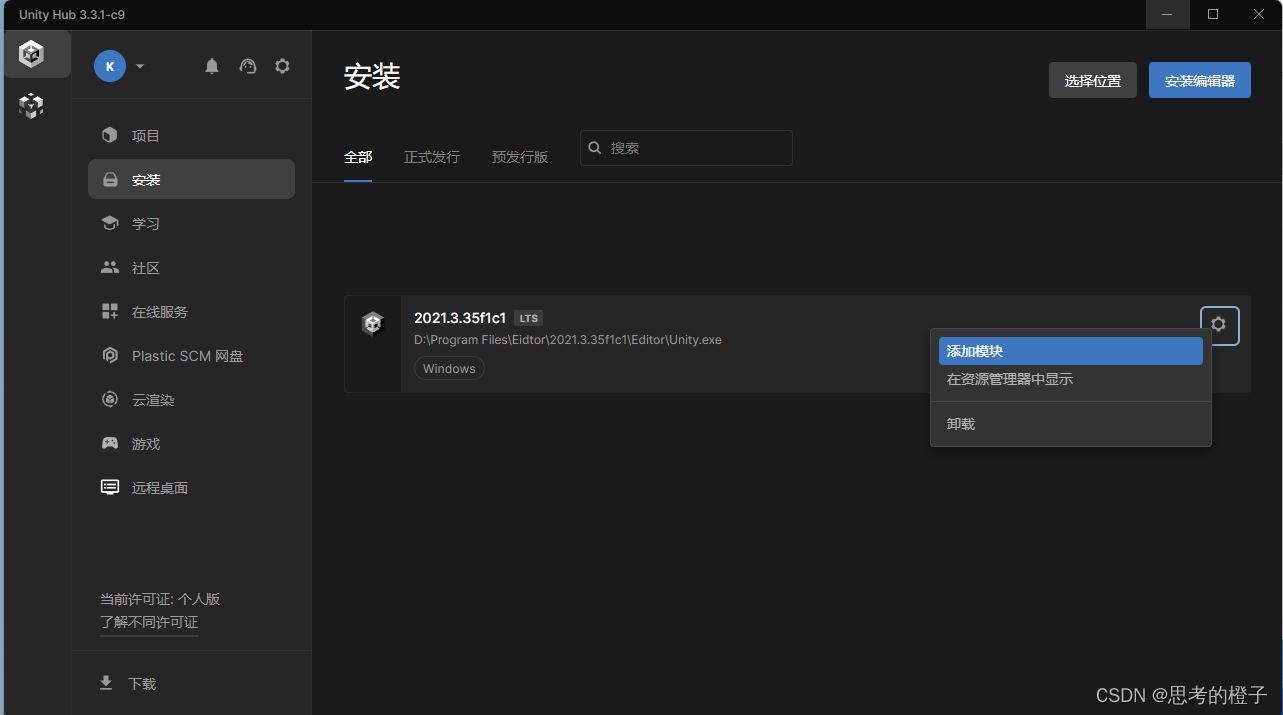
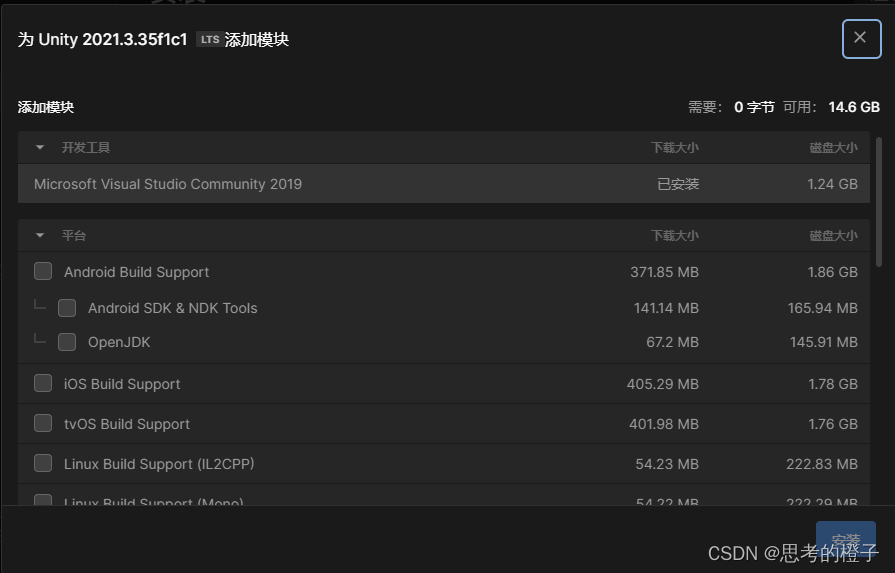
这里可以选择发布到不同的平台,但发布到有些平台如下图所示,需要安装把不同的模块才能发布
Player Setting
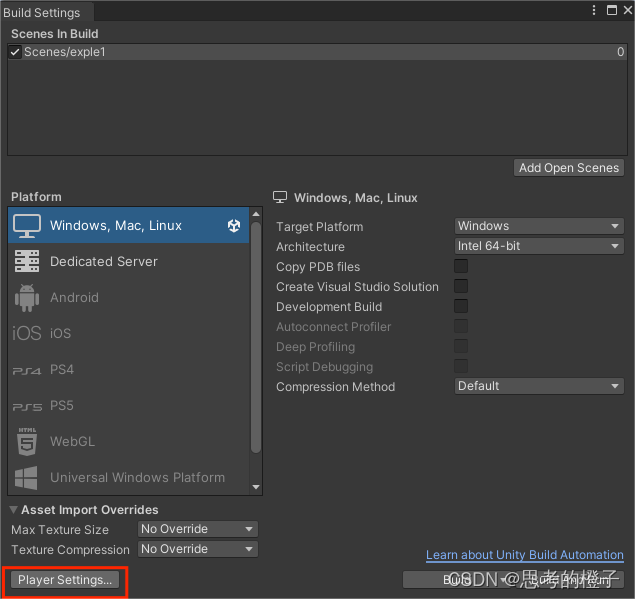
现在对用户窗口进行设置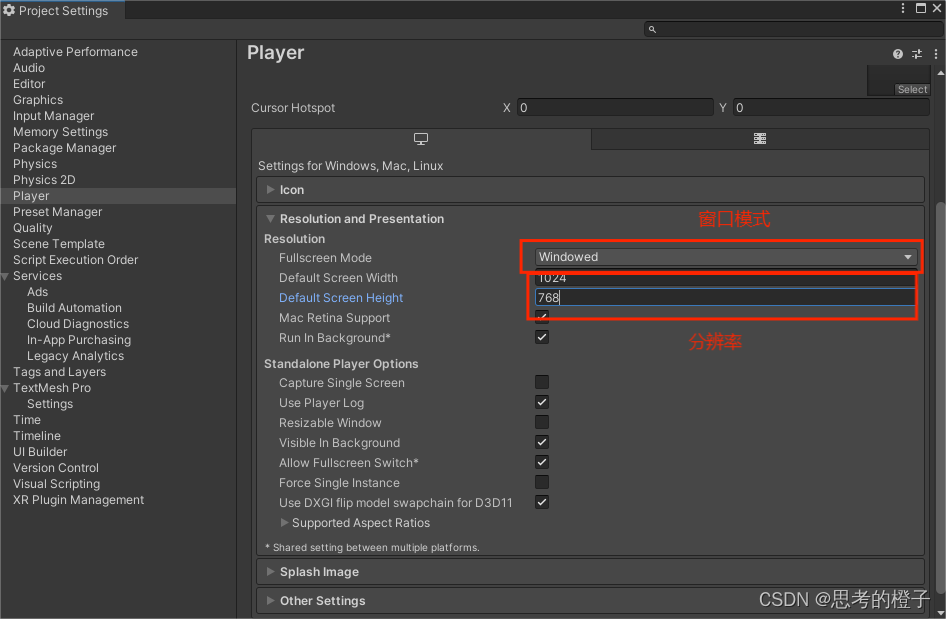
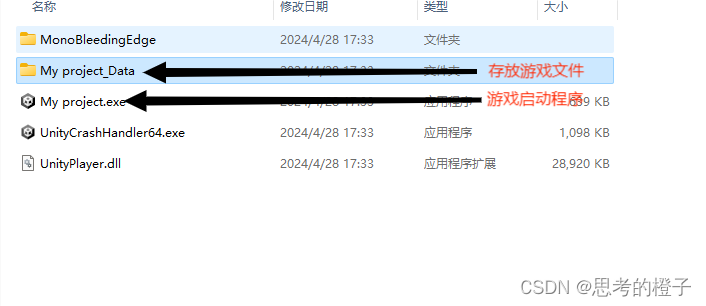
现在进行打包


 858
858

 被折叠的 条评论
为什么被折叠?
被折叠的 条评论
为什么被折叠?
 到【灌水乐园】发言


