


本文共分五个部分,分别是配置云服务器安全组放开所有端口、为云服务器安装虚拟桌面、为云服务器安装vnc_server、为本地电脑安装vnc_client、分析vnc交互报文。
首先更新系统
sudo apt update
sudo apt upgrade
一、配置云服务器安全组放开所有端口
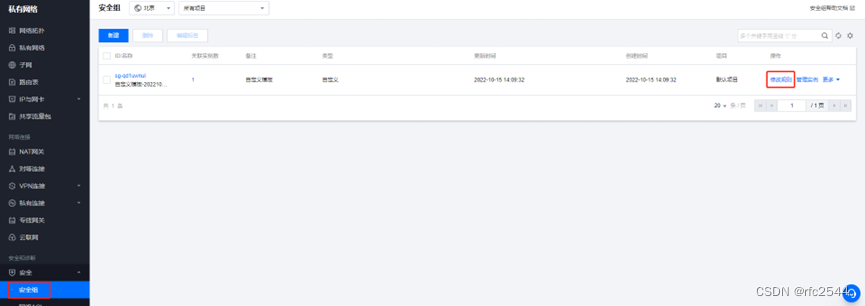
【腾讯云】登录官网->【控制台】->【我的资源】->【云服务器】->【网络与安全】->【安全组】


【安全组】->【修改云服务器绑定的规则】
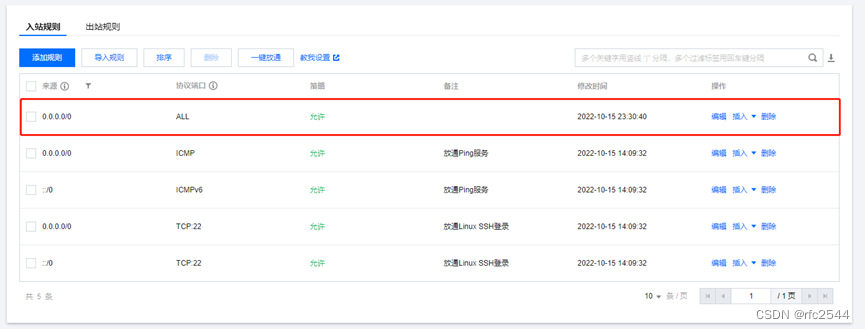
【添加规则】

【添加入站规则】
类型:自定义
来源:0.0.0.0/0,表示所有IPv4源地址
协议端口:ALL,表示所有端口
策略:允许
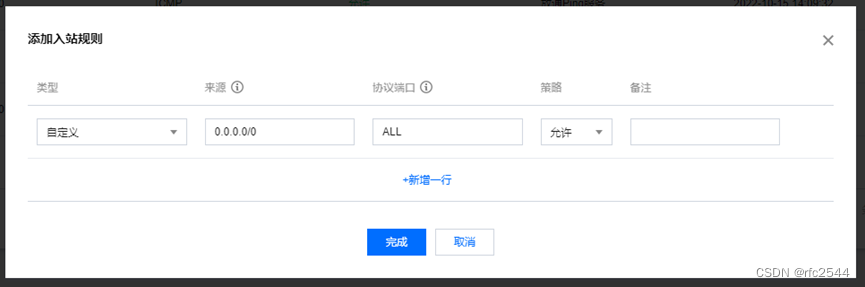
【完成】
二、为云服务器安装虚拟桌面
安装轻量级桌面环境Xfce
安装Xfce过程中会提示配置“lightdm”,选择“gdm3”即可
sudo apt install xfce4 xfce4-goodies xorg dbus-x11 x11-xserver-utils三、为云服务器安装vnc_server
本次选择“TigerVNC”作为vnc_server
sudo apt install tigervnc-standalone-server tigervnc-common安装TigerVNC完成,配置vnc访问密码,注意最下方选择n,选择y则vnc_client拨入后仅能观看,无法操作。
ubuntu@VM-0-8-ubuntu:/etc$ vncpasswd
Password:
Verify:
Would you like to enter a view-only password (y/n)? n
配置TigerVNC(远程软件)关联Xfce(桌面环境)
#首先find找到.vnc的路径
root@VM-0-8-ubuntu:~# find / -name .vnc
/root/.vnc
/home/ubuntu/.vnc
root@VM-0-8-ubuntu:~#

#其次切换工作目录
root@VM-0-8-ubuntu:/# cd /root/.vnc/

#之后touch新建一个文件,文件名xstartup
root@VM-0-8-ubuntu:~/.vnc# touch xstartup

#修改新建的xstartup
root@VM-0-8-ubuntu:~/.vnc# vim xstartup

#增加以下内容,保存并关闭文件。这样每次启动TigerVNC_server时,以下命令均会自动执行。
#!/bin/sh
unset SESSION_MANAGER
unset DBUS_SESSION_BUS_ADDRESS
exec startxfce4

#给xstartup授权
root@VM-0-8-ubuntu:~/.vnc# chmod 777 xstartup
root@VM-0-8-ubuntu:~/.vnc# ls -l
-rw-r--r-- 1 root root 1782 Oct 15 22:41 localhost.localdomain:1.log
-rw-r--r-- 1 root root    7 Oct 15 22:41 localhost.localdomain:1.pid
-rw-r--r-- 1 root root 1091 Oct 15 22:44 localhost.localdomain:2.log
-rw-r--r-- 1 root root    7 Oct 15 22:44 localhost.localdomain:2.pid
-rw-r--r-- 1 root root 1117 Oct 15 22:48 localhost.localdomain:3.log
-rw-r--r-- 1 root root    7 Oct 15 22:48 localhost.localdomain:3.pid
-rw------- 1 root root    8 Oct 15 22:33 passwd
-rwxrwxrwx 1 root root   79 Oct 15 23:02 xstartup
启动TigerVNC_server
注意下方的localhost.localdomain:2,则vnc_client连接此vnc_server时候,所用端口号为5900+2=5902,即vnc_sever启动时候加载的是端口号x,则vnc_client连接该vnc_server时所有端口号就是5900+x。
root@VM-0-8-ubuntu:~/.vnc# vncserver
New 'localhost.localdomain:2 (root)' desktop at :2 on machine localhost.localdomain
Starting applications specified in /root/.vnc/xstartup
Log file is /root/.vnc/localhost.localdomain:2.log
Use xtigervncviewer -SecurityTypes VncAuth -passwd /root/.vnc/passwd :2 to connect to the VNC server.
root@VM-0-8-ubuntu:~/.vnc#

#配置某些参数的启动
#-geometry 1920x1080,设定远程桌面分辨率
root@VM-0-8-ubuntu:~/.vnc# vncserver -localhost no -geometry 1920x1080 -depth 24
New 'localhost.localdomain:1 (root)' desktop at :1 on machine localhost.localdomain
Starting applications specified in /root/.vnc/xstartup
Log file is /root/.vnc/localhost.localdomain:1.log
Use xtigervncviewer -SecurityTypes VncAuth,TLSVnc -passwd /root/.vnc/passwd localhost.localdomain:1 to connect to the VNC server.
常用TigerVNC_server命令
#查看当前存在几个vnc_server进程及各占用哪个端口号
root@VM-0-8-ubuntu:~/.vnc# vncserver -list
TigerVNC server sessions:
X DISPLAY #     RFB PORT #      PROCESS ID
:1              5901            158188
:2              5902            166676
:5              5905            157490

#杀掉vnc_server进程
root@VM-0-8-ubuntu:~/.vnc# vncserver -kill :2
Killing Xtigervnc process ID 166676... success!
root@VM-0-8-ubuntu:~/.vnc# vncserver -kill :5
Killing Xtigervnc process ID 157490... success!

#查看当前存在几个vnc_server进程及各占用哪个端口号
root@VM-0-8-ubuntu:~/.vnc# vncserver -list
TigerVNC server sessions:
X DISPLAY #     RFB PORT #      PROCESS ID
:1              5901            158188
root@VM-0-8-ubuntu:~/.vnc#
执行vncserver报错
#报错
root@VM-0-8-ubuntu:/# vncserver
/usr/bin/xauth:  file /root/.Xauthority does not exist
New 'localhost.localdomain:1 (root)' desktop at :1 on machine localhost.localdomain
Starting applications specified in /etc/X11/Xvnc-session
Log file is /root/.vnc/localhost.localdomain:1.log
Use xtigervncviewer -SecurityTypes VncAuth -passwd /root/.vnc/passwd :1 to connect to the VNC server.
vncserver: Failed command '/etc/X11/Xvnc-session': 256!
=================== tail -15 /root/.vnc/localhost.localdomain:1.log ===================
Copyright (C) 1999-2019 TigerVNC Team and many others (see README.rst)
See https://www.tigervnc.org for information on TigerVNC.
Underlying X server release 12008000, The X.Org Foundation
Sat Oct 15 22:33:59 2022
 vncext:      VNC extension running!
 vncext:      Listening for VNC connections on local interface(s), port 5901
 vncext:      created VNC server for screen 0
X connection to :1 broken (explicit kill or server shutdown).
Sat Oct 15 22:34:00 2022
 ComparingUpdateTracker: 0 pixels in / 0 pixels out
 ComparingUpdateTracker: (1:-nan ratio)
Killing Xtigervnc process ID 152341... which seems to be deadlocked. Using SIGKILL!
=======================================================================================
Starting applications specified in /etc/X11/Xvnc-session has failed.
Maybe try something simple first, e.g.,
        tigervncserver -xstartup /usr/bin/xterm
root@VM-0-8-ubuntu:/#

#执行tigervncserver -xstartup /usr/bin/xterm
New 'localhost.localdomain:1 (root)' desktop at :1 on machine localhost.localdomain
Starting applications specified in /usr/bin/xterm
Log file is /root/.vnc/localhost.localdomain:1.log
Use xtigervncviewer -SecurityTypes VncAuth -passwd /root/.vnc/passwd :1 to connect to the VNC server.
四、为本地电脑安装vnc_client
TightVNC: VNC-Compatible Free Remote Control / Remote Desktop Software
【Download Now!】->【根据本地电脑操作系统选择下载版本】

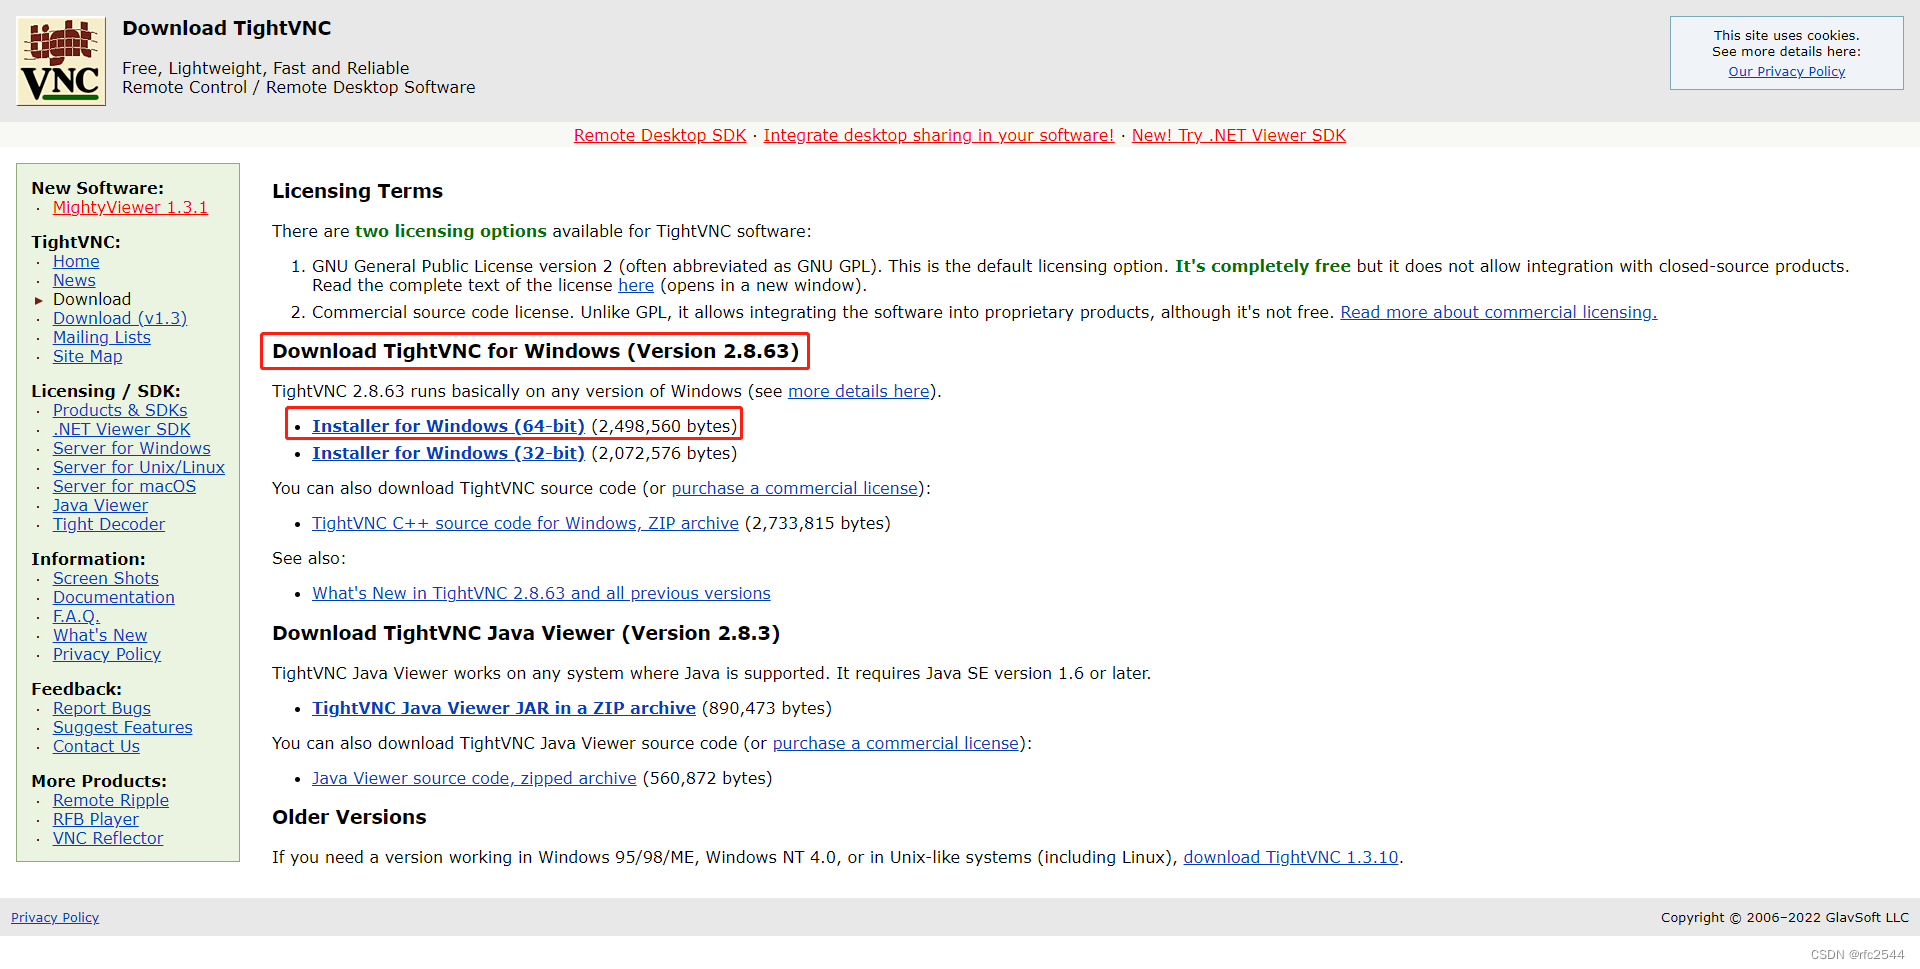
【下载完成】
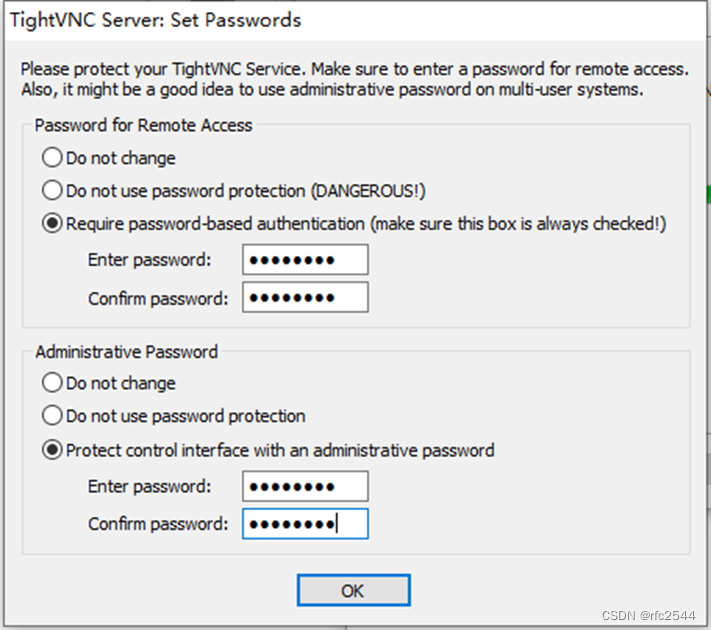
【双击安装】->【安装过程中会提示输入密码】
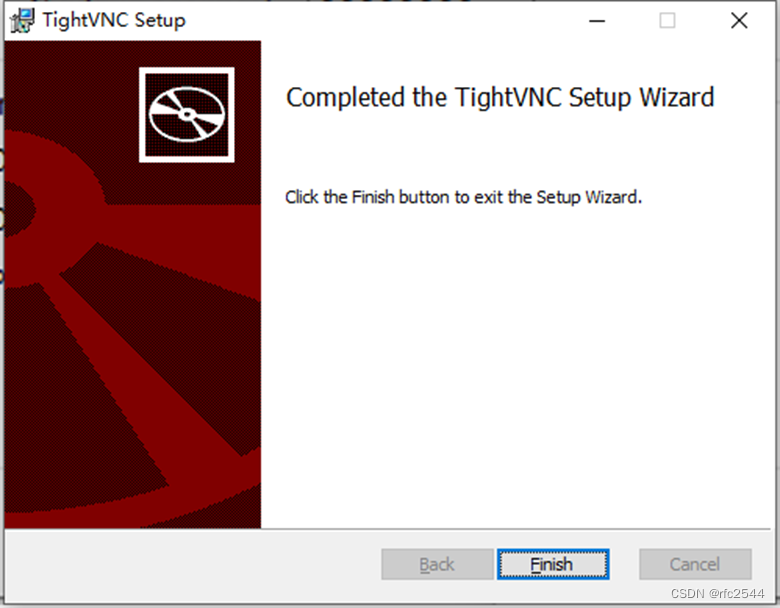
【安装完成】->【在本地电脑桌面看不到】->【在开始菜单/搜索可以找到】->【右键打开】

【键入远程vnc_server的IP和端口号】->【注意格式remoteIP::port】->【connect】
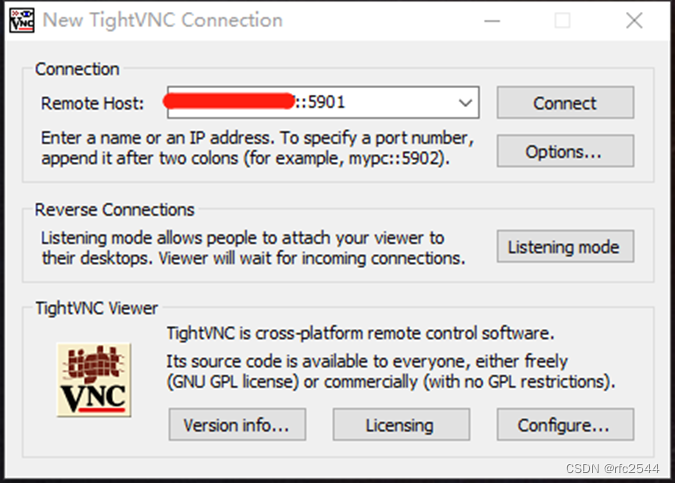
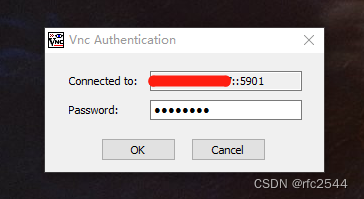
【键入vnc_server密码】->【OK】
【远程桌面登录成功】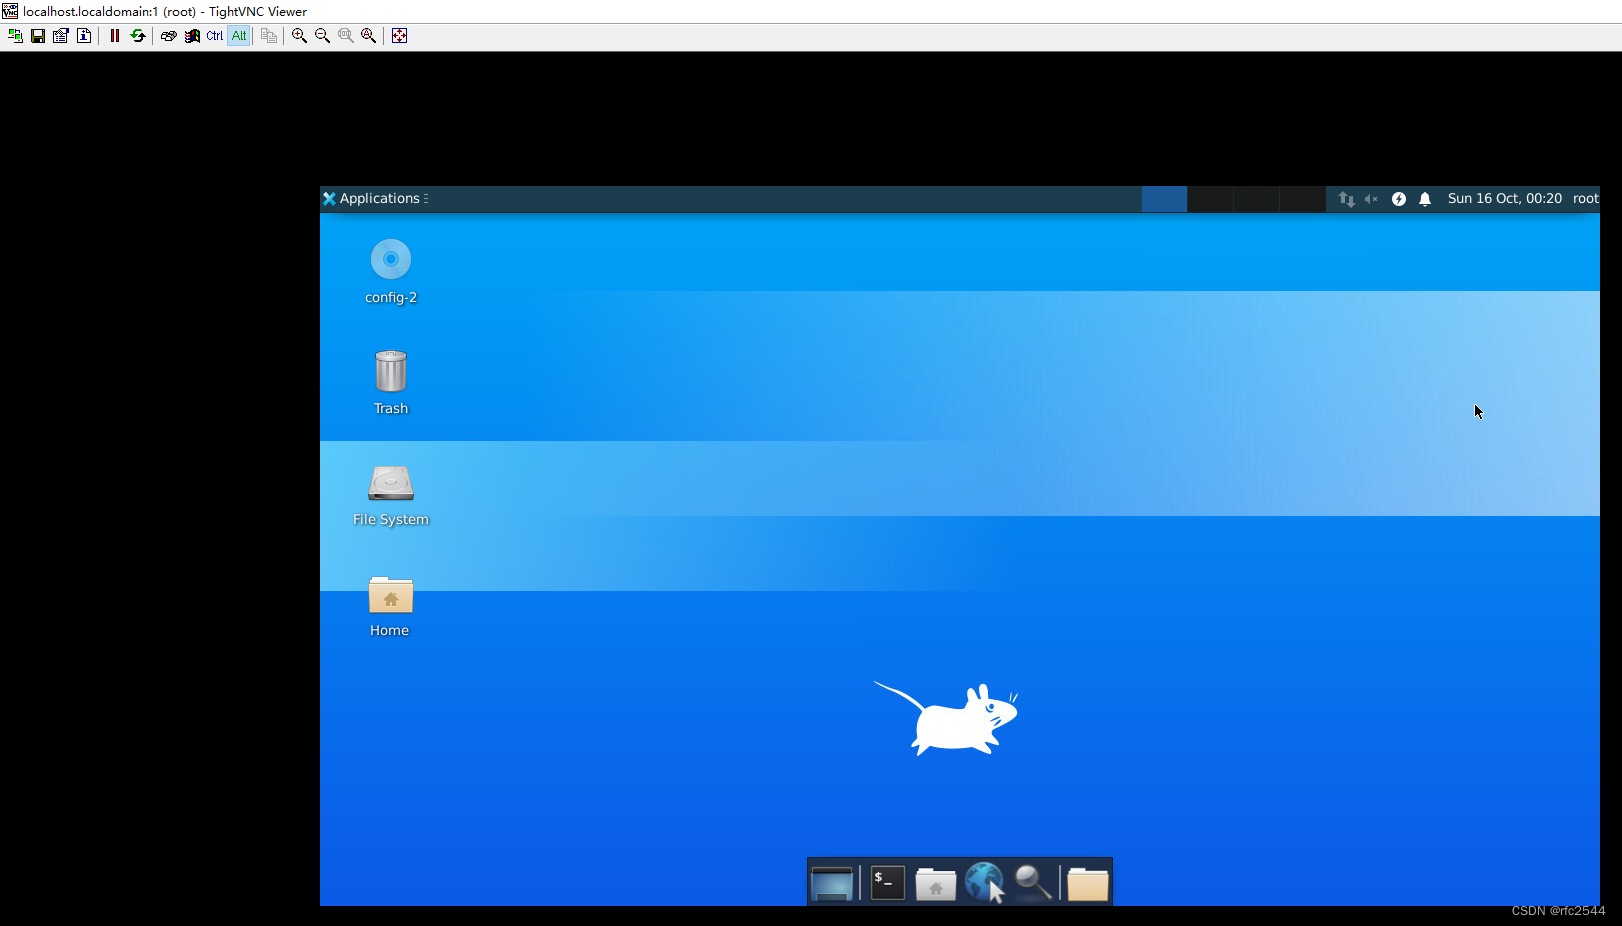
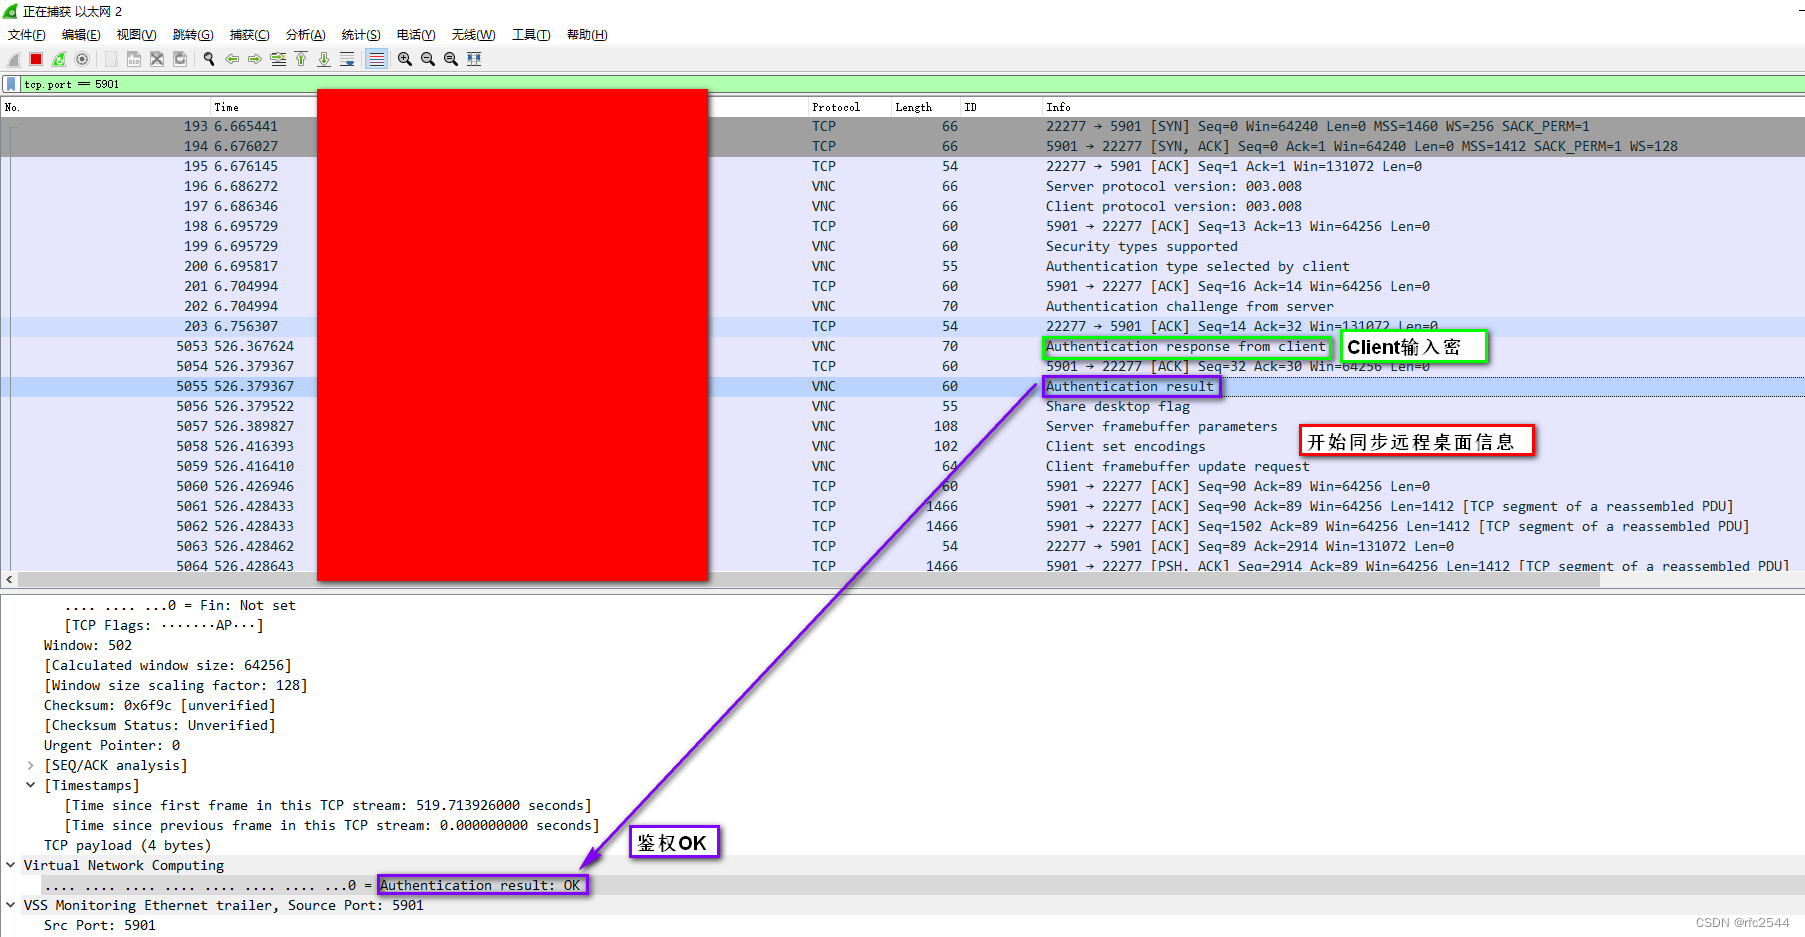
五、分析vnc交互报文
【键入远程vnc_server的IP和端口号】->【注意格式remoteIP::port】->【connect】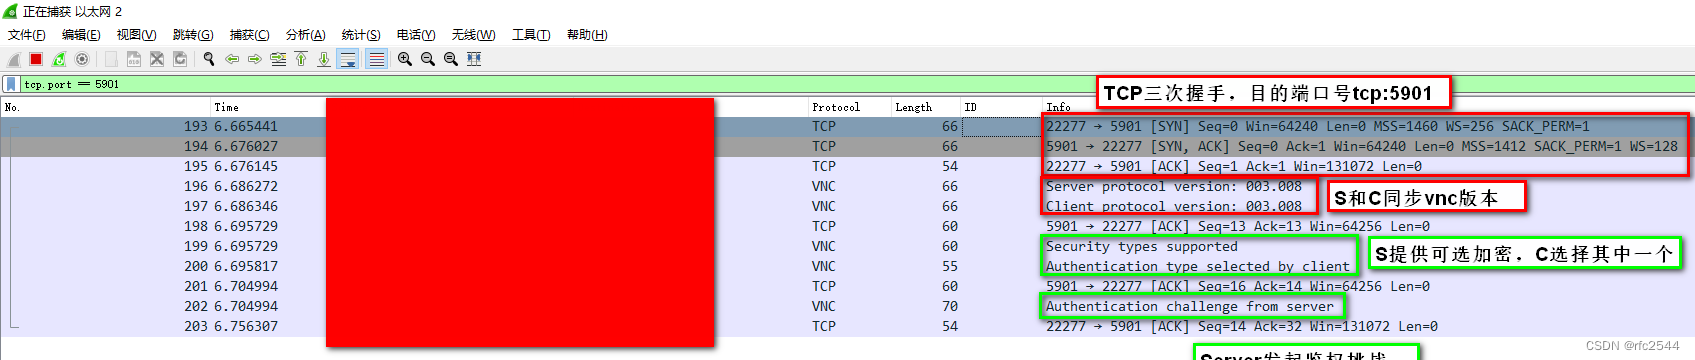
【键入vnc_server密码】->【OK】
六、感谢
https://wiki.archlinux.org/title/TigerVNC_(%E7%AE%80%E4%BD%93%E4%B8%AD%E6%96%87)
https://blog.csdn.net/level_code/article/details/125534100
https://www.51cto.com/article/635182.html
https://xie.infoq.cn/article/cf473dc0dea917b0b2a546ecd
https://www.cnblogs.com/liyuanhong/articles/15487147.html
https://blog.csdn.net/shuirenbushijun/article/details/107765654


 6886
6886


 被折叠的 条评论
为什么被折叠?
被折叠的 条评论
为什么被折叠?
 到【灌水乐园】发言


