


在编译成功源码,安装完毕xl2tpd后,便可以配置xl2tpd服务。基本配置过程主要涉及两个配置文件:一个用来配置xl2tpd, 一个用来配置ppp协议。下面分别对这两个文件进行说明,最后添加xl2tpd服务搭建过程。
具体信息也可以通过man来查看:
- man xl2tpd :启动xl2tpd服务命令行传递参数说明
- man xl2tpd-control : 对xl2tpd进行参数配置的命令行说明
- man xl2tpd.conf :xl2tpd.conf配置文件配置信息说明
模块说明:
| xl2tpd | 用来提供L2TP协议服务 |
| xl2tpd-control | 用来对xl2tpd进行参数配置:隧道、会话的增删改查等 |
他们是两个不同的进程,使用管道进行通信。
1. 使用GDB调试xl2tpd-control
如果需要使用GDB来辅助调试、学习xl2tpd, 需要在编译阶段加上-g选项,否则无法准确的跟踪调试。直接打开源码中的Makefile, 修改CFLAGS即可,之后重新编译、安装。Makefile修改信息如下:

如果需要单独调试xl2tpd-control进程:挂载到GDB上后,传递参数可通过以下方式:

2. xl2tpd启动参数说明
下面信息可以通过man xl2tpd进行查看
| -D | 进入调试模式 |
| -l | 记录日志信息 |
| -c <config file> | 使用指定的配置文件,默认配置文件为/etc/xl2tpd/xl2tpd.conf; 回退配置保留文件:/etc/xl2tpd/l2tpd.conf |
| -s <secret file> | 认证的用户信息,默认的文件为/etc/xl2tpd/l2tp-secrets |
| -p <pid file> | 使用指定的PID文件,默认/var/run/xl2tpd/l2tp-contol 这个文件用来进行管道通信使用的(控制交互),xl2tpd和xl2tpd-control之间进行进程间通信 |
| -C | 同 -c |
3. xl2tpd.conf配置文件说明
下面信息可以通过man xl2tpd.conf进行查看
|
GLOBAL
SECTION
| auth file | 用于对隧道的认证。默认文件为: /etc/xl2tpd/xl2tpd.secrets |
| ipsec asref | 用于ipsec的SA进行跟踪。这是一个开关:yes or no | |
| saref refinfo |
| |
| listen-addr | 监听的接口IP。默认为0.0.0.0,即监控所有的接口 | |
| port | 监听的端口,默认1701 | |
| access control | 访问控制开关:yes or no 如果为yes,只能允许指定的对端连接 | |
| debug avp |
| |
| debug network |
| |
| debug packet | 与-D配合使用,信息显示在标准输出上 | |
| debug state |
| |
| debug tunnel |
| |
| max retries | 隧道关闭前尝试的次数,默认为5 | |
|
LNS SECTION | exclusive | 只允许创建一个控制隧道 |
| (no) ip range | 用于为客户端分配IP的IP地址池 | |
| assign ip | 是否分配IP。yes or no | |
| (no) lac | 指定lac的IP地址 | |
| hidden bit | 隐藏传输 | |
| local ip | Xl2tpd本地IP | |
| local ip range | 为客户端分配的本地IP池,该项不受assign ip影响 | |
| length bit | L2tp报文中length字段生效 | |
| (refuse|require) chap | 启用或者禁用chap认证 | |
| (refuse|require) pap | 启用和禁用pap认证 (yes or no) | |
| (refuse|require) authentication | 启动和禁用认证 (yes or no)。对连接的用户进行用户和密码认证 | |
| unix authentication | If set yes, 将使用/etc/passwd 对对端ppp进行认证 | |
| hostname |
| |
| ppp debug |
| |
| pass peer |
| |
| pppoptfile | ppp参数选项配置文件 | |
| call rws | 过时 | |
| tunnel rws | 隧道的窗口大小 | |
| flow bits | 启用序号 | |
| challenge | 使用challenge向对端发起认证 | |
| rx bps | 接收带宽 | |
| tx bps | 发送带宽 | |
|
LAC SECTION | lns | 设置LNS地址信息 |
| autodial | 如果设置为yes,则在启动时进行自动协商 | |
| redial | 重拨,set yes, 会话断后会尝试重拨 | |
| redial timeout | 设置重拨的超时时间 | |
| max redials | 设置重播次数 |
4. xl2tpd-control配置说明
下面信息可以通过man xl2tpd-control进行查看
| xl2tpd-control [-c <PATH>] <command> <tunnel name> [<COMMAND OPTIONS>] | ||
| Option | -c | 用来指定xl2tpd配置文件 |
|
| -d | 进入调试模式 |
| COMMAND | add | 添加新的或者修改已存的lac配置。 格式:<key>=<value> |
|
| connect | 用来激活当前隧道 |
|
| disconnect | 断开当前隧道 |
|
| remove | 删除隧道 |
|
| add-lac | 添加新的或者修改已存的lac配置 |
|
| connect-lac |
|
|
| disconnect-lac |
|
|
| remove-lac |
|
|
| add-lns | 添加新的或者修改已存的lns配置 |
|
| remove-lns |
|
|
| status |
|
|
| status-lns |
|
|
| available |
|
5. xl2tpd服务配置
首先要说明的是在xl2tpd源码的examples目录提供了最基本的配置实例,我们可以直接使用该配置,然后把其中的IP地址信息修改自己的虚拟机接口地址基本就可以完成。
root@book-virtual-machine:/usr/src/xl2tpd-1.3.15/examples# ls
chapsecrets.sample  README       xl2tpd-L2TP-CERT.conf             xl2tpd-L2TP-PSK.conf
ppp-options.xl2tpd  xl2tpd.conf  xl2tpd-L2TP-CERT-orgWIN2KXP.conf  xl2tpd-L2TP-PSK-orgWIN2KXP.conf
5.1 xl2tpd.conf服务配置
- 首先在/etc目录下创建一个xl2tpd目录,这个目录是xl2tpd的默认路径。
- 将源码中examples目录中的 xl2tpd.conf 拷贝到 /etc/xl2tpd/ 目录。xl2tpd.conf的内容如下(分号是注释),实际起作用的为最后没有注释的那部分
;
; This is a minimal sample xl2tpd configuration file for use
; with L2TP over IPsec.
;
; The idea is to provide an L2TP daemon to which remote Windows L2TP/IPsec
; clients connect. In this example, the internal (protected) network
; is 192.168.1.0/24.  A special IP range within this network is reserved
; for the remote clients: 192.168.1.128/25
; (i.e. 192.168.1.128 ... 192.168.1.254)
;
; The listen-addr parameter can be used if you want to bind the L2TP daemon
; to a specific IP address instead of to all interfaces. For instance,
; you could bind it to the interface of the internal LAN (e.g. 192.168.1.98
; in the example below). Yet another IP address (local ip, e.g. 192.168.1.99)
; will be used by xl2tpd as its address on pppX interfaces.

[global]
; listen-addr = 192.168.1.98
;
; requires openswan-2.5.18 or higher - Also does not yet work in combination
; with kernel mode l2tp as present in linux 2.6.23+
; ipsec saref = yes
; Use refinfo of 22 if using an SAref kernel patch based on openswan 2.6.35 or
;  when using any of the SAref kernel patches for kernels up to 2.6.35.
; saref refinfo = 30
;
; force userspace = yes
;
; debug tunnel = yes

[lns default]
ip range = 192.168.1.128-192.168.1.254
local ip = 192.168.1.99
require chap = yes
refuse pap = yes
require authentication = yes   ;这是注释: 如果不需要认证,把yes改为no即可
name = LinuxVPNserver
ppp debug = yes
pppoptfile = /etc/ppp/options.xl2tpd   ;这是注释:PPP协议参数配置
length bit = yes
5.2 PPP参数选项配置
PPP参数选项文件是通过上述的xl2tpd.conf中指定的:pppoptfile = /etc/ppp/options.xl2tpd
- 这个目录好像不需要自己创建(我自己没有创建,可能是安装时自动创建的,也可能是百问网虚拟机已经安装了PPP)
- 将源码中examples目录中的 ppp-options.xl2tpd 拷贝到 /etc/ppp/ 目录下,并改名为options.xl2tpd(要与刚指定文件名一致)。内容如下:
ipcp-accept-local
ipcp-accept-remote
ms-dns  192.168.1.1
ms-dns  192.168.1.3
ms-wins 192.168.1.2
ms-wins 192.168.1.4
noccp
idle 1800
mtu 1410
mru 1410
nodefaultroute
debug
lock
proxyarp
connect-delay 5000
5.3 用户名和密码预置
用户名和密码是需要提前预置的,否则在开启认证功能是无法创建隧道。
预置用户名和密码的文件也只可以手动指定的。 它在源码的examples目录也有提供: chapsecrets.sample可以拿来直接使用。我尝试了好几次,发现在启动xl2tpd进程时通过-c选项来制定认证文件发现依然提示上述错误(抓包发现是PPP在chap认证时失败导致的),后来把/etc/ppp/chap-secrets文件添加上自己预置的用户和密码发现可以连接成功,也不需要指定该文件,应该是默认的文件,暂不清楚原因。文件内容如下:
root@book-virtual-machine:/etc/ppp# cat chap-secrets
# Secrets for authentication on server using CHAP
# client	server	secret			IP addresses
jacco		*	"mysecret"		192.168.1.128/25 # Dynamic IP
sam		*	"rumpelstiltskin"	192.168.1.5	 # Static IP
sunzd		*	"123456"		192.168.1.100   #这是我自己添加的
#
# Secrets for authentication on client using CHAP
# client	server	secret			IP addresses
*		jacco	"mysecret"
*		sam	"rumpelstiltskin"
*		sunzd	"123456"             #这是我自己添加的
5.4 启动xl2tpd服务
直接运行xl2tpd便可以,如果需要查看调试信息,加上-D选项即可。
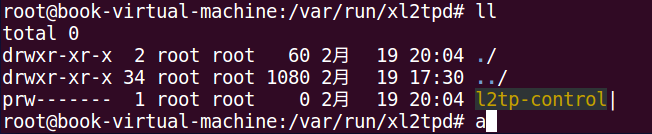
这里可能提示/var/run ...错误,这里需要创建一个目录xl2tpd,用途是:xl2tpd和xl2tpd-control会在该目录下创建一个管道用来通信。


 606
606


 被折叠的 条评论
为什么被折叠?
被折叠的 条评论
为什么被折叠?
 到【灌水乐园】发言


