


与MFC相比,WPF框架下控件与数据的关联有很大区别,所谓难而不会,会而不难,一旦上手之后,使用起来很方便。文中实现了两个简单的数据绑定的例子。
例子1:拖动Slider控件时,TextBox控件中显示滑块对应的值
该例子实现起来非常方便,连代码都不用添加,只需要相应的xaml文件即可,其中
<Window x:Class="WpfDataBinding.MainWindow"
        xmlns="http://schemas.microsoft.com/winfx/2006/xaml/presentation"
        xmlns:x="http://schemas.microsoft.com/winfx/2006/xaml"
        Title="MainWindow" Height="350" Width="525" Background="#FF0F1444">
    <Grid>
        <TextBox Name="TextBox1" HorizontalAlignment="Left" Height="41" Margin="30,53,0,0" TextWrapping="Wrap" Text = "{Binding ElementName=Slider1, Path=Value}" VerticalAlignment="Top" Width="206"/>
        <Slider Name="Slider1" HorizontalAlignment="Left" Height="18" Margin="49,156,0,0" VerticalAlignment="Top" Width="173"/>
    </Grid>
</Window>运行程序:

移动滑块之后:

例子2:每点击一次Button控件,TextBox显示值加1
xaml文件如下:
<Window x:Class="WpfDataBinding.MainWindow"
        xmlns="http://schemas.microsoft.com/winfx/2006/xaml/presentation"
        xmlns:x="http://schemas.microsoft.com/winfx/2006/xaml"
        Title="MainWindow" Height="350" Width="525" Background="#FF0F1444">
    <Grid Name="Grid1">
        <TextBox Name="TextBox1" HorizontalAlignment="Left" Height="41" Margin="30,53,0,0" TextWrapping="Wrap" Text = "{Binding ElementName=Slider1, Path=Value}" VerticalAlignment="Top" Width="206"/>
        <Slider Name="Slider1" HorizontalAlignment="Left" Height="18" Margin="49,156,0,0" VerticalAlignment="Top" Width="173"/>
        <TextBox Name="TextBox2" HorizontalAlignment="Left" Height="41" Margin="283,53,0,0" TextWrapping="Wrap" Text="{Binding Path=TextBoxValue}" VerticalAlignment="Top" Width="203"/>
        <Button Content="Button" HorizontalAlignment="Left" Margin="322,151,0,0" VerticalAlignment="Top" Width="120" Height="31" Click="Button_Click_1"/>
    </Grid>
</Window>
TextBox2 中 Text = "{Binding Path=TextBoxValue}" 就是将TextBoxValue值与TextBox2关联起来。
using System;
using System.Collections.Generic;
using System.Linq;
using System.Text;
using System.Threading.Tasks;
using System.Windows;
using System.Windows.Controls;
using System.Windows.Data;
using System.Windows.Documents;
using System.Windows.Input;
using System.Windows.Media;
using System.Windows.Media.Imaging;
using System.Windows.Navigation;
using System.Windows.Shapes;

using System.ComponentModel;

namespace WpfDataBinding
{
    /// <summary>
    /// Interaction logic for MainWindow.xaml
    /// </summary>
    public partial class MainWindow : Window, INotifyPropertyChanged
    {
        public event PropertyChangedEventHandler PropertyChanged;

        static int ClickCount = 0;

        protected void NotifyPropertyChanged(string property)
        {
            if (PropertyChanged != null)
            {
                PropertyChanged(this, new PropertyChangedEventArgs(property));
            }
        }

        private string _Value2;

        public string TextBoxValue
        {
            get { return _Value2; }
            set
            {
                if (value != _Value2)
                {
                    _Value2 = value;
                    NotifyPropertyChanged("TextBoxValue");
                }
            }
        }

        public MainWindow()
        {
            InitializeComponent();
            TextBoxValue = new String('0', 1);
            Grid1.DataContext = this;
        }

        private void Button_Click_1(object sender, RoutedEventArgs e)
        {
            ClickCount++;
            TextBoxValue = ClickCount.ToString();
            return;
        }
    }
}
为了实现显示值的动态更新,需要实现INotifyPropertyChanged接口,而 Button的响应函数(Button_Click_1)中负责将TextBoxValue的值更新。
运行程序:
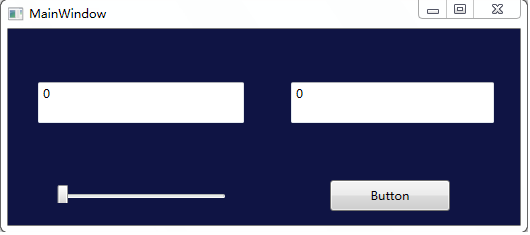
第一次点击Button:
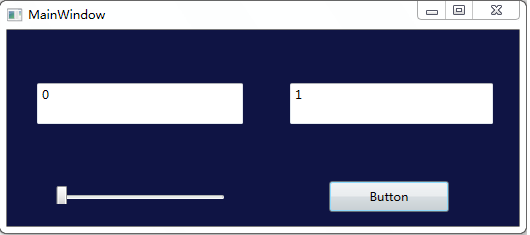
第二次点击Button:

注:原创文章,用于学习和交流,转载请注明出处,谢谢!


 1245
1245

 被折叠的 条评论
为什么被折叠?
被折叠的 条评论
为什么被折叠?
 到【灌水乐园】发言


