


A manuscript about object detection based on tf-fast-rcnn
This is a manuscript about how to use deep learning model firstly
- In recently, I have a project about object detection. However, I have never really used a deep learning model to implement a function. So, I have been spending a week, from installing Ubuntu to the configuration environment, and finally making a dataset to achieve a tf-fast-rcnn model. This manuscript initially recorded my entire learning process.
Ubuntu 16.04
- There is a good tutorial about installing Ubuntu.
Tips: It is beat to keep the purity of the system. In the first, just install system and don’t install other app.
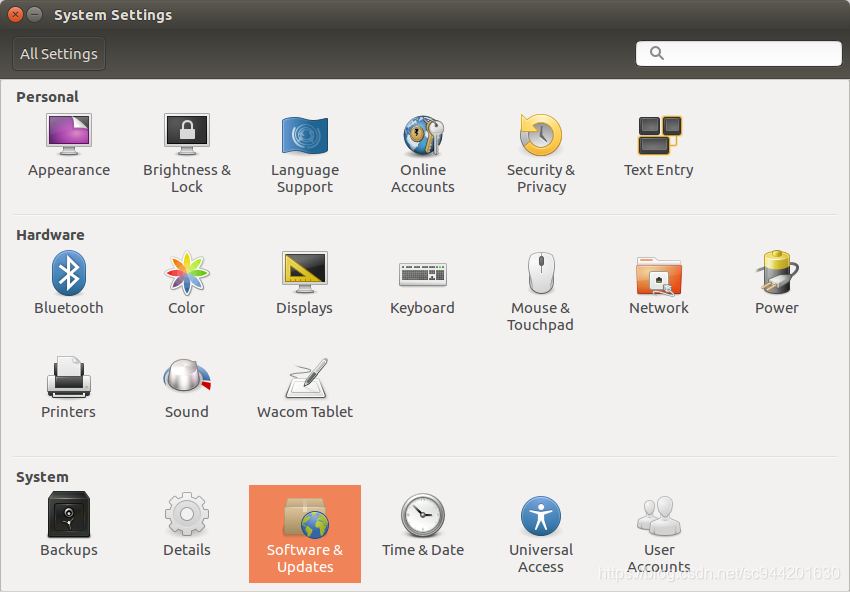
- You only need to go to the second step.
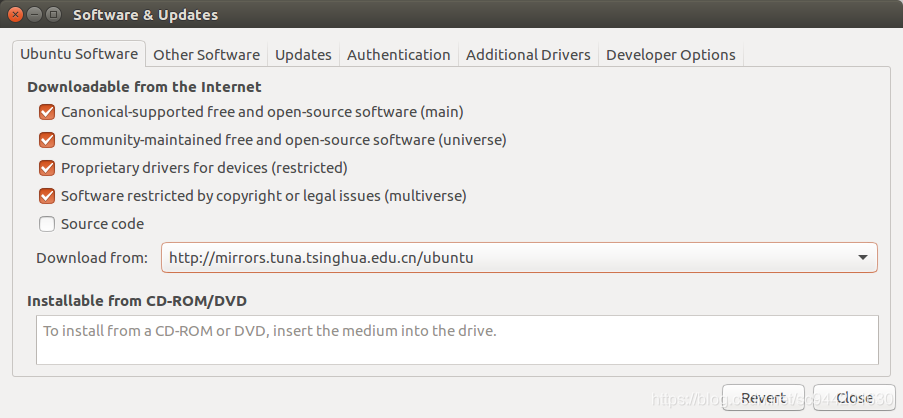
- Setting Software, change the Download from:
- In order to make sure install a software faster, you better modify file.config.
# Ctrl + Alt + t (open the terminal)
mkdir ~/.pip
cd ~/.pip
touch pip.conf
sudo gedit ~/.pip/pip.conf
- Copy the following code, then save.
[global]
index-url = https://pypi.tuna.tsinghua.edu.cn/simple
[install]
trusted-host=mirrors.aliyun.com
- Update system.
sudo apt update
sudo apt upgrade
- Show “no space left on device”
dpkg --get-selections |grep linux	#show installed version
uname -r	#show current version
sudo apt-get remove linux-image-xxxx	#delete unuse version
- Install Nvidia driver
Before install the driver, you need to disablenouveau.
sudo apt-get remove --purge nvidia*
sudo gedit /etc/modprobe.d/blacklist.conf
#Add this in the last:  blacklist nouveau
sudo update-initramfs -u
reboot
lsmod | grep nouveau  #没有输出,即说明安装成功
nvidia-smi	#print information
tf-fast-rcnn
- The following is mainly for tf-fast-rcnn adding notes. The author wrote very well, but for me, rookie, who has less common sense, will still encounter many problems. All of them are found from the Internet a little bit, and are arranged below. I hope to reduce the configuration time of everyone.
Environmental configuration
- Python packages you might not have:
cython,opencv-python,easydict(similar to py-faster-rcnn). Foreasydictmake sure you have the right version. I use 1.6. - Check the Tensorflow version, the project supports
1.2.1
python
import tensorflow as tf
print tf.__version__
# If not
exit() #drop out python, and you can imput 'Ctrl + c' to drop out.
pip install -I tensorflow==1.2.1 #This is for cpu
#the following is for GPU
pip install --upgrade https://storage.googleapis.com/tensorflow/linux/gpu/tensorflow_gpu-1.2.1-cp27-none-linux_x86_64.whl
- If you want to use GPU, you must fellow this advice:
- Install Cuda 8.0
tensorflow-gpu v1.9.0 | cuda9.0 | cuDNN7.1.4可行 | 备注:7.0.4/ 7.0.5/ 7.1.2不明确
tensorflow-gpu v1.8.0 | cuda9.0 | cuDNN 不明确 | 备注:7.0.4/ 7.0.5/ 7.1.2/ 7.1.4
tensorflow-gpu v1.7.0 | cuda9.0 | cuDNN 不明确 | 备注:7.0.4/ 7.0.5/ 7.1.2/ 7.1.4
tensorflow-gpu v1.6.0 | cuda9.0 | cuDNN 不明确 | 备注:7.0.4/ 7.0.5/ 7.1.2/ 7.1.4
tensorflow-gpu v1.5.0 | cuda9.0 | cuDNN 不明确 | 备注:7.0.4/ 7.0.5/ 7.1.2/ 7.1.4
tensorflow-gpu v1.4.0 | cuda8.0 | cuDNN 6.0 | 备注:6.0正常使用, 7.0.5不能用,5.1未知
tensorflow-gpu v1.3.0 | cuda8.0 | cuDNN 6.0 | 备注:6.0正常使用, 7.0.5不能用,5.1未知
tensorflow-gpu v1.2.0 | cuda8.0 | cuDNN 5.1 | 备注:5.1正常使用, 6.0/ 7.0.5 未知
tensorflow-gpu v1.1.0 | cuda8.0 | cuDNN 5.1 | 备注:5.1正常使用, 6.0/ 7.0.5 未知
- Install cuDNN 5.1
Download the project
- You need to download the project and follow the steps.
- In the Installation. 2, you need to keep mind. If you have only CPU, there are many Tips you need to care.
- In the Download pre-trained model, this code may not work. I have download it and upload to BaiduPan and
Extraction code:jkjd.
./data/scripts/fetch_faster_rcnn_models.sh
Train your own dataset
- Firstly, you need to carry out Train your own model. 1, this coad may not work. I have download it and upload to BaiduPan and
Extraction code:xpbq.
wget -v http://download.tensorflow.org/models/vgg_16_2016_08_28.tar.gz
- Download the training, validation, test data and VOCdevkit
wget http://host.robots.ox.ac.uk/pascal/VOC/voc2007/VOCtrainval_06-Nov-2007.tar
wget http://host.robots.ox.ac.uk/pascal/VOC/voc2007/VOCtest_06-Nov-2007.tar
wget http://host.robots.ox.ac.uk/pascal/VOC/voc2007/VOCdevkit_08-Jun-2007.tar
- Extract all of these tars into one directory named
VOCdevkit
tar xvf VOCtrainval_06-Nov-2007.tar
tar xvf VOCtest_06-Nov-2007.tar
tar xvf VOCdevkit_08-Jun-2007.tar
- It should have this basic structure
$VOCdevkit/                           # development kit
$VOCdevkit/VOCcode/                   # VOC utility code
$VOCdevkit/VOC2007                    # image sets, annotations, etc.
# ... and several other directories ...
Make dataset
- First of all, the pictures taken may have too much resolution, which is not conducive to training. They are reduced to almost the same size as the pictures in the
voc datasetby a single operation.
#coding = utf-8
import os
from PIL import Image
import re

Start_path = '/home/lebeau/RCNN/imagePro/img/' #the pic dir
iphone5_width = 333 #max width
iphone5_depth = 500 #max depth

list = os.listdir(Start_path)
#print list
count = 0
for pic in list:
    path = Start_path+pic
    print(path)
    im = Image.open(path)
    w,h = im.size

    if w > iphone5_width:
        print(pic)
        print("pic name "+pic+" change as")
        h_new = iphone5_width*h/w
        w_new = iphone5_width
        count = count+1
        out = im.resize((w_new,h_new),Image.ANTIALIAS)
        #new_pic = re.sub(pic[:-4],pic[:-4]+'_new.',pic)
        new_pic = re.sub(pic[:-4], pic[:-4], pic)
        #print new_pic
        new_path = Start_path+new_pic
        out.save(new_path)

    if h > iphone5_depth:
        print(pic)
        print("pic name " + pic + " change as")
        w = iphone5_depth*w/h
        h = iphone5_depth
        count = count+1
        out = im.resize((w_new,h_new),Image.ANTIALIAS)
        #new_pic = re.sub(pic[:-4],pic[:-4]+'_new.',pic)
        new_pic = re.sub(pic[:-4], pic[:-4], pic)
        #print new_pic
        new_path = Start_path+new_pic
        out.save(new_path)

print('END')
count = str(count)
print("sum "+count+" have changed")
- Then name the picture, according to certain rules.
#coding=utf-8
import os
from PIL import Image
import re

class BatchRename():
    def __init__(self):
        self.path = '/home/lebeau/RCNN/imagePro/img/'

    def rename(self):
        filelist = os.listdir(self.path)
        total_num = len(filelist)
        i = 10044
        n = 6
        for item in filelist:
            if item.endswith('.jpg') or item.endswith('.jpeg') or item.endswith('.png'):
                n = 6 - len(str(i))
                src = os.path.join(os.path.abspath(self.path), item)
                dst = os.path.join(os.path.abspath(self.path), str(0)*n + str(i) + '.jpg')
                try:
                    os.rename(src, dst)
                    print 'converting %s to %s ...' % (src, dst)
                    i = i + 1
                except:
                    continue
        print 'total %d to rename & converted %d jpgs' % (total_num, i)
if __name__ == '__main__':
    demo = BatchRename()
    demo.rename()
How does CNN work?


 6067
6067


 被折叠的 条评论
为什么被折叠?
被折叠的 条评论
为什么被折叠?
 到【灌水乐园】发言


