


 文章介绍了如何使用ESP8266开发板通过WiFi连接创建一个Web服务器,控制GPIO(GeneralPurposeInput/Output,通用输入/输出)的状态,并分享了针对Java开发者的学习资源,包括从入门到高级的全套学习资料和面试技巧总结。
const long timeoutTime = 2000;
void setup() {
Serial.begin(115200);
// Initialize the output variables as outputs
pinMode(output5, OUTPUT);
pinMode(output4, OUTPUT);
// Set outputs to LOW
digitalWrite(output5, LOW);
digitalWrite(output4, LOW);
// Connect to Wi-Fi network with SSID and password
Serial.print("Connecting to ");
Serial.println(ssid);
WiFi.begin(ssid, password);
while (WiFi.status() != WL_CONNECTED) {
delay(500);
Serial.print(“.”);
}
// Print local IP address and start web server
Serial.println(“”);
Serial.println(“WiFi connected.”);
Serial.println("IP address: ");
Serial.println(WiFi.localIP());
server.begin();
}
void loop(){
WiFiClient client = server.available(); // Listen for incoming clients
if (client) { // If a new client connects,
Serial.println(“New Client.”); // print a message out in the serial port
String currentLine = “”; // make a String to hold incoming data from the client
currentTime = millis();
previousTime = currentTime;
while (client.connected() && currentTime - previousTime <= timeoutTime) { // loop while the client’s connected
currentTime = millis();
if (client.available()) { // if there’s bytes to read from the client,
char c = client.read(); // read a byte, then
Serial.write©; // print it out the serial monitor
header += c;
if (c == ‘\n’) { // if the byte is a newline character
// if the current line is blank, you got two newline characters in a row.
// that’s the end of the client HTTP request, so send a response:
if (currentLine.length() == 0) {
// HTTP headers always start with a response code (e.g. HTTP/1.1 200 OK)
// and a content-type so the client knows what’s coming, then a blank line:
// 拼接HTTP协议回复
client.println(“HTTP/1.1 200 OK”);
client.println(“Content-type:text/html”);
client.println(“Connection: close”);
client.println();
// turns the GPIOs on and off
if (header.indexOf(“GET /5/on”) >= 0) {
Serial.println(“GPIO 5 on”);
output5State = “on”;
digitalWrite(output5, HIGH);
} else if (header.indexOf(“GET /5/off”) >= 0) {
Serial.println(“GPIO 5 off”);
output5State = “off”;
digitalWrite(output5, LOW);
} else if (header.indexOf(“GET /4/on”) >= 0) {
Serial.println(“GPIO 4 on”);
output4State = “on”;
digitalWrite(output4, HIGH);
} else if (header.indexOf(“GET /4/off”) >= 0) {
Serial.println(“GPIO 4 off”);
output4State = “off”;
digitalWrite(output4, LOW);
}
// Display the HTML web page
client.println(“”);
client.println(“<meta name=“viewport” content=“width=device-width, initial-scale=1”>”);
client.println(“<link rel=“icon” href=“data:,”>”);
// CSS to style the on/off buttons
// Feel free to change the background-color and font-size attributes to fit your preferences
client.println(“
client.println(“.button { background-color: #195B6A; border: none; color: white; padding: 16px 40px;”);
client.println(“text-decoration: none; font-size: 30px; margin: 2px; cursor: pointer;}”);
client.println(“.button2 {background-color: #77878A;}”);
// Web Page Heading
client.println(“
ESP8266 Web Server
”);// Display current state, and ON/OFF buttons for GPIO 5
client.println("
GPIO 5 - State " + output5State + “
”);// If the output5State is off, it displays the ON button
if (output5State==“off”) {
client.println(“
<a href=”/5/on"><button class=“button”>ON
");} else {
client.println(“
<a href=”/5/off"><button class=“button button2”>OFF
");}
// Display current state, and ON/OFF buttons for GPIO 4
client.println("
GPIO 4 - State " + output4State + “
”);// If the output4State is off, it displays the ON button
if (output4State==“off”) {
client.println(“
<a href=”/4/on"><button class=“button”>ON
");} else {
client.println(“
<a href=”/4/off"><button class=“button button2”>OFF
");}
client.println(“”);
// The HTTP response ends with another blank line
client.println();
// Break out of the while loop
break;
自我介绍一下,小编13年上海交大毕业,曾经在小公司待过,也去过华为、OPPO等大厂,18年进入阿里一直到现在。
深知大多数Java工程师,想要提升技能,往往是自己摸索成长或者是报班学习,但对于培训机构动则几千的学费,着实压力不小。自己不成体系的自学效果低效又漫长,而且极易碰到天花板技术停滞不前!
因此收集整理了一份《2024年Java开发全套学习资料》,初衷也很简单,就是希望能够帮助到想自学提升又不知道该从何学起的朋友,同时减轻大家的负担。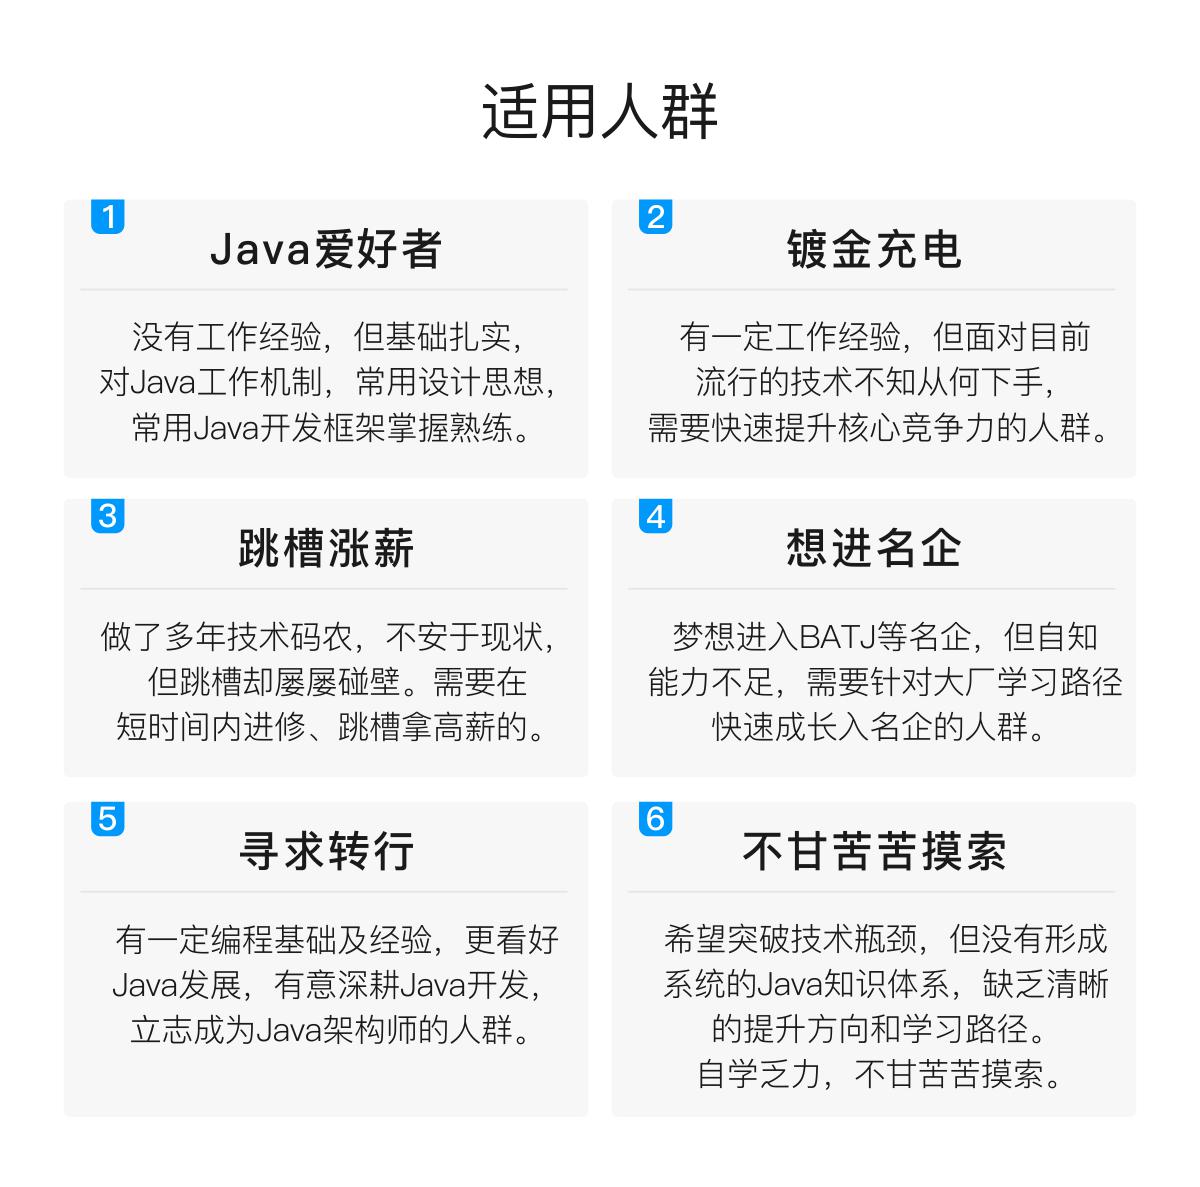
既有适合小白学习的零基础资料,也有适合3年以上经验的小伙伴深入学习提升的进阶课程,基本涵盖了95%以上Java开发知识点,真正体系化!
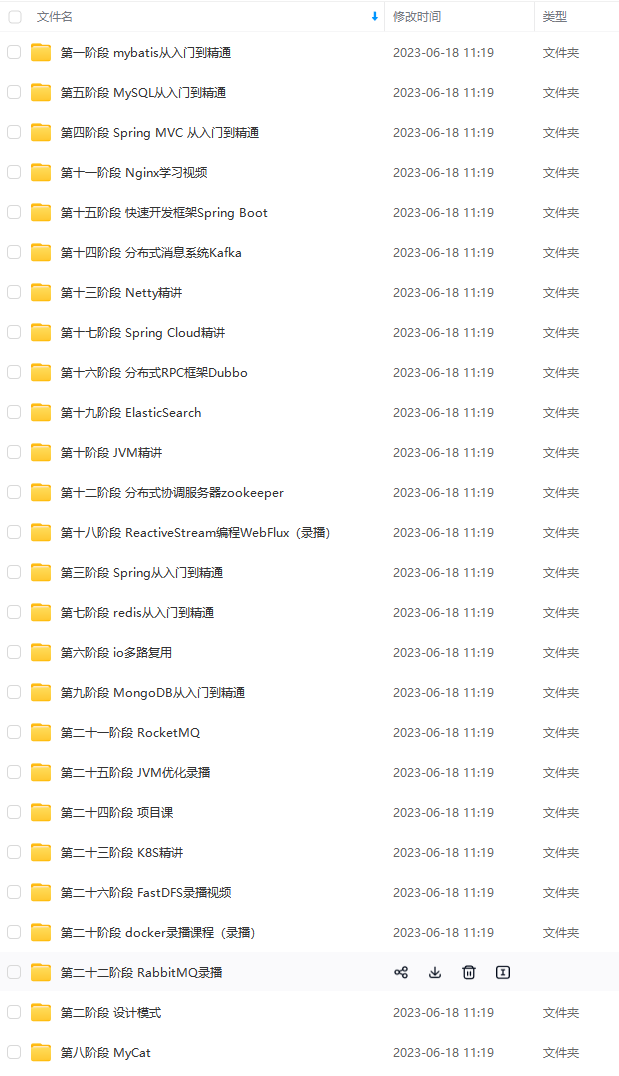
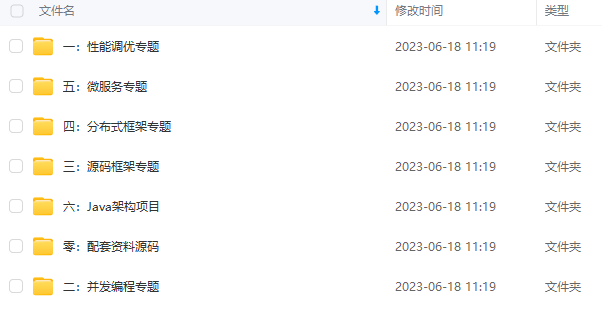
由于文件比较大,这里只是将部分目录截图出来,每个节点里面都包含大厂面经、学习笔记、源码讲义、实战项目、讲解视频,并且会持续更新!
如果你觉得这些内容对你有帮助,可以扫码获取!!(备注:Java)

2021年Java中高级面试必备知识点总结
在这个部分总结了2019年到目前为止Java常见面试问题,取其面试核心编写成这份文档笔记,从中分析面试官的心理,摸清面试官的“套路”,可以说搞定90%以上的Java中高级面试没一点难度。
本节总结的内容涵盖了:消息队列、Redis缓存、分库分表、读写分离、设计高并发系统、分布式系统、高可用系统、SpringCloud微服务架构等一系列互联网主流高级技术的知识点。
目录:

(上述只是一个整体目录大纲,每个点里面都有如下所示的详细内容,从面试问题——分析面试官心理——剖析面试题——完美解答的一个过程)

部分内容:


对于每一个做技术的来说,学习是不能停止的,小编把2019年到目前为止Java的核心知识提炼出来了,无论你现在是处于什么阶段,如你所见,这份文档的内容无论是对于你找面试工作还是提升技术广度深度都是完美的。
不想被后浪淘汰的话,赶紧搞起来吧,高清完整版一共是888页,需要的话可以点赞+关注
《互联网大厂面试真题解析、进阶开发核心学习笔记、全套讲解视频、实战项目源码讲义》点击传送门即可获取!
术的来说,学习是不能停止的,小编把2019年到目前为止Java的核心知识提炼出来了,无论你现在是处于什么阶段,如你所见,这份文档的内容无论是对于你找面试工作还是提升技术广度深度都是完美的。
不想被后浪淘汰的话,赶紧搞起来吧,高清完整版一共是888页,需要的话可以点赞+关注
《互联网大厂面试真题解析、进阶开发核心学习笔记、全套讲解视频、实战项目源码讲义》点击传送门即可获取!


 158
158

 被折叠的 条评论
为什么被折叠?
被折叠的 条评论
为什么被折叠?
 到【灌水乐园】发言


