


上一章讲了Remote OData Service(使用远端Odata服务) 相关的内容。
本章继续讲Fiori 开发的知识。
目录
下面是详细内容。
1,Routing and Navigation(路由和导航)
概念大家都懂,咱们直接看Fiori里面怎么实现的。
1),manifest.json
{
"_version": "1.65.0",
"sap.app": {
"id": "ui5.walkthrough",
"i18n": "i18n/i18n.properties",
"title": "{{appTitle}}",
"description": "{{appDescription}}",
"type": "application",
"applicationVersion": {
"version": "1.0.0"
},
"dataSources": {
"invoiceRemote": {
"uri": "V2/Northwind/Northwind.svc/",
"type": "OData",
"settings": {
"odataVersion": "2.0"
}
}
}
},
"sap.ui": {
"technology": "UI5",
"deviceTypes": {
"desktop": true,
"tablet": true,
"phone": true
}
},
"sap.ui5": {
"dependencies": {
"minUI5Version": "1.108.0",
"libs": {
"sap.ui.core": {},
"sap.m": {}
}
},
"models": {
"i18n": {
"type": "sap.ui.model.resource.ResourceModel",
"settings": {
"bundleName": "ui5.walkthrough.i18n.i18n",
"supportedLocales": [""],
"fallbackLocale": ""
}
},
"invoice": {
"dataSource": "invoiceRemote"
}
},
"rootView": {
"viewName": "ui5.walkthrough.view.App",
"type": "XML",
"id": "app"
},
"resources": {
"css": [
{
"uri": "css/style.css"
}
]
},
"routing": {
"config": {
"routerClass": "sap.m.routing.Router",
"type": "View",
"viewType": "XML",
"path": "ui5.walkthrough.view",
"controlId": "app",
"controlAggregation": "pages"
},
"routes": [
{
"pattern": "",
"name": "overview",
"target": "overview"
},
{
"pattern": "detail",
"name": "detail",
"target": "detail"
}
],
"targets": {
"overview": {
"id": "overview",
"name": "Overview"
},
"detail": {
"id": "detail",
"name": "Detail"
}
}
}
}
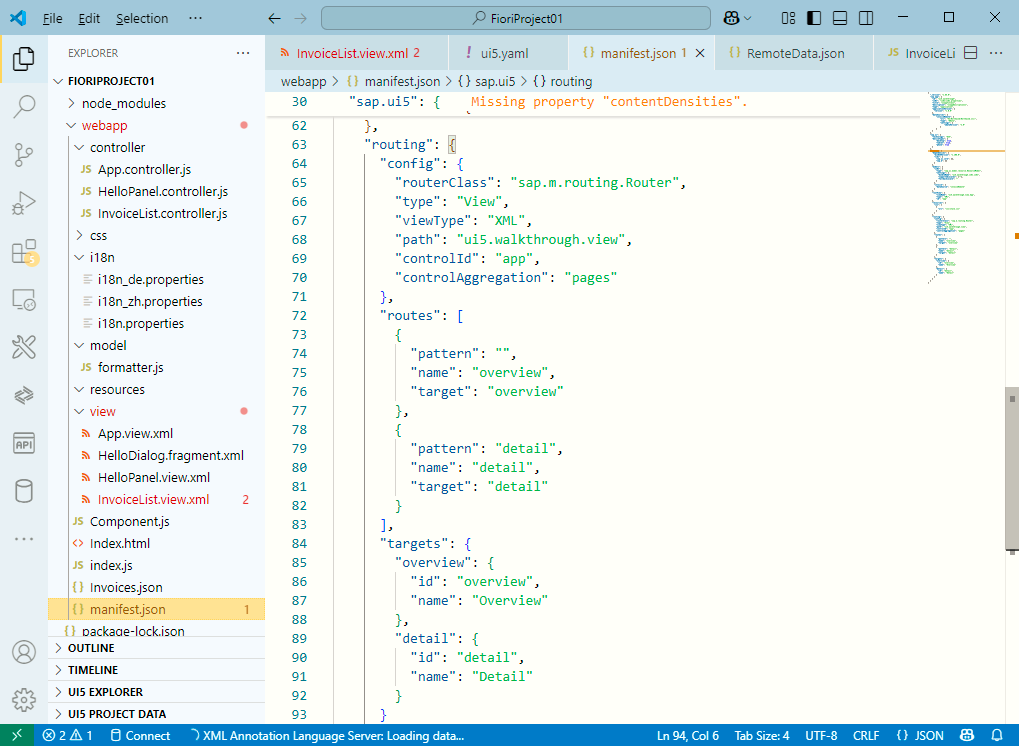
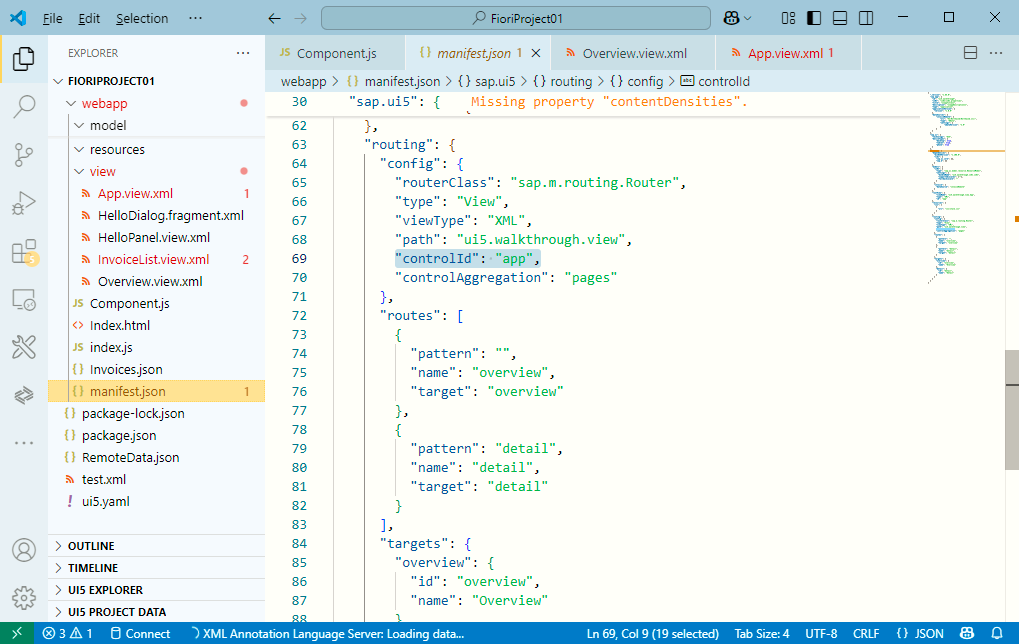
}这代码是越来越多了哈,这改了哪里了呢?
基本上就是设定了路由处理模块,以及定义了本app里有几个路由:
"sap.ui5": {
。。。
"routing": {
"config": {
"routerClass": "sap.m.routing.Router", ==》设定路由处理模块
"type": "View",
"viewType": "XML",
"path": "ui5.walkthrough.view",
"controlId": "app",
"controlAggregation": "pages"
},
"routes": [ ==》设定路由一览,咱这里有2个路由,默认是overview,还有一个detail 路由
{
"pattern": "",
"name": "overview",
"target": "overview"
},
{
"pattern": "detail",
"name": "detail",
"target": "detail"
}
],
"targets": {
"overview": {
"id": "overview",
"name": "Overview"
},
"detail": {
"id": "detail",
"name": "Detail"
}
}
}
}
2),Component.js
sap.ui.define([
   "sap/ui/core/UIComponent",
   "sap/ui/model/json/JSONModel"
], (UIComponent, JSONModel) => {
   "use strict";

   return UIComponent.extend("ui5.walkthrough.Component", {
      metadata : {
         interfaces: ["sap.ui.core.IAsyncContentCreation"],
         manifest: "json"
      },

      init() {
         // call the init function of the parent
         UIComponent.prototype.init.apply(this, arguments);

         // set data model
         const oData = {
            recipient : {
               name : "World"
            }
         };
         const oModel = new JSONModel(oData);
         this.setModel(oModel);

         // create the views based on the url/hash
		 this.getRouter().initialize();
      }
   });
});
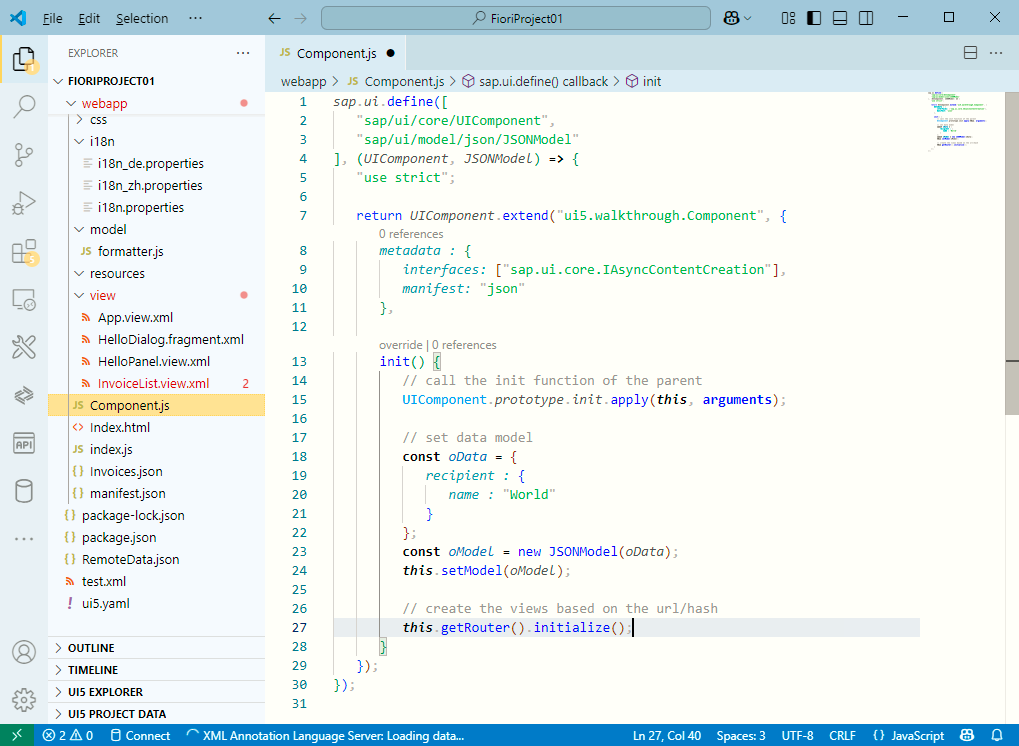
注释有点儿怪哈,应该是把上面manifest里面定义的路由给 load 一下,其实SAP就干了得了呗
// create the views based on the url/hash
this.getRouter().initialize();
3),Overview.view.xml
<mvc:View
    controllerName="ui5.walkthrough.controller.App"
    xmlns="sap.m"
    xmlns:mvc="sap.ui.core.mvc"
    displayBlock="true">
    <Page title="{i18n>homePageTitle}">
        <content>
            <mvc:XMLView viewName="ui5.walkthrough.view.HelloPanel" />
            <mvc:XMLView viewName="ui5.walkthrough.view.InvoiceList" />
        </content>
    </Page>
</mvc:View>
这个代码看着是不是和 App.view.xml 里的一样,对,就是把那里的代码拿过来了
对比一下App.view.xml,构造略有不同,代码基本是一样的吧
<mvc:View
	controllerName="ui5.walkthrough.controller.App"
	xmlns="sap.m"
	xmlns:mvc="sap.ui.core.mvc"
	displayBlock="true">
	<Shell>
		<App class="myAppDemoWT">
			<pages>
				<Page title="{i18n>homePageTitle}">
					<content>
						<mvc:XMLView viewName="ui5.walkthrough.view.HelloPanel"/>
						<mvc:XMLView viewName="ui5.walkthrough.view.InvoiceList"/>
					</content>
				</Page>
			</pages>
		</App>
	</Shell>
</mvc:View>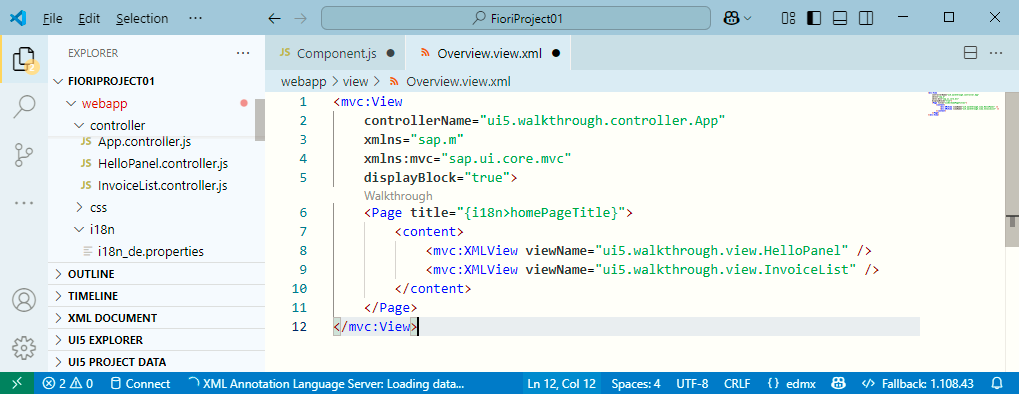
4),App.view.xml
App view 里面的代码修改一下
<mvc:View
    controllerName="ui5.walkthrough.controller.App"
    xmlns="sap.m"
    xmlns:mvc="sap.ui.core.mvc"
    displayBlock="true">
    <Shell>
        <App
            class="myAppDemoWT"
            id="app"/>
    </Shell>
</mvc:View>
这回只要通过一个 id = “app"就可以指定要显示的view 了,那这个 ”app"是谁呢?
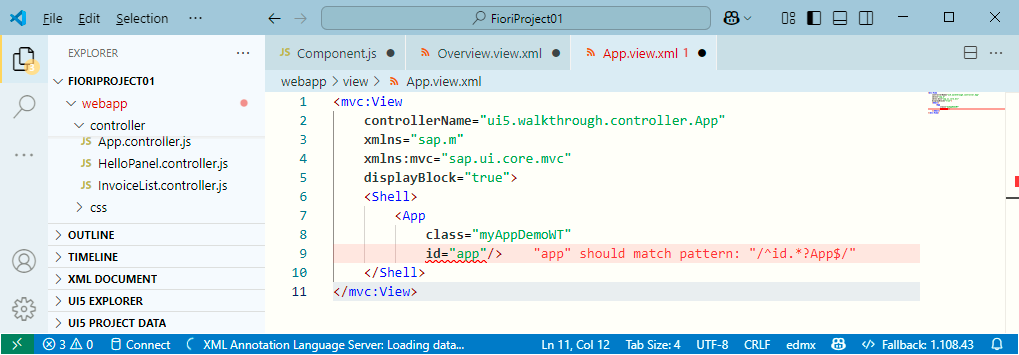
就是咱们上面定义的 manifest.json 里面的 路由(routing)里的 controlId:"app" 那段儿
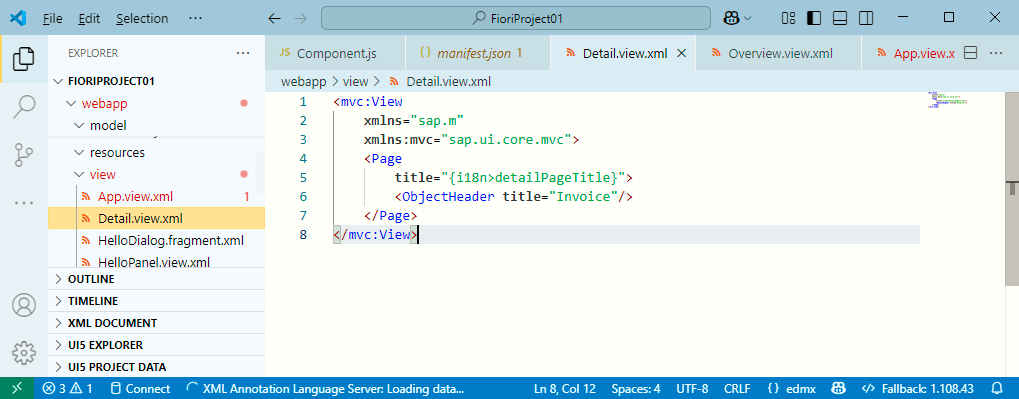
5),Detail.view.xml
<mvc:View
	xmlns="sap.m"
	xmlns:mvc="sap.ui.core.mvc">
	<Page
		title="{i18n>detailPageTitle}">
		<ObjectHeader title="Invoice"/>
	</Page>
</mvc:View>
这就是Detail view,其实里面就是一行字儿
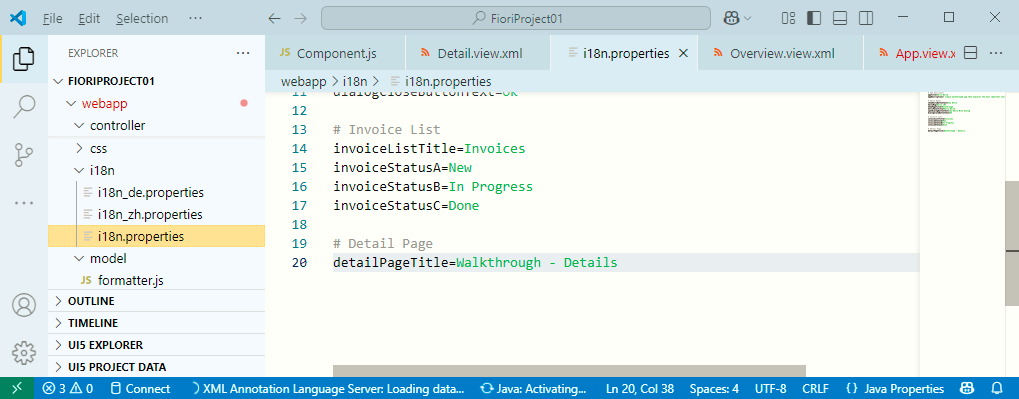
6),i18n.properties
# App Descriptor
appTitle=Hello World
appDescription=A simple walkthrough app that explains the most important concepts of SAPUI5

# Hello Panel
showHelloButtonText=Say Hello
helloMsg=Hello {0}
homePageTitle=Walkthrough
helloPanelTitle=Hello World
openDialogButtonText=Say Hello With Dialog
dialogCloseButtonText=Ok

# Invoice List
invoiceListTitle=Invoices
invoiceStatusA=New
invoiceStatusB=In Progress
invoiceStatusC=Done

# Detail Page
detailPageTitle=Walkthrough - Details
一行字儿也不能马虎😓,从properties 文件里取
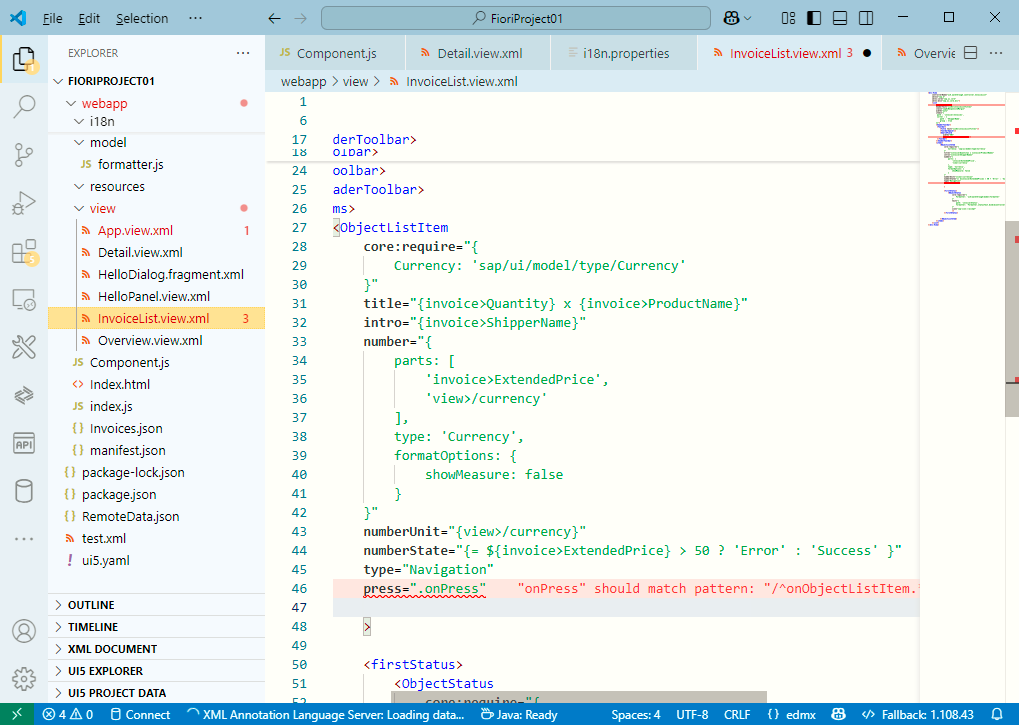
7),InvoiceList.view.xml
<mvc:View
    controllerName="ui5.walkthrough.controller.InvoiceList"
    xmlns="sap.m"
    xmlns:core="sap.ui.core"
    xmlns:mvc="sap.ui.core.mvc">
    <List
        id="invoiceList"
        headerText="{i18n>invoiceListTitle}"
        class="sapUiResponsiveMargin"
        width="auto"
        items="{
         path : 'invoice>/Invoices',
         sorter : {
            path : 'ShipperName',
            group : true
        }}">
        <headerToolbar>
         <Toolbar>
            <Title text="{i18n>invoiceListTitle}"/>
            <ToolbarSpacer/>
            <SearchField
               width="50%"
               search=".onFilterInvoices"/>
         </Toolbar>
        </headerToolbar>
        <items>
            <ObjectListItem
                core:require="{
                    Currency: 'sap/ui/model/type/Currency'
                }"
                title="{invoice>Quantity} x {invoice>ProductName}"
                intro="{invoice>ShipperName}"
                number="{
                    parts: [
                        'invoice>ExtendedPrice',
                        'view>/currency'
                    ],
                    type: 'Currency',
                    formatOptions: {
                        showMeasure: false
                    }
                }"
                numberUnit="{view>/currency}"
                numberState="{= ${invoice>ExtendedPrice} > 50 ? 'Error' : 'Success' }"
                type="Navigation"
                press=".onPress"

                >

                <firstStatus>
                    <ObjectStatus
                        core:require="{
                            Formatter: 'ui5/walkthrough/model/formatter'
                        }"
                        text="{
                            path: 'invoice>Status',
                            formatter: 'Formatter.statusText.bind($controller)'
                        }"
                        icon="sap-icon://accept"
                        />
                </firstStatus>


            </ObjectListItem>
        </items>
    </List>
</mvc:View>
1,这里加了下面两行代码
type="Navigation" =》这行是说把 这个 ObjectListItem(行项目)给变成可点击的,显示为小手
press=".onPress" =》这是点击事件处理函数
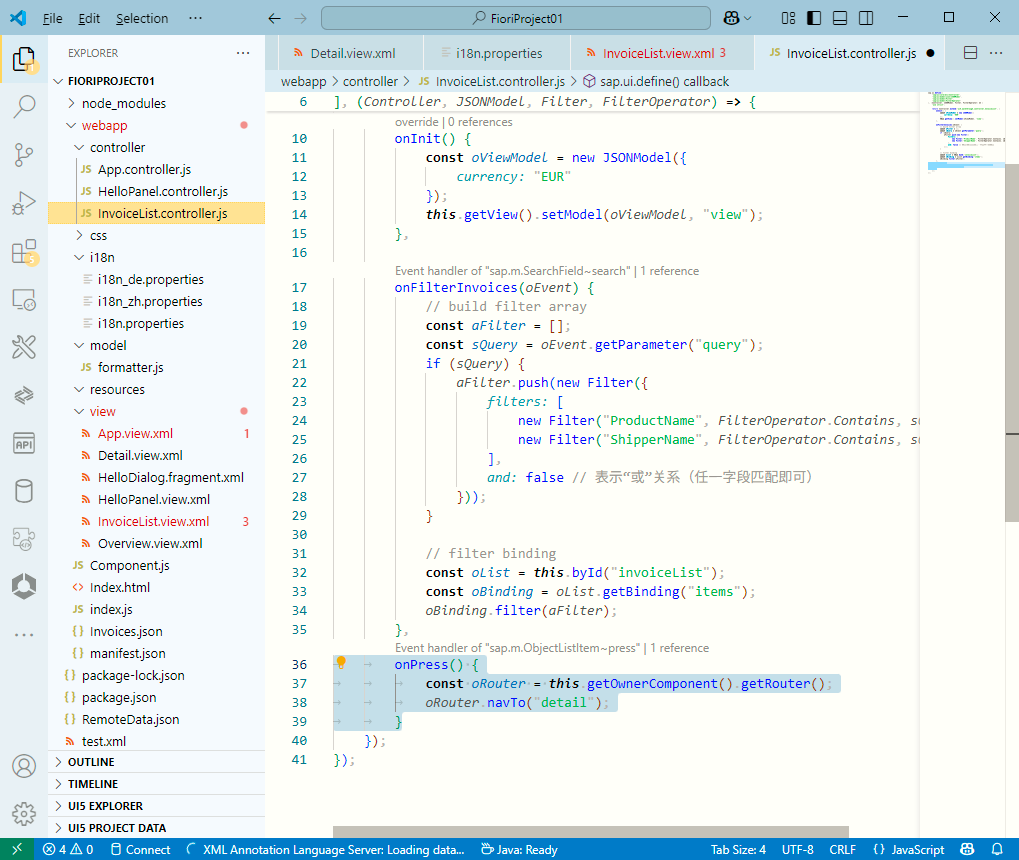
8),InvoiceList.controller.js
sap.ui.define([
	"sap/ui/core/mvc/Controller",
	"sap/ui/model/json/JSONModel",
	"sap/ui/model/Filter",
	"sap/ui/model/FilterOperator"
], (Controller, JSONModel, Filter, FilterOperator) => {
	"use strict";

	return Controller.extend("ui5.walkthrough.controller.InvoiceList", {
		onInit() {
			const oViewModel = new JSONModel({
				currency: "EUR"
			});
			this.getView().setModel(oViewModel, "view");
		},

		onFilterInvoices(oEvent) {
			// build filter array
			const aFilter = [];
			const sQuery = oEvent.getParameter("query");
			if (sQuery) {
				aFilter.push(new Filter({
					filters: [
						new Filter("ProductName", FilterOperator.Contains, sQuery),
						new Filter("ShipperName", FilterOperator.Contains, sQuery)
					],
					and: false // 表示“或”关系(任一字段匹配即可)
				}));
			}

			// filter binding
			const oList = this.byId("invoiceList");
			const oBinding = oList.getBinding("items");
			oBinding.filter(aFilter);
		},
		onPress() {
			const oRouter = this.getOwnerComponent().getRouter();
			oRouter.navTo("detail");
		}
	});
});
1,这个就是事件处理代码
onPress() {
const oRouter = this.getOwnerComponent().getRouter(); =》取得manifest 里面定义的路由
oRouter.navTo("detail"); =》找到 detail 名的那个路由,然后用 navTo 函数给导航(迁移)过去
}
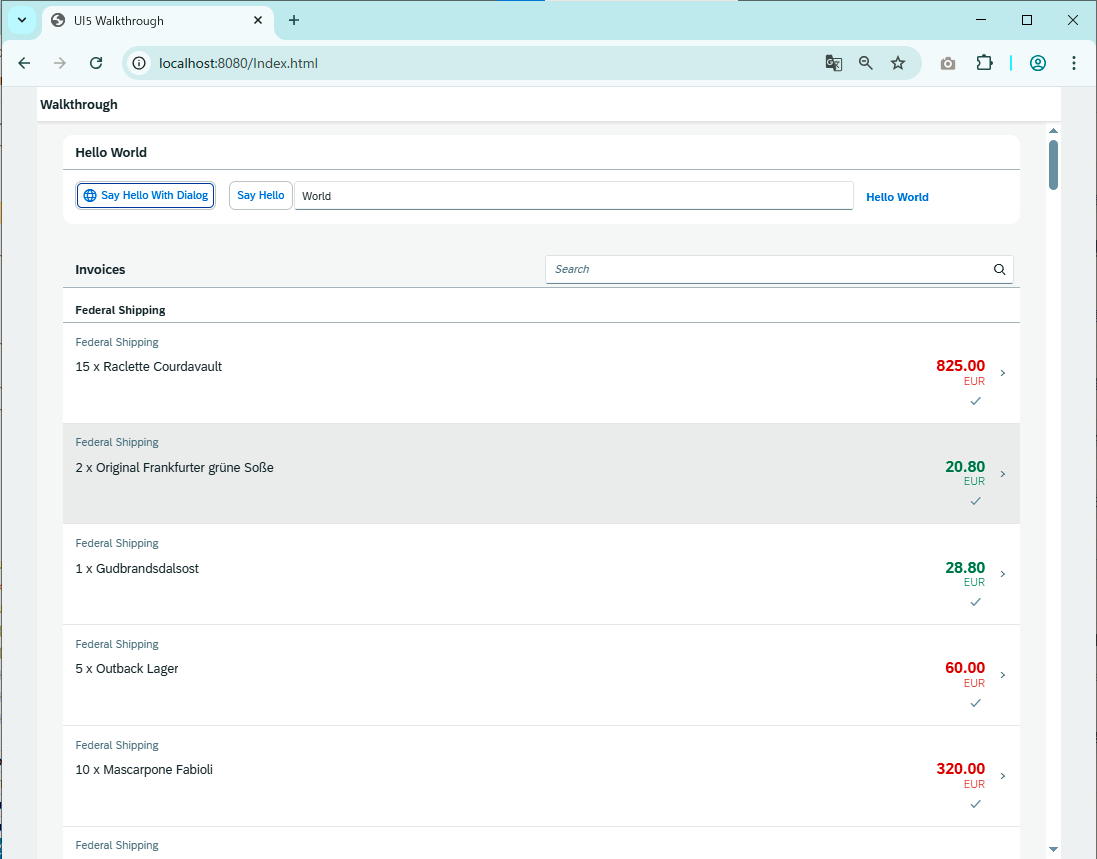
9),运行看效果
鼠标移动到行项目上的时候,会显示为小手
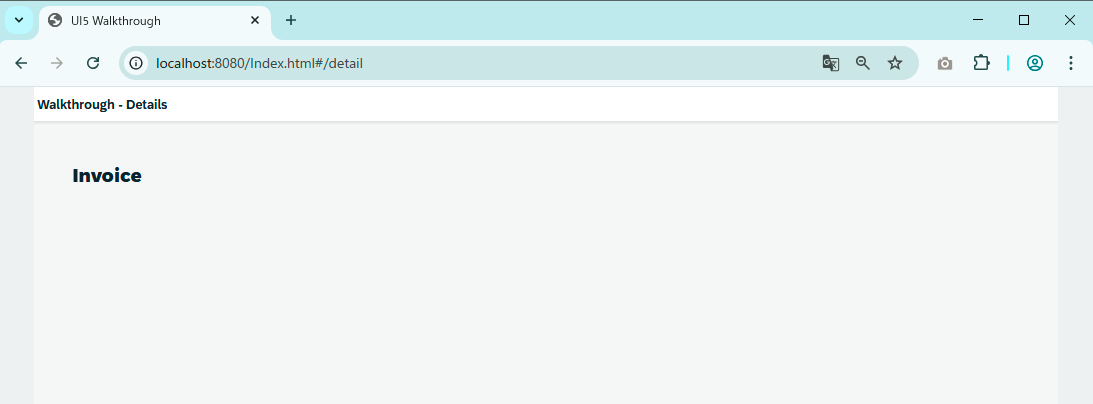
然后右侧也会有 > ,意思是点了就会迁移过去
点一下之后,就会迁移过去,这是 detail view
2,总结
以下内容是在Deepseek中查询之后整理而成。
整理完之后,我也是一脸懵,所以即使看不懂也没关系,以后慢慢理解😄,要是你一看就懂,NB
2-1,SAP Fiori 路由与导航核心概念
1),路由的本质
-
URL ↔ 应用状态映射:将浏览器 URL 路径映射到应用的特定视图和状态
-
深层链接:允许直接通过 URL 访问应用内的特定页面(如书签分享)
-
历史管理:自动处理浏览器前进/后退按钮行为
2),核心组件
| 组件 | 作用 | 关键配置位置 |
|---|---|---|
| 路由器 (Router) | 控制导航逻辑 | Component.js |
| 路由配置 (Routes) | 定义 URL 模式与视图映射 | manifest.json |
| 目标 (Targets) | 声明视图/组件加载方式 | manifest.json |
| 哈希前缀 (hashPrefix) | URL 中 # 后的前缀(默认空) | 路由初始化配置 |
2-2、路由配置详解 (manifest.json)
json
"routing": {
  "config": {
    "routerClass": "sap.m.routing.Router",
    "controlId": "app",           // 容器控件ID
    "controlAggregation": "pages", // 视图加载位置
    "transition": "slide",        // 视图切换动画
    "async": true                 // 异步视图加载
  },
  "routes": [
    {
      "pattern": "",              // 默认路径
      "name": "home",             // 路由名称
      "target": "home"            // 目标名称
    },
    {
      "pattern": "products/{id}", // 带参数路径
      "name": "productDetail",
      "target": "productDetail"
    }
  ],
  "targets": {
    "home": {
      "viewName": "Home",         // 视图名称
      "viewLevel": 1              // 视图层级(用于返回按钮)
    },
    "productDetail": {
      "viewName": "ProductDetail",
      "viewLevel": 2
    }
  }
}
2-3、路由生命周期与关键方法
1),初始化路由
javascript
// Component.js
sap.ui.define([
  "sap/ui/core/UIComponent"
], function(UIComponent) {
  return UIComponent.extend("my.Component", {
    init: function() {
      UIComponent.prototype.init.apply(this, arguments);
      this.getRouter().initialize(); // 关键初始化!
    }
  });
});2),触发导航
javascript
// 控制器中导航
this.getOwnerComponent().getRouter().navTo("productDetail", {
  id: productId // 传递路径参数
}, true); // 第三个参数:是否替换历史记录3),路由事件监听
javascript
// 在目标视图的控制器中
onInit: function() {
  const router = this.getOwnerComponent().getRouter();
  router.getRoute("productDetail").attachPatternMatched(this._onRouteMatched, this);
},
_onRouteMatched: function(event) {
  const args = event.getParameter("arguments");
  const productId = args.id; // 获取URL参数
  this.loadProductData(productId);
}
2-4、高级导航模式
1),嵌套路由
json
"routes": [
  {
    "pattern": "users/{userID}",
    "name": "userMain",
    "target": "userMaster"
  },
  {
    "pattern": "users/{userID}/orders/{orderID}",
    "name": "orderDetail",
    "target": ["userMaster", "orderDetail"] // 多目标
  }
]2),路由参数类型
javascript
// 定义参数约束
pattern: "products/{id:int}" // 只匹配整数ID3),路由中间件
javascript
// 在路由匹配前执行逻辑
router.getRoute("securePage").attachBeforeMatched(function() {
  if (!user.isAuthenticated()) {
    router.navTo("login");
    return false; // 阻止路由匹配
  }
});
2-5、最佳实践
1),URL 设计原则
- 语义化路径:/products/123 优于 /page?type=prod&id=123
- 扁平化结构:最多 2-3 级嵌套
- 参数最小化:避免长查询字符串
2),视图生命周期
- 使用 onPatternMatched 替代 onInit 加载数据
- 在 onExit 中清理事件监听
3),错误处理
Javascript
router.attachBypassed(function(event) {
  console.error("No route found:", event.getParameter("hash"));
});
4),移动端优化
- 使用 viewLevel 控制返回按钮行为
- 响应式路由:平板/手机不同导航模式
2-6、Fiori Elements 特殊处理
在 Smart Templates 中:
- 列表报告 → 对象页 导航自动配置
- 通过 manifest.json 的 navigation 部分定义
json
"navigation": {
  "detail": {
    "route": "ObjectPageRoute",
    "parameters": {
      "key": "{key}"
    }
  }
}
2-7,路由 vs 直接视图加载
| 方式 | 适用场景 | 优点 | 缺点 |
|---|---|---|---|
| 路由导航 | 多视图应用、深层链接 | 状态可回溯、URL 共享 | 配置较复杂 |
| 直接加载 | 简单弹窗、一次性视图 | 编码简单、快速实现 | 无法书签分享 |
2-8,常见问题解决方案
1),路由不生效
- 检查 manifest.json 是否被正确加载
- 确认 Component.prototype.init 中调用了 initialize()
- 验证路由名称拼写一致性
2),参数获取失败
- 确保 attachPatternMatched 在控制器初始化时注册
- 检查 URL 模式与参数名匹配(区分大小写)
3),视图缓存问题
javascript
    targets: {
      "detail": {
        "viewId": "uniqueDetailView", // 强制创建新实例
        "viewName": "Detail"
      }
}4),返回按钮控制
javascript
    // 自定义返回逻辑
    onNavBack: function() {
      const history = sap.ui.core.routing.History.getInstance();
      const prevHash = history.getPreviousHash();
      if (prevHash) window.history.go(-1);
      else this.getRouter().navTo("home");
    }
2-9,总结:路由导航四步曲
-
配置:在
manifest.json定义路由规则 -
初始化:在组件中调用
router.initialize() -
导航:用
navTo()触发路由跳转 -
响应:在目标视图通过
attachPatternMatched处理参数
⚠️ 关键原则:路由应反映应用状态,而非视图结构。良好的路由设计是 SAP Fiori 应用可维护性的基石。
以上就是本篇的全部内容。
更多SAP顾问业务知识请点击下面目录链接或东京老树根的博客主页


 1200
1200

 被折叠的 条评论
为什么被折叠?
被折叠的 条评论
为什么被折叠?
 到【灌水乐园】发言


