Download and Description
1.1 official website
Loaders
1.1 code directory
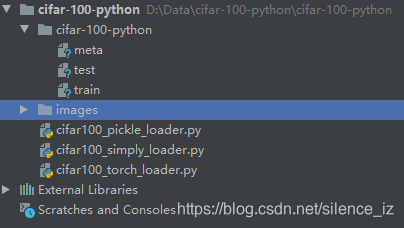
- images: output folder of the dataset.
1.2 simply loader
import numpy as np
import os
import matplotlib.pyplot as plt


data_dir_cifar100 = "./cifar-100-python"
class_names_cifar100 = np.load(os.path.join(data_dir_cifar100, "meta"), allow_pickle=True)


def one_hot(x, n):
    """
    convert index representation to one-hot representation
    """
    x = np.array(x)
    assert x.ndim == 1
    return np.eye(n)[x]


def _grayscale(a):
    return a.reshape(a.shape[0], 3, 32, 32).mean(1).reshape(a.shape[0], -1)


def _load_batch_cifar100(filename, dtype='float64'):
    path = os.path.join(data_dir_cifar100, filename)
    batch = np.load(path, allow_pickle=True, encoding="latin1")
    data = batch['data'] / 255.0
    labels = one_hot(batch['fine_labels'], n=100)
    return data.astype(dtype), labels.astype(dtype)


def cifar100(data_type="train", dtype='float64', grayscale=True):
    x, y = _load_batch_cifar100(data_type, dtype=dtype)

    if grayscale:
        x = _grayscale(x)

    return x, y


x_train, y_train = cifar100()
print("training dataset size = %d, label size = %d" % (len(x_train), len(y_train)))
print(y_train[0])
plt.imshow(x_train[0].reshape(32, 32), cmap='gray')
plt.show()
1.3 torch loader
import numpy as np
import torch
import torchvision.transforms as transforms
import matplotlib.pyplot as plt
from torchvision import datasets
from torch.utils.data.sampler import SubsetRandomSampler
data_dir_cifar100 = "./"
transform = transforms.Compose([
transforms.ToTensor(),
transforms.Normalize((0.5, 0.5, 0.5), (0.5, 0.5, 0.5))
])
train_data = datasets.CIFAR100(data_dir_cifar100, train=True, download=False, transform=transform)
num_train = len(train_data)
indices = list(range(num_train))
split = int(np.floor(0.2 * num_train))
train_idx = indices[split:]
train_sampler = SubsetRandomSampler(train_idx)
train_loader = torch.utils.data.DataLoader(train_data,
batch_size=20,
sampler=train_sampler,
num_workers=0
)
def EachImg(img):
img = img / 2 + 0.5
plt.imshow(np.transpose(img, (1, 2, 0)))
dataiter = iter(train_loader)
images, labels = dataiter.next()
images = images.numpy()
fig = plt.figure(figsize=(25, 4))
for idx in np.arange(20):
ax = fig.add_subplot(2, 10, idx + 1, xticks=[], yticks=[])
EachImg(images[idx])
ax.set_title(str(labels[idx]))
plt.show()
1.4 pickle loader
import os
import pickle as p
import numpy as np
import matplotlib.pyplot as plt
import matplotlib.image as plimg
from PIL import Image
from tqdm import tqdm
def load_CIFAR_batch(filename):
""" load single batch of cifar """
with open(filename, 'rb')as f:
datadict = p.load(f, encoding='bytes')
x = datadict[b'data']
y = datadict[b'fine_labels']
class_name = datadict[b'filenames']
x = x.reshape(50000, 3, 32, 32)
y = np.array(y)
return x, y, class_name
if __name__ == "__main__":
x_train, y_train, file_names = load_CIFAR_batch("./cifar-100-python/train")
print("loading...")
for i in tqdm(range(x_train.shape[0])):
imgs = x_train[i]
label = y_train[i]
file_name = file_names[i]
img0 = imgs[0]
img1 = imgs[1]
img2 = imgs[2]
i0 = Image.fromarray(img0)
i1 = Image.fromarray(img1)
i2 = Image.fromarray(img2)
img = Image.merge("RGB", (i0, i1, i2))
file_path = "./train/" + str(label)
if not os.path.exists(file_path):
os.makedirs(file_path)
img.save(file_path + "/" + str(file_name, encoding='utf8'), "png")
print("done.")
Reference
- disanda‘s blog
- Vivinia_Vivinia’s blog


 7245
7245

 被折叠的 条评论
为什么被折叠?
被折叠的 条评论
为什么被折叠?
 到【灌水乐园】发言


