


经过近两天的忙活,总算把cocos2d-x的开发环境搭建好了,下面开始自己的cocos2d-x学习之旅。
按照惯例,首先还是HelloWorld,就来看看cocos2d-x工程中自带的HelloWorld项目吧:
目录:1.Classes文件夹放置代码
2.Resource放置资源(图片,声音,图片配置文件等)
程序结构:
1.main类是win32平台的一个入口类启动程序
2.AppDelegate是真正的入口,在这里有平台的适配参数,找到导演类,启动场景
bool AppDelegate::applicationDidFinishLaunching()
{
    // initialize director
	//初始化导演类
    CCDirector *pDirector = CCDirector::sharedDirector();
    pDirector->setOpenGLView(CCEGLView::sharedOpenGLView());
    // turn on display FPS
	//开启帧率显示
    pDirector->setDisplayStats(true);
    // set FPS. the default value is 1.0/60 if you don't call this
    pDirector->setAnimationInterval(1.0 / 60);
    // create a scene. it's an autorelease object
	//创建场景
    CCScene *pScene = HelloWorld::scene();
    // run
	//执行
    pDirector->runWithScene(pScene);
    return true;
}
在场景类中则主要实现两个方法:
1.CCScene* HelloWorld::scene() 返回该场景
2.bool HelloWorld::init() 初始化
示例代码简单注释如下:
CCScene* HelloWorld::scene()
{
CCScene * scene = NULL;
do
{
// 'scene' is an autorelease object
//初始化场景
scene = CCScene::create();
CC_BREAK_IF(! scene);
// 'layer' is an autorelease object
//创建层
HelloWorld *layer = HelloWorld::create();
CC_BREAK_IF(! layer);
//将层添加到场景中
// add layer as a child to scene
scene->addChild(layer);
} while (0);
// return the scene
return scene;
}
// on "init" you need to initialize your instance
//初始化层实例
bool HelloWorld::init()
{
bool bRet = false;
do
{
//
// super init first
//
//父类初始化
CC_BREAK_IF(! CCLayer::init());
// 加载地图
CCTMXTiledMap* map = CCTMXTiledMap::create("map/map2.tmx");
this->addChild(map);
//
// add your codes below...
//
// 1. Add a menu item with "X" image, which is clicked to quit the program.
//创建关闭按钮
// Create a "close" menu item with close icon, it's an auto release object.
CCMenuItemImage *pCloseItem = CCMenuItemImage::create(
"CloseNormal.png",
"CloseSelected.png",
this,
menu_selector(HelloWorld::menuCloseCallback));
CC_BREAK_IF(! pCloseItem);
// Place the menu item bottom-right conner.
pCloseItem->setPosition(ccp(CCDirector::sharedDirector()->getWinSize().width - 20, 20));
// Create a menu with the "close" menu item, it's an auto release object.
//创建一个包含上面图片的菜单
CCMenu* pMenu = CCMenu::create(pCloseItem, NULL);
pMenu->setPosition(CCPointZero);
CC_BREAK_IF(! pMenu);
// Add the menu to HelloWorld layer as a child layer.
this->addChild(pMenu, 1);
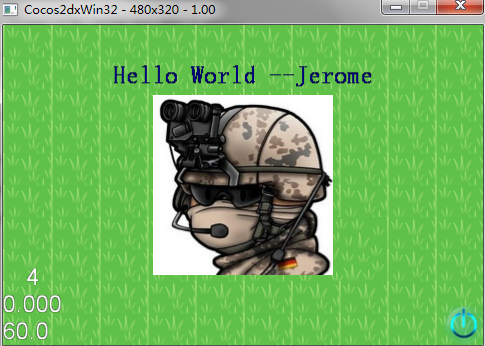
// 2. Add a label shows "Hello World".
//创建文字标签
// Create a label and initialize with string "Hello World".
CCLabelTTF* pLabel = CCLabelTTF::create("Hello World --Jerome", "MarkerFelt-Thin", 25);
//设置颜色
ccColor3B color = ccc3(0, 0, 128);
pLabel->setColor(color);
CC_BREAK_IF(! pLabel);
// Get window size and place the label upper.
//获取窗口的尺寸大小
CCSize size = CCDirector::sharedDirector()->getWinSize();
//设置位置
pLabel->setPosition(ccp(size.width / 2, size.height - 50));
// Add the label to HelloWorld layer as a child layer.
this->addChild(pLabel, 1);
// 3. Add add a splash screen, show the cocos2d splash image.
//创建精灵
CCSprite* pSprite = CCSprite::create("jerome.jpg");
CC_BREAK_IF(! pSprite);
// Place the sprite on the center of the screen
//设置位置
pSprite->setPosition(ccp(size.width/2, size.height/2));
// Add the sprite to HelloWorld layer as a child layer.
this->addChild(pSprite, 0);
bRet = true;
} while (0);
return bRet;
}


 3592
3592

 被折叠的 条评论
为什么被折叠?
被折叠的 条评论
为什么被折叠?
 到【灌水乐园】发言


