前言: 相对于oc或者swift来说,学习微信小程序给我感觉就是简单,明了,不绕弯子。基础不懂的同学可以去微信 小程序API学习
对于界面搭建,创建控件本文以自身demo为例
先上图
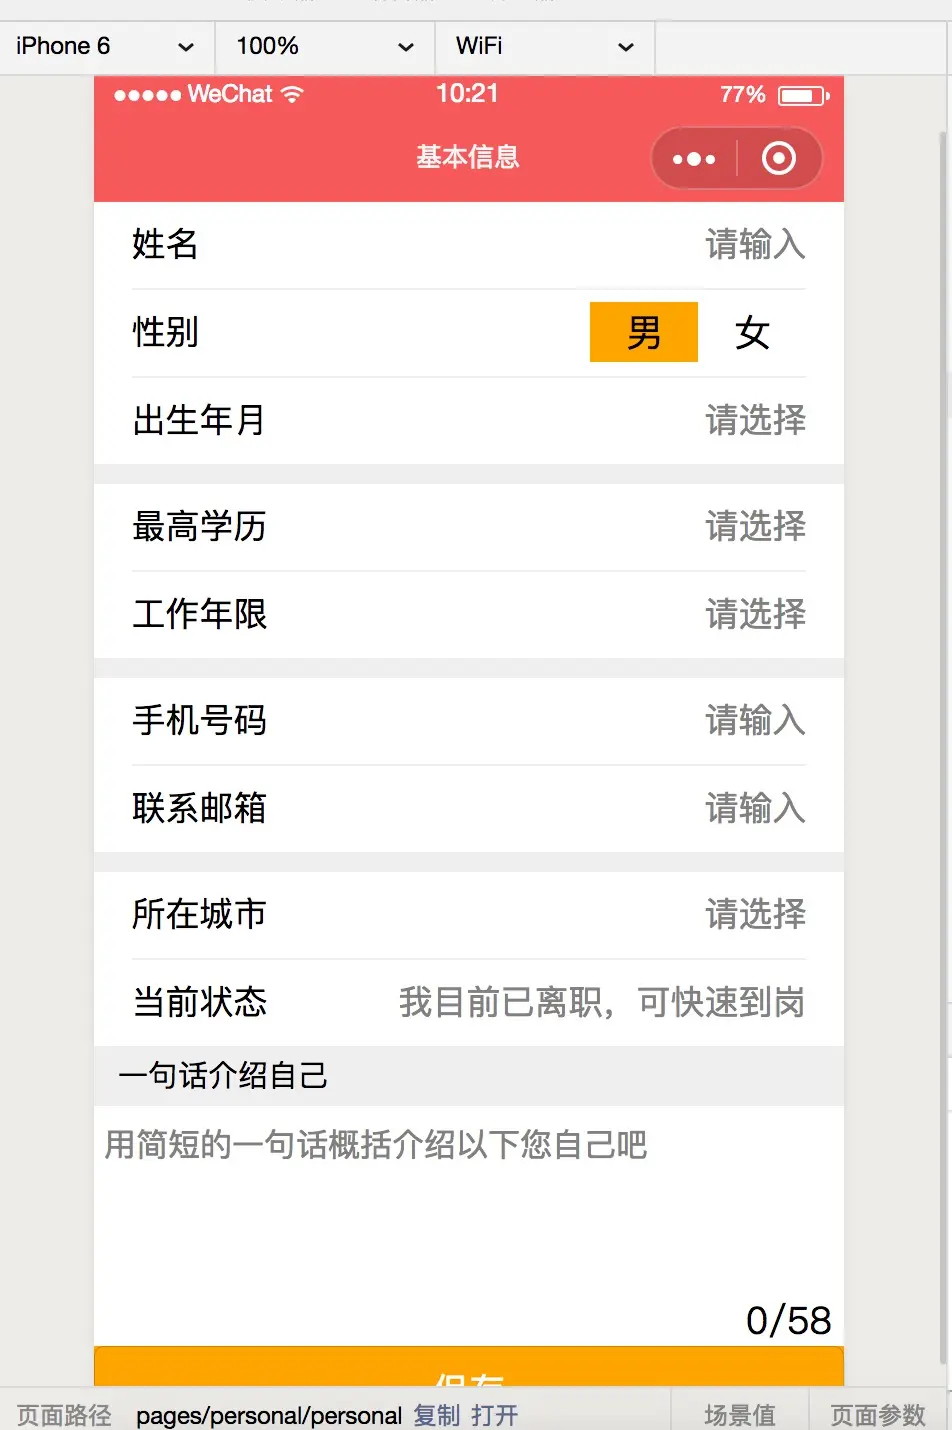
界面样式正如上图所示,比较简单,主要就用到了几个标签1.相当于父视图,里边可以放你想放的任一子视图 2.,这两个相当去文字控件 3.这个标签相当于iOS中的textfield,输入框,
直接上创建代码和样式布局
<view class="container">
<view class='objectClass'>
<text>{{actualName}}</text>
<input placeholder='请输入' maxlength='15' bindinput='nameClick'>{{userName}}</input>
</view>
<view class='objectClass'>
<text>{{sex}}</text>
<view class='changeSex'>
<label style='background-color: {{sexManColor}}' bindtap='setManClick'>男</label>
<label style='background-color: {{sexWomenColor}}' bindtap='setWomenClick'>女</label>
</view>
</view>
<view class='objectClass'>
<text>{{birthdayTime}}</text>
<picker mode="date"
value="{{date}}"
start="1965-09-01"
end="2020-09-01"
bindchange="bindDateChange"
style='font-size: 35rpx'>
<view style='color: {{birthdayColor}}'>
{{birthdayTitle}}
</view>
</picker>
</view>
<view class='bottomNormalView'></view>
<view class='objectClass'>
<text>{{education}}</text>
<text bindtap='selectEducation' style='color: {{educationColor}}'>{{educationTitle}}</text>
</view>
<view class='objectClass'>
<text>{{workYear}}</text>
<picker bindchange="bindPickerChange"
value="{{index}}" range="{{array}}">
<view style='color: {{workYearColor}};font-size: 35rpx'>
{{workYearTitle}}
</view>
</picker>
</view>
<view class='bottomNormalView'></view>
<view class='objectClass'>
<text>{{phoneText}}</text>
<input placeholder='请输入' maxlength='11' bindinput='phoneClick'>{{phoneNumber}}</input>
</view>
<view class='objectClass'>
<text>{{emailText}}</text>
<input placeholder='请输入' maxlength='100' bindinput='emailClick'>{{emailNumber}}</input>
</view>
<view class='bottomNormalView'></view>
<view class='objectClass'>
<text>{{cityText}}</text>
<text style='color: {{cityColor}};font-size: 35rpx' bindtap='cityClick'>{{chouseCity}}</text>
</view>
<view class='objectClass'>
<text>{{userText}}</text>
<text style='color: {{jobStateColor}};font-size: 35rpx' bindtap='jobStateClick'>{{chouseJobState}}</text>
</view>
<view class='normalView'>一句话介绍自己</view>
<view class='item_tarea'>
<textarea placeholder='用简短的一句话概括介绍以下您自己吧' maxlength='58' bindinput="bindTextAreaBlur"></textarea>
<text>{{oberseverAreaLength}}</text>
</view>
<button bindtap='comfirmData'>保存</button>
</view>
代码注释比较详细,主要样式的话,这里和html很相似的,可能唯一区别就是px改为了微信小程序的rpx了。样式布局同样采用的是class声明,然后在wxss里边进行布局,这里用到的css样式如下
.objectClass{
width: 90%;
height: 86rpx;
line-height: 86rpx;
border-bottom: 1rpx #eeeeee solid;
display: flex;
flex-flow: row;
justify-content: space-between;
}
.objectClass input{
text-align: right;
line-height: 86rpx;
height: 86rpx;
font-size: 35rpx;
}
.objectClass text{
font-size: 35rpx;
}
.changeSex{
width: 40%;
text-align: right;
}
.changeSex label{
display: inline-block;
height: 60rpx;
line-height: 60rpx;
width: 40%;
text-align: center;
}
.bottomNormalView{
background-color: rgb(239, 239, 239);
height: 20rpx;
width: 100%;
margin-top: -1rpx;
}
.normalView{
height: 60rpx;
line-height: 60rpx;
background-color: rgb(239, 239, 239);
text-align: left;
width: 100%;
font-size: 30rpx;
text-indent: 24rpx;
margin-top: -1rpx;
}
textarea{
font-size: 33rpx;
padding: 20rpx 10rpx;
width: 100%;
height: 200rpx;
line-height: 30rpx;
overflow-x: hidden
}
button{
background-color: orange;
width: 100%;
border-radius: 0;
color: #fff;
}
.button-hover{
background-color: orange;
color: #fff;
}
.jobState{
width: 400rpx;
}
.item_tarea{
width: 100%;
position: relative;
word-wrap:break-word;
}
.item_tarea text{
position: absolute;
right: 12rpx;
bottom: 0;
}
大家有没有发现,这个作者写的代码,注释不是一般的详细哈。因为我也是初学者,便于记忆所以不会的不懂的地方都加了注释,方便以后观看哈。
以上就是作者写的第一个微信小程序Demo,写出来加深印象同时也是给又需要的人观看。最后再附上demo地址
#
微信小程序自学Demo地址
下一章节会讲下具体代码内部js的基本使用


 5469
5469

 被折叠的 条评论
为什么被折叠?
被折叠的 条评论
为什么被折叠?
 到【灌水乐园】发言


