


后台单机多卡训练
参考链接
如何单机多卡
- 一种是
torch.nn.DataParallel,但是这种会有内存分配不平衡的弊端,因此这里采用的是官方推荐的torch.nn.parallel.DistributedDataParallel,下面介绍的也是DistributedDataParallel
DistributedDataParallel
-
这里就用这位老哥的例子:Pytorch分布式训练(单机多卡),代码可以稍微浏览一下,主要关注几个注释的地方,就是指出需要配置的东西
-
# distributedDataParallel.py import torch import torch.nn as nn from torch.autograd import Variable from torch.utils.data import Dataset, DataLoader import os from torch.utils.data.distributed import DistributedSampler # 1) 初始化 torch.distributed.init_process_group(backend="nccl") input_size = 5 output_size = 2 batch_size = 30 data_size = 90 # 2) 配置每个进程的gpu local_rank = torch.distributed.get_rank() torch.cuda.set_device(local_rank) device = torch.device("cuda", local_rank) class RandomDataset(Dataset): def __init__(self, size, length): self.len = length self.data = torch.randn(length, size).to('cuda') def __getitem__(self, index): return self.data[index] def __len__(self): return self.len dataset = RandomDataset(input_size, data_size) # 3)使用DistributedSampler rand_loader = DataLoader(dataset=dataset, batch_size=batch_size, sampler=DistributedSampler(dataset)) class Model(nn.Module): def __init__(self, input_size, output_size): super(Model, self).__init__() self.fc = nn.Linear(input_size, output_size) def forward(self, input): output = self.fc(input) print(" In Model: input size", input.size(), "output size", output.size()) return output model = Model(input_size, output_size) # 4) 封装之前要把模型移到对应的gpu model.to(device) if torch.cuda.device_count() > 1: print("Let's use", torch.cuda.device_count(), "GPUs!") # 5) 封装 model = torch.nn.parallel.DistributedDataParallel(model, device_ids=[local_rank], output_device=local_rank) for data in rand_loader: if torch.cuda.is_available(): input_var = data else: input_var = data output = model(input_var) print("Outside: input size", input_var.size(), "output_size", output.size()) -
主要的步骤如下:
-
# 1) 初始化
torch.distributed.init_process_group(backend="nccl")
# 2) 配置每个进程的gpu
local_rank = torch.distributed.get_rank()
torch.cuda.set_device(local_rank)
device = torch.device("cuda", local_rank)
# 3)使用DistributedSampler
rand_loader = DataLoader(dataset=dataset,
                         batch_size=batch_size,
                         sampler=DistributedSampler(dataset))
# 4) 封装之前要把模型移到对应的gpu
model.to(device)
# 5) 封装
    model = torch.nn.parallel.DistributedDataParallel(model,
                                                      device_ids=[local_rank],
                                                      output_device=local_rank)
-
-
运行的话需要如下命令:
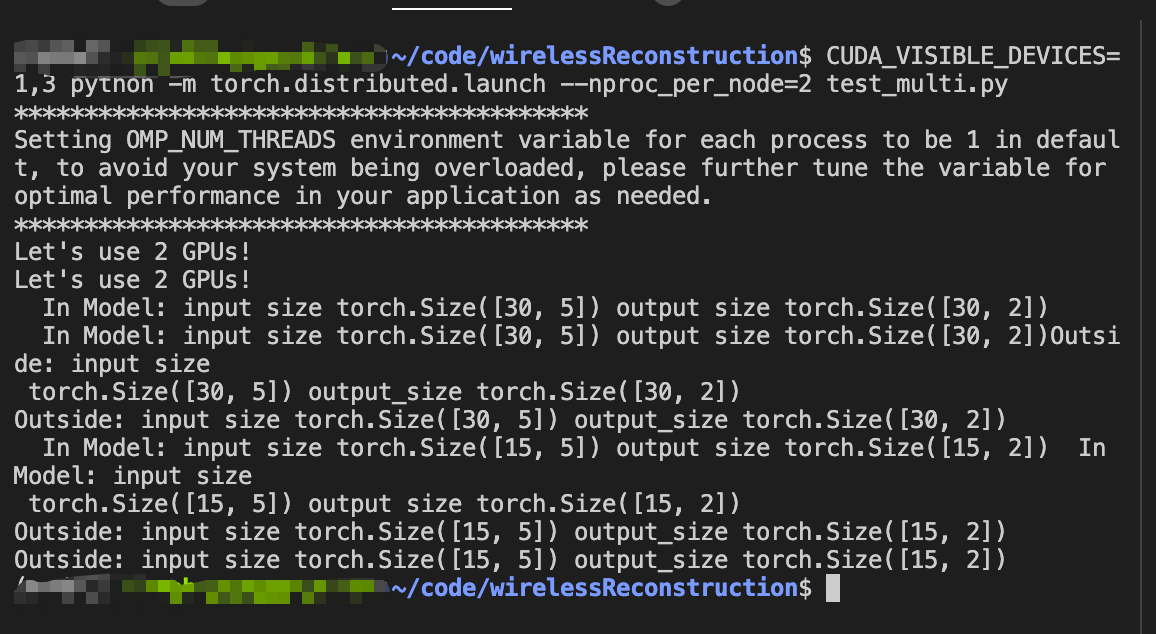
CUDA_VISIBLE_DEVICES=1,3 python -m torch.distributed.launch --nproc_per_node=2 YOUR_FILE.py- 这里需要注意的是
CUDA_VISIBLE_DEVICES必须在命令中指定,而不能在代码中指定(一般我们用的os.environ["CUDA_VISIBLE_DEVICES"] = '1,3'在这里是失效的) - 20220123这里修正一下,
os.environ["CUDA_VISIBLE_DEVICES"] = '1,3'不是失效,这是有用的,CUDA_VISIBLE_DEVICES=1,3最大的作用是告诉系统要用多卡了,看了一眼mmdetection的代码好像可以不加,但是需要在哪里设置一下才行的 - 另外, --nproc_per_node=2表示使用GPU的张数,这里设置的是2,如果有多台则改改就行
-
结果大致如下:
如何后台训练
- 一般我后台训练用的是nohup命令,但是如果是直接运行DistributedDataParallel的话会报错,于是需要转换思路
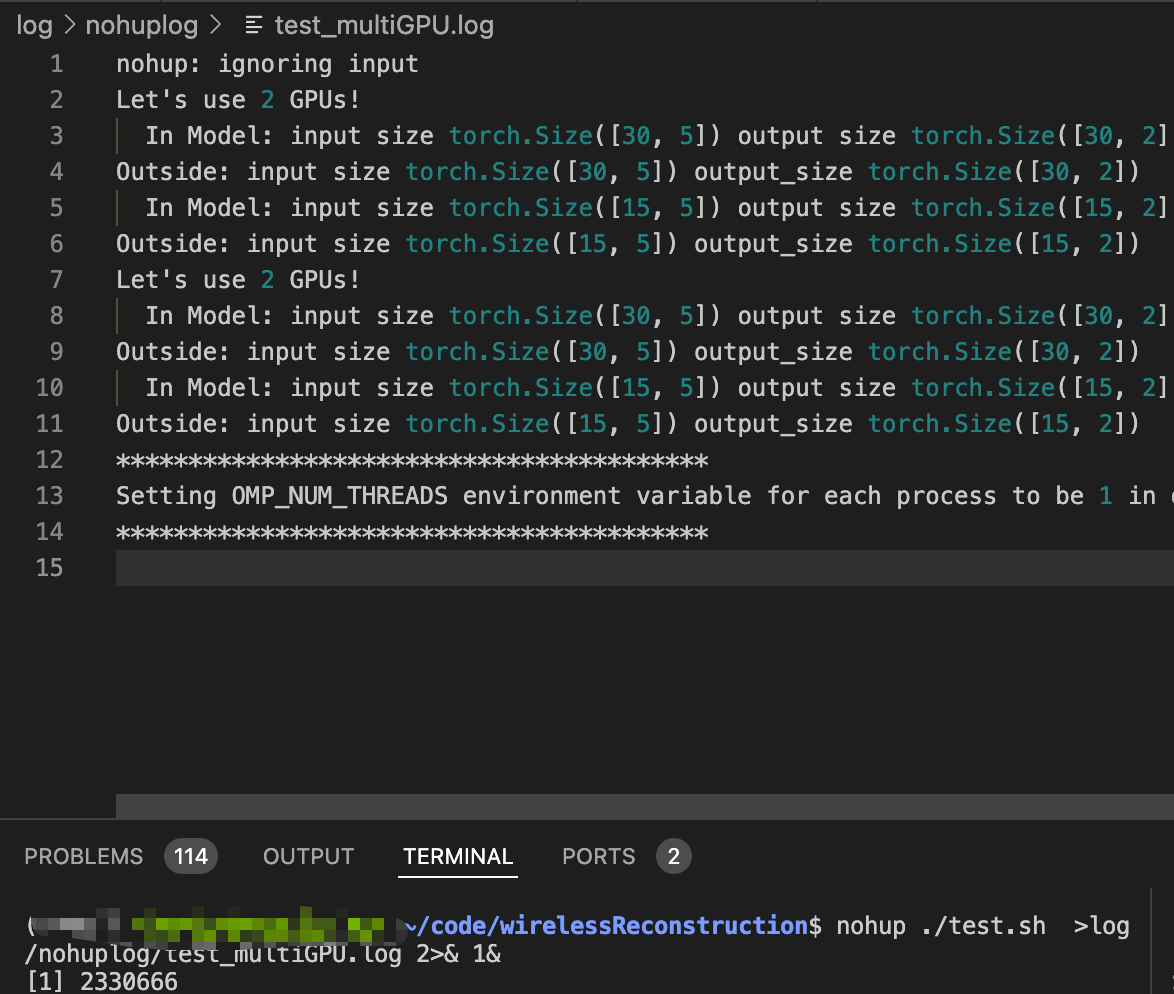
nohup CUDA_VISIBLE_DEVICES=1,3 python -m torch.distributed.launch --nproc_per_node=2 test_multi.py >log/nohuplog/test_multiGPU.log 2>& 1&
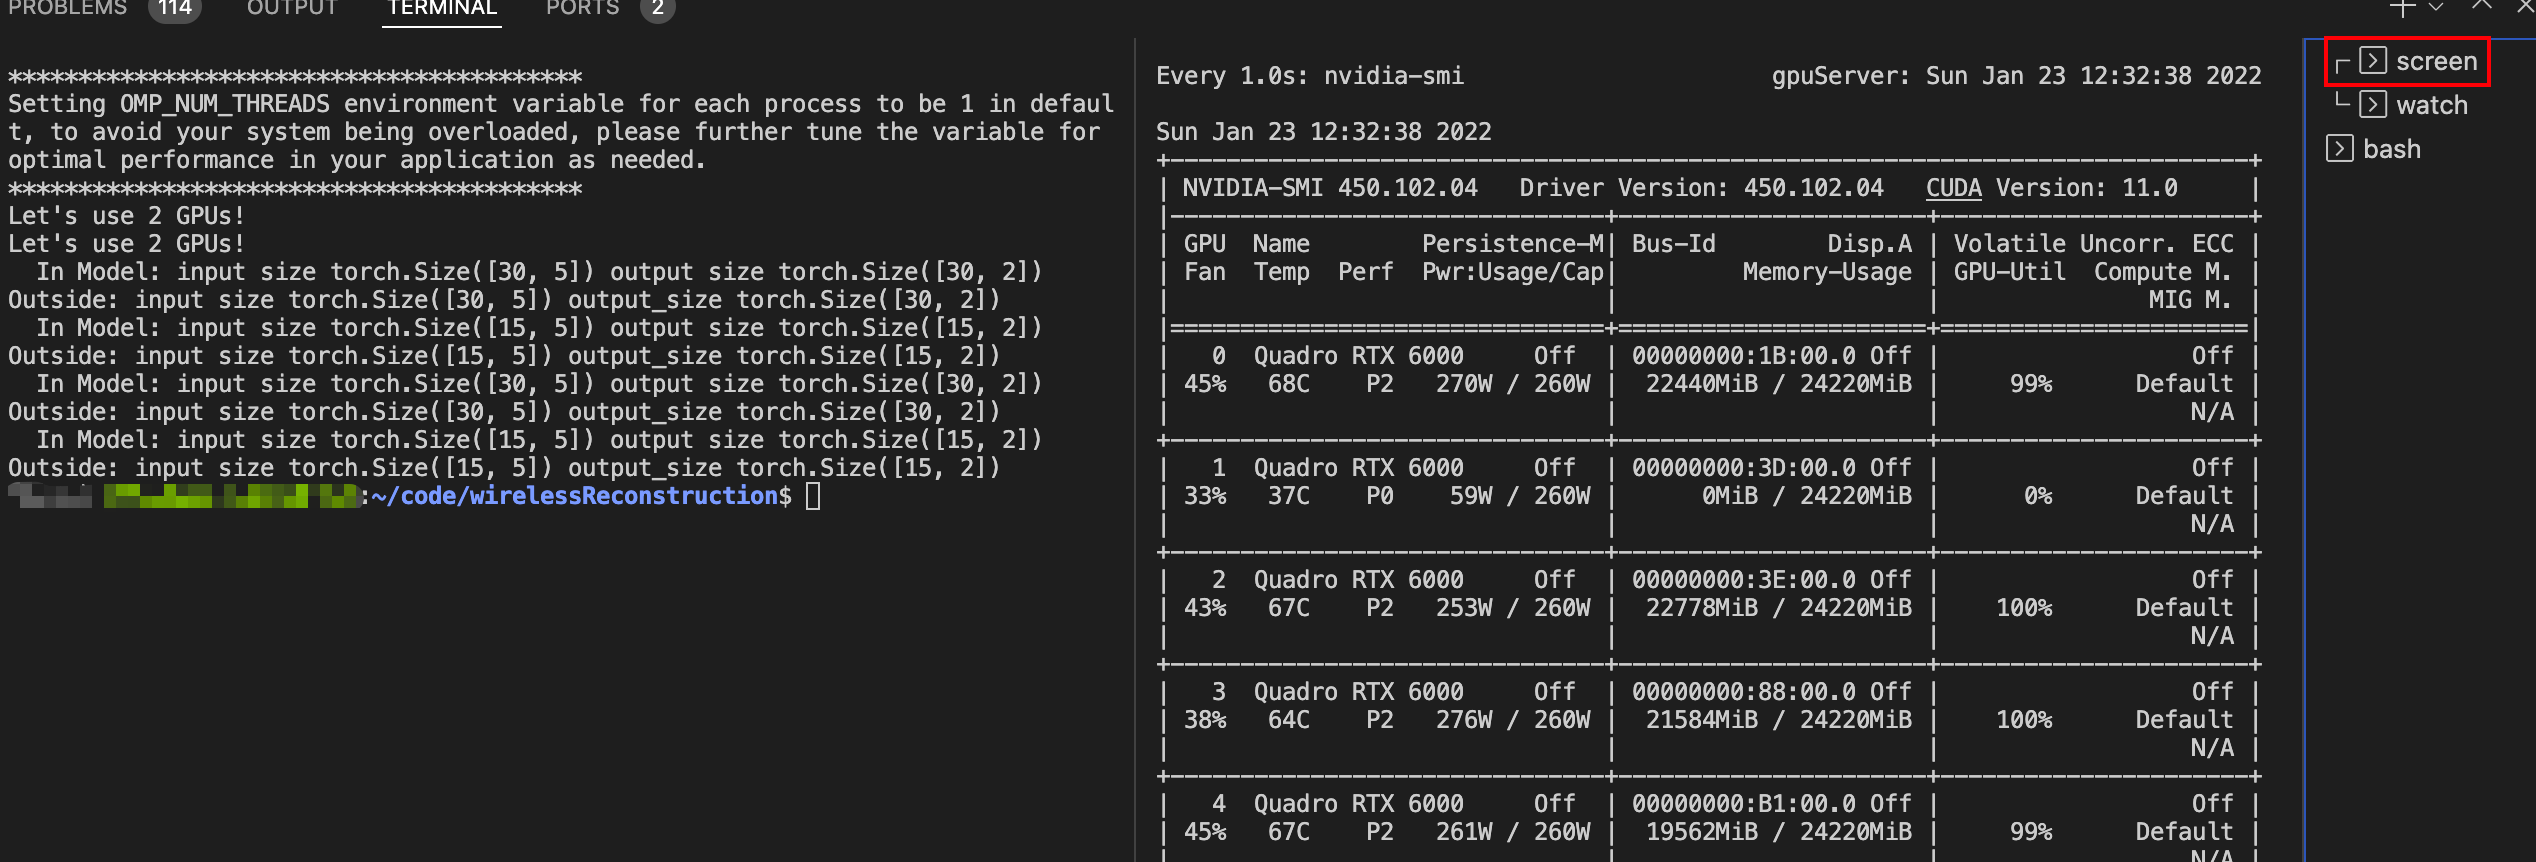
screen …
-
在screen 中运行有个好处就是退出终端了程序也不会停止,只需要 screen -r Name即可重新进入,这样的话就可以避免nohup执行失败了
-
具体的screen命令参考这位老哥的博客Linux使用screen执行长时间运行的任务,这里用到的是:
-
# screen -S docker-d    新建一个名叫docker-d的session,并马上进入
# screen -dmS docker-d  新建一个名叫docker-d的session,但暂不进入,可用于系统启动脚本里
# screen -ls            列出当前所有session
# screen -r docker-d    恢复到zhouxiao这个session,前提是已经是断开状态(-d可以远程断开会话)
# screen -x docker-d    连接到离线模式的会话(多窗口同步演示)

# screen ./rsync.sh     screen创建一个执行脚本的单窗口会话,可以attach进程ID
# screen -wipe          检查目前所有的screen作业,并删除已经无法使用的screen作业
-
-
nohup train.sh …
- 后来我发现nohup也不是不能用,只需要把命令扔到.sh文件执行就可以了,这样也能避免nohup执行错误


 1968
1968


 被折叠的 条评论
为什么被折叠?
被折叠的 条评论
为什么被折叠?
 到【灌水乐园】发言


