


视图
首先来讲Material Design 视图的概念,在新的api中,新添加了z轴的概念,z轴垂直于屏幕,用来表现元素的层叠关系,z值(海拔高度)越高,元素离界面底层(水平面)越远,投影越重,这里有一个前提,所有的元素的厚度都是1dp。
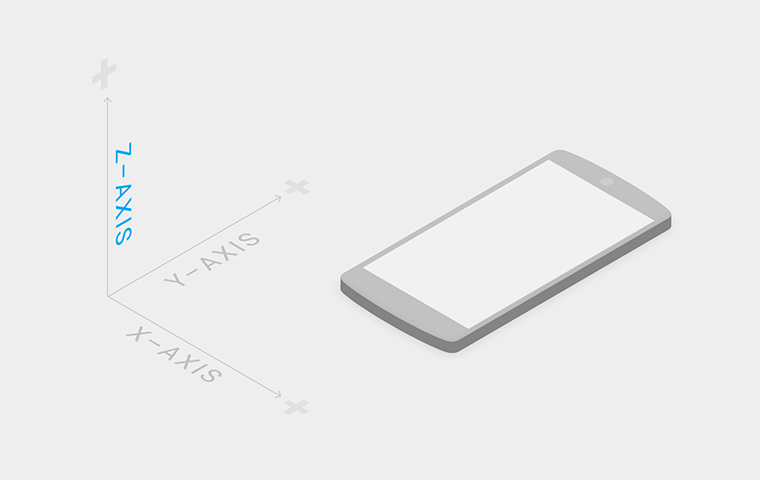
Material Design中UI主打扁平化,但是这种扁平化是扁而不平,是对现实的拟物扁平化,所以引入z轴空间的概念,即所有元素都有默认的海拔高度,对它进行操作会抬升它的海拔高度,操作结束后,它应该落回默认海拔高度。同一种元素,同样的操作,抬升的高度是一致的。

既然加入z轴,那么这种空间感是怎么体现出来的呢?答案就是View的elevation(阴影高度),细心的可以发现在Android 5.0后所有控件中都多了这么两个属性:elevation、translationZ。分别表示阴影的大小和往z轴平移的大小(用作动画效果)。不过这两个属性只在api 21(5.0)以上才有效果。在z轴上有这么一个关系:
Z = elevation + translationZ
我们可以在layout中或者在代码中使用它们:
android:elevation
View.setElevation()
Tint详解
在Android 5.0后,引入了一个叫tint的属性,意思叫“着色”,有两种形式:
1、android:backgroundTint=””
2、android:tint=”“
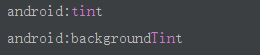
细心的同学就会发现,在给一些控件(Button、EditText等)设置背景时候可以看到新添加了backgroundTint属性:

而在给ImageView设置时候,则添加了tint和backgroundTint属性:
同时,还分别新增了与之对应的TintMode属性,表示tint的模式:

那么,既然有了background可以设置背景色还加入Tint干嘛呢?Tint是用来是干什么的呢?
首先我们得了解这两个属性的用处:
了解之前我们先了解TintMode
顾名思义,TintMode是改变我们着色的模式。
Mode的取值有六种:
1、add -
2、screen -
3、src_over -
4、src_in -
5、multiply -
6、src_atop -
关于它们的特性请看传送门:PorterDuff.Mode
一般情况下默认是src_in。
1、backgroundTint - 当然是着背景色了
那么我们就来使用它试试效果,我们给Button着上红色的背景色:
<Button
        android:id="@+id/btn2"
        android:layout_width="match_parent"
        android:layout_height="wrap_content"
        android:backgroundTint="@color/red"
        android:text="Button2" />
效果:
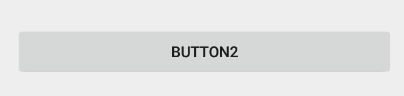
我们发现这背景色并没有改变,为什么呢?既然tint是给背景色着色,那么肯定是需要有背景色的前提下,我们给Button随便加上一个背景颜色后:
<Button
        android:id="@+id/btn2"
        android:layout_width="match_parent"
        android:layout_height="wrap_content"
        android:backgroundTint="@color/red"
        android:background="#ffffff"
        android:text="Button2" />
效果:

可以发现,tint的作用的却是给当前控件的背景色着上一个我们指定的颜色。
每个模式不同的效果想看的自己实现,这里就不贴了,因为重点是下面对ImageView的遮罩进行着色。
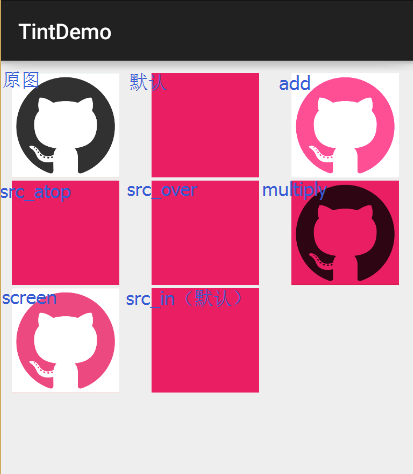
2、tint - 则是给图片着上一层遮罩颜色
废话不多说,贴一张效果图自然明白了,我们给图片罩上一层红色的遮罩后,不同模式显示的效果:
<LinearLayout xmlns:android="http://schemas.android.com/apk/res/android"
    xmlns:tools="http://schemas.android.com/tools"
    android:layout_width="match_parent"
    android:layout_height="match_parent"
    android:orientation="vertical"
    android:padding="10dp"
    tools:context=".MainActivity">

    <LinearLayout
        android:layout_width="wrap_content"
        android:layout_height="wrap_content">

        <ImageView
            android:layout_width="100dp"
            android:layout_height="100dp"
            android:src="@mipmap/bg" />

        <Space
            android:layout_width="30dp"
            android:layout_height="match_parent" />

        <ImageView
            android:layout_width="100dp"
            android:layout_height="100dp"
            android:src="@mipmap/bg"
            android:tint="@color/red" />

        <Space
            android:layout_width="30dp"
            android:layout_height="match_parent" />

        <ImageView
            android:layout_width="100dp"
            android:layout_height="100dp"
            android:src="@mipmap/bg"
            android:tint="@color/red"
            android:tintMode="add" />

    </LinearLayout>

    <LinearLayout
        android:layout_width="wrap_content"
        android:layout_height="wrap_content">

        <ImageView
            android:layout_width="100dp"
            android:layout_height="100dp"
            android:src="@mipmap/bg"
            android:tint="@color/red"
            android:tintMode="src_atop" />

        <Space
            android:layout_width="30dp"
            android:layout_height="match_parent" />

        <ImageView
            android:layout_width="100dp"
            android:layout_height="100dp"
            android:src="@mipmap/bg"
            android:tint="@color/red"
            android:tintMode="src_over" />

        <Space
            android:layout_width="30dp"
            android:layout_height="match_parent" />

        <ImageView
            android:layout_width="100dp"
            android:layout_height="100dp"
            android:src="@mipmap/bg"
            android:tint="@color/red"
            android:tintMode="multiply" />

    </LinearLayout>

    <LinearLayout
        android:layout_width="wrap_content"
        android:layout_height="wrap_content">

        <ImageView
            android:layout_width="100dp"
            android:layout_height="100dp"
            android:src="@mipmap/bg"
            android:tint="@color/red"
            android:tintMode="screen" />

        <Space
            android:layout_width="30dp"
            android:layout_height="match_parent" />

        <ImageView
            android:layout_width="100dp"
            android:layout_height="100dp"
            android:src="@mipmap/bg"
            android:tint="@color/red"
            android:tintMode="src_in" />
    </LinearLayout>
</LinearLayout>
Tint兼容性
上述效果均是在Android 5.0以上的平台上才支持,不过,如果我们想支持5.0以下的,我们可以使用support-v7包下的AppCompat**** 控件,不过我们还是不能在layout中使用它,只能通过代码
ViewCompat.setSupportBackgroundTintList(ColorStateList tint);
ViewCompat.setSupportBackgroundTintMode(PorterDuff.Mode tintMode);
来设置。setSupportBackgroundTintList()方法接收的是一个ColorStateList类型的参数,我们可以通过
ColorStateList lists = getResources().getColorStateList(R.color.red);得到对应颜色的ColorStateList对象,并设置给它。
如,下面我使用AppCompat控件并着色:
<LinearLayout xmlns:android="http://schemas.android.com/apk/res/android"
    xmlns:tools="http://schemas.android.com/tools"
    android:layout_width="match_parent"
    android:layout_height="match_parent"
    android:orientation="vertical"
    android:paddingBottom="@dimen/activity_vertical_margin"
    android:paddingLeft="@dimen/activity_horizontal_margin"
    android:paddingRight="@dimen/activity_horizontal_margin"
    android:paddingTop="@dimen/activity_vertical_margin"
    tools:context=".MainActivity">

    <android.support.v7.widget.AppCompatButton
        android:id="@+id/btn1"
        android:layout_width="match_parent"
        android:layout_height="50dp"
        android:text="Button" />

    <Space
        android:layout_width="match_parent"
        android:layout_height="50dp" />

    <android.support.v7.widget.AppCompatEditText
        android:id="@+id/edt"
        android:layout_width="match_parent"
        android:layout_height="50dp" />
</LinearLayout>
代码:
protected void onCreate(Bundle savedInstanceState) {
        super.onCreate(savedInstanceState);
        setContentView(R.layout.activity_main);
        AppCompatButton mBtnCompat = (AppCompatButton) findViewById(R.id.btn1);
        ColorStateList lists = getResources().getColorStateList(R.color.red);
        mBtnCompat.setSupportBackgroundTintList(lists);
        mBtnCompat.setSupportBackgroundTintMode(PorterDuff.Mode.SRC_IN);

        ColorStateList lists2 = getResources().getColorStateList(R.color.bule);
        AppCompatEditText mEdt = (AppCompatEditText) findViewById(R.id.edt);
        mEdt.setSupportBackgroundTintList(lists2);
    }
其实AppCompatEditText中底下那根线是一张黑色的.9线条图片,AppCompatButton也是通过一张.9图片进行着色的,所以我们通过backgroundTint能让它着成不同的颜色。
效果:
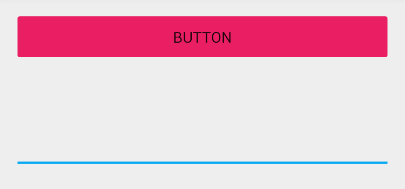
所以,综上的效果,backgroundTint和android:tint属性可以帮我们在原图只有一张的情况下,我们利用tint可以轻松的把图片换成我们需要的颜色,这极大减小了apk因包含众多图片的大小。
让自定义控件加上对Tint支持
在5.0以下,我们对自定义的控件也加上对tint的支持:
public class AppCompatCustomView extends View implements TintableBackgroundView {

    private static final int[] TINT_ATTRS = {
            android.R.attr.background
    };

    private TintInfo mInternalBackgroundTint;
    private TintInfo mBackgroundTint;
    private TintManager mTintManager;

    public AppCompatCustomView(Context context) {
        this(context, null);
    }

    public AppCompatCustomView(Context context, AttributeSet attributeSet) {
        this(context, attributeSet, 0);
    }

    public AppCompatCustomView(Context context, AttributeSet attributeSet, int defStyle) {
        super(context, attributeSet, defStyle);

        if (TintManager.SHOULD_BE_USED) {
            TintTypedArray a = TintTypedArray.obtainStyledAttributes(context, attributeSet,
                    TINT_ATTRS, defStyle, 0);
            if (a.hasValue(0)) {
                ColorStateList tint = a.getTintManager().getTintList(a.getResourceId(0, -1));
                if (tint != null) {
                    setInternalBackgroundTint(tint);
                }
            }
            mTintManager = a.getTintManager();
            a.recycle();
        }
    }

    private void applySupportBackgroundTint() {
        if (getBackground() != null) {
            if (mBackgroundTint != null) {
                TintManager.tintViewBackground(this, mBackgroundTint);
            } else if (mInternalBackgroundTint != null) {
                TintManager.tintViewBackground(this, mInternalBackgroundTint);
            }
        }
    }

    @Override
    protected void drawableStateChanged() {
        super.drawableStateChanged();
        applySupportBackgroundTint();
    }

    private void setInternalBackgroundTint(ColorStateList tint) {
        if (tint != null) {
            if (mInternalBackgroundTint == null) {
                mInternalBackgroundTint = new TintInfo();
            }
            mInternalBackgroundTint.mTintList = tint;
            mInternalBackgroundTint.mHasTintList = true;
        } else {
            mInternalBackgroundTint = null;
        }
        applySupportBackgroundTint();
    }

    @Override
    public void setSupportBackgroundTintList(ColorStateList tint) {
        if (mBackgroundTint == null) {
            mBackgroundTint = new TintInfo();
        }
        mBackgroundTint.mTintList = tint;
        mBackgroundTint.mHasTintList = true;

        applySupportBackgroundTint();
    }

    @Nullable
    @Override
    public ColorStateList getSupportBackgroundTintList() {
        return mBackgroundTint != null ? mBackgroundTint.mTintList : null;
    }

    @Override
    public void setSupportBackgroundTintMode(PorterDuff.Mode tintMode) {
        if (mBackgroundTint == null) {
            mBackgroundTint = new TintInfo();
        }
        mBackgroundTint.mTintMode = tintMode;
        mBackgroundTint.mHasTintMode = true;

        applySupportBackgroundTint();
    }

    @Nullable
    @Override
    public PorterDuff.Mode getSupportBackgroundTintMode() {
        return mBackgroundTint != null ? mBackgroundTint.mTintMode : null;
    }
}


 1069
1069

 被折叠的 条评论
为什么被折叠?
被折叠的 条评论
为什么被折叠?
 到【灌水乐园】发言


