


Qtcreator 调试cmake
http://blog.csdn.net/u012062327
之前的cmake程序都是用gedit来编辑,并且需要cmake和make两条执行指令。不用IDE会存在程序编写时不能自动跳转、编译过程繁琐及调试程序麻烦等问题,本blog主要是介绍应用qtcreator来解决如上问题。
1. qtcreator的安装
很简单,仅需一句话:sudo apt-get install qtcreator
2.qtcreator编译及调试
以opennni驱动kinect1为例,openni的配置参考:http://mitchtech.net/ubuntu-kinect-openni-primesense
http://igorbarbosa.com/articles/how-to-install-kin-in-linux-mint-12-ubuntu/
2.1 首先新建相关文件夹及CmakeLists.txt文件
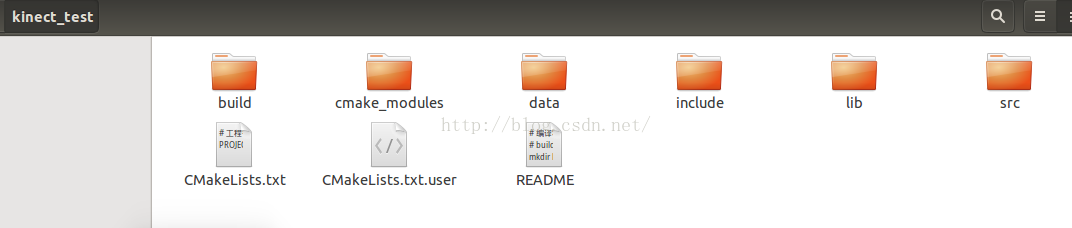
其中CmakeLists.txt内容为:
<span style="font-size:14px;"><span style="font-family:SimSun;"># 工程名称
PROJECT(kinect_test)

#设定头文件目录
INCLUDE_DIRECTORIES( ${PROJECT_SOURCE_DIR}/include)

#设定存放编译出来的库文件的目录
SET( LIBRARY_OUTPUT_PATH ${PROJECT_SOURCE_DIR}/lib)

#并且把该目录设为连接目录
LINK_DIRECTORIES( ${PROJECT_SOURCE_DIR}/lib)
#增加子文件夹,ADD_SUBDIRECTORY( source_dirbinary_dir), source_dir 当前工程的源文件,binary_dir 为中间二进制和目标二进制存放位置下指令的lib在 /build/lib
ADD_SUBDIRECTORY( ${PROJECT_SOURCE_DIR}/src lib)</span>
 </span>
并在/src 新建CmakeLists.txt
2.2 qtcreator 打开kinect_test/CmakeLists.txt,并选择include directory 为kinect_test/build

编辑src/ CmakeLists.txt
<span style="font-family:SimSun;font-size:14px;">CMAKE_MINIMUM_REQUIRED(VERSION2.8)#设定版本
#增加opencv的依赖
FIND_PACKAGE(OpenCVREQUIRED)
#FIND_PACKAGE(OpenNI2  )
#添加头文件和库文件
#INCLUDE_DIRECTORIES(/usr/include/ni  )
#LINK_LIBRARIES(/usr/lib)
LIST(APPENDCMAKE_MODULE_PATH${PROJECT_SOURCE_DIR}/cmake_modules)
find_package(OpenNIREQUIRED)
IF(OPENNI_INCLUDE_DIRANDOPENNI_LIBRARY_DIR)
MESSAGE(STATUS"FoundOpenNIlib")
INCLUDE_DIRECTORIES(${OPENNI_INCLUDE_DIR}  )
MESSAGE(STATUS"includediris"${OPENNI_INCLUDE_DIR})
MESSAGE(STATUS"libdiris"${OPENNI_LIBRARY_DIR})
ADD_EXECUTABLE(kinect_testkinect_test.cpp)
TARGET_LINK_LIBRARIES(kinect_test
    ${OpenCV_LIBS}
    ${OPENNI_LIBRARY_DIR})
ADD_LIBRARY(copennicopenni.cpp)
TARGET_LINK_LIBRARIES(copenni
    ${OpenCV_LIBS}
    ${OPENNI_LIBRARY_DIR})
ADD_EXECUTABLE(gesture_reconitiongesture_recon.cpp)
TARGET_LINK_LIBRARIES(gesture_reconition
    copenni
    ${OpenCV_LIBS}
    ${OPENNI_LIBRARY_DIR})
ENDIF(OPENNI_INCLUDE_DIRANDOPENNI_LIBRARY_DIR)</span>
新建kinect_test.cpp
<span style="font-size:14px;">#include<stdlib.h>
#include<iostream>
#include<string>
//【1】
#include<XnCppWrapper.h>
//#include<OpenNI.h>
#include<opencv2/core/core.hpp>
#include<opencv2/highgui/highgui.hpp>
#include<opencv2/opencv.hpp>
usingnamespacestd;
usingnamespacecv;
voidCheckOpenNIError(XnStatusresult,stringstatus)
{
        if(result!=XN_STATUS_OK)
                cerr<<status<<"Error:"<<xnGetStatusString(result)<<endl;
}
intmain(intargc,char**argv)
{
        XnStatusresult=XN_STATUS_OK;
        xn::DepthMetaDatadepthMD;
        xn::ImageMetaDataimageMD;
        //OpenCV
        MatimgDepth16u(Size(640,480),CV_16UC1);
        MatimgRGB8u(Size(640,480),CV_8UC3);
        MatdepthShow(Size(640,480),CV_16UC1);
        MatimageShow(Size(640,480),CV_8UC3);
        cvNamedWindow("depth",1);
        cvNamedWindow("image",1);
        charkey=0;
        //【2】
        //context
        xn::Contextcontext;
        result=context.Init();
        CheckOpenNIError(result,"initializecontext");
        //creategenerator
        xn::DepthGeneratordepthGenerator;
        result=depthGenerator.Create(context);
        CheckOpenNIError(result,"Createdepthgenerator");
        xn::ImageGeneratorimageGenerator;
        result=imageGenerator.Create(context);
        CheckOpenNIError(result,"Createimagegenerator");
        //【3】
        //mapmode
        XnMapOutputModemapMode;
        mapMode.nXRes=640;
        mapMode.nYRes=480;
        mapMode.nFPS=30;
        result=depthGenerator.SetMapOutputMode(mapMode);
        result=imageGenerator.SetMapOutputMode(mapMode);
        //【4】
        //correctviewport
        depthGenerator.GetAlternativeViewPointCap().SetViewPoint(imageGenerator);
        //【5】
        //readdata
        result=context.StartGeneratingAll();
        //【6】
        result=context.WaitNoneUpdateAll();
        charSaverbg[256],Savedepth[256];
        intimagecount=0;
        while((key!=27)&&!(result=context.WaitNoneUpdateAll())  )
        {
                //getmetadata
                depthGenerator.GetMetaData(depthMD);
                imageGenerator.GetMetaData(imageMD);
                //【7】
                //OpenCVoutput
                memcpy(imgDepth16u.data,depthMD.Data(),640*480*2);
                //imgDepth16u.convertTo(depthShow,CV_8UC1,255/4096.0);
                memcpy(imgRGB8u.data,imageMD.Data(),640*480*3);
                cvtColor(imgRGB8u,imageShow,CV_RGB2BGR);
                imshow("depth",imgDepth16u);
                imshow("image",imageShow);
                key=cvWaitKey(20);
                if(key==13)
                {
                   imagecount++;
                   sprintf(Saverbg,"../data/rgb_png/%01d.png",imagecount);
                   sprintf(Savedepth,"../data/depth_png/%01d.png",imagecount);
                   imwrite(Saverbg,imageShow);
                   imwrite(Savedepth,imgDepth16u);
                }
        }
        //destroy
        context.StopGeneratingAll();
        context.Shutdown();
        return0;
}</span>
如果要调试程序,需要填写Cmake arguments为:-DCMAKE_BUILD_TYPE=Debug

点击坐下角斧头进行buld编译,和F5开始程序的调试,如设置断电调试

最终程序可以实现,每按一次Enter保存color和depth图片至kinect_test/data文件夹。


 3431
3431

 被折叠的 条评论
为什么被折叠?
被折叠的 条评论
为什么被折叠?
 到【灌水乐园】发言


