


一 . 前言
阅读本篇文章前, 请先查看一下笔者之前的写的两篇博客文章: Android Service知识 和 Android AIDL使用.
进程间通信涉及到客户端和服务端, 肯定有绑定服务的过程, 所以要阅读一下Android Service相关的知识, 跨进程通信的媒介aidl文件,我们也必须要了解怎么创建的,有什么规则,所以请先阅读一下Android AIDL使用这篇文章.
本篇文章为啥要先讲一讲startService的流程呢? 主要是为了后面分析bindService绑定服务的流程做个铺垫. 本文内容是基于 Android10源码上分析总结出的.
二. Service的启动过程
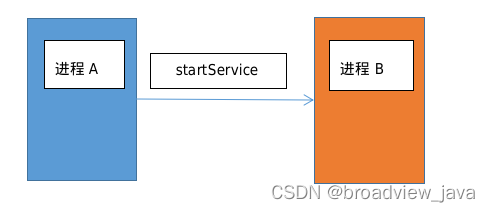
我们主要是为了把进程间通信机制搞明白, 假设我在进程A中通过调用 startService 这个方法,来启动进程B中的某个服务. 示例图:
2.1 首先来看下这段代码, 进程A中点击某个按钮后,启动进程B中的服务
        Intent intent = new Intent();
        ComponentName componentName = new ComponentName("com.example.进程B",
                "com.example.进程B.MyService");
        intent.setComponent(componentName);
        startService(intent);
要启动 Service ,我们会调用 startService 方法,它在 ContextImpl.java 中实现,代码如下
frameworks/base/core/java/android/app/Contextlmpl.java
    @Override
    public ComponentName startService(Intent service) {
        warnIfCallingFromSystemProcess();
        return startServiceCommon(service, false, mUser);
    }
接下来继续调用startServiceCommon方法, 这里为了跟踪流程,我们只把关键代码贴出(下同)
private ComponentName startServiceCommon(Intent service, boolean requireForeground,
            UserHandle user) {

        //这里为了跟踪流程,我们只把关键代码贴出
        .....

     ComponentName cn = ActivityManager.getService().startService(
                mMainThread.getApplicationThread(), service, service.resolveTypeIfNeeded(
                            getContentResolver()), requireForeground,
                            getOpPackageName(), user.getIdentifier());

        ....

}
到这里,我们来看看 ActivityManager.getService() 是什么
@UnsupportedAppUsage
    public static IActivityManager getService() {
        return IActivityManagerSingleton.get();
    }
@UnsupportedAppUsage
private static final Singleton<IActivityManager> IActivityManagerSingleton =
new Singleton<IActivityManager>() {
@Override
protected IActivityManager create() {
final IBinder b = ServiceManager.getService(Context.ACTIVITY_SERVICE);
final IActivityManager am = IActivityManager.Stub.asInterface(b);
return am;
}
};IBinder b = ServiceManager.getService(Context.ACTIVITY_SERVICE)这句话拿到AMS的Stub (AMS服务实体的存根), 然后 IActivityManager.Stub.asInterface(b) 在转换成一个AMS服务的代理Proxy对象(供客户端调用,AMS对应的就是ActivityManager). 那么am 这个对象就可以跨进程调用AMS中的方法了. 那么理所当然的就调用 AMS.startService方法
2.2 接着来查看 AMS startService方法,如下所示:
frameworks/base/services/core/java/com/android/server/am/ActivityManagerService.java
 @Override
    public ComponentName startService(IApplicationThread caller, Intent service,
            String resolvedType, boolean requireForeground, String callingPackage, int userId)
            throws TransactionTooLargeException {
.....
.....
        try {
                res = mServices.startServiceLocked(caller, service,
                        resolvedType, callingPid, callingUid,
                        requireForeground, callingPackage, userId);
            } finally {
                Binder.restoreCallingIdentity(origId);
            }

.....
.....

}
注释 处调用 mServices.startServiceLocked 方法, mServices 的类型是 ActiveServices,
ActiveServices startServiceLocked 方法代码如下所示:
framewoks/base/services/core/java/com/android/server/am/ActiveServices.java
ComponentName startServiceLocked(IApplicationThread caller, Intent service, String resolvedType,
            int callingPid, int callingUid, boolean fgRequired, String callingPackage,
            final int userId, boolean allowBackgroundActivityStarts)
            throws TransactionTooLargeException {

.....
.....
    ServiceLookupResult res =
            retrieveServiceLocked(service, null, resolvedType, callingPackage,
                    callingPid, callingUid, userId, true, callerFg, false, false);

    //其中 ServiceRecord 用于记录一个Service的信息
    ServiceRecord r = res.record;

    //方法最后一行
    ComponentName cmp = startServiceInnerLocked(smap, service, r, callerFg, addToStarting);
    return cmp;
.....
.....
}
retrieveServiceLocked 方法会找是否有与参数 service 对应的
ServiceRecord ,如果没有找到,就会调用 PackageManagerService 去获取参数 service 对应的
Service 信息,并封装到 ServiceRecord 中,最后将 ServiceRecord 封装为 ServiceLookupResult
返回。 方法中的最后一行代码 接着调用startServiceInnerLocked继续
 ComponentName startServiceInnerLocked(ServiceMap smap, Intent service, ServiceRecord r,
            boolean callerFg, boolean addToStarting) throws TransactionTooLargeException {
.....

    String error = bringUpServiceLocked(r, service.getFlags(), callerFg, false, false);
        if (error != null) {
            return new ComponentName("!!", error);
        }

.....
}
在startServiceInnerLocked 方法中又调用了 bringUpServiceLocked 方法
 private String bringUpServiceLocked(ServiceRecord r, int intentFlags, boolean execInFg,
            boolean whileRestarting, boolean permissionsReviewRequired)
            throws TransactionTooLargeException {
.....
.....
        //获取service所在的进程名
        final String procName = r.processName;
        HostingRecord hostingRecord = new HostingRecord("service", r.instanceName);
        ProcessRecord app;

       //如果进程存在, 则调用 realStartServiceLocked
       if (app != null && app.thread != null) {
                try {
                    app.addPackage(r.appInfo.packageName, r.appInfo.longVersionCode, mAm.mProcessStats);
                    realStartServiceLocked(r, app, execInFg);
                    return null;
                } catch (TransactionTooLargeException e) {
                    throw e;
                } catch (RemoteException e) {
                    Slog.w(TAG, "Exception when starting service " + r.shortInstanceName, e);
                }

                // If a dead object exception was thrown -- fall through to
                // restart the application.
            }


    //如果进程不存在,则需要重新fork一个新的进程
    if (app == null && !permissionsReviewRequired) {
            if ((app=mAm.startProcessLocked(procName, r.appInfo, true, intentFlags,
                    hostingRecord, false, isolated, false)) == null) {
                String msg = "Unable to launch app "
                        + r.appInfo.packageName + "/"
                        + r.appInfo.uid + " for service "
                        + r.intent.getIntent() + ": process is bad";
                Slog.w(TAG, msg);
                bringDownServiceLocked(r);
                return msg;
            }
            if (isolated) {
                r.isolatedProc = app;
            }
        }
.....
}
三. service所在的进程B已经启动过
我们先来看稍微简单的场景, 进程B已经启动过
那么就调用realStartServiceLocked 方法启动 Service
 private final void realStartServiceLocked(ServiceRecord r,
            ProcessRecord app, boolean execInFg) throws RemoteException {

....
  app.thread.scheduleCreateService(r, r.serviceInfo,
                    mAm.compatibilityInfoForPackage(r.serviceInfo.applicationInfo),
                    app.getReportedProcState());
            r.postNotification();
            created = true;

....
}
在realStartServiceLocked方法中调用了 app.thread scheduleCreateService 方法。其
app.thread 是IApplicationThread 类型的,它的实现是 ActivityThread 的内部类
ApplicationThread.
AppIicationThread scheduleCreateService 方法如下所示:
public final void scheduleCreateService(IBinder token,
                ServiceInfo info, CompatibilityInfo compatInfo, int processState) {
            updateProcessState(processState, false);
            CreateServiceData s = new CreateServiceData();
            s.token = token;
            s.info = info;
            s.compatInfo = compatInfo;

            sendMessage(H.CREATE_SERVICE, s);
        }
到这里,就看到了我们熟悉的Handler代码 发送一个CREATE_SERVICE的消息,处理的代码:
case CREATE_SERVICE:
                    Trace.traceBegin(Trace.TRACE_TAG_ACTIVITY_MANAGER, ("serviceCreate: " + String.valueOf(msg.obj)));
                    handleCreateService((CreateServiceData)msg.obj);
                    Trace.traceEnd(Trace.TRACE_TAG_ACTIVITY_MANAGER);
break;@UnsupportedAppUsage
private void handleCreateService(CreateServiceData data) {
// If we are getting ready to gc after going to the background, well
// we are back active so skip it.
......
//获取要启动 Service 的应用程序的 LoadedApk
LoadedApk packageInfo = getPackageInfoNoCheck(
data.info.applicationInfo, data.compatInfo);
Service service = null;
try {
//获取类加载器
java.lang.ClassLoader cl = packageInfo.getClassLoader();
long startTime = CheckTime.getTime();
//创建service实例
service = packageInfo.getAppFactory()
.instantiateService(cl, data.info.name, data.intent);
CheckTime.checkTime(startTime, "instantiate service");
try {
if (localLOGV) Slog.v(TAG, "Creating service " + data.info.name);
//创建Service 的上下文环境 Contextimpl 对象
ContextImpl context = ContextImpl.createAppContext(this, packageInfo);
context.setOuterContext(service);
Application app = packageInfo.makeApplication(false, mInstrumentation);
//初始化service
service.attach(context, this, data.info.name, data.token, app,
ActivityManager.getService());
//回调服务的生命周期onCreate方法,这样子服务就启动了
service.onCreate();
//将启动的service加入到ActivityThread的成员变量mServices中
mServices.put(data.token, service);
try {
ActivityManager.getService().serviceDoneExecuting(
data.token, SERVICE_DONE_EXECUTING_ANON, 0, 0);
} catch (RemoteException e) {
throw e.rethrowFromSystemServer();
}
.....
}好了,到这里 service就启动了.
四. service所在的进程B未创建
我们来看第二种情况, 假设service所在的进程B未创建,那我们就走 mAm.startProcessLocked方法
frameworks/base/services/core/java/com/android/server/am/ActivityManagerService.java
 @GuardedBy("mService")
    final ProcessRecord startProcessLocked(String processName, ApplicationInfo info,
            boolean knownToBeDead, int intentFlags, HostingRecord hostingRecord,
            boolean allowWhileBooting, boolean isolated, int isolatedUid, boolean keepIfLarge,
            String abiOverride, String entryPoint, String[] entryPointArgs, Runnable crashHandler) {
......
......

    //如果进程不存在, 则创建一个新的进程
    if (app == null) {
            checkSlow(startTime, "startProcess: creating new process record");
            app = newProcessRecordLocked(info, processName, isolated, isolatedUid, hostingRecord);


    //接下来就启动目标进程
    final boolean success = startProcessLocked(app, hostingRecord, abiOverride);
        checkSlow(startTime, "startProcess: done starting proc!");
        return success ? app : null;

.....
.....

}启动目标应用进程的流程,可以查阅笔者的另一篇文章Android 进程间通信机制(四) 应用进程启动过程


 1087
1087


 被折叠的 条评论
为什么被折叠?
被折叠的 条评论
为什么被折叠?
 到【灌水乐园】发言


