


Python实现卷积层:
def conv2(X,k):
    X_row,X_col=X.shape
    k_row,k_col=k.shape
    ret_row,ret_col=X_row-k_row+1,X_col-k_col+1
    ret=numpy.empty((ret_row,ret_col))
    for i in range(ret_row):
        for j in range(ret_col):
            sub=X[i:i+k_row, j:j+k_col]
            ret[i,j]=numpy.sum(sub*k)
    return ret
class ConvLayer:
    def __init__(self,in_channel,out_channel,kernel_size):
        self.w=numpy.random.randn(in_channel,out_channel,kernel_size[0],kernel_size[1])
        self.b=numpy.zeros((out_channel))
    def _relu(self,x):
        x[x<0]=0
        return x
    def forward(self,in_data):
        in_channel,in_row,in_col=in_data.shape
        out_channel,kernel_row,kernel_col=self.w.shape[1],self.w.shape[2],self.w.shape[3]
        self.topVal=numpy.zeros((out_channel,in_row-kernel_row+1,in_col-kernel_col+1))
        for j in range(out_channel):
            for i in range(in_channel):
                self.topVal[j] += conv2(in_data[i],self.w[i,j])
            self.topVal[j] +=self.b[j]
            self.topVal[j] = self._relu(self.topVal[j])
        return self.topVal
卷积层实例
不同卷积核对图像的处理效果不同,这里使用了Sobel Kernel提取图像纵向梯度。
Kernel=⎡⎣⎢−101−202−101⎤⎦⎥
img=cv2.imread('4_1.bmp',0) #flag=0 : return a grayscale image
row,col=img.shape
in_data=img.reshape(1,row,col)
in_data=in_data.astype(numpy.float)/255
meanConv=ConvLayer(1,1,(3,3))
meanConv.w[0,0]=numpy.array([[-1,-2,-1],[0,0,0],[1,2,1]])
meanOut=meanConv.forward(in_data)
plt.figure('result')
plt.subplot(211);
plt.imshow(in_data[0],cmap='Greys_r')

plt.subplot(212);
plt.imshow(meanOut[0],cmap='Greys_r')
plt.show()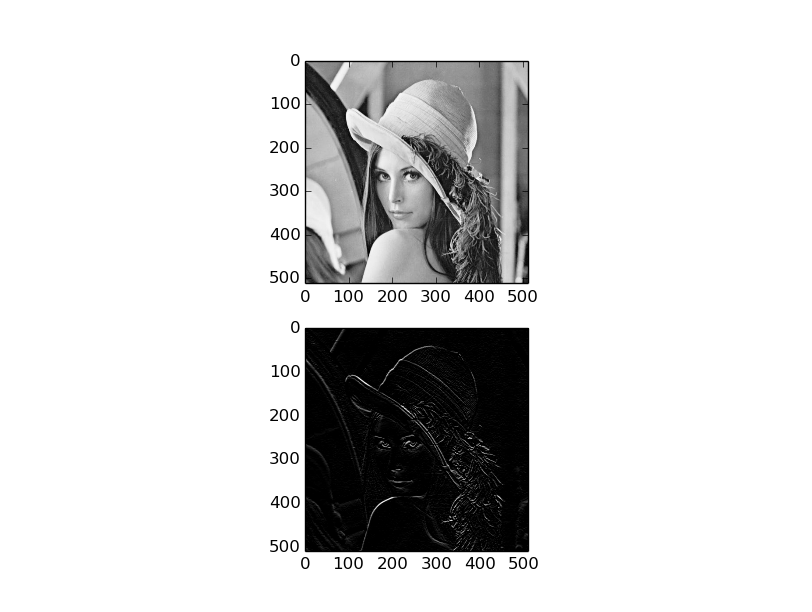


 5万+
5万+


 被折叠的 条评论
为什么被折叠?
被折叠的 条评论
为什么被折叠?
 到【灌水乐园】发言


