


单元测试是对软件中的最小可测试单元进行检查和验证(比如说工厂在组装一台电视机之前,会对每个元件都进行测试,这,就是单元测试)。之所以要进行单元测试是因为证明这段代码的行为和我们期望的一致。这篇文章讲到两种测试,单元测试和ui测试。单元测试用的Junit库,ui测试用的是espresso库。
单元测试:
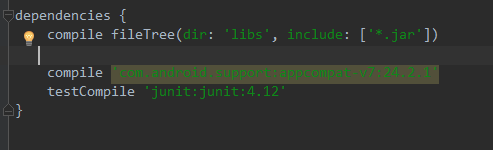
环境搭配:在app项目下的bulid.xml中添加junit库。
在src目录下,新建test,再在test目录下新建java。这样子环境就搭好了。(ps:AS新建一个工程时候,已经帮我们搭配环境了,忽略上面的环境搭配吧)
在java目录下的包名下,新建一个类名为Calculator,然后把下面的代码复制进去:
package com.james.test;

/**
 * Created by 1 on 2017/2/23.
 */

public class Calculator {
    public double sum(double a, double b){
        return a + b;
    }

    public double substract(double a, double b){
        return 0;
    }

    public double divide(double a, double b){
        return 0;
    }

    public double multiply(double a, double b){
        return 0;
    }
}
ps:substract,divide,multiply直接返回0,测试是会报错的。原因是assertEquals 这个方法,如果这个doubleIsDifferent(expected, actual, delta) 是true,就会抛异常了。具体doubleIsDifferent(expected, actual, delta) 什么时候返回true,什么时候返回false,有兴趣的可以跟踪代码看看。
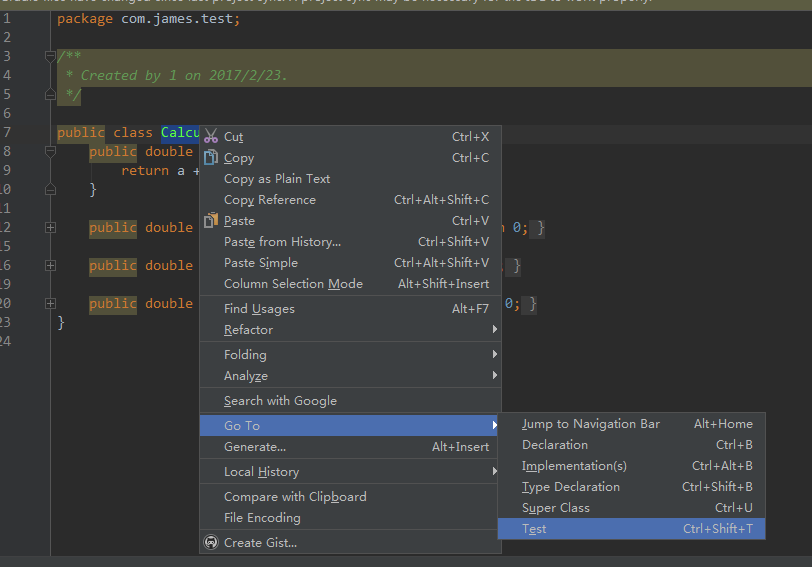
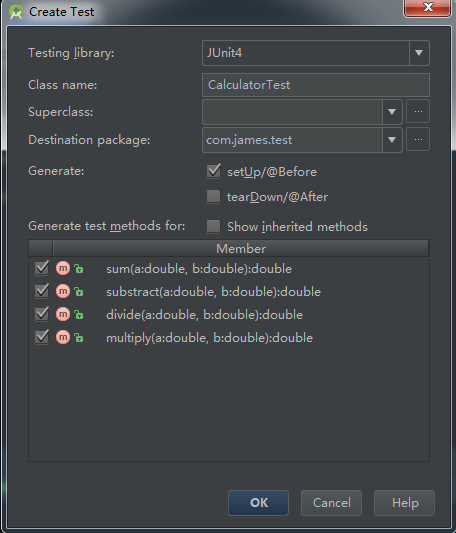
选中Calculator这个类,右击——>go to ——>test——>Create New Test ,选择setUp/@Before和下面的四个Member.然后确定。选择第二包的路径,确定。就会在指定的路径下生成CalculatorTest这个类。
把下面代码复制进Calculator
package com.james.test;

import org.junit.Before;
import org.junit.Test;

import static org.junit.Assert.assertEquals;

/**
 * Created by 1 on 2017/2/23.
 */
public class CalculatorTest {
    private Calculator mCalculator;

    @Before
    public void setUp() throws Exception {
        mCalculator = new Calculator();
    }

    @Test
    public void testSum() throws Exception {
        //expected: 6, sum of 1 and 5
        assertEquals(6d, mCalculator.sum(1d, 5d), 0);
    }

    @Test
    public void testSubstract() throws Exception {
        assertEquals(1d, mCalculator.substract(5d, 4d), 0);
    }

    @Test
    public void testDivide() throws Exception {
        assertEquals(4d, mCalculator.divide(20d, 5d), 0);
    }

    @Test
    public void testMultiply() throws Exception {
        assertEquals(10d, mCalculator.multiply(2d, 5d), 0);
    }

}
右击测试方法,run测试方法,即可看到结果。比如说testSum()。选中testSum方法,右击——>run testSum()。控制台是绿色说明程序运行没有问题,红色代表有问题。
assertEquals(6d, mCalculator.sum(1d, 5d), 0);//第一个参数是期望值,第二参数是实际运行得到的结果,第三个参数差值范围,也就是说第一个参数减去第二个参数的值小于或等于第三个参数的值才不会出错。
ui测试:
1、搭建环境:
在app项目下build.xml中写入testInstrumentationRunner "android.support.test.runner.AndroidJUnitRunner",
dependencies {androidTestCompile('com.android.support.test.espresso:espresso-core:2.2.2', { exclude group: 'com.android.support', module: 'support-annotations' })}

这样环境就算搭建好。(ps:AS新建一个工程时候,已经帮我们搭配环境了,忽略上面的环境搭配吧)
2、定义布局:
activity_main.xml:
<RelativeLayout xmlns:android="http://schemas.android.com/apk/res/android"
    xmlns:tools="http://schemas.android.com/tools"
    android:layout_width="match_parent"
    android:layout_height="match_parent"
    android:paddingBottom="@dimen/activity_vertical_margin"
    android:paddingLeft="@dimen/activity_horizontal_margin"
    android:paddingRight="@dimen/activity_horizontal_margin"
    android:paddingTop="@dimen/activity_vertical_margin"
    tools:context=".MainActivity">

    <TextView
        android:id="@+id/textView"
        android:layout_width="wrap_content"
        android:layout_height="wrap_content"
        android:text="hello world" />

    <EditText
        android:id="@+id/editText"
        android:layout_width="match_parent"
        android:layout_height="wrap_content"
        android:layout_below="@+id/textView"
        android:hint="Enter your name here" />

    <Button
        android:layout_width="match_parent"
        android:layout_height="wrap_content"
        android:layout_below="@+id/editText"
        android:onClick="sayHello"
        android:text="Say hello!" />
</RelativeLayout>package com.james.test;
import android.os.Bundle;
import android.support.v7.app.AppCompatActivity;
import android.util.Log;
import android.view.View;
import android.widget.EditText;
import android.widget.TextView;
public class MainActivity extends AppCompatActivity {
@Override
protected void onCreate(Bundle savedInstanceState) {
super.onCreate(savedInstanceState);
setContentView(R.layout.activity_main);
}
public void sayHello(View v){
TextView textView = (TextView) findViewById(R.id.textView);
EditText editText = (EditText) findViewById(R.id.editText);
textView.setText("Hello, " + editText.getText().toString() + "!");
Log.d("debug","------------Hello, " + editText.getText().toString() + "!");
}
}
在androidTest目录下,新建一个类MainActivityInstrumentationTest:
package com.james.test;

import android.support.test.rule.ActivityTestRule;
import android.support.test.runner.AndroidJUnit4;
import android.test.suitebuilder.annotation.LargeTest;

import org.junit.Rule;
import org.junit.Test;
import org.junit.runner.RunWith;

import static android.support.test.espresso.Espresso.onView;
import static android.support.test.espresso.action.ViewActions.click;
import static android.support.test.espresso.action.ViewActions.closeSoftKeyboard;
import static android.support.test.espresso.action.ViewActions.typeText;
import static android.support.test.espresso.assertion.ViewAssertions.matches;
import static android.support.test.espresso.matcher.ViewMatchers.withId;
import static android.support.test.espresso.matcher.ViewMatchers.withText;

/**
 * Created by 1 on 2017/2/23.
 */

@RunWith(AndroidJUnit4.class)
@LargeTest
public class MainActivityInstrumentationTest {

    private static final String STRING_TO_BE_TYPED = "Peter";

    @Rule
    public ActivityTestRule<MainActivity> mActivityRule = new ActivityTestRule<>(MainActivity.class);

    @Test
    public void sayHello() {
        onView(withId(R.id.editText)).perform(typeText(STRING_TO_BE_TYPED), closeSoftKeyboard()); //line 1

        onView(withText("Say hello!")).perform(click()); //line 2

        String expectedText = "Hello, " + STRING_TO_BE_TYPED + "!";
        onView(withId(R.id.textView)).check(matches(withText(expectedText))); //line 3
    }
}ps:魅蓝手机会报错,说不匹配,原因是editText.getText().toString()获取到的是peter,而不是Peter,不知道是什么原因。正常来说应该是Peter才对啊。红米测试没有问题。
onView(),check()等方法什么意思,建议大家看看sdk文档。在training——>Best Practices for Testing——>Testing UI for a Single App。

参考文档:
1、http://www.jianshu.com/p/3685a601b388
2、http://baike.baidu.com/item/单元测试?sefr=cr
3、sdk文档


 1007
1007


 被折叠的 条评论
为什么被折叠?
被折叠的 条评论
为什么被折叠?
 到【灌水乐园】发言


