


 本文详细比较了标准Spring框架与Spring Boot在MVC、Security模块的应用差异,SpringBoot通过简化配置和自动功能实现,加速了开发过程。SpringBoot依赖自动配置,只需web starter,而Spring需手动配置更多。
A Comparison Between Spring and Spring Boot
by baeldung
1. Overview
In this write-up, we're going to look at the differences between the standard Spring frameworks
and Spring Boot.

We'll focus on and discuss how the modules of Spring, like MVC and Security, differ when used in core Spring versus when used with Boot.
2. What Is Spring?
Simply put, the Spring framework provides comprehensive infrastructure support for developing Java applications.
It's packed with some nice features like Dependency Injection and out of the box modules like:
Spring JDBC
Spring MVC
Spring Security
Spring AOP
Spring ORM
Spring Test
These modules can drastically reduce the development time of an application.
For example, in the early days of Java web development, we needed to write a lot of boilerplate code to insert a record into a data source. But by using the JDBCTemplate of the Spring JDBC module we can reduce it to a few lines of code with only a few configurations.
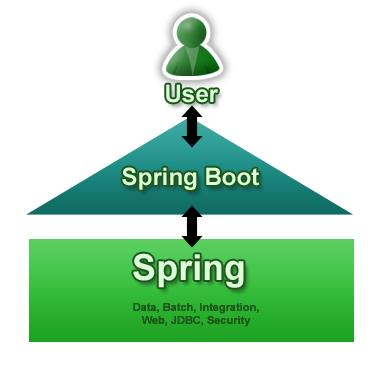
3. What Is Spring Boot?
Spring Boot is basically an extension of the Spring framework which eliminated the boilerplate configurations required for setting up a Spring application.
It takes an opinionated view of the Spring platform which paved the way for a faster and more efficient development eco-system.
Here are just a few of the features in Spring Boot:
- Opinionated ‘starter' dependencies to simplify build and application configuration
- Embedded server to avoid complexity in application deployment
- Metrics, Health check, and externalized configuration
- Automatic config for Spring functionality – whenever possible
Let's get familiar with both of these frameworks step by step.
4. Maven Dependencies
First of all, let's look at the minimum dependencies required to create a web application using Spring:
<dependency>
    <groupId>org.springframework</groupId>
    <artifactId>spring-web</artifactId>
    <version>5.2.9.RELEASE</version>
</dependency>
<dependency>
    <groupId>org.springframework</groupId>
    <artifactId>spring-webmvc</artifactId>
    <version>5.2.9.RELEASE</version>
</dependency>
Unlike Spring, Spring Boot requires only one dependency to get a web application up and running:
<dependency>
    <groupId>org.springframework.boot</groupId>
    <artifactId>spring-boot-starter-web</artifactId>
    <version>2.3.4.RELEASE</version>
</dependency>
All other dependencies are added automatically to the final archive during build time.
Another good example is testing libraries. We usually use the set of Spring Test, JUnit, Hamcrest, and Mockito libraries. In a Spring project, we should add all these libraries as dependencies.
But in Spring Boot, we only need the starter dependency for testing to automatically include these libraries.
Spring Boot provides a number of starter dependencies for different Spring modules. Some of the most commonly used ones are:
spring-boot-starter-data-jpa
spring-boot-starter-security
spring-boot-starter-test
spring-boot-starter-web
spring-boot-starter-thymeleaf
For the full list of starters, also check out the Spring documentation.
5. MVC Configuration
Let's explore the configuration required to create a JSP web application using both Spring and Spring Boot.
Spring requires defining the dispatcher servlet, mappings, and other supporting configurations. We can do this using either the web.xml file or an Initializer class:
public class MyWebAppInitializer implements WebApplicationInitializer {

    @Override
    public void onStartup(ServletContext container) {
        AnnotationConfigWebApplicationContext context
          = new AnnotationConfigWebApplicationContext();
        context.setConfigLocation("com.baeldung");

        container.addListener(new ContextLoaderListener(context));

        ServletRegistration.Dynamic dispatcher = container
          .addServlet("dispatcher", new DispatcherServlet(context));

        dispatcher.setLoadOnStartup(1);
        dispatcher.addMapping("/");
    }
}
We also need to add the @EnableWebMvc annotation to a @Configuration class and define a view-resolver to resolve the views returned from the controllers:
@EnableWebMvc
@Configuration
public class ClientWebConfig implements WebMvcConfigurer {
   @Bean
   public ViewResolver viewResolver() {
      InternalResourceViewResolver bean
        = new InternalResourceViewResolver();
      bean.setViewClass(JstlView.class);
      bean.setPrefix("/WEB-INF/view/");
      bean.setSuffix(".jsp");
      return bean;
   }
}
By comparison to all this, Spring Boot only needs a couple of properties to make things work, once we've added the web starter:
spring.mvc.view.prefix=/WEB-INF/jsp/
spring.mvc.view.suffix=.jsp
All the Spring configuration above is automatically included by adding the Boot web starter, through a process called auto-configuration.
What this means is that Spring Boot will look at the dependencies, properties, and beans that exist in the application and enable configuration based on these.
Of course, if we want to add our own custom configuration, then the Spring Boot auto-configuration will back away.
5.1. Configuring Template Engine
Let's now learn how to configure a Thymeleaf template engine in both Spring and Spring Boot.
In Spring we need to add the thymeleaf-spring5 dependency and some configurations for the view resolver:
@Configuration
@EnableWebMvc
public class MvcWebConfig implements WebMvcConfigurer {

    @Autowired
    private ApplicationContext applicationContext;

    @Bean
    public SpringResourceTemplateResolver templateResolver() {
        SpringResourceTemplateResolver templateResolver =
          new SpringResourceTemplateResolver();
        templateResolver.setApplicationContext(applicationContext);
        templateResolver.setPrefix("/WEB-INF/views/");
        templateResolver.setSuffix(".html");
        return templateResolver;
    }

    @Bean
    public SpringTemplateEngine templateEngine() {
        SpringTemplateEngine templateEngine = new SpringTemplateEngine();
        templateEngine.setTemplateResolver(templateResolver());
        templateEngine.setEnableSpringELCompiler(true);
        return templateEngine;
    }

    @Override
    public void configureViewResolvers(ViewResolverRegistry registry) {
        ThymeleafViewResolver resolver = new ThymeleafViewResolver();
        resolver.setTemplateEngine(templateEngine());
        registry.viewResolver(resolver);
    }
}
Spring Boot 1 required only the dependency of spring-boot-starter-thymeleaf to enable Thymeleaf support in a web application. But because of the new features in Thymeleaf3.0, we have to add thymeleaf-layout-dialect also as a dependency in a Spring Boot 2 web application. Alternatively, we can choose to add a spring-boot-starter-thymeleaf dependency that'll take care of all this for us.
Once the dependencies are in place, we can add the templates to the src/main/resources/templates folder and the Spring Boot will display them automatically.
6. Spring Security Configuration
For the sake of simplicity, we'll see how the default HTTP Basic authentication is enabled using these frameworks.
Let's start by looking at the dependencies and configuration we need to enable Security using Spring.
Spring requires both the standard spring-security-web and spring-security-config dependencies to set up Security in an application.
Next, we need to add a class that extends the WebSecurityConfigurerAdapter and makes use of the @EnableWebSecurity annotation:
@Configuration
@EnableWebSecurity
public class CustomWebSecurityConfigurerAdapter extends WebSecurityConfigurerAdapter {

    @Autowired
    public void configureGlobal(AuthenticationManagerBuilder auth) throws Exception {
        auth.inMemoryAuthentication()
          .withUser("user1")
            .password(passwordEncoder()
            .encode("user1Pass"))
          .authorities("ROLE_USER");
    }

    @Override
    protected void configure(HttpSecurity http) throws Exception {
        http.authorizeRequests()
          .anyRequest().authenticated()
          .and()
          .httpBasic();
    }

    @Bean
    public PasswordEncoder passwordEncoder() {
        return new BCryptPasswordEncoder();
    }
}
Here we're using inMemoryAuthentication to set up the authentication.
Similarly, Spring Boot also requires these dependencies to make it work. But we need to define only the dependency of spring-boot-starter-security as this will automatically add all the relevant dependencies to the classpath.
The security configuration in Spring Boot is the same as the one above.
If you need to know how the JPA configuration can be achieved in both Spring and Spring Boot, then check out our article A Guide to JPA with Spring.
7. Application Bootstrap
The basic difference in bootstrapping of an application in Spring and Spring Boot lies with the servlet. Spring uses either the web.xml or SpringServletContainerInitializer as its bootstrap entry point.
On the other hand, Spring Boot uses only Servlet 3 features to bootstrap an application. Let's talk about this in detail.
7.1. How Spring Bootstraps?
Spring supports both the legacy web.xml way of bootstrapping as well as the latest Servlet 3+ method.
Let's see the web.xml approach in steps:
Servlet container (the server) reads web.xml
The DispatcherServlet defined in the web.xml is instantiated by the container
DispatcherServlet creates WebApplicationContext by reading WEB-INF/{servletName}-servlet.xml
Finally, the DispatcherServlet registers the beans defined in the application context
Here's how Spring bootstraps using Servlet 3+ approach:
The container searches for classes implementing ServletContainerInitializer and executes
The SpringServletContainerInitializer finds all classes implementing WebApplicationInitializer
The WebApplicationInitializer creates the context with XML or @Configuration classes
The WebApplicationInitializer creates the DispatcherServlet with the previously created context.
7.2. How Spring Boot Bootstraps?
The entry point of a Spring Boot application is the class which is annotated with @SpringBootApplication:
@SpringBootApplication
public class Application {
    public static void main(String[] args) {
        SpringApplication.run(Application.class, args);
    }
}
By default, Spring Boot uses an embedded container to run the application. In this case, Spring Boot uses the public static void main entry-point to launch an embedded web server.
Also, it takes care of the binding of the Servlet, Filter, and ServletContextInitializer beans from the application context to the embedded servlet container.
Another feature of Spring Boot is that it automatically scans all the classes in the same package or sub packages of the Main-class for components.
Spring Boot provides the option of deploying it as a web archive in an external container as well. In this case, we have to extend the SpringBootServletInitializer:
@SpringBootApplication
public class Application extends SpringBootServletInitializer {
    // ...
}
Here the external servlet container looks for the Main-class defined in the META-INF file of the web archive and the SpringBootServletInitializer will take care of binding the Servlet, Filter, and ServletContextInitializer.
8. Packaging and Deployment
Finally, let's see how an application can be packaged and deployed. Both of these frameworks support the common package managing technologies like Maven and Gradle. But when it comes to deployment, these frameworks differ a lot.
For instance, the Spring Boot Maven Plugin provides Spring Boot support in Maven. It also allows packaging executable jar or war archives and running an application “in-place”.
Some of the advantages of Spring Boot over Spring in the context of deployment include:
- Provides embedded container support
- Provision to run the jars independently using the command java -jar
- Option to exclude dependencies to avoid potential jar conflicts when deploying in an external container
- Option to specify active profiles when deploying
- Random port generation for integration tests
9. Conclusion
In this tutorial, we've learned about the differences between Spring and Spring Boot.
In a few words, we can say that Spring Boot is simply an extension of Spring itself to make development, testing, and deployment more convenient.


 1286
1286

 被折叠的 条评论
为什么被折叠?
被折叠的 条评论
为什么被折叠?
 到【灌水乐园】发言


