


 本文介绍了如何在SwiftUI应用中获取iOS设备的联系人列表,并结合SearchBar进行搜索操作。通过翻译Medium上的教程,详细展示了实现这一功能的步骤。
ios searchbar
联系信息解析 (Contact Information Parsing)
Create an identifiable struct for our contact information. Declare variables for the ID, first name, last name, and phone number as below:
为我们的联系信息创建一个可识别的结构。 声明ID,名字,姓氏和电话号码的变量,如下所示:
获取联系人 (Fetching Contacts)
Create a class that contains a function to fetch the contact information and returns an array of our ContactInfo struct. There can be more than one phone number per contact. In this tutorial, I used the first phone number only. Before returning the contacts array, we can sort it by first name, last name, or phone number:
创建一个包含函数的类,该函数用于获取联系信息并返回我们的ContactInfo结构的数组。 每个联系人可以有多个电话号码。 在本教程中,我仅使用第一个电话号码。 在返回contacts数组之前,我们可以按名字,姓氏或电话号码对其进行排序:
处理键盘 (Handling Keyboard)
Before starting on the UI, we need to add an extension of UIApplication for re-signing the keyboard when the editing ends:
在开始使用UI之前,我们需要添加UIApplication扩展,以便在编辑结束时重新为键盘签名:
联系人行视图 (Contact Row View)
Create a struct for the contact row that takes one ContactInfo and displays the first and last name in a Text view:
为使用一个ContactInfo并在Text视图中显示名字和姓氏的联系人行创建一个结构:
主视图(ContentView) (Main View (ContentView))
In our ContentView, we need to declare the three variables below:
在我们的ContentView ,我们需要声明以下三个变量:
contactwill hold an array of our contact list.contact将保存我们的联系人列表的数组。searchTextwill be used for the search text field.searchText将用于搜索文本字段。showCancelButtonwill determine when we are going to show the cancel button inside our view.showCancelButton将确定我们何时在视图中显示取消按钮。
Add the function below to fetch the content list using our previous FetchContents class. Use DispatchQueue.main.async to speed up the performance:
添加下面的函数以使用我们之前的FetchContents类获取内容列表。 使用DispatchQueue.main.async可以提高性能:
允许 (Permission)
Inside info.plist, we need to add the key and value below to get permission to use the user’s contact information. The value needs to describe your need to access the contact list.
在info.plist内部,我们需要在下面添加键和值以获取使用用户联系信息的权限。 该值需要描述您访问联系人列表的需求。
We still need to check if the permission got denied or restricted and request to access the contacts. Once we are granted access to the contact list, we can use our getContacts function to fetch the contacts:
我们仍然需要检查权限是否被拒绝或限制,并请求访问联系人。 一旦获得对联系人列表的访问权限,就可以使用getContacts函数获取联系人:
搜索栏 (SearchBar)
Create the search bar in SwiftUI below. Use the magnifying glass and x mark system symbols to mimic the look of the search bar found inside your phone’s app:
在下面的SwiftUI中创建搜索栏。 使用放大镜和x标记系统符号来模拟手机应用程序中发现的搜索栏的外观:
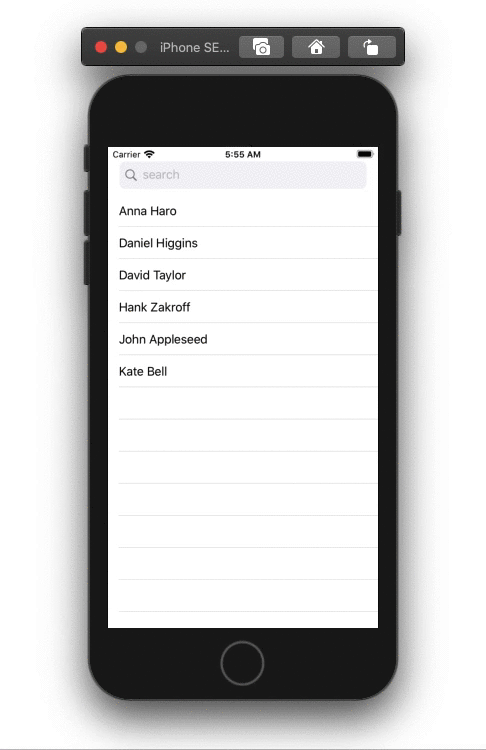
Embed the code above inside a VStack, then add the code below inside the same VStack. The List view contains the ContactRow for every contact we fetch. Use onAppear to fire up our requestAccess function:
将上面的代码嵌入到VStack ,然后将下面的代码添加到同一VStack 。 List视图包含我们获取的每个联系人的ContactRow 。 使用onAppear启动我们的requestAccess函数:
All done! Thanks for reading the article.
全做完了! 感谢您阅读本文。
ios searchbar


 685
685

 被折叠的 条评论
为什么被折叠?
被折叠的 条评论
为什么被折叠?
 到【灌水乐园】发言


