


ios自定义动画帧的hud
With iOS 13 Apple changed from a big, disruptive UI for silent mode and volume to smaller and more focused UIs, that don’t take up the whole screen. There are buttons in your app, where a feedback is more intuitive for the user, but not so important to disrupt the whole screen with an ActionSheet . Examples are “Added to favorites” or “Saved image”. For that, a simple info sheet at the top is great.
随着iOS 13的发布,苹果公司从用于破坏性模式和音量的大型破坏性UI变成了无法占据整个屏幕的更小且更具针对性的UI。 应用程序中有一些按钮,对于用户来说,反馈更直观,但使用ActionSheet破坏整个屏幕并不是那么重要。 例如“添加到收藏夹”或“保存的图像”。 为此,顶部的简单信息表很棒。
建立您的快速信息表 (Building your quick info sheet)
The HUD will be displayed in a layer above the main app interface. To do so, wrap the view elements in your ContentView in a ZStack . Than we can add the HUD in the ZStack . First, we create an simple HUD with only a Text as content. The modifiers create the iOS-HUD style. As background we use a blur UIViewRepresentable , but you can also use Color(.systemBackground) or any other color.
HUD将显示在主应用程序界面上方的图层中。 为此,将View元素包装在ZStack的ContentView中。 比我们可以在ZStack添加HUD。 首先,我们创建一个仅包含Text作为内容的简单HUD。 修改器创建iOS-HUD样式。 作为背景,我们使用模糊UIViewRepresentable ,但是您也可以使用Color(.systemBackground)或任何其他颜色。
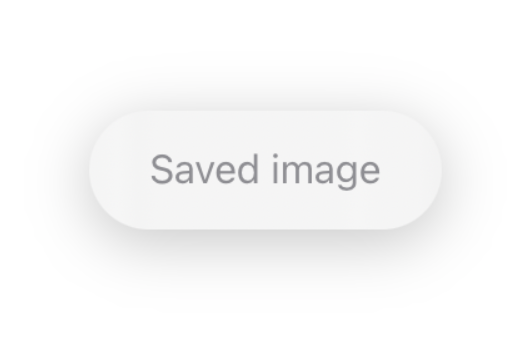
This looks great! When we put the HUD() in our ContentView , the HUD is in the middle of the view, instead of the top. Simply set the alignment of the ZStack to .top , and the OS does the rest. Via the safe margins, the HUD is always placed right.
看起来很棒! 当将HUD()放入ContentView ,HUD位于视图的中间,而不是顶部。 只需将ZStack的alignment设置为.top ,剩下的就由操作系统完成。 通过安全边距,HUD始终放置在正确的位置。
使HUD动画化 (Animating the HUD)
We want the HUD to be hidden by default, and moves from the top when we tap the Button .
我们希望HUD默认处于隐藏状态,并在单击Button时从顶部移动。

The animation is beautiful, but we want the button to only activate the HUD(), and that the HUD dismisses itself after time.
动画很漂亮,但是我们希望按钮仅激活HUD() ,并且HUD会在一段时间后关闭。
With the function added, the button only shows the HUD, and it dismisses itself after 2 seconds. Depending on what content you display, you can change the time in the dismissHUDAfterTime() method.
添加该功能后,该按钮仅显示HUD,并在2秒钟后关闭。 根据显示的内容,您可以在dismissHUDAfterTime()方法中更改时间。
更改HUD的内容 (Change the HUD’s content)
The HUD should only contain limited content. To amplify the message, add a system image to the HUD.
HUD应该只包含有限的内容。 要放大消息,请向HUD添加系统映像。
Change the Text to a Label and the HUD is instantly much more appealing and information rich. If you want to know more about LabelStyles , check my article about this topic out.
将Text更改为Label ,HUD会立即变得更具吸引力且信息丰富。 如果您想了解有关LabelStyles更多信息,请查看我有关此主题的文章 。

向HUD添加动作 (Adding actions to the HUD)
The HUD shouldn’t be used to add actions, but simple functionality can be very useful. For example when tapping the HUD, it dismisses itself.
HUD不应用于添加动作,但是简单的功能可能非常有用。 例如,在点击HUD时,它会自动关闭。
Or you can add message specific action like opening the Photos app.
或者,您可以添加特定于消息的操作,例如打开“照片”应用程序。
在详细视图中使用HUD (Using the HUD in a detail view)
When you use the HUD in a detail view, and not in the main view, you should still put the main view in the ZStack . Then add an @Binding and the Button in the detail view and it works perfectly fine.
当在详细视图中而不是在主视图中使用HUD时,仍应将主视图放在ZStack 。 然后在详细信息视图中添加一个@Binding和Button ,它可以很好地工作。
更多想法 (More ideas)
You have limited, but still many options on what to display in the HUD. For example, when you have a Slider or Picker to change the brightness in your app, you could display the brightness value in a HUD.
您在HUD中显示的内容有限,但仍有很多选择。 例如,当您使用Slider或Picker更改应用程序中的亮度时,可以在HUD中显示亮度值。

The same approach can be used, when you have a custom volume control. Together with .matchedGeometryEffect() you can create great transitions like this:
当您具有自定义音量控件时,可以使用相同的方法。 与.matchedGeometryEffect()一起,您可以创建出色的过渡效果,如下所示:
Although that looks complex, this is very very easy and needs only some lines of code.
尽管看起来很复杂,但这非常简单,只需要几行代码。
The most is only styling, but the important parts are the @Namespace , the .matchedGeometryEffect() modifiers and the if showHUD {} .
最多的是只造型,但重要的部分是@Namespace的.matchedGeometryEffect()修饰符和if showHUD {}
结论 (Conclusion)
When you want to give the user quick feedback, that an action happened, HUDs are the ideal element for you. They are not as interruptive than ActionSheets but can display much information with less content.
当您想给用户快速反馈,说明有动作发生时,HUD是您的理想选择。 它们不像ActionSheets那样具有干扰ActionSheets但是可以显示较少内容的大量信息。
翻译自: https://itnext.io/create-custom-info-huds-in-swiftui-a3c2baabbddb
ios自定义动画帧的hud


 2240
2240


 被折叠的 条评论
为什么被折叠?
被折叠的 条评论
为什么被折叠?
 到【灌水乐园】发言


