


ios小部件
Note: This is the third and final part of my 3-part widget tutorial. Make sure to complete part 1 and part 2 before continuing with this article.
注意: 这是我的3部分窗口小部件教程的第三部分也是最后一部分。 在继续本文之前, 请确保完成 第1部分 和 第2部分 。
Note: You’ll need Xcode 12 Beta 2 or higher to follow this tutorial.
注意: 您需要Xcode 12 Beta 2或更高版本才能遵循本教程。
So far, we have created a simple list-based app that displays different emoji along with their names, and allows you to view details about a specific emoji by tapping on it. Furthermore, we created a widget for our app–which can be small, medium, or large–and will display an emoji that is updated randomly every hour.
到目前为止,我们已经创建了一个简单的基于列表的应用程序,该应用程序显示不同的表情符号及其名称,并允许您通过点击查看特定表情符号的详细信息。 此外,我们为应用程序创建了一个小部件(大小,大小均可),并将显示每小时随机更新的表情符号。
In this final part of the tutorial, we will use SiriKit to add a new widget that the user can configure to display an emoji of their choice.
在本教程的最后一部分,我们将使用SiriKit添加一个新的小部件,用户可以配置该小部件来显示他们选择的表情符号。
用户可配置的小部件 (User-Configurable Widgets)
In some cases, we may want an app widget to display content chosen by the user. For example, a stock market app may let users choose a specific stock to display on a widget. Let’s go ahead and write some code to support adding a widget that displays an emoji of your choice.
在某些情况下,我们可能希望应用小部件显示用户选择的内容。 例如,股票市场应用程序可以让用户选择要显示在窗口小部件上的特定股票。 让我们继续编写一些代码,以支持添加显示您选择的表情符号的小部件。
目的定义 (Intent Definition)
To get started, we first need to create a custom intent definition; this is what will allow us to define customizable properties for our widget (i.e. the emoji). To create an intent definition click on the File menu, select New File and select SiriKit Intent Definition File; name your file SelectEmojiIntent.
首先,我们首先需要创建一个自定义的意图定义 ; 这就是允许我们为小部件(即表情符号)定义可自定义属性的原因。 要创建意图定义,请在“ 文件”菜单上单击,选择“ 新建文件”,然后选择“ SiriKit意图定义文件” ; 将文件SelectEmojiIntent 。
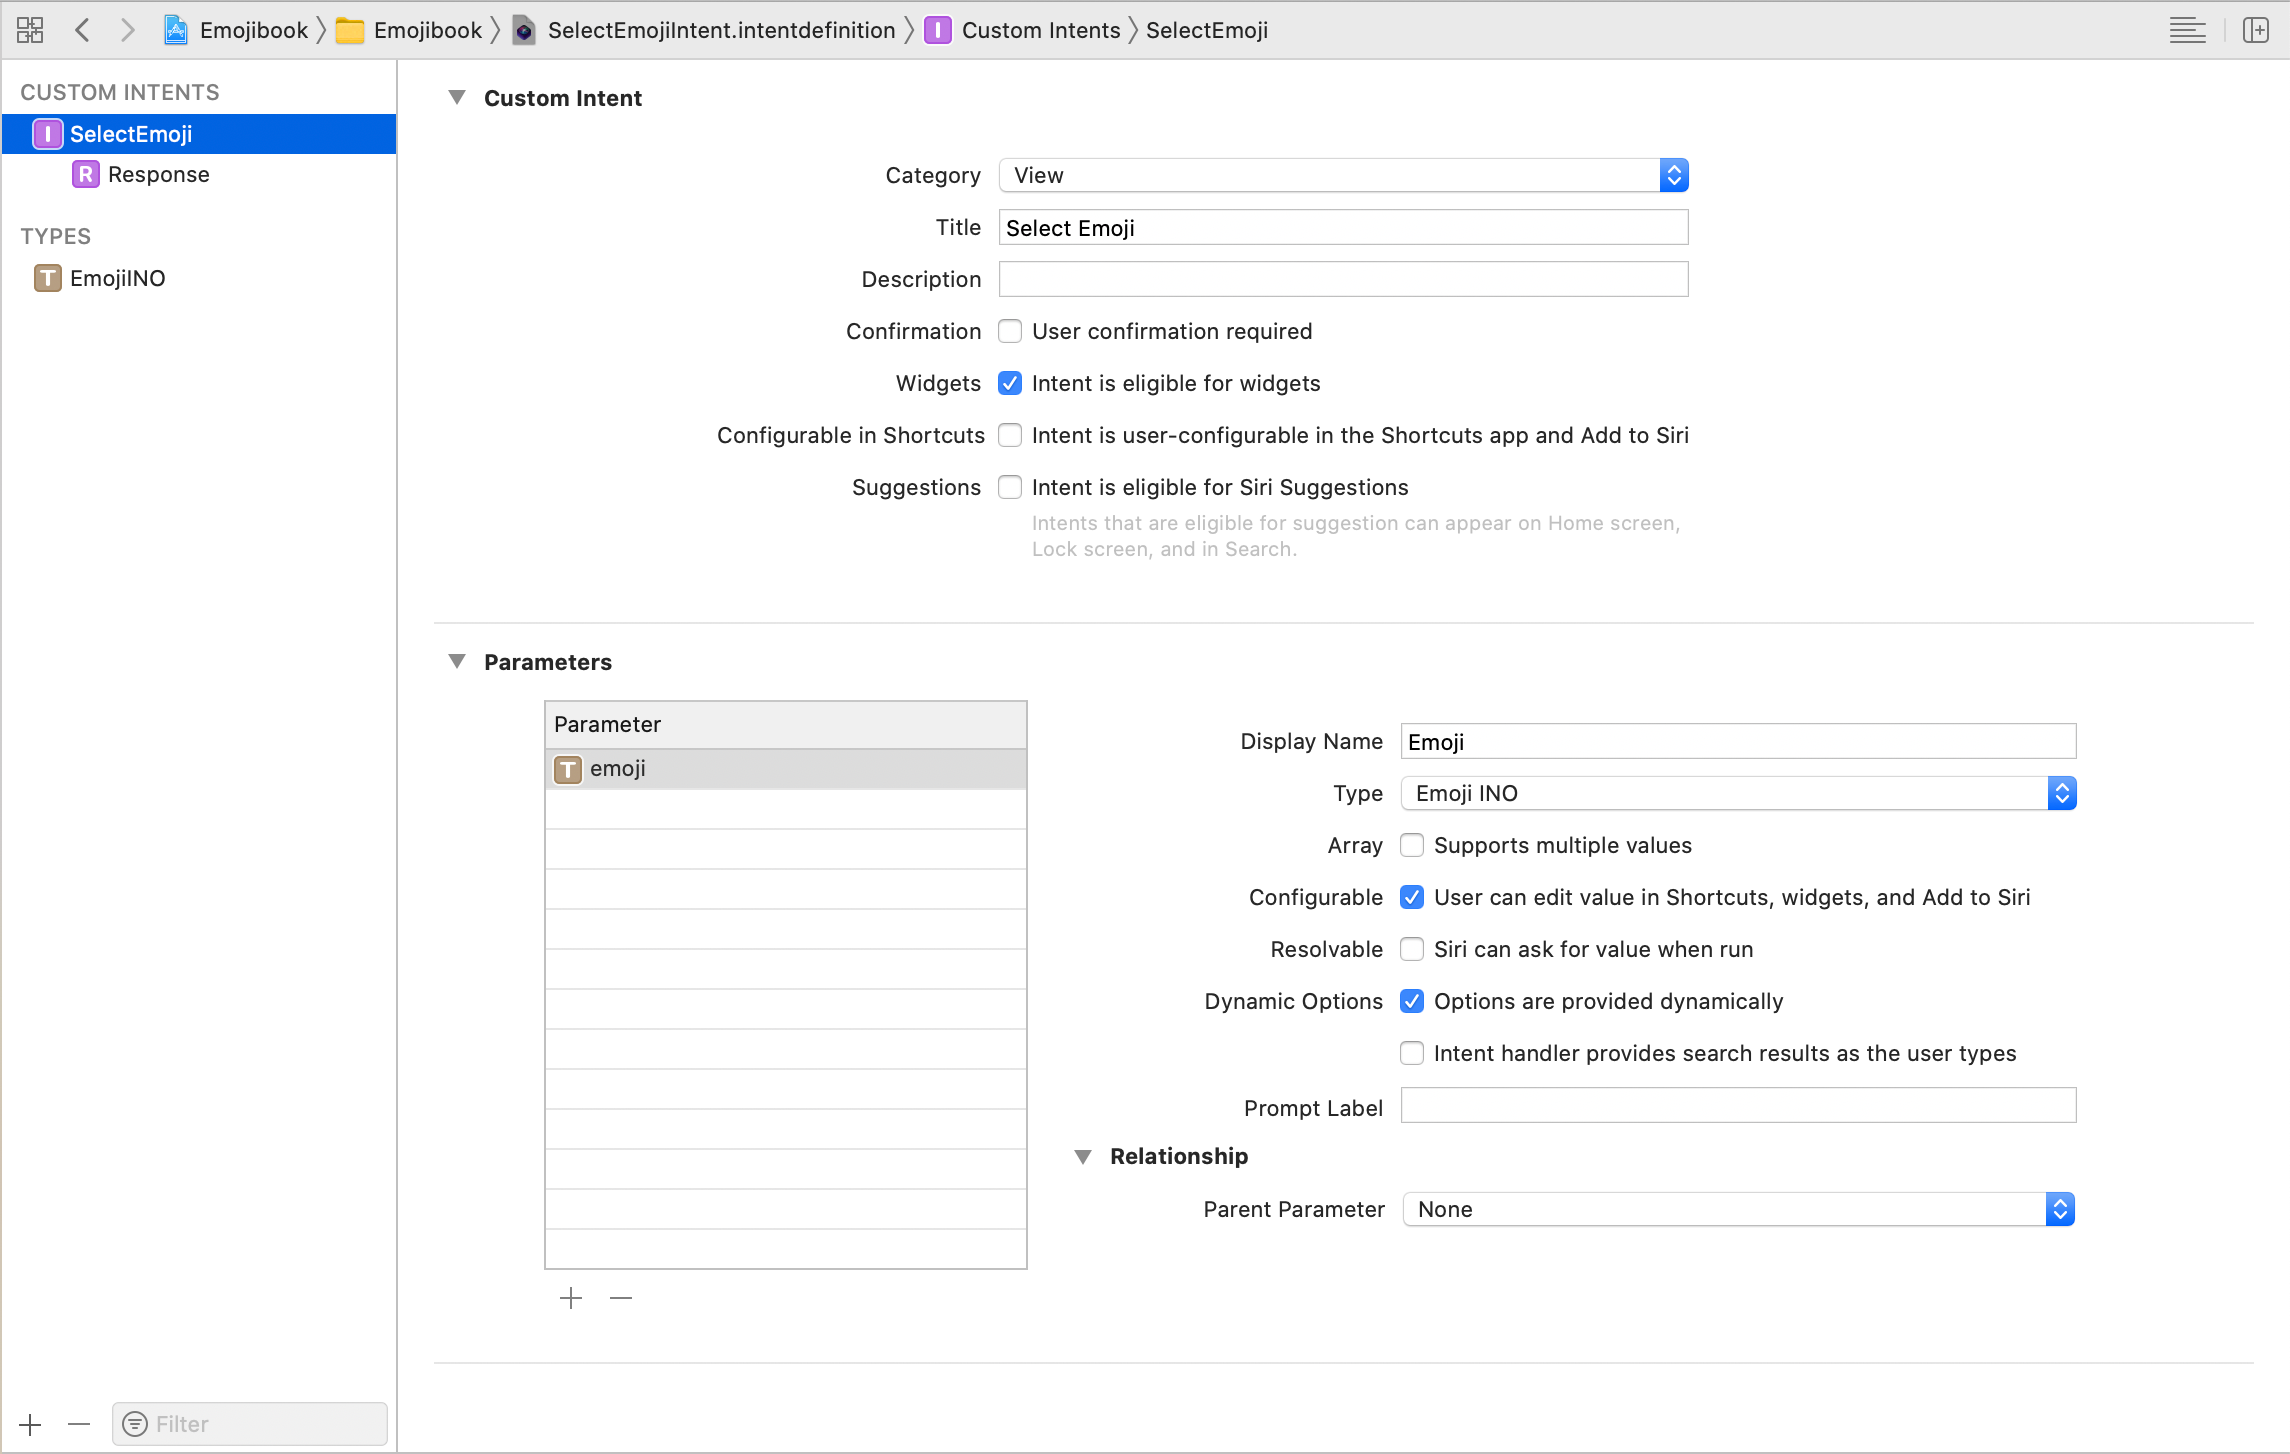
Now that the intent file is created, we need to define our intent. To do this, click on the ‘+’ icon on the bottom left of the intent file and select New Intent, give your intent the name SelectEmoji. Set the category to View; make sure that Intent is eligible for widgets is selected, and the other options are deselected.
现在已经创建了意图文件,我们需要定义意图。 为此,请单击意图文件左下方的“ +”图标,然后选择“ 新建意图” ,为您的意图命名为SelectEmoji 。 将类别设置为View ; 确保已选择Intent适用于小部件 ,并取消选择其他选项。
Now that we’ve created our intent, we need to define the configurable properties that our intent will handle. We will define a new INObject type (intent object) called EmojiINO (emoji intent object). Click on the ‘+’ icon again, and select ‘New Type’, give it the name EmojiINO. You should see a new type created with the identifier and displayString properties.
现在,我们已经创建了意图,我们需要定义意图将要处理的可配置属性。 我们将定义一个新的INObject类型(意图对象),称为EmojiINO (表情符号意图对象)。 再次单击“ +”图标,然后选择“ 新类型” ,将其命名为EmojiINO 。 您应该看到使用identifier和displayString属性创建的新类型。
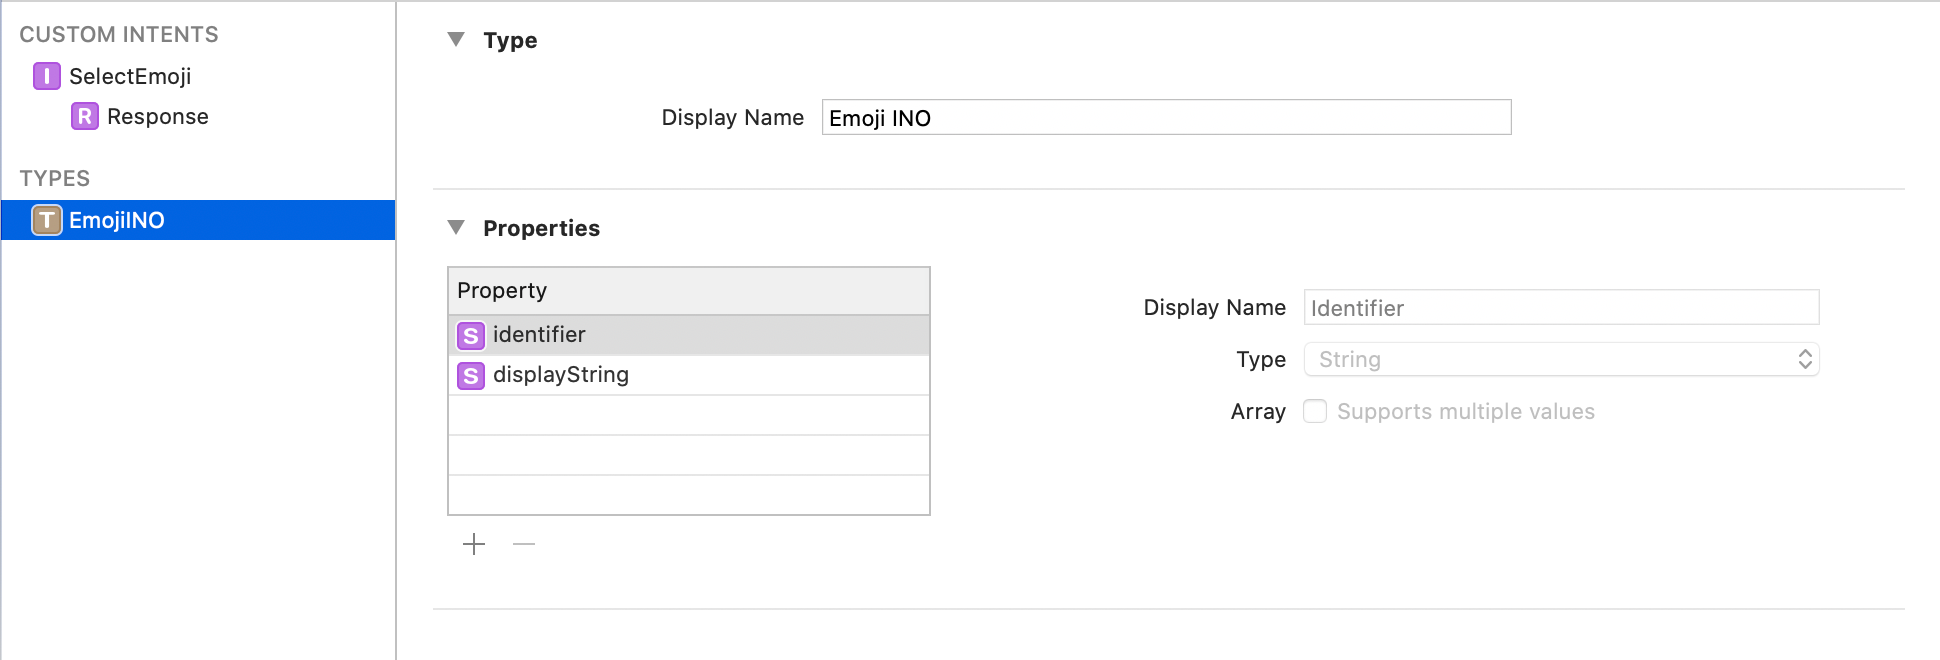
Now go back to your SelectEmoji intent and add a new parameter called emoji, changing the type to EmojiINO. Make sure that ‘Options are provided dynamically’ is selected.
现在回到您的SelectEmoji意图,并添加一个名为emoji的新参数,将类型更改为EmojiINO 。 确保选中“动态提供选项” 。
The EmojiINO type describes the emoji that a user can choose in a SelectEmojiIntent. Now we will write some code for providing the emoji options dynamically.
EmojiINO类型描述用户可以在SelectEmojiIntent选择的表情符号。 现在,我们将编写一些代码来动态提供表情符号选项。
意图扩展 (Intents Extension)
To dynamically provide the list of supported emoji, we need to add an Intents Extension. Here, we will create an IntentHandler that will create a list of EmojiINO from all the emoji in our EmojiProvider. To add the intents extension choose File -> New -> Target… and select Intents Extension. Press Next and give a name to your extension (e.g. Emojibook Intent), make sure that None is selected as the starting point. Click Finish, and activate the Intents scheme if prompted by Xcode.
为了动态提供支持的表情符号列表,我们需要添加一个Intents Extension。 在这里,我们将创建一个IntentHandler ,将创建的列表EmojiINO从我们所有的表情符号EmojiProvider 。 要添加意图扩展名,请选择“ 文件” ->“ 新建” ->“ 目标…”,然后选择“ 意图扩展名” 。 按Next(下一步)并为扩展名命名(例如Emojibook Intent),确保选择None(无 )作为起点。 单击Finish ,并在Xcode提示时激活Intents方案。
Navigate to the General tab of the Emojibook Intent target and add SelectEmojiIntent as one of the supported intents, like so:
导航到Emojibook意向目标的常规选项卡,并添加SelectEmojiIntent所支持的意图之一,像这样:
Now go to the intent definition file, and make sure that it is a member of the Emojibook app, the Widget, and the Intents extension. Do the same for the EmojiDetails.swift and the EmojiProvider.swift files.
现在转到意图定义文件,并确保它是Emojibook应用程序,窗口小部件和意图扩展的成员。 对EmojiDetails.swift和EmojiProvider.swift文件执行相同的操作。

We can now go to IntentHandler.swift and implement the SelectEmojiIntentHandling protocol to provide the emoji options. Our IntentHandler.swift file will look like so:
现在,我们可以转到IntentHandler.swift并实现SelectEmojiIntentHandling协议以提供表情符号选项。 我们的IntentHandler.swift文件如下所示:
Here, we’re obtaining all the emoji options from our EmojiProvider, and creating a INObjectCollection of EmojiINO. Each EmojiINO has an identifier to distinguish it from others, and a display name shown in the options list of the widget.
在这里,我们从EmojiProvider获取所有emoji选项,并创建INObjectCollection的EmojiINO 。 每个EmojiINO都有一个identifier以区别于其他identifier ,并且在小部件的选项列表中显示了一个显示名称。
自定义表情符号小部件 (Custom Emoji Widget)
Before adding our custom emoji widget, let’s make some changes to better organize our code. First, let’s add a reusable placeholder view in EmojibookWidgetView.swift by adding a View struct, like so:
在添加自定义表情符号小部件之前,让我们进行一些更改以更好地组织我们的代码。 首先,让我们通过添加View struct在EmojibookWidgetView.swift添加可重用的占位符视图,如下所示:
Now, go ahead and rename the Emojibook_Widget.swift file to RandomEmojiWidget.swift. We will also rename the structs inside this file to refer to a RandomEmojiWidget, like so:
现在,继续将Emojibook_Widget.swift文件重命名为RandomEmojiWidget.swift 。 我们还将重命名此文件中的结构以引用RandomEmojiWidget ,如下所示:
We can finally work on our custom emoji widget. First, add a new Swift file called CustomEmojiWidget.swift making sure it is part of the Emojibook Widget Extension target. Similar to the TimelineProvider we defined in our RandomEmojiWidget, we will need to define an IntentTimelineProvider for our CustomEmojiWidget. An IntentTimelineProvider provides the widget entries for a user-configurable widget, based on a given Intent; in our case, this is the SelectEmojiIntent.
我们终于可以使用自定义表情符号小部件了。 首先,添加一个名为CustomEmojiWidget.swift的新Swift文件,确保它是Emojibook Widget Extension目标的一部分。 与我们在RandomEmojiWidget定义的TimelineProvider相似,我们将需要为IntentTimelineProvider定义一个CustomEmojiWidget 。 IntentTimelineProvider根据给定的Intent为用户可配置的窗口小部件提供窗口小部件条目; 在我们的例子中,这是SelectEmojiIntent 。
We previously used a static widget configuration, since the random emoji widget does not have any configurable properties. For the custom emoji widget, we will use an intent widget configuration, since the widget will be configured based on the SelectEmojiIntent. In the end, our CustomEmojiWidget will look like this:
我们以前使用了静态窗口小部件配置 ,因为随机表情符号窗口小部件没有任何可配置的属性。 对于自定义表情符号小部件,我们将使用意图小部件配置 ,因为该小部件将基于SelectEmojiIntent进行配置。 最后,我们的CustomEmojiWidget将如下所示:
Note that the timeline method now includes a configuration parameter, which refers to the intent containing user-customized values (i.e. SelectEmojiIntent). We also created a helper function, lookupEmojiDetails, that allows us to find the corresponding emoji for the configuration, based on the id.
注意,时间轴方法现在包括一个configuration参数,该参数引用包含用户自定义值的意图(即SelectEmojiIntent )。 我们还创建了一个帮助程序函数lookupEmojiDetails ,该函数使我们能够基于id查找与配置相对应的表情符号。
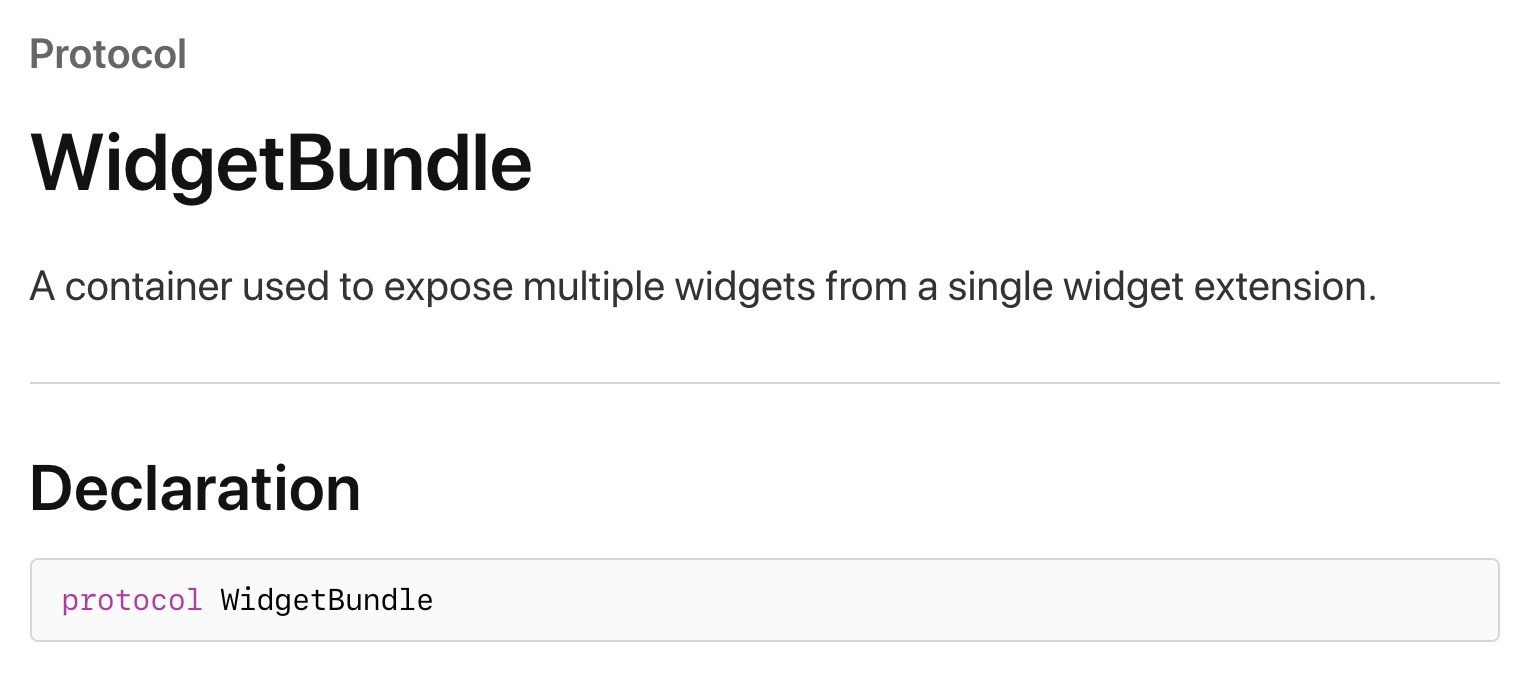
If you run your app now and try to add a CustomEmojiWidget, you won’t be able to do so. This is because we need to tell the system that our app now supports two types of widgets, the RandomEmojiWidget and the CustomEmojiWidget. To achieve this, we will need to create a WidgetBundle.
如果您现在运行应用程序并尝试添加CustomEmojiWidget ,则将无法执行此操作。 这是因为我们需要告诉系统我们的应用程序现在支持两种类型的小部件,即RandomEmojiWidget和CustomEmojiWidget 。 为此,我们需要创建一个WidgetBundle 。
Create a new file called EmojiWidgetBundle.swift, and add the code below:
创建一个名为EmojiWidgetBundle.swift的新文件,并添加以下代码:
As you might remember, the @main annotation defines the entry point to our widget. We previously used RandomEmojiWidget as our entry point, but since our new entry point will be the widget bundle we just defined, we should now remove this annotation from RandomEmojiWidget.swift. After doing so, we will be ready to test our new widget.
您可能还记得, @main注释定义了我们小部件的入口点。 我们以前使用RandomEmojiWidget作为我们的入口点,但是由于新的入口点将是我们刚刚定义的小部件包,因此现在应该从RandomEmojiWidget.swift删除此注释。 这样做之后,我们将准备测试新的小部件。
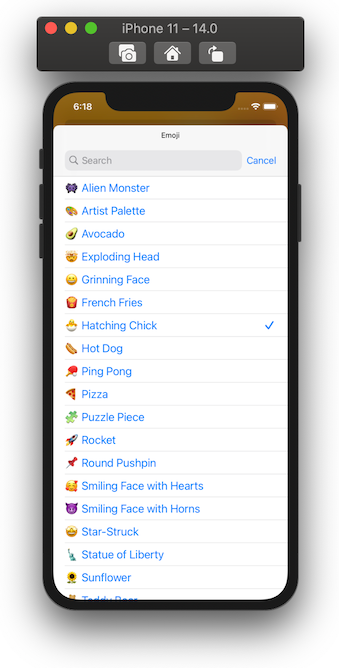
Let’s go ahead and run our app. When you try to add an Emojibook widget, you will now have the option add a custom emoji widget. Once you add it, you can edit the widget to show the emoji that you want!
让我们继续运行我们的应用程序。 当您尝试添加表情符号小部件时,现在可以选择添加自定义表情符号小部件。 添加后,您可以编辑小部件以显示所需的表情符号!
Thanks for reading! I hope you enjoyed this article and found it useful. You can find the completed app on GitHub.
谢谢阅读! 我希望您喜欢这篇文章并觉得它有用。 您可以在GitHub上找到完整的应用程序。
To learn more about WidgetKit, make sure to check out Apple’s awesome resources:
要了解有关WidgetKit的更多信息,请确保查看Apple的出色资源:
翻译自: https://medium.com/swlh/build-your-first-ios-widget-part-3-36ba53033e33
ios小部件


 526
526

 被折叠的 条评论
为什么被折叠?
被折叠的 条评论
为什么被折叠?
 到【灌水乐园】发言


