


亮度对比度何色相饱和度
Did you know that the Apple II, launched in 1977, was the first PC that had colour? It was a lead that Apple somehow dropped with an incomprehensible twenty-year gap before anybody seem to get their act together. A lead that Microsoft/HP took from Apple with an initiative that would become the de-facto standard most of us use today. Yes, it’s incredible that it’s a standard which has hardly changed in the last 25 years.
您是否知道1977年推出的Apple II是第一台带有彩色的PC? 苹果公司以某种不可思议的二十年的差距落在了所有人面前,这是一个领先优势。 Microsoft / HP从Apple手中获得的一项领先优势已成为当今我们大多数人使用的事实上的标准。 是的,令人难以置信的是,该标准在过去25年中几乎没有改变。
Apple did eventually come to the table on this and came back with a new standard, namely display P3 in 2016 — mot only talking the talk but also walking the walk. They launched products that would use it, like the iPhone 7 and others, including the iPad Pro and the iMac.
苹果最终做到了这一点,并提出了一个新标准,即2016年的P3显示屏–既要说话,又要走路。 他们推出了会使用它的产品,例如iPhone 7和其他产品,包括iPad Pro和iMac。
Indeed, colour today is a far more challenging problem than it ever was, with more devices using different technologies with very different characteristics coming to market.
的确,当今的色彩比以往任何时候都更具挑战性,随着越来越多的设备使用具有不同特性的不同技术上市。
Anyway, to code, where do we start. Let’s do de-facto. Unsurprisingly, the sRGB as you might expect from a standard developed in 1996 isn’t very intuitive.
无论如何,要编码,我们从哪里开始。 事实吧。 毫不奇怪,您可能会期望1996年开发的标准中的sRGB不是很直观。
The first thing we need to do is understand colorspaces. You can think of a colour space as a unit of measurement/lookup table. The default colorspace of iOS is also known as sRGB [of course]. But wait — there are two RGB colour spaces in this sphere, both shown here.
我们需要做的第一件事是了解色彩空间。 您可以将色彩空间视为度量/查找表的单位。 iOS的默认色彩空间也称为sRGB [当然]。 但是,等等-这个球体中有两个RGB颜色空间,都显示在这里。
The one on the top is .sRGBLinear and the one below is .sRGB. Can you see the difference? The sRGB is a standard that has been tuned to the human eye, whereas sRGBLinear is a more mathematical model. Humans are better at distinguishing differences in darker shades than they are lighter ones, which is why when you compare sRGB against sRGBLinear, you see a tad more blue in the lower line.
顶部的一个是.sRGBLinear ,下面的一个是.sRGB 。 你能看到差别吗? sRGB是已经调整到人眼的标准,而sRGBLinear是更数学的模型。 人类更擅长区分较深的阴影而不是较浅的阴影,这就是为什么当您将sRGB与sRGBLinear进行比较时,您会在下方看到一点点蓝色。
As already mentioned, Apple came up with a new standard in 2016. It has a far larger gamut of colours that can be represented than the sRGB palette. How much larger? Wikipedia tells us it’s 25%. It is a move forward, and needless to say, the reason that photos look so much better on those newer phones, but —
如前所述,Apple在2016年提出了一个新标准。与sRGB调色板相比,它可以代表的色域要大得多。 大多少? 维基百科告诉我们这是25%。 这是前进的一步,不用说,这些新手机上的照片看起来好很多的原因,但是-
Most of us are still using sRGB, so let’s stay there for now. OK, to define a colour using the sRGB colour space, you do so with a line like this:
我们大多数人仍在使用sRGB,所以让我们现在呆在那里。 好的,要使用sRGB颜色空间定义颜色,请使用如下一行:
let color = Color(.sRGB, red: 1.0, green: 0.0, blue: 0.0, opacity: 1.0)The first parameter is the color space. The numbers that follow are decimal numbers that indicate how much of that colour you want, which, put another way, is the level of saturation. Red as red can be is 1.0 on the red channel. Less red is, well… less than 1.0… down to 0, which of course, is no red at all. Now, what about if you want, say magenta —
第一个参数是色彩空间。 后面的数字是十进制数字,表示您想要多少颜色,换句话说就是饱和度。 在红色通道上,红色与红色可以是1.0。 较少的红色是…小于1.0…降至0,这当然根本不是红色。 现在,如果要的话,洋红色说-
This is where things start to look a little more like a physics class. Magenta is a mixture of red, blue, and green; to get magenta, you need to use a code line like this.
这是事物开始看起来有点像物理课的地方。 洋红色是红色,蓝色和绿色的混合物; 要获得洋红色,您需要使用这样的代码行。
let magenta = Color(.sRGB, red: 168/255, green: 57/255, blue: 168/255, opacity: 1.0)I used a slightly different syntax here, just to illustrate. You can get approximately 16 million colours with combinations like this.
我在这里使用了稍微不同的语法,只是为了说明。 通过这样的组合,您可以获得大约1600万种颜色。
Needless to say, to use sRGB, you need to spend a good deal of your time looking up the values to get the colours you want. I put together some code at the end of this article to shortcut the process; more of that later.
不用说,要使用sRGB,您需要花费大量时间查找值以获得所需的颜色。 我在本文结尾处整理了一些代码,以简化该过程。 以后再说。
But wait — if looking up RGB values sounds too arduous don’t worry, iOS has another trick up its sleeve. There is a better/alternative means of specifying colour using hue, saturation, and brightness (or HSB for short). It isn’t better than then new display P3 — just different. Different and, I think, better for humans designing interfaces, since it makes a lot more sense. To get magenta, for example we would use a line like this.
但是请稍候-如果查找RGB值听起来太费力,请放心,iOS还有另外一个窍门。 有一种使用色相,饱和度和亮度(或简称HSB)指定颜色的更好/替代方法。 它并不比新的显示器P3好-只是有所不同。 我认为,这与人类设计界面不同,而且更好,因为它意义更大。 为了获得洋红色,例如,我们将使用这样的线。
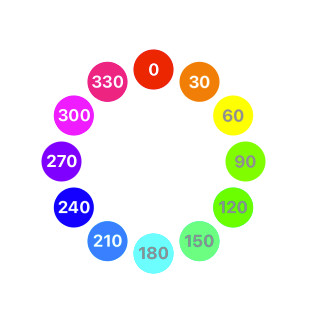
let color = Color.init(hue: 300/255, saturation: 0.66, brightness: 0.66, opacity: 1.0)The beauty of the HSB scheme is that your description of the colour you want is named by a single value, the hue. The colour scheme for hues is essentially a wheel of the colours that are grouped like a rainbow, marked out in at different degrees. So red, in this case, is 0/360, and magenta is 300/360. It’s a far cry from a mixture of red, green, and blue.
HSB方案的优点在于,您对所需颜色的描述由单个值(色相)命名。 色相的配色方案本质上是一组颜色不同的轮,这些轮像彩虹一样分组。 因此,在这种情况下,红色为0/360,而洋红色为300/360。 与红色,绿色和蓝色的混合相去甚远。
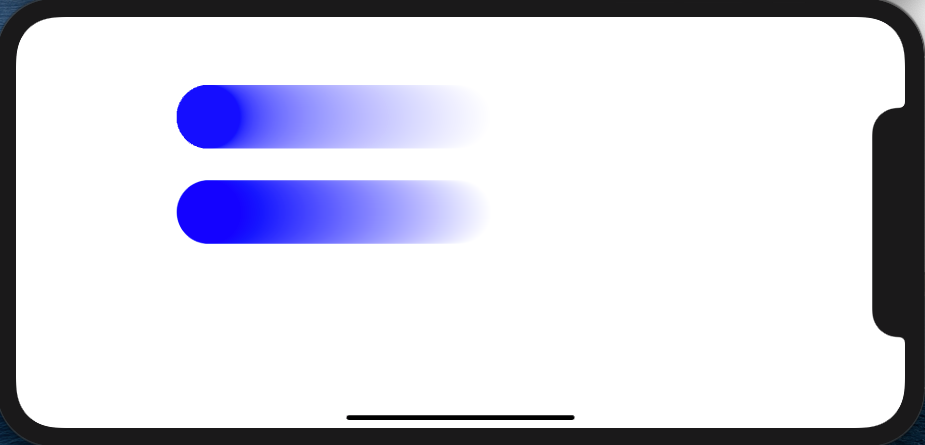
With the saturation number in the HSB code, that looks like this:
HSB代码中的饱和度数字如下所示:

And the brightness number for the HSB code. It looks like this:
亮度数字为HSB码。 看起来像这样:

OK, we’ve got two schemes, and both are good, but how do you move between them? If you print out the HSB value as a description, it’ll give you RGB in hex. That is RGB -> HSB.
好的,我们有两种方案,两者都很好,但是您如何在它们之间移动? 如果打印出HSB值作为说明,它将以十六进制显示RGB。 那就是RGB-> HSB。
let colour2 = Color.init(hue: 300/360, saturation: 0.66, brightness: 0.66, opacity: 1.0)....onAppear {
   print("colour2 ",colour2.description)
}
We can then use a function like this to split the hex value into its component values of red, green, and blue, although it's true that we’re missing the saturation and brightness values. These would, in theory, have been accounted for when the RGB value was selected.
然后,我们可以使用类似这样的函数将十六进制值分为红色,绿色和蓝色的分量值,尽管确实缺少饱和度和亮度值。 从理论上讲,这些是在选择RGB值时考虑的。
func returnComponents(colorToSplit: Color) -> (red: Double, green: Double, blue:Double) {
  let hexNumbers = Array(colorToSplit.description)
  let redColorInHex = Double("0x\(hexNumbers[1])\(hexNumbers[2])")!
  let greenColorInHex = Double("0x\(hexNumbers[3])\(hexNumbers[4])")!
  let blueColorInHex = Double("0x\(hexNumbers[5])\(hexNumbers[6])")!
  return ((red:redColorInHex,green: greenColorInHex,blue: blueColorInHex))
}
To go from HSV-> RGB, you can use this extension, assuming you have broken down your RGB value into its components using the function above that is.
要从HSV-> RGB出发,可以使用此扩展名,假设您已使用上面的功能将RGB值分解为各个分量。
extension Color {
static func hexColour(hexValue:UInt32)->Color
{
let red = Double((hexValue & 0xFF0000) >> 16) / 255.0
let green = Double((hexValue & 0xFF00) >> 8) / 255.0
let blue = Double(hexValue & 0xFF) / 255.0
return Color(.displayP3, red:red, green:green, blue:blue)
}
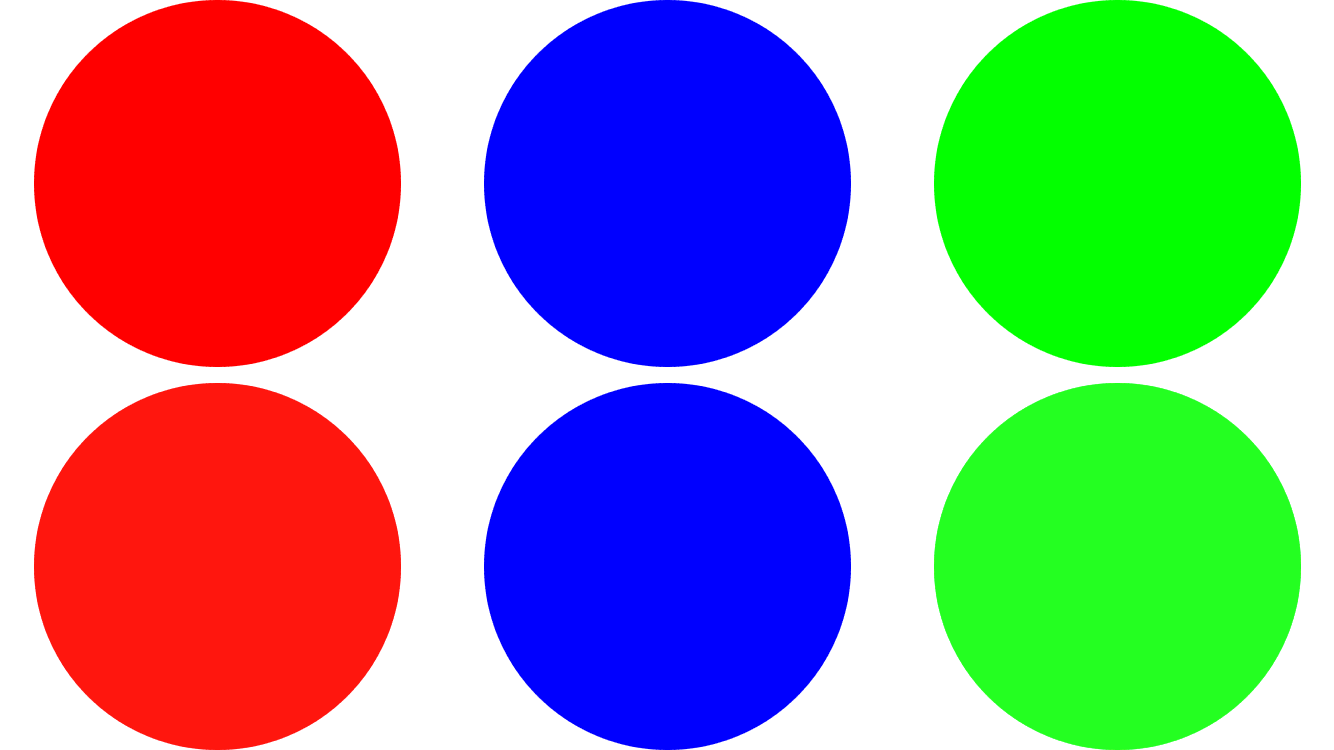
}I can’t promise that it will work perfectly. I am not sure as I write this if it is a feature of Xcode 12 beta or not; only time will tell. The circle on the left here have been coloured using HSB; the circle in the centre has been coloured using RGB with the hex extension given here; the circle on the right has been coloured using standard RGB.
我不能保证它会完美运行。 我不确定我是否编写了Xcode 12 beta的功能。 只有时间证明一切。 此处左侧的圆圈已使用HSB进行了着色; 中心的圆圈已使用RGB着色,并具有此处给出的十六进制扩展名; 右侧的圆圈已使用标准RGB进行了着色。

As you can start to appreciate, your eyes and your brain are much better at this than you realise. But wait — what happened to that RGB lookup table for values and colours?
正如您可以开始欣赏的那样,您的眼睛和大脑在这方面比您意识到的要好得多。 但是,等等-RGB查找表中的值和颜色发生了什么?
Here it is — well, a modified version of our colour wheel I presented earlier. You tap on the circle and it’ll print out the RGB values it finds.
在这里-好吧,这是我之前介绍的色轮的修改版本。 您点击圆圈,它将打印出找到的RGB值。
A quick note to give some extra credit where credit is due: I used this excellent article to help me put this last bit of code together.
快速注释,在应归功的地方多加一些功劳:我用这篇出色的文章来帮助我将最后的代码放在一起。
But wait, we’re not finished. Those of you reading between the lines must surely have some more questions, some doubts in your mind. Is the iOS colour command with hues, saturations, and brightness better than the standard RGB one? How does display P3 have more colours and yet the same code parameters? What is the extended RGB colour space, and where does that fit in?
但是,等等,我们还没有结束。 那些在字里行间中阅读的人肯定肯定还有其他问题,一些疑问。 具有颜色,饱和度和亮度的iOS颜色命令是否比标准RGB更好? 显示器P3如何具有更多的颜色和相同的代码参数? 什么是扩展的RGB颜色空间,它在哪里适合?
Let’s dig just a little deeper.
让我们深入一点。
You see it works like this. The display P3 is a superset of standard RGB colours. It has the same anchor point as Standard RGB in the visible colour gamut, but an extended range of values; it is the extended RGB colour space. The illustration below shows where that additional 25% fits in.
您会看到它像这样工作。 显示器P3是标准RGB颜色的超集。 在可见色域中,它具有与标准RGB相同的锚点,但是值的范围更大; 它是扩展的RGB颜色空间。 下图显示了另外25%的位置。

But OK— I still haven’t answered the question: how do I squeeze more colours into the same three parameters? The answer is simple: you don’t use 8 bits, you use 16 bits per channel and you go above 1.0 and below 0.0 when you want colours that are beyond the standard RGB range.
但是,好的-我仍然没有回答这个问题: 如何将更多的颜色压缩为相同的三个参数? 答案很简单:您不使用8位,每个通道使用16位,并且当您想要超出标准RGB范围的颜色时,可以超过1.0,低于0.0。
This isn’t an easy answer to find or illustrate ultimately, since your display needs to be able to support display P3 gamut of colors. If that’s the case, then the circles in the image shown here should look different.
最终要找到或说明这不是一个容易的答案,因为您的显示器需要能够支持显示器的P3色域。 如果是这种情况,那么此处显示的图像中的圆圈应该看起来有所不同。
What does the code look like that builds these colours? You can try this code out in your own app if the image above isn’t working for you.
构建这些颜色的代码看起来像什么? 如果上面的图片不适合您,则可以在自己的应用中尝试此代码。
let rgbRedColor = Color(.sRGB, red: 1.0, green: 0.0, blue: 0.0)
let p3RedColor = Color(.displayP3, red: 1.22486, green: -0.0420312, blue: -0.01964301)let rgbGreenColor = Color(.sRGB, red: 0.0, green: 1.0, blue: 0.0)
let p3GreenColor = Color(.displayP3, red: -0.0420, green: 1.0419, blue: 0.0)let rgbBlueColor = Color(.sRGB, red: 0.0, green: 0, blue: 1)
let p3BlueColor = Color(.displayP3, red: -0.0197, green: -0.0786, blue: 1.0979)
Figures that I pulled from this excellent SO post goes into a good deal of detail as to how are calculated, and this page is also an excellent reference. And here is an app to show you more display p3 colours, palettist. This is an image with 8036951 colours in it — almost 48% of the RGB gamut.
我从这篇出色的SO帖子中获得的数据在如何计算方面做了很多详细的介绍,并且该页面也是一个很好的参考。 这是一个向您显示更多p3色彩的应用程序, 古生物学家 。 这是其中包含8036951种颜色的图像-几乎是RGB色域的48%。

I hope you’ve enjoyed reading this article as much as I enjoyed writing it
希望您喜欢阅读本文并喜欢阅读这篇文章
Keep calm, keep coding.
保持冷静,保持编码。
翻译自: https://medium.com/better-programming/colour-hue-saturation-and-brightness-24661bb809a3
亮度对比度何色相饱和度


 2415
2415

 被折叠的 条评论
为什么被折叠?
被折叠的 条评论
为什么被折叠?
 到【灌水乐园】发言


